
Subscribe to Our Youtube Channel
Related Manuals for Nordson EFD E2


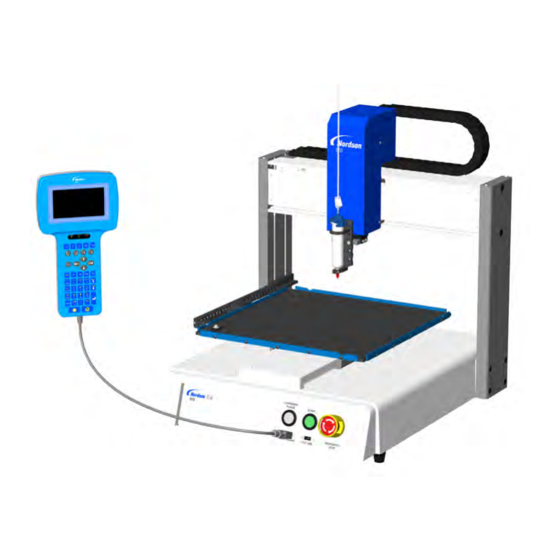
Summary of Contents for Nordson EFD E2
- Page 1 E Series Automated Dispensing Systems Operating Manual ™ Electronic pdf files of Nordson EFD manuals are also available at www.nordsonefd.com...
- Page 2 Thank You! You have just purchased the world’s finest precision dispensing equipment. I want you to know that all of us at Nordson EFD value your business and will do everything in our power to make you a satisfied customer.
-
Page 3: Table Of Contents
Program Menu ...............................25 Menu 1 ...................................26 Utility Menu ................................27 Diagnostic Menu ..............................28 Menu 2 ...................................28 Setup Menu ................................29 Type Menu ................................31 USB Menu ................................31 Continued on next page www.nordsonefd.com info@nordsonefd.com 800-556-3484 Sales and service of Nordson EFD dispensing systems are available worldwide. - Page 4 Enable or Disable an Input / Output ........................74 Automatically Switch Outputs ON .........................75 Set How Outputs Behave at the End of a Program ....................75 Continued on next page www.nordsonefd.com info@nordsonefd.com 800-556-3484 Sales and service of Nordson EFD dispensing systems are available worldwide.
- Page 5 Option Screen ..............................120 DXF Screen and Icons............................121 Modifying the DXF Import Options ..........................123 Importing a DXF File ..............................124 Appendix D, Height Sensor Setup and Use ........................128 www.nordsonefd.com info@nordsonefd.com 800-556-3484 Sales and service of Nordson EFD dispensing systems are available worldwide.
-
Page 6: Introduction
Programs are created and executed using the Teach Pendant. Material is dispensed through a Nordson EFD syringe barrel or valve system. A valve system may be contact or non-contact. Contact systems may dispense fluid through a needle or a dispensing tip. For the purposes of this manual, “dispensing tip” refers to either a needle or a tip. -
Page 7: Nordson Efd Product Safety Statement
Hot surfaces! Avoid contact with the hot metal surfaces of heated components. If contact can not be avoided, wear heat-protective gloves and clothing when working around heated equipment. Failure to avoid contact with hot metal surfaces can result in personal injury. www.nordsonefd.com info@nordsonefd.com 800-556-3484 Sales and service of Nordson EFD dispensing systems are available worldwide. -
Page 8: Halogenated Hydrocarbon Solvent Hazards
• Using incompatible or damaged parts. • Using unapproved auxiliary equipment. • Operating equipment in excess of maximum ratings. • Operating equipment in an explosive atmosphere. www.nordsonefd.com info@nordsonefd.com 800-556-3484 Sales and service of Nordson EFD dispensing systems are available worldwide. -
Page 9: Regulations And Approvals
Make sure all equipment is rated and approved for the environment in which it is used. Any approvals obtained for Nordson EFD equipment will be voided if instructions for installation, operation, and service are not followed. If the equipment is used in a manner not specified by Nordson EFD, the protection provided by the equipment may be impaired. -
Page 10: Preventive Maintenance
• Test: Verify the operation of features and the performance of equipment using the appropriate sections of this manual. Return faulty or defective units to Nordson EFD for replacement. • Use only replacement parts that are designed for use with the original equipment. Contact your Nordson EFD representative for information and advice. -
Page 11: Equipment-Specific Safety Information
Nordson EFD Product Safety Statement (continued) Equipment-Specific Safety Information The following safety information is specific to Nordson EFD automated dispensing systems. European Community To meet the requirements of the European Community (CE) safety directives, the robot must be placed in an enclosure. -
Page 12: Specifications
WEEE Directive This equipment is regulated by the European Union under WEEE Directive (2012/19/EU). Refer to www.nordsonefd.com/WEEE for information about how to properly dispose of this equipment. www.nordsonefd.com info@nordsonefd.com 800-556-3484 Sales and service of Nordson EFD dispensing systems are available worldwide. -
Page 13: Operating Features
Fixture plate (optional) Front Panel DISPENSER PURGE button START button EMERGENCY STOP button SVC USB port (for Teach Pendant transferring programs or connection connecting a barcode scanner) www.nordsonefd.com info@nordsonefd.com 800-556-3484 Sales and service of Nordson EFD dispensing systems are available worldwide. -
Page 14: Back Panel
Remove the protective foam covers and tape. Double-check the shipping box to ensure you have removed everything. www.nordsonefd.com info@nordsonefd.com 800-556-3484 Sales and service of Nordson EFD dispensing systems are available worldwide. -
Page 15: Position The Robot And Install And Connect Components
‡ Refer to the dispensing equipment manuals for all other dispensing system installation steps. www.nordsonefd.com info@nordsonefd.com 800-556-3484 Sales and service of Nordson EFD dispensing systems are available worldwide. -
Page 16: Prepare The Work Surface Or Fixture Plate
Prepare the Work Surface or Fixture Plate Prepare the robot work surface or fixture plate for secure placement of the workpiece. All Nordson EFD automated dispensing systems include a standard fixture plate. Other fixture plate sizes are available. Refer to “Accessories” on page 78. -
Page 17: Power On The System
• “Concepts” on page 18 • “Overview of the Teach Pendant” on page 20 • “Setup” on page 32 • “Programming” on page 44 Teach Pendant port www.nordsonefd.com info@nordsonefd.com 800-556-3484 Sales and service of Nordson EFD dispensing systems are available worldwide. -
Page 18: Concepts
XYZ location and then a dispense command is registered for that location. This action is repeated until the desired dispensing pattern is complete. Several examples are provided below. Setup commands dictate how dispense commands will be executed. Nordson EFD recommends inserting setup commands at the beginning of a program. -
Page 19: About Tip Height
Points to adjust all the XY values in a program based on any changes made to the position or orientation of a workpiece. This adjustment is accomplished through the Program Offset function. www.nordsonefd.com info@nordsonefd.com 800-556-3484 Sales and service of Nordson EFD dispensing systems are available worldwide. -
Page 20: Overview Of The Teach Pendant
Key Descriptions” on Enter key: Selects the current page 23. item. Start key: Use to run Home key: Moves the programs. dispensing tip to the Home Position. www.nordsonefd.com info@nordsonefd.com 800-556-3484 Sales and service of Nordson EFD dispensing systems are available worldwide. -
Page 21: Run Mode Vs. Teach Mode
Execute the function shown in YELLOW by first pressing and releasing the SHIFT key, then pressing this key Execute the function shown in WHITE by pressing this key once www.nordsonefd.com info@nordsonefd.com 800-556-3484 Sales and service of Nordson EFD dispensing systems are available worldwide. -
Page 22: Navigating The Menus
To decelerate the jog speed of the robot, release the FAST key while still pressing and holding any X, Y, or Z jog key. The robot speed will begin to ramp down. www.nordsonefd.com info@nordsonefd.com 800-556-3484 Sales and service of Nordson EFD dispensing systems are available worldwide. -
Page 23: Teach Pendant Key Descriptions
Opens Menu1 Menu1 / Moves the tip to the Home SHIFT > MENU1 inserts an Arc Home Arc Point Position (0, 0, 0) Point command www.nordsonefd.com info@nordsonefd.com 800-556-3484 Sales and service of Nordson EFD dispensing systems are available worldwide. -
Page 24: Teach Pendant Menu Structure
01 Load Program 24 Dummy Point 02 Save Program 25 Wait Time 03 Load All Programs 26 Stop Point 04 Save All Programs 27 Park Position www.nordsonefd.com info@nordsonefd.com 800-556-3484 Sales and service of Nordson EFD dispensing systems are available worldwide. -
Page 25: Teach Pendant Menu Item Descriptions
For this function to work properly, you must calibrate the tip detector. Refer to “Calibrating the Tip Height” on page 70. www.nordsonefd.com info@nordsonefd.com 800-556-3484 Sales and service of Nordson EFD dispensing systems are available worldwide. -
Page 26: Menu 1
Refer to “Teach Move Z Clearance (How High the Tip Lifts in the Teach Mode)” on page 34. 08 Utility Menu Refer to “Utility Menu” on page 27. 09 Diagnostic Refer to “Diagnostic Menu” on page 28. www.nordsonefd.com info@nordsonefd.com 800-556-3484 Sales and service of Nordson EFD dispensing systems are available worldwide. -
Page 27: Utility Menu
06 System Lockout Locks or unlocks the current program. When a program is locked, it cannot be modified. NOTE: This function is password-protected. www.nordsonefd.com info@nordsonefd.com 800-556-3484 Sales and service of Nordson EFD dispensing systems are available worldwide. -
Page 28: Diagnostic Menu
Position (0, 0, 0) unless modified (see Park Position under the Setup menu). 06 Jump Jumps to a specified address or label number within the dispense program (useful for long programs). www.nordsonefd.com info@nordsonefd.com 800-556-3484 Sales and service of Nordson EFD dispensing systems are available worldwide. -
Page 29: Setup Menu
Description 01 XY Move Speed Sets the speed of the of X and Y axis movement: • Maximum XY speed: 500 (mm/s) (E2); 800 (mm/s) (E3, E4, E5, E6) • Default: 100 (mm/s) 02 Z Move Speed Sets the speed of the of Z axis movement: •... - Page 30 Used to set the language. Refer to “Language” on page 40. 20 System Information Displays the system information, including the robot model and the Teach Pendant software version. www.nordsonefd.com info@nordsonefd.com 800-556-3484 Sales and service of Nordson EFD dispensing systems are available worldwide.
-
Page 31: Type Menu
Existing dispense programs are overwritten. 04 Save All Programs Saves all the dispense programs on the robot to the USB drive as a *.PKG file. www.nordsonefd.com info@nordsonefd.com 800-556-3484 Sales and service of Nordson EFD dispensing systems are available worldwide. -
Page 32: Setup
• Jog Acceleration: How the robot accelerates when the FAST button is pressed (applies to program creation in the Teach Mode). Refer to “Setup Menu” on page 29 for default and maximum / minimum settings. www.nordsonefd.com info@nordsonefd.com 800-556-3484 Sales and service of Nordson EFD dispensing systems are available worldwide. -
Page 33: Xy Move Speed Or Z Move Speed
[F3] Default - E6 maximums: 620, 500, 150 mm • Press F1 to save or exit. • Press F3 to return to the factory default settings. www.nordsonefd.com info@nordsonefd.com 800-556-3484 Sales and service of Nordson EFD dispensing systems are available worldwide. -
Page 34: Jog Acceleration
Teach Mode. When Teach Move Z Clearance is switched OFF, the system ignores the setting for Z Lift Height. Range: 0 to the Z axis travel limit www.nordsonefd.com info@nordsonefd.com 800-556-3484 Sales and service of Nordson EFD dispensing systems are available worldwide. -
Page 35: Point To Point Arc Jump
Park Position 000.00 mm location, and press F1. • Press F1 to save or exit. [F1] OK [F2] Move [F3] Jog www.nordsonefd.com info@nordsonefd.com 800-556-3484 Sales and service of Nordson EFD dispensing systems are available worldwide. -
Page 36: Pause Status (Tip Pause Location)
------------------------------ • Press 2 DISABLE for no initialization 1 Enable between dispense cycles. 2 Disable Select: _ • Press F1 to save or exit. [F1] OK www.nordsonefd.com info@nordsonefd.com 800-556-3484 Sales and service of Nordson EFD dispensing systems are available worldwide. -
Page 37: Pre-Dispense Wait Time
NOTE: Port 0 refers to the Dispenser ------------------------------ Port: port connector on the rear panel of the robot. Port 0 is system default • Press F1 to save or exit. [F1] OK www.nordsonefd.com info@nordsonefd.com 800-556-3484 Sales and service of Nordson EFD dispensing systems are available worldwide. -
Page 38: Measurement Unit
New Password : Confirm Password: > xxxxxxxx • To restore password protection to the [F1] OK default settings, clear all characters from the New Password field and press www.nordsonefd.com info@nordsonefd.com 800-556-3484 Sales and service of Nordson EFD dispensing systems are available worldwide. -
Page 39: Auto Purge
Time Time Dispenser ON Time (seconds) Dispenser OFF Example of an Auto Purge setup when Wait Time is 5 seconds and Purge Time is 2 seconds www.nordsonefd.com info@nordsonefd.com 800-556-3484 Sales and service of Nordson EFD dispensing systems are available worldwide. -
Page 40: Language
------------------------------ • Press 2 DISABLE to switch the key beep 1 Enable OFF. 2 Disable Select: _ • Press F1 to save or exit. [F1] OK www.nordsonefd.com info@nordsonefd.com 800-556-3484 Sales and service of Nordson EFD dispensing systems are available worldwide. -
Page 41: Setting The Tool Offset
• Accessory XYZ values: • Tip XYZ values: • Offset XYZ values: -10 (the differences between the accessory XYZ values and the tip XYZ values) www.nordsonefd.com info@nordsonefd.com 800-556-3484 Sales and service of Nordson EFD dispensing systems are available worldwide. -
Page 42: Setting Up Barcode Scanning
With the robot in the Run Mode, an operator scans the TEST barcode and the system matches the barcode to the program with the same name (in this case, TEST) and the robot begins executing the program. www.nordsonefd.com info@nordsonefd.com 800-556-3484 Sales and service of Nordson EFD dispensing systems are available worldwide. -
Page 43: Setting The Dispenser Ports
Dispense Port (Dispense Port Output)” on page 37. • For a system with multiple dispensers / valves, use the Dispense Port command. Refer to “15 Dispense Port” on page 102. www.nordsonefd.com info@nordsonefd.com 800-556-3484 Sales and service of Nordson EFD dispensing systems are available worldwide. -
Page 44: Programming
Programming This section provides how-to procedures for the most commonly performed programming tasks. If you have difficulty creating a program for your application, contact your Nordson EFD representative. Before using this section: • Complete all applicable installation tasks. Refer to “Installation” on page 14. -
Page 45: How To Open And Edit A Program
• Press F1 to save and exit or ESC to [F1] OK [F2] Next [F3] Current cancel the changes. • Make other changes as needed. • Press F1 to save and exit. www.nordsonefd.com info@nordsonefd.com 800-556-3484 Sales and service of Nordson EFD dispensing systems are available worldwide. -
Page 46: How To Name A Program
How to Name a Program Nordson EFD recommends assigning a unique name to all programs. If a program is not named, the system prompts for a Program Name. Program names are limited to 15 characters. A program name is required for the barcode scanning capability. -
Page 47: How To Clear Or Copy A Program
• Press F1 to copy all program contents to the selected program number. If the destination program is [F1] OK NOTE: not empty, the program contents are overwritten by the copied program. www.nordsonefd.com info@nordsonefd.com 800-556-3484 Sales and service of Nordson EFD dispensing systems are available worldwide. -
Page 48: How To Jump To A Specific Address Or Label
To delete a command, make sure it is shown in the Teach Pendant display, then press DEL > F1. > www.nordsonefd.com info@nordsonefd.com 800-556-3484 Sales and service of Nordson EFD dispensing systems are available worldwide. -
Page 49: How To Change A Group Of Addresses (Group Edit)
5 — Changes the Line Speed value for all selected addresses by the specified percentage. Continued on next page www.nordsonefd.com info@nordsonefd.com 800-556-3484 Sales and service of Nordson EFD dispensing systems are available worldwide. - Page 50 • Press F1 to continue and follow the instructions on the display to complete the selected action for the specified range of addresses. • When done, press F1 again to save or exit. www.nordsonefd.com info@nordsonefd.com 800-556-3484 Sales and service of Nordson EFD dispensing systems are available worldwide.
- Page 51 Example illustration of Mirror Points under Group Edit Original Position Counterclockwise rotation Clockwise rotation 90° Rotation origin -90° Example illustration of Rotate Points under Group Edit www.nordsonefd.com info@nordsonefd.com 800-556-3484 Sales and service of Nordson EFD dispensing systems are available worldwide.
-
Page 52: How To Set Mark Points
XY locations in the program to the new workpiece location and / or orientation. Mark 1 Mark 2 Example of two Mark Point locations on a workpiece www.nordsonefd.com info@nordsonefd.com 800-556-3484 Sales and service of Nordson EFD dispensing systems are available worldwide. -
Page 53: How To Adjust All Points In A Program (Program Offset)
Press [ENTER] to begin automatically adjusts all the points ------------------------------ in the current program for the new workpiece position. Mark 1 Mark 2 Example illustration of Program Offset www.nordsonefd.com info@nordsonefd.com 800-556-3484 Sales and service of Nordson EFD dispensing systems are available worldwide. -
Page 54: How To Expand A Step & Repeat Command
The selected Step & Repeat command 07 Teach Move Z Clearance is expanded to the root level of the program and all addresses are renumbered accordingly. www.nordsonefd.com info@nordsonefd.com 800-556-3484 Sales and service of Nordson EFD dispensing systems are available worldwide. -
Page 55: How To Lock Or Unlock The System
Run Mode to the Teach Mode. To disable the system lockout, continue to the next section. [ RUN MODE ] PRESS [HOME] TO INITIALIZE SYSTEM www.nordsonefd.com info@nordsonefd.com 800-556-3484 Sales and service of Nordson EFD dispensing systems are available worldwide. - Page 56 • Press F1. The system no longer requires a Password: _ > password to switch from Run Mode to Teach Mode. [F1] OK System Unlocked ! www.nordsonefd.com info@nordsonefd.com 800-556-3484 Sales and service of Nordson EFD dispensing systems are available worldwide.
-
Page 57: How To Upload / Download Programs Using The Svc Usb Port
- Select 4 to save all populated robot programs to the USB drive as a *.PKG file. • Follow the instructions on the display to complete the selected action. www.nordsonefd.com info@nordsonefd.com 800-556-3484 Sales and service of Nordson EFD dispensing systems are available worldwide. -
Page 58: How To Create And Run A Program
NOTE: You can also press the ENTER key in empty address lines to open the Type menu. • Continue entering commands until the program is complete. Continued on next page www.nordsonefd.com info@nordsonefd.com 800-556-3484 Sales and service of Nordson EFD dispensing systems are available worldwide. - Page 59 ENTER key to enter ------------------------------ a program name. EXAMPLE ------------------------------ • Press F1 to save and continue. 0123456789-._ > ABCDEFGHIJKLM NOPQRSTUVWXYZ [F1] OK www.nordsonefd.com info@nordsonefd.com 800-556-3484 Sales and service of Nordson EFD dispensing systems are available worldwide.
-
Page 60: Creating Patterns
10.0 mm/s [F1] OK [F2] Next • Press SHIFT > END to register the end of the program. > • Press START to run the program. www.nordsonefd.com info@nordsonefd.com 800-556-3484 Sales and service of Nordson EFD dispensing systems are available worldwide. -
Page 61: How To Make A Line
> ------------------------------ Line Speed: 10.0 mm/s • Press F1 to save and exit. Node Time: 0.00 Dispenser Off(0)/On(1): [F1] OK [F2] Next Continued on next page www.nordsonefd.com info@nordsonefd.com 800-556-3484 Sales and service of Nordson EFD dispensing systems are available worldwide. - Page 62 80.0 mm/s [F1] OK [F2] Next • Press SHIFT > END to register the end of the program. > • Press START to run the program. www.nordsonefd.com info@nordsonefd.com 800-556-3484 Sales and service of Nordson EFD dispensing systems are available worldwide.
-
Page 63: How To Make An Arc
• Press F1 to save and exit. [F1] OK [F3] Current • Jog the tip to the XYZ location where the arc should end (Line End). Continued on next page www.nordsonefd.com info@nordsonefd.com 800-556-3484 Sales and service of Nordson EFD dispensing systems are available worldwide. - Page 64 80.0 mm/s [F1] OK [F2] Next • Press SHIFT > END to register the end of the program. > • Press START to run the program. www.nordsonefd.com info@nordsonefd.com 800-556-3484 Sales and service of Nordson EFD dispensing systems are available worldwide.
-
Page 65: How To Make A Circle
80.0 mm/s [F1] OK [F2] Next • Press SHIFT > END to register the end of the program. > • Press START to run the program. www.nordsonefd.com info@nordsonefd.com 800-556-3484 Sales and service of Nordson EFD dispensing systems are available worldwide. -
Page 66: How To Fill An Area
Dispenser Off(0)/On(1): [F1] OK [F2] Next • Jog the dispensing tip to the bottom right corner of the area to be filled. Continued on next page www.nordsonefd.com info@nordsonefd.com 800-556-3484 Sales and service of Nordson EFD dispensing systems are available worldwide. - Page 67 80.0 mm/s [F1] OK [F2] Next • Press SHIFT > END to register the end of the program. > • Press START to run the program. www.nordsonefd.com info@nordsonefd.com 800-556-3484 Sales and service of Nordson EFD dispensing systems are available worldwide.
-
Page 68: How To Make An Array Of Dots (Step & Repeat)
Step & Repeat Repeat menu. > > ------------------------------ • Press F1. [F1] Step & Repeat 2D [F2] Step & Repeat 3D ------------------------------ Continued on next page www.nordsonefd.com info@nordsonefd.com 800-556-3484 Sales and service of Nordson EFD dispensing systems are available worldwide. - Page 69 • Press F1 to save and exit. [F1] OK [F2] Next • Press SHIFT > END to register the end of the program. > • Press START to test the program. www.nordsonefd.com info@nordsonefd.com 800-556-3484 Sales and service of Nordson EFD dispensing systems are available worldwide.
-
Page 70: Calibrating The Tip Height
• Jog the tip down until it is as close to Calibration Point the fixture plate surface as possible. ------------------------------ • Press F1 to save the setting. Jog to position > ------------------------------ [F1] OK www.nordsonefd.com info@nordsonefd.com 800-556-3484 Sales and service of Nordson EFD dispensing systems are available worldwide. - Page 71 Needle Adjust calibration point. ------------------------------ • Press ENTER. Jog tip over calibration point > The system adjusts the dispense ------------------------------ program to the recalibrated tip height. [ENTER] www.nordsonefd.com info@nordsonefd.com 800-556-3484 Sales and service of Nordson EFD dispensing systems are available worldwide.
-
Page 72: Systems With A Tip Detector
------------------------------ • Press F1 to accept the calibration. Needle Detect Setup NOTE: Press F2 to cancel the ------------------------------ calibration. Reset position? ------------------------------ [F1] Yes [F2] No www.nordsonefd.com info@nordsonefd.com 800-556-3484 Sales and service of Nordson EFD dispensing systems are available worldwide. - Page 73 ------------------------------ calibrate the tip height. • After the search is complete, press F1 to Auto Needle Adjust accept the calibration. ------------------------------ Searching for tip... ------------------------------ www.nordsonefd.com info@nordsonefd.com 800-556-3484 Sales and service of Nordson EFD dispensing systems are available worldwide.
-
Page 74: Working With Inputs / Outputs
The Set I/O menu appears. Refer to 19 End Subroutine 20 Call Program “21 Set I/O” on page 105 for detailed 21*Set I/O information on the Set I/O command. www.nordsonefd.com info@nordsonefd.com 800-556-3484 Sales and service of Nordson EFD dispensing systems are available worldwide. -
Page 75: Automatically Switch Outputs On
• Press 2 DISABLE (default) to allow 1 Enable outputs to switch OFF after a program 2 Disable Select: _ ends. [F1] OK • Press F1 to save or exit. www.nordsonefd.com info@nordsonefd.com 800-556-3484 Sales and service of Nordson EFD dispensing systems are available worldwide. -
Page 76: Operation
Position the workpiece on the fixture plate. Use the barcode reader to scan the barcode for the dispense program to be run. The system opens and runs the program. www.nordsonefd.com info@nordsonefd.com 800-556-3484 Sales and service of Nordson EFD dispensing systems are available worldwide. -
Page 77: Pausing During A Dispense Cycle
Part Numbers Part # Part # Europe* Description 7360852 7361345 Robot, E2, 200 x 200 x 50 mm (8 x 8 x 2”) 7360853 7361346 Robot, E3, 300 x 300 x 100 mm (12 x 12 x 4”) 7360854 7361347 Robot, E4, 400 x 400 x 100 mm (16 x 16 x 4”) -
Page 78: Accessories
NOTE: For replacement parts, refer to the robot maintenance instructions available at www.nordsonefd.com. Safety Enclosures Nordson EFD guarded safety enclosures integrate seamlessly with our complete line of automated dispensing systems. Featuring external dispensing controls, a safety light curtain, and an internal electrical control box and wireways for faster, safer setup, these CE-compliant enclosures also fully comply with EU Machinery Directive 2006/42/EC. -
Page 79: Fixture Plates
Refer to “Appendix D, Height Sensor Setup and Use” on page 128 to install and use the height sensor. Part # Description 7361667 Height sensor accessory kit, E / EV Series www.nordsonefd.com info@nordsonefd.com 800-556-3484 Sales and service of Nordson EFD dispensing systems are available worldwide. -
Page 80: Mounting Brackets
Universal valve mounting bracket for all valves without mounting 7361758 holes (702, 754, 794, and 784S-SS Series valves) Mounting bracket for 7361114 xQR41 and 745 Series valves www.nordsonefd.com info@nordsonefd.com 800-556-3484 Sales and service of Nordson EFD dispensing systems are available worldwide. -
Page 81: Troubleshooting
Destination for a Group Edit > Move Ensure that the destination address to command already contains a command which address lines are being moved is empty. Continued on next page www.nordsonefd.com info@nordsonefd.com 800-556-3484 Sales and service of Nordson EFD dispensing systems are available worldwide. -
Page 82: Diagnostic Checks (Diagnostic Menu)
- If an axis is functioning properly, the displayed value for the axis changes from 0 to 1. • Press ESC to return to the Diagnostic menu. Continued on next page www.nordsonefd.com info@nordsonefd.com 800-556-3484 Sales and service of Nordson EFD dispensing systems are available worldwide. - Page 83 (~10 mm) 0 Home of the axis occurs. • Press and hold ESC until the axis movement stops and to return to the Diagnostic menu. www.nordsonefd.com info@nordsonefd.com 800-556-3484 Sales and service of Nordson EFD dispensing systems are available worldwide.
-
Page 84: Restoring The System To The Factory Default Settings (Clear Memory)
• Press F1 to clear the memory. This will erase all data from all program numbers. The system clears the memory. It does not ask for additional confirmation. Password: _ [F1] OK www.nordsonefd.com info@nordsonefd.com 800-556-3484 Sales and service of Nordson EFD dispensing systems are available worldwide. -
Page 85: Technical Data
500 mm 500 mm 500 mm (11.88") (15.75") (19.69") (19.69") (19.69") 300 mm 410 mm 510 mm 510 mm 510 mm (11.81") (16.14") (20.08") (20.08") (20.08") www.nordsonefd.com info@nordsonefd.com 800-556-3484 Sales and service of Nordson EFD dispensing systems are available worldwide. -
Page 86: Wiring Diagrams
• The optional start / stop box accessory facilitates input / output connections to this port. Refer to “Accessories” on page 78 for part numbers. Description Ground Start signal Motor power Motion idle Run / Teach Emergency stop Emergency stop www.nordsonefd.com info@nordsonefd.com 800-556-3484 Sales and service of Nordson EFD dispensing systems are available worldwide. -
Page 87: I/O Port
Input schematic Output schematic RS232 Port (for Remote Communication) NOTE: Refer to “Appendix B, RS-232 Communication Protocol” on page 113 to set up remote communication. Description Description www.nordsonefd.com info@nordsonefd.com 800-556-3484 Sales and service of Nordson EFD dispensing systems are available worldwide. -
Page 88: Example Input / Output Connections
Start and Emergency Stop (ESTOP) Connections to Ext. Control Ext. Control port Pin 2 Start signal Pin 1 Ground Ext. Control port Pin 6 Emergency ESTOP stop Pin 7 Emergency stop www.nordsonefd.com info@nordsonefd.com 800-556-3484 Sales and service of Nordson EFD dispensing systems are available worldwide. -
Page 89: Appendix A, Type Menu Reference
The purpose of specifying a Z Clearance is to allow the tip to raise high enough to clear any obstacles it encounters on its way to the next point. Refer to “13 Z Clearance” on page 101. Range: 30–200 (mm/s) www.nordsonefd.com info@nordsonefd.com 800-556-3484 Sales and service of Nordson EFD dispensing systems are available worldwide. - Page 90 Line Passing point and waits at the Line Passing point, with the dispenser activated, for the specified time period. Range: 0–100 (s) Dispenser Off(0)/ Turns the dispenser OFF (0) or ON (1) at the current address. On(1) www.nordsonefd.com info@nordsonefd.com 800-556-3484 Sales and service of Nordson EFD dispensing systems are available worldwide.
- Page 91 Z Clearance value for that point. Range: 0–100 (mm) Backtrack Speed The speed of the dispensing tip backtrack movement. Range: 0.1–200 (mm/s) Continued on next page www.nordsonefd.com info@nordsonefd.com 800-556-3484 Sales and service of Nordson EFD dispensing systems are available worldwide.
- Page 92 The purpose of specifying a Z Clearance is to allow the tip to raise high enough to clear any obstacles it encounters on the way to the next point. Refer to “13 Z Clearance” on page 101. Range: 30–200 (mm/s) www.nordsonefd.com info@nordsonefd.com 800-556-3484 Sales and service of Nordson EFD dispensing systems are available worldwide.
- Page 93 1 (Back) Backtrack Gap Backtrack Length 2 (Square Back) Backtrack Gap Backtrack Length 3 (Forward) Backtrack Gap Backtrack Length 4 (Square Forward) Backtrack Gap Backtrack Length www.nordsonefd.com info@nordsonefd.com 800-556-3484 Sales and service of Nordson EFD dispensing systems are available worldwide.
- Page 94 The delay time that occurs at the end of a circle after the dispenser closes. This allows the pressure to equalize before the tip moves to the next point. Range: 0–1000 (s) Continued on next page www.nordsonefd.com info@nordsonefd.com 800-556-3484 Sales and service of Nordson EFD dispensing systems are available worldwide.
- Page 95 The purpose of specifying a Z Clearance is to allow the tip to raise high enough to clear any obstacles it encounters on the way to the next point. Range: 30–200 (mm/s) www.nordsonefd.com info@nordsonefd.com 800-556-3484 Sales and service of Nordson EFD dispensing systems are available worldwide.
- Page 96 80.0 mm/s [F1] OK Key Press Function The speed at which the dispensing tip travels when it moves through a Spline Node point. Range: 0.1–500 (mm/s) > www.nordsonefd.com info@nordsonefd.com 800-556-3484 Sales and service of Nordson EFD dispensing systems are available worldwide.
- Page 97 11 Goto Goto ------------------------------ Label: [F1] OK Key Press Function The program jumps to the address line in the program that contains the specified label. > www.nordsonefd.com info@nordsonefd.com 800-556-3484 Sales and service of Nordson EFD dispensing systems are available worldwide.
- Page 98 Row (Y) X Offset (in mm) Y Offset (in mm) Diagram of the Step & Repeat 2D X Offset, Y Offset, Columns (X), and Rows (Y) Parameters www.nordsonefd.com info@nordsonefd.com 800-556-3484 Sales and service of Nordson EFD dispensing systems are available worldwide.
- Page 99 Difference between the S and N paths when the Direction is X Step & Repeat Y, S Path Step & Repeat Y, N Path Difference between the S and N paths when the Direction is Y www.nordsonefd.com info@nordsonefd.com 800-556-3484 Sales and service of Nordson EFD dispensing systems are available worldwide.
- Page 100 Z Offset (in mm) Y Offset (in mm) Diagram of the Step & Repeat 3D X Offset, Y Offset, Columns (X), Rows (Y), and Tier (Z) Parameters www.nordsonefd.com info@nordsonefd.com 800-556-3484 Sales and service of Nordson EFD dispensing systems are available worldwide.
- Page 101 Z-axis zero position to which the tip raises regardless of the Z-axis value of the taught point location. Nordson EFD recommends inserting a Z Clearance command at the beginning of a program. Parameter Description (see illustrations below) Value The distance the tip raises after dispensing.
- Page 102 If the system includes multiple > valves, you can specify multiple dispense ports, as shown in the example above (Multi-out ex: 0.1.2). Default: 0 Range: 0-8 www.nordsonefd.com info@nordsonefd.com 800-556-3484 Sales and service of Nordson EFD dispensing systems are available worldwide.
- Page 103 Line Start Line End Line end Line End Line end Dispense Dispense Dispense Dispense Dispense Dispense Dispense Dispense Dispense Dispense Example Illustration of the Call Pattern command www.nordsonefd.com info@nordsonefd.com 800-556-3484 Sales and service of Nordson EFD dispensing systems are available worldwide.
- Page 104 19 End Subroutine Key Press Function Used in tandem with Call Subroutine to return the program to the address that occurs just after a Call Subroutine command. > www.nordsonefd.com info@nordsonefd.com 800-556-3484 Sales and service of Nordson EFD dispensing systems are available worldwide.
- Page 105 (Goto Label) for the program to go to when that input status occurs. 2 Output Enter the output port number (1–8) and whether the output should be turned ON or OFF (1 = ON or 0 = OFF). www.nordsonefd.com info@nordsonefd.com 800-556-3484 Sales and service of Nordson EFD dispensing systems are available worldwide.
- Page 106 The width (in mm) of the fill area. Range: 0–500 (mm) NOTE: Band distance is ignored for rectangle Fill Type 1 because this function is not supported. www.nordsonefd.com info@nordsonefd.com 800-556-3484 Sales and service of Nordson EFD dispensing systems are available worldwide.
- Page 107 Width = 5 mm Width = 5 mm Rectangle In when Width = 5 and Band = 0 Rectangle In when Width = 5 and Band = 15 www.nordsonefd.com info@nordsonefd.com 800-556-3484 Sales and service of Nordson EFD dispensing systems are available worldwide.
- Page 108 Width = 5 mm Band = 15 mm Circle In when Width = 5 and Band = 0 Circle In when Width = 5 and Band = 15 www.nordsonefd.com info@nordsonefd.com 800-556-3484 Sales and service of Nordson EFD dispensing systems are available worldwide.
- Page 109 Band = 15 mm Width = 5 mm Polygon In when Width = 5 and Band = 0 Polygon In when Width = 5 and Band = 15 www.nordsonefd.com info@nordsonefd.com 800-556-3484 Sales and service of Nordson EFD dispensing systems are available worldwide.
- Page 110 Controls the acceleration of the robot axes from point to point along a continuous path. This command is useful for creating sharp corners in a line dispense pattern. > Default (recommended): 50 (mm/s Range: 20–500 (mm/s www.nordsonefd.com info@nordsonefd.com 800-556-3484 Sales and service of Nordson EFD dispensing systems are available worldwide.
- Page 111 • Press F1 to set the Stop Point at the displayed coordinates. • Press F3 to set the Stop Point at the current dispensing tip location, updating the XYZ coordinates accordingly. www.nordsonefd.com info@nordsonefd.com 800-556-3484 Sales and service of Nordson EFD dispensing systems are available worldwide.
- Page 112 For this functionality, the optional height sensor must be installed and set up. Refer to”Appendix D, Height Sensor Setup and Use” on page 128 for all information related to the height sensor. www.nordsonefd.com info@nordsonefd.com 800-556-3484 Sales and service of Nordson EFD dispensing systems are available worldwide.
-
Page 113: Appendix B, Rs-232 Communication Protocol
Disable ----------------------------- • Press 2 DISABLE to disable 1 Enable remote communication. 2 Disable > Select: _ • Press F1 to save or exit. [F1] OK www.nordsonefd.com info@nordsonefd.com 800-556-3484 Sales and service of Nordson EFD dispensing systems are available worldwide. - Page 114 The robot is Idle in the Teach Mode. 0000 0111 The robot is Running in the Teach Mode. 0001 0110 The robot is Running in the Run Mode. www.nordsonefd.com info@nordsonefd.com 800-556-3484 Sales and service of Nordson EFD dispensing systems are available worldwide.
-
Page 115: Appendix C, Dxf File Import Using Teachmotion Dxf
Disable REMOTE COMMAND under the Setup menu. Refer to “Enabling or Disabling Remote Communication” on page 113. On the PC, double-click the TeachMotion DXF icon. The software automatically connects to the robot. www.nordsonefd.com info@nordsonefd.com 800-556-3484 Sales and service of Nordson EFD dispensing systems are available worldwide. -
Page 116: Overview Of The Teachmotion Dxf Software
Opens the DXF screen. This screen is used to import a DXF file, select the desired points and lines, and generate the initial set of dispense commands. www.nordsonefd.com info@nordsonefd.com 800-556-3484 Sales and service of Nordson EFD dispensing systems are available worldwide. -
Page 117: Program Screen And Icons
Saves the open file as a new Insert Inserts a command file name Undo Undoes the last command Delete Deletes the current command Redo Restores the last Undo action www.nordsonefd.com info@nordsonefd.com 800-556-3484 Sales and service of Nordson EFD dispensing systems are available worldwide. - Page 118 (not coordinate values) in the Edit window. Copied parameters can be pasted to another command line (of the same command) using Paste Parameter on the Program screen. www.nordsonefd.com info@nordsonefd.com 800-556-3484 Sales and service of Nordson EFD dispensing systems are available worldwide.
- Page 119 Shows all the programed points Magnify Magnifies an area of the grid window Reverse line Reverses the direction of the programmed points Select entity Selects a group of points www.nordsonefd.com info@nordsonefd.com 800-556-3484 Sales and service of Nordson EFD dispensing systems are available worldwide.
-
Page 120: Option Screen
Sets the Auto Purge parameters. You can enter these values or download them from the robot. NOTE: Refer to “Auto Purge” on page 39 for more information. www.nordsonefd.com info@nordsonefd.com 800-556-3484 Sales and service of Nordson EFD dispensing systems are available worldwide. -
Page 121: Dxf Screen And Icons
DXF image Select All Selects all the points in Option Opens the DXF screen the DXF file Option window www.nordsonefd.com info@nordsonefd.com 800-556-3484 Sales and service of Nordson EFD dispensing systems are available worldwide. - Page 122 EXAMPLE: If the source DXF has the length units set to inches, check this box to convert the drawing from inches to millimeters when it is imported. www.nordsonefd.com info@nordsonefd.com 800-556-3484 Sales and service of Nordson EFD dispensing systems are available worldwide.
-
Page 123: Modifying The Dxf Import Options
Click PROGRAM to return to the Program screen. Continue to “Importing a DXF File” on page 124 to import a DXF using these settings. www.nordsonefd.com info@nordsonefd.com 800-556-3484 Sales and service of Nordson EFD dispensing systems are available worldwide. -
Page 124: Importing A Dxf File
For this example, the letters EFD are selected. Refer to “1. DXF Screen Editing NOTE: Icons” on page 121 for an explanation of all the selection icons. Continued on next page www.nordsonefd.com info@nordsonefd.com 800-556-3484 Sales and service of Nordson EFD dispensing systems are available worldwide. - Page 125 REFRESH to update the view in the grid window to show the changes. The next step is to match the program commands to the actual workpiece. Continued on next page www.nordsonefd.com info@nordsonefd.com 800-556-3484 Sales and service of Nordson EFD dispensing systems are available worldwide.
- Page 126 Use the Teach Pendant to jog the tip to the top point on the actual workpiece and then click the top SET button under TABLE. > Continued on next page www.nordsonefd.com info@nordsonefd.com 800-556-3484 Sales and service of Nordson EFD dispensing systems are available worldwide.
- Page 127 A progress bar displays the upload status. When the upload is complete, the program is available on the Teach Pendant for further editing. www.nordsonefd.com info@nordsonefd.com 800-556-3484 Sales and service of Nordson EFD dispensing systems are available worldwide.
-
Page 128: Appendix D, Height Sensor Setup And Use
Used to view or add a Z-height reference value that the system uses when checking the Z height at a specified location on a workpiece. 04 Offset Program Used to update all the Z-height values in an existing program. www.nordsonefd.com info@nordsonefd.com 800-556-3484 Sales and service of Nordson EFD dispensing systems are available worldwide. - Page 129 - Probe Output: As connected [F1] OK on your system - Detect Speed: 5 - Travel Limit: 20 • Press F1. Continued on next page www.nordsonefd.com info@nordsonefd.com 800-556-3484 Sales and service of Nordson EFD dispensing systems are available worldwide.
- Page 130 02 Sensor Position • MOVE UP / DOWN to INITIAL 03*Initial Height Detect HEIGHT DETECT. 04 Offset Program > > • Press ENTER. Continued on next page www.nordsonefd.com info@nordsonefd.com 800-556-3484 Sales and service of Nordson EFD dispensing systems are available worldwide.
- Page 131 Z-height values. Offset Z Height xxx.xx • Press F1 to accept the offset value. The system automatically updates all the Z-height values in [F1] OK the program. www.nordsonefd.com info@nordsonefd.com 800-556-3484 Sales and service of Nordson EFD dispensing systems are available worldwide.
- Page 132 0003 Height Sensor 0004 EMPTY An example program is shown at 0005 Dispense Dot 0.150 right. 0006 Dispense Dot 0.150 0007 End Program 0008 Empty www.nordsonefd.com info@nordsonefd.com 800-556-3484 Sales and service of Nordson EFD dispensing systems are available worldwide.
- Page 133 E Series Automated Dispensing System Notes www.nordsonefd.com info@nordsonefd.com 800-556-3484 Sales and service of Nordson EFD dispensing systems are available worldwide.
- Page 134 NORDSON EFD ONE YEAR LIMITED WARRANTY Nordson EFD products are warranted for one year from date of purchase to be free from defects in material and workmanship (but not against damage caused by misuse, abrasion, corrosion, negligence, accident, faulty installation or by dispensing material incompatible with equipment) when the equipment is installed and operated in accordance with factory recommendations and instructions.
Need help?
Do you have a question about the E2 and is the answer not in the manual?
Questions and answers