Advertisement
Available languages
Available languages
Quick Links
Advertisement

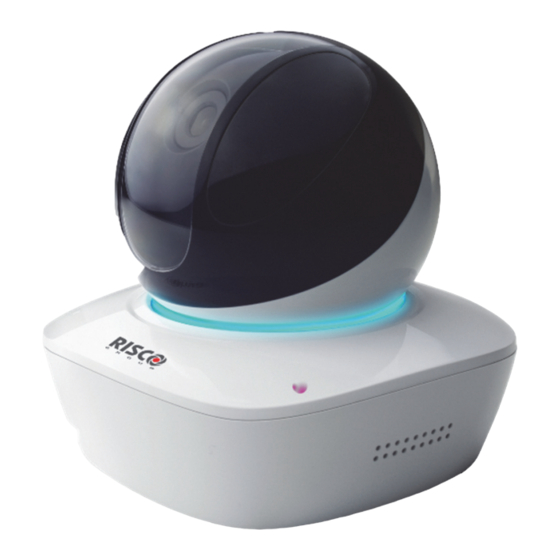
Summary of Contents for Risco VUpoint RVCM61H03
- Page 1 VUpoint Pan/Tilt Indoor P2P IP Camera Model: RVCM61H03 Quick Guide...
- Page 2 Language Page...
- Page 3 Status Red light normally on Booting Green light slow flashing IP Camera is not connected to the RISCO Cloud. Please check for internet connection and try to connect again by rebooting the IP Camera. Blue light normally on IP Camera is successfully connected to the RISCO Cloud.
-
Page 4: Defining Ip Camera Settings
Defining IP Camera Settings Step 1 Connect one end of the network cable (LAN) to the camera Ethernet port and the other side to your router. Step 2 Log into the Installer Administration application (www.riscocloud.com/installer) and enter your Installer Admin user name and password. NOTE –... - Page 5 Step 5 If you selected the “Connect to Wi-Fi” option, select a wireless network from the available list and click Connect. Make your selection and then click Connect Step 6 If your network is password protected, enter a password into the displayed password screen and then click Connect.
- Page 6 État Voyant rouge allumé Démarrage en cours normalement Voyant vert clignotant La caméra IP n'est pas connectée au RISCO Cloud. Vérifiez la lentement connexion Internet et essayez de vous reconnecter en redémarrant la caméra IP. Voyant bleu allumé La caméra IP a bien été connectée au RISCO Cloud.
- Page 7 Définition des paramètres de la caméra IP Étape 1 Raccordez l'une des extrémités du câble réseau (LAN) au port Ethernet de la caméra, et l'autre extrémité à votre routeur. Étape 2 Connectez-vous à l'application Installateur Admin (www.riscocloud.com/installer), puis spécifiez votre nom d'utilisateur et votre mot de passe. REMARQUE : il est recommandé...
- Page 8 Étape 5 Si vous avez sélectionné l'option « Connecter au Wi-Fi », sélectionnez un réseau sans fil dans la liste disponible, puis cliquez sur Connecter. Effectuez votre sélection et cliquez sur Connecter Étape 6 Si votre réseau est protégé par mot de passe, saisissez un mot de passe dans l'écran qui s'affiche, puis cliquez sur Connecter.
- Page 9 Indicación Significado Rojo fijo Arrancando Verde con parpadeo La cámara IP no está conectada a RISCO Cloud. Compruebe la lento conexión a Internet y reinicie la cámara IP para intentar volver a conectarla. Azul normalmente La cámara IP está conectada correctamente a RISCO Cloud.
- Page 10 Definir la configuración de la cámara IP Paso 1 Conecte un extremo del cable de red (LAN) al puerto Ethernet de la cámara y el otro extremo al router. Paso 2 Conéctese a la aplicación de administración de instaladores (www.riscocloud.com/installer) e introduzca su nombre de usuario y su contraseña de administrador de instaladores.
- Page 11 Paso 5 Si selecciona la opción “Connect to Wi-Fi”, elija una red inalámbrica en la lista de redes disponibles y pulse Connect. Realice la selección y pulse Connect Paso 6 Si la red está protegida con contraseña, introduzca una contraseña en la pantalla de contraseña y pulse Connect.
- Page 12 Per la funzione WPS (Wi-Fi Protected Setup), premere il tasto normalmente Stato LED Significato Luce rossa fioca Avvio dispositivo . La telecamera non è connessa al cloud RISCO. Controllare la Luce verde fioca connessione internet e tentare una connessione successiva riavviando la telecamera. Luce verde lampeggiante Configurazione smart WiFi in corso (modalità...
- Page 13 Configurazione parametri telecamera IP Passo 1 Collegare un cavo LAN alla porta ethernet della telecamera e con l’altro capo del cavo collegarsi al router. Passo 2 Entrare nell’area installatore del cloud (www.riscocloud.com/installer) inserendo le proprie credenziali per accedervi. NOTA – Si consiglia di usare Google Chrome o Mozilla Firefox per entrare nell’area installatore del Cloud.
- Page 14 Passo 5 Se si seleziona “Connettersi al WiFi”, selezionare una rete WiFi tra quelle disponibili e cliccare su Connetti. Selezionare la rete WiFi e cliccare su Connetti Passo 6 Se la rete selezionata è protetta da password, digitare la password richiesta e cliccare su Connetti.
- Page 16 2014/53/EU sur notre site web, à l’adresse suivante : www.riscogroup.com. Declaración de Conformidad RED : Por la presente, RISCO Group declara que este equipo cumple con los requisitos esenciales y otras disposiciones relevantes de la Directiva 2014/53/EU. Para la Declaración de Conformidad CE, por favor diríjase a nuestra web: www.riscogroup.com.
- Page 17 FCC ID: 2AATL-8112MET This device complies with part 15 of the FCC Rules. Operation is subject to the following two conditions: (1) This device may not cause harmful interference, and (2) This device must accept any interference received, including interference that may cause undesired operation.
- Page 18 RISCO, for a period of (i) 24 months from the date of delivery of the Product ( the “Warranty Period”). This Limited Warranty covers the Product only within the country where the Product was originally purchased and only covers Products purchased as new.
- Page 19 Software and applications distributed or made available by RISCO in conjunction with the Product (with or without the RISCO brand), including, but not limited to system software, as well as P2P services or any other service made available by RISCO in relation to the Product, are not covered under this Limited Warranty.
- Page 20 FACILITIES, INCLUDING THE INTERNET, GSM OR OTHER MEANS OF COMMUNICATIONS AND THAT RISCO’S PRODUCTS, MAY BE SUBJECT TO LIMITATIONS, DELAYS, AND OTHER PROBLEMS INHERENT IN THE USE OF SUCH MEANS OF COMMUNICATIONS. RISCO IS NOT RESPONSIBLE FOR ANY DELAYS, DELIVERY FAILURES, OR OTHER DAMAGE RESULTING FROM SUCH PROBLEMS.


Need help?
Do you have a question about the VUpoint RVCM61H03 and is the answer not in the manual?
Questions and answers