Table of Contents
Advertisement
Advertisement
Table of Contents

Subscribe to Our Youtube Channel
Related Manuals for Telme GEL 20

Summary of Contents for Telme GEL 20
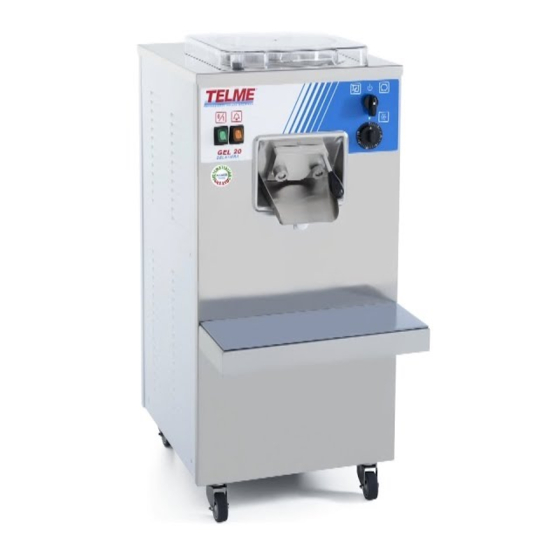
- Page 1 GEL 20 Z15.013 0198 V02 ING GEL Ice cream freezer...
- Page 2 English Ice cream freezer...
-
Page 3: Table Of Contents
Dear customer, we congratulate you for choosing a high quality product which will surely satisfy your expectations. With our thanks for choosing us, we kindly invite you to examine the present operating instructions manual before operating your new device. SUMMARY IMPORTANT SAFETY SUGGESTIONS AND MACHINE’S OPERATION ........ -
Page 4: Important Safety Suggestions And Precautions
English Ice cream freezer MPORTANT SAFETY SUGGESTIONS AND PRECAUTIONS AREFULLY READ THE INSTRUCTIONS CONTAINED IN THE PRESENT OPERATING INSTRUCTIONS MANUAL BEFORE INSTALLING AND OPERATING THIS MACHINE HESE INSTRUCTIONS HAVE BEEN DRAFTED FOR THE SAFETY OF INSTALLATION OPERATION AND MAINTENANCE OF THIS MACHINE »–›... -
Page 5: Safety Devices
English Operating instructions • The beater and the cylinder are have been assembled with precision: therefore they are sensitive to changes of temperature, which could cause breakdowns or damages to the machine's mechanical parts due to thermal dilatation. NEVER expose to abrupt temperature changes the parts subject to refrigeration: DO NOT pour water in the cylinder immediately after ice-cream has been produced. -
Page 6: Technical Data
English Ice cream freezer ECHNICAL DATA Technical data plate and EC marking The technical data plate and CE marking must not be removed. It is located on the back part of the device and identifies: the name and address of the manufacturer [F]; the designation of the model [MOD] and the relative series number [S/N];... -
Page 7: Transportation Of The Packed Machine (Floor Models)
English Operating instructions Transportation of the packed machine (floor models) The packing has been projected to assure at the machine the highest protection. It is therefore suggested to transport the machine while it is packed as near as possible at the place where it will be installed. To carry the packed machine, use an elevator, or a bench trolley, inserting its forks in the basement’s holes. -
Page 8: Installation
English Ice cream freezer NSTALLATION HE INSTALLATION MUST BE CARRIED OUT ONLY BY THE ASSISTANCE SERVICE OR BY TECH NICALLY AUTHORISED PERSONNEL AND IN COMPLIANCE WITH THE LAWS IN FORCE ALWAYS FOLLOWING INSTRUCTIONS OF THE MANUFACTURER Placing and check of the parts Place the machine on a flat and steady surface. -
Page 9: Electrical Connection
English Operating instructions Electrical connection ’ HE SUPPLY S VOLTAGE REQUIRED BY THE MACHINE IS HIGH IT IS PARTICULARLY DAN ’ GEROUS HE WORKS ON THE SUPPLY S ELECTRICAL CIRCUITS MUST BE MADE WORKMANLIKE BY QUALIFIED STAFF HE ELECTRICAL SAFETY OF THIS MACHINE IS REACHED ONLY WHEN THE SAME IS CORRECTLY CONNECTED QUALIFIED AND CERTIFIED PERSONNEL TO AN EFFICIENT... -
Page 10: Initial Functional Test
English Ice cream freezer Initial functional test At the end of the installation, and before utilising the machine, it is indispensable to let a qualified technician check the correct connection, by performing the following procedure. Before starting, check that the socket's Main Switch is in the position “0”; check that Beater's Switch [24] on the machine is in the STOP position (centre) and that Principal Switch [23] (if... -
Page 11: Machine's Operation
English Operating instructions ’ ACHINE S OPERATION Warnings HEN USING THE MACHINE AS WITH ALL ELECTRICAL DEVICES ESSENTIAL RULES MUST BE COMPLIED WITH PARTICULARLY never touch it if your feet or hands are wet; never operate it while barefoot; never pull the supply cable to disconnect it from the mains network; avoid liquids to penetrate in the machine, for example during its cleaning;... -
Page 12: Production
English Ice cream freezer Beater's Switch [24] STOP position (centre) When knob is in the above position, the beater is not moving and the refrigerator is off, independently from the Timer. BEATING position (right) By turning the knob to the above position the beater starts rotating clockwise and, when setting refrigerating time, the refrigerator turns on. - Page 13 English Operating instructions close cylinder's lid; turn Timer [32] and read clock (in minute) to set refrigerating time according to mixture type and quantity; The product's required thickness can be achieved by carrying out a few trial cycles. We suggest to start with a short time (6…10 minutes) and to increase it by one minute at a time, according to machine model, mixture type and quantity to be whipped.
-
Page 14: Washing And Sanitizing
English Ice cream freezer Models WITH extraction door: place a suitable basin on the basin support; FIRST completely open the door, THEN turn Beater's Switch [24] to EXTRACTION (left). Scoop product out into the basin; stop beater by turning Switch [24] to STOP (centre);... -
Page 15: Disassembling Of The Parts
English Operating instructions Check that Timer knob is turned counterclockwise (start- ing position) to avoid starting refrigerator unnecessarily. CAUTION: DO NOT TURN Beater Switch to EXTRACTION (left) as this would cause water to be suddenly ejected out of the cylinder. stop beater, put a container under the cylinder drain (or extraction door) and open it to let water out of the cylinder. -
Page 16: Reassembly
English Ice cream freezer Separately wash all those parts which can be dismantled by the user following instructions in Par. 7.2. Only use warm water and food compatible detergent, followed by a cool rinse. Note: For a long life of the machine we suggest not to use too hot water, solvents, abrasive detergents, or rough sponges, in particular on the plastic parts. -
Page 17: Adjusting Blades
English Operating instructions Models WITHOUT extraction door: put drain plug [4] in. The slot [37] has to be facing downwards, otherwise the plug will not go in. Should it prove hard to insert, lubricate gasket [38] with food compat- ible lubricant; Models WITH extraction door: fix chute [9] under the door [14] hooking it on hinges [26];... -
Page 18: Maintenance During The Components Disassembling
English Ice cream freezer Maintenance during the components disassembling Check the integrity of gaskets and substitute those that are deteriorated. Use exclusively original, compatible with food, rubber gaskets. The spare bag contains a complete series of gaskets approved by the manufacturer. To correctly replace the gaskets it is necessary to: remove the old gaskets by using a sharp tool, possibly non-metallic, paying atten- tion not to scratch the seating of the gaskets themselves;... -
Page 19: Periods Of Inactivity
English Operating instructions ERIODS OF INACTIVITY If long periods of inactivity are foreseen, proceed as follows: wash up completely the machine (see Section 7); switch off the power breaker and unplug the machine; if the machine will be stored in a different place, group all the documentation, together with the present manual, and enclose it at the machine (i.e. - Page 20 English Ice cream freezer Cause: The Beater’s back up relay switches off, following overuse or mechanical overload. Check that the eventual product in the cylinder is not excessively dense and that there are no other causes of mechani- cal stress. Stop the machine, wait a few minutes and try again. If the inconvenient should not be eliminated, or should frequently repeat, call the assistance service.
- Page 21 English Operating instructions...
- Page 22 Replaced parts still belong to TELME and will have to be returned to the head office free of charge. Labour and eventual travelling expenses will be at purchasers charge. Freon gas filling is excluded from the warranty.
- Page 23 English Operating instructions...
- Page 24 COSTRUTTORE: MANUFACTURER: CONSTRUCTEUR: HERSTELLER: CONSTRUCTOR: FABRIKANT: Servizio Assistenza: Technical Service: Service d’Assistance: Kundendienst: Servicio Asistencia: Servicedienst:...
Need help?
Do you have a question about the GEL 20 and is the answer not in the manual?
Questions and answers