
Related Manuals for Blomberg DV 17600 W


Summary of Contents for Blomberg DV 17600 W
- Page 1 Front-Loading Dryer Owner’s Guide: Installation and Operation Instructions DV 17600 W Dryer / User Manual 1 / EN...
- Page 2 Please read this user manual first! Dear Customer, Thank you for prefering a Blomberg product. We hope that your product which has been manufactured with high quality and technology will give you the best results. We advise you to read through this manual and the other accompanying documentation carefully before using your product and keep it for future reference.
-
Page 3: Table Of Contents
TABLE OF CONTENTS 1 Your Dryer 6 Technical Specifications 2 Important Safety Instructions 7 User maintenance and cleaning instructions 3 Installation Instructions 7.1 Lint filter ..........22 3.1 Electrical connection......8 7.2 Sensor ..........22 3.2 Grounding Instructions ......10 8 Troubleshooting 3.3 Appropriate installation location ..11 3.4 Minimum Installation Clearances..12 9 Warranty Statement 3.5 Use on top of a washer......12... -
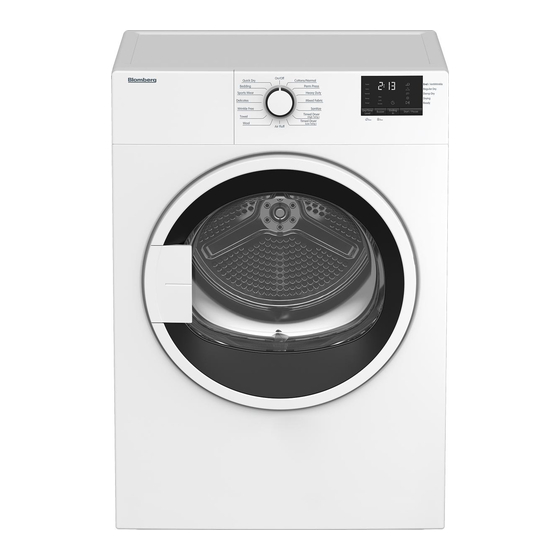
Page 4: Your Dryer
Overview Figure 1 Control Panel Type label Loading Door Adjustable Feet Lint Filter NOTE: Specifications of this appliance may change without notice to improve the quality of the product. Drawings in this manual are schematic and may not match your product exactly. Values stated on the dryer labels or in the documentation accompanying it are obtained in the laboratory in accordance with relevant standards. -
Page 5: Important Safety Instructions
Important Safety Instructions WARNING: To reduce the risk of fire or electric shock resulting in serious injury or death when using this appliance, follow the basic precautions including the following: • Read all instructions before using the appliance. Failure to follow these instructions will increase the risk of fire or electric shock and will void the warranty. - Page 6 • This appliance must be grounded. In the event of malfunction or breakdown, grounding will reduce the risk of electric shock by providing a path of least resistance for electric current. This appliance is equipped with a cord having an equipment-grounding conductor and a grounded plug.
- Page 7 give off vapors that could ignite or explode. • Do not use the tumble dryer if industrial chemicals have been used for cleaning what you want to dry. • Do not dry unwashed items in the tumble dryer. • Do not place items exposed to cooking oils in your dryer. Items contaminated with cooking oils may contribute to a chemical reaction that could cause a load to catch fire.
- Page 8 • Keep pets away from the appliance during the drying cycle. • Before the appliance is removed from service or discarded, remove the door to the drying compartment. • Close the loading door when you leave the area where the dryer is located. •...
-
Page 9: Installation Instructions
Installation Instructions WARNING: Failure to follow Neutral conecction is not used in these instructions could result this product in a risk of fire •The clothes dryer (“appliance‘) installation must be performed by a qualified installer. •Install the appliance according to the manufacturer’s instructions and local codes. -
Page 10: Grounding Instructions
To change the cord: The dryer is now ready to be plugged into the 3-wire receptacle of the proper rating. 1. Make sure that the dryer is not plugged into any power outlet. The receptacle should be located so that the DO NOT plug end of dryer power plug and receptacle will be accessible with cord into a live receptacle before... -
Page 11: Appropriate Installation Location
The appliance must not be operated unless it is repaired! There is the risk of electric shock! 3.3 Appropriate installation location •Install your appliance in environments that have no risk of freezing and are in a stable and level position. •Do not place your appliance on a high pile rug or on similar surfaces. -
Page 12: Minimum Installation Clearances
” 36.14 (918 mm) min. 33 ¾" (856,5 mm) 3.4 Minimum Installation Ventilation Requirements Clearances Closet door must have 2 openings, one located 3.2 inches (8 cm) from bottom of door having a minimum area of 16 sq. inches (103 cm2) and the other one located Alcove or Closet 3 inches (7.5 cm) from top of door having a... -
Page 13: Adjusting The Feet
•Place the appliance on a solid floor. If Metal rigid duct it is to be placed on top of a washer, the Maximum approximate weight together may reach 397 72 ft (21.9 m) + 2 elbows length lbs (180 kg) when they are full. Therefore, the floor must be capable of carrying the load placed on it! To connect a ventilation duct;... -
Page 14: Destroying Packaging Material
Exhaust of humid air from the dryer Care must be taken not to pinch or into the room is to be avoided. bend the ducts. It may damage the walls and The end of the hose should not be furniture in the room. bent, it should not be stepped on The ventilation duct can be routed and it must not be folded between... -
Page 15: Operating Instructions
Operating Instructions WARNING: To reduce the risk of fire, electric shock, or personal injury, read the 2. IMPORTANT SAFETY INSTRUCTIONS before operating this appliance. LAUNDRY DRYING SYMBOLS Drying Suitable for No Iron Do not dry- Sensitive / Do not dry Do not dry Symbols dryer... -
Page 16: Preparing Clothes To Be Dried
•Overly wet laundry or laundry with dripping The following weights are given as water must not be put into the dryer. examples. 4.4 Preparing clothes to be Home articles Weight (g)* Weight (lb)* dried •All laundry must be spun at the highest Cotton quit covers 1500 3 ¼... -
Page 17: Operating The Product
Operating the product 5.1 Control Panel End / Ant Wr nkle Super Regular Dry Extra Damp Dry Normal F lter Dry ng Damp Lock Ready T med Buzzer Dry/T me End ng Buzzer Start / Pause Level On/Off/Program selection button Buzzer volume button Start/Pause button Drying level/Time programs selection... -
Page 18: Program Selection And Consumption Chart
5.4 Program selection and consumption chart Spin speed in wash- Wight Drying time Programs Explanation (Ib) (minutes) machine (rpm) Cottons/Nor- Durable clothing can be dried with this Medium program at a normal temperature. Less durable clothing can be dried with this program at a at a lower temperature Perm Press compared to the cottons program. -
Page 19: Auxiliary Functions
Drying level Cancel the program by turning the On/Off/ Program selection knob. Select the program you want and repeat the End Time selection Use for heavy-duty fabrics in to be process. Super very dry Cancelling the end time function Extra Use for extra drying If you want to cancel the end time countdown and start the program immediately:... -
Page 20: Changing The Program After It Is Started
5.9 Changing the program after 5.10 Cancelling the program it is started If you want to cancel the program and ter- You can change the program you selected minate the drying operation for any reason to dry your laundry with a different program after the drying machine starts running, turn after the drying machine starts running the On/Off/Cancel knob, the program will be... -
Page 21: Technical Specifications
Technical Specifications Model Vented Dryer with electronic sensor control Height (in) 33 1/4 Witdth (in) 23 7/16 Depth (in) 22 15/16 Height adjustment of feet (in) 1 1/16 Net weight (plastic front door usage) (lbs) 69,7 Net weight (glass front door usage) (lbs) 73,4 Voltage / Frequency 208-240V ~ 60 Hz... -
Page 22: User Maintenance And Cleaning Instructions
User maintenance and cleaning instructions 7.1 Lint filter 7.2 Sensor Lint and fibers released from the laundry There are humidity sensors in your dryer that in to the air during the drying cycle are detect whether the laundry is dry or not. collected in the “Lint Filter”. -
Page 23: Troubleshooting
Troubleshooting Problem Cause Explanation / Solution * Clean the lint filter. *Lint filter may not have been * Meshes of the filter may be cleaned. clogged. Wash with water. *Remove the objects (if any) that *Ventilation grids on the front side block ventilation in front of the of the machine are blocked. -
Page 24: Warranty Statement
This product is fully tested and went through official quality assurance inspections before leaving the original manufacturing site. Warranty terms for this Blomberg household appliance is not valid if the product is altered, tampered, modifed, additional parts assembled, fixed and re-packed by an authorized... - Page 28 www.blomberginternational.com info@blomberginternational.com 2960311757_EN/070918.1428...
Need help?
Do you have a question about the DV 17600 W and is the answer not in the manual?
Questions and answers
How to turn up the volume on buzzer on Blomberg dryer DV17600W S/N 23-204423-03
To increase the buzzer volume on the Blomberg dryer DV17600 W, press the "Buzzer volume" button.
This answer is automatically generated
Hi There, my tenant has informed me that the dryer Blomberg DV17600W is not drying very well. He has cleaned the lint filter and exhaust. The dryer is about 3.5 years old. Please suggest what could be done to resolve this issue. Thank you