
Subscribe to Our Youtube Channel
Related Manuals for Moxa Technologies WAC-2004


Summary of Contents for Moxa Technologies WAC-2004
- Page 1 WAC-2004 User’s Manual Edition 5.0, September 2017 www.moxa.com/product © 2017 Moxa Inc. All rights reserved.
- Page 2 WAC-2004 User’s Manual The software described in this manual is furnished under a license agreement and may be used only in accordance with the terms of that agreement. Copyright Notice © 2017 Moxa Inc. All rights reserved. Trademarks The MOXA logo is a registered trademark of Moxa Inc.
-
Page 3: Table Of Contents
Power Socket ..........................1-6 Beeper ............................1-6 Getting Started..........................2-1 Using Web Console to Access the WAC-2004 ..................2-2 Using Telnet Console to Access the WAC-2004 ..................2-3 Using Serial Console to Access the WAC-2004 ..................2-4 Web Console Configuration ....................... 3-1 Function Map ............................. -
Page 4: Introduction
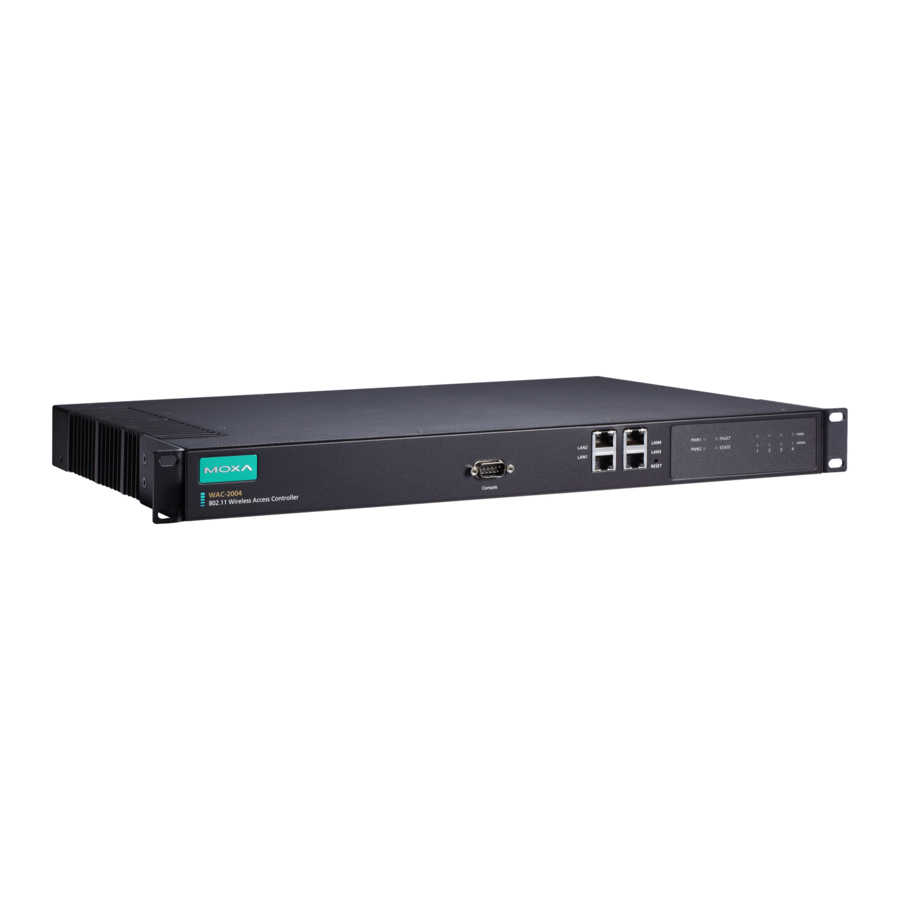
Introduction The WAC-2004 is Moxa’s high-end Wireless Access Controller that incorporates with the AWK-RTG (Rail Train to Ground) series and is designed specifically for Railway applications. The WAC-2004 supports not only single-subnet roaming (Layer 2), it also allows roaming between multiple subnets (Layer 3) with Mobile IP technology. -
Page 5: Overview
The advanced roaming algorithm, along with Mobile IP technology, allows wireless clients to roam between APs in different IP subnets within milliseconds while upholding stringent security in extremely demanding environments. The WAC-2004 is rated to operate at temperatures of 0 to 50°C and is rugged enough for on-site installation in any harsh industrial environment. -
Page 6: Product Specifications
WAC-2004 Introduction Useful Utilities and Remote Configuration • RS-232/Telnet console management • Web Console (HTTP/HTTPS) management • Firmware upgrade from TFTP, Web Console, and utility • Supports SNMP • Configuration backup and reset Industrial-grade Design • Rackmount fanless design •... -
Page 7: Interface Specifications
Warranty Warranty Period: 3 years Details: www.moxa.com/warranty ATTENTION The WAC-2004 is NOT designed for use by the general public. A well-trained technician is required to safely deploy the WAC-2004. Interface Specifications This section provides detailed introduction on the WAC-2004 interfaces. -
Page 8: Power Reset Button
No activity or 10 Mbps Ethernet mode. Power Reset Button The RESET button located on the top panel of WAC-2004 is for power reset ONLY. You can reboot the WAC-2004 by pressing the RESET button with a pointed object, such as an unfolded paper clip. -
Page 9: Serial Console Connection
Refer to the diagram above to see how the RJ45 pins are numbered. Serial Console Connection The WAC-2004 offers a serial port with DB9 male connector for its console access. The pin assignments are shown in the following table: RS-232 NOTE The pin numbers for the male DB9 connectors are stated in the table above. -
Page 10: Getting Started
The Serial Console can be used if you do not have the WAC-2004’s IP address; however it requires using a RS-232 serial cable to connect WAC-2004 to your PC’s COM port. -
Page 11: Using Web Console To Access The Wac-2004
To use the WAC-2004’s management and monitoring functions from a PC host connected to the same LAN as the WAC-2004, you must make sure that the PC host and the WAC-2004 are on the same logical subnet. The WAC-2004’s default IP is 192.168.127.253. -
Page 12: Using Telnet Console To Access The Wac-2004
Step 2: Setting up the computer IP address Choose an IP address on the same subnet as the WAC-2004. Since the WAC-2004’s default IP address is 192.168.127.253, and the subnet mask is 255.255.255.0, you should set the IP address of the computer to 192.168.127.xxx/24. -
Page 13: Using Serial Console To Access The Wac-2004
Exit Telnet console. Using Serial Console to Access the WAC-2004 If you do not have the WAC-2004’s IP address, but you can physically reach the device, use Serial Console to manage the device or obtain the IP address. Default Serial Console access information... - Page 14 WAC-2004 Getting Started...
- Page 15 After the connection is established, you will be asked to enter username and password. For first-time configuration, please use the default username and password (please refer to section: Using Web Console to access the WAC-2004) Step 4: Basic text-based management interface...
-
Page 16: Web Console Configuration
Web Console Configuration The WAC-2004’s Web Console provides a convenient way to modify the controller’s configuration, monitor the controller and governed AP/Client status, and upgrade FW remotely over an existing network. The recommended web browser is Microsoft® Internet Explorer 8.0 or later releases with JVM (Java Virtual Machine). -
Page 17: Function Map
Web Console Configuration Function Map The Function Map provides a convenient means of determining which functions you need to use. Quick overview of the WAC-2004’s status Basic settings for administering the WAC-2004 Essential settings related to set up a wireless... -
Page 18: Overview
WAC-2004 Web Console Configuration Overview The Overview page summarizes the WAC-2004’s current status. The information is categorized into several groups: System info, Device info, and Controller info. Basic Settings The Basic Settings group includes the most commonly used settings required by administrators to maintain and control the WAC-2004. -
Page 19: Network Settings
Identifies the WAC-2004 on a TCP/IP network. 192.168.127.253 Subnet mask Setting Description Factory Default WAC-2004 subnet Identifies the type of network to which the WAC-2004 is 255.255.255.0 mask connected (e.g., 255.255.0.0 for a Class B network, or 255.255.255.0 for a Class C network). Gateway Setting... -
Page 20: Time Settings
Time information. Functions such as Auto warning can add real-time information to the message. The Current local time shows the WAC-2004’s system time when you open this web page. You can click on the Set Time button to activate the updated date and time parameters. An “(Updated)” string will appear to indicate that the change is complete. -
Page 21: Controller Settings
WAC-2004 Web Console Configuration Time server 1/2 Setting Description Factory Default IP/Name of Time IP or Domain name of the NTP time server. The 2nd NTP server None Server 1/2 will be used if the 1st NTP server fails to connect. - Page 22 Roaming domain Setting Description Factory Default 6 Hex characters This specifies the area served by the WAC-2004. All related <The Mac address of controllers, APs, and clients use this as identification to work the WAC-2004> and communicate with each other.
-
Page 23: Wac Security Settings
WAC Security Settings By enabling the 802.1X/EAP on the WAC-2004, the controller acts as an authentication proxy/relay between the APs and the RADIUS server. So when configuring your RADIUS server, instead of entering IPs for every authentication requester (in normal cases, it will be your APs), you only need to enter the IP for the WAC-2004. -
Page 24: Mobile Ip Settings
WAC-2004 Web Console Configuration Mobile IP Settings Mobile IP allows you to access the same IP address even when the Client is travelling across different subnets. Mobile IP Setting Description Factory Default Enable/Disable Enable or disable Mobile IP feature Enable... -
Page 25: Advanced Settings
MD5 or SHA, is the most secure protocol. You can also enable data encryption to enhance data security. The WAC-2004’s MIB can be found in the software CD and supports reading/writing the attributes via SNMP. SNMP security modes and security levels supported by the WAC-2004 are shown in the following table. Select the security mode and level that will be used to communicate between the SNMP agent and manager. - Page 26 Private Key Setting Description Factory Default Max. 63 characters A data encryption key is the minimum requirement for data None encryption. Private MIB Information Device Object ID Also known as OID, this is the WAC-2004’s enterprise value and is fixed. 3-11...
-
Page 27: Auto Warning Settings
In addition to logging these events, the WAC-2004 supports different approaches to warn engineers automatically, such as SNMP trap, and e-mail. -
Page 28: Syslog
WAC-2004 Web Console Configuration Syslog This function provides the event logs for the Syslog server. The function supports up to three configurable Syslog servers and Syslog server UDP port numbers. When an event occurs, the event will be sent as a Syslog UDP packet to the specified Syslog servers. -
Page 29: E-Mail
E-mail Server Settings You can set up to 4 e-mail addresses to receive alarm emails from the WAC-2004. The following parameters can be configured on the E-mail Server Settings page. In addition, a Send Test Mail button can be used to test whether the Mail server and e-mail addresses work well. -
Page 30: Trap
WAC-2004 Web Console Configuration From e-mail address Setting Description Factory Default Max. 63 characters Enter the administrator’s e-mail address which will be shown in None the “From” field of a warning e-mail. To E-mail address 1/ 2/ 3/ 4 Setting... - Page 31 WAC-2004 Web Console Configuration SNMP Trap Receiver Settings SNMP traps are defined in SMIv1 MIBs (SNMPv1) and SMIv2 MIBs (SNMPv2c). The two styles are basically equivalent, and it is possible to convert between the two. You can set the parameters for SNMP trap receivers through the web page.
-
Page 32: Status
1 and 2. Managed Device List The Managed Device List displays all AWK APs, which are managed by the WAC-2004; the associated clients are also displayed here. Select the Auto refresh check box to enable periodic updates. -
Page 33: Mobile Ip Status
Mobile IP Status The Mobile IP Status displays the status of all Mobile IP Clients, which are managed by this particular WAC-2004. This page contains two main tables - CCoA Subnet Status and Home Subnet Status. The CCoA Subnet Status table provides the Mobile IP Client’s IP information from the CCoA’s... -
Page 34: Maintenance
WAC-2004 Web Console Configuration Maintenance Maintenance functions provide the administrator with tools to manage the WAC-2004 and wired/wireless networks. Console Settings You can enable or disable access permission for the following consoles: HTTP, HTTPS and Telnet connections. For more security, we recommend you only allow access to the secured console. -
Page 35: Firmware Upgrade
The WAC-2004 can be enhanced with more value-added functions by installing firmware upgrades. Note that while the firmware is being upgraded, all APs controlled by the WAC-2004 will be out of service. Click the Browse button to specify the firmware image file and click Firmware Upgrade and Restart to start the firmware upgrade. -
Page 36: Mib Export
Click MIB Export to save a MIB file to your local storage. The configuration file is a .my file that you can import with a general SNMP tool. This operation allows you to control or configure the WAC-2004 remotely. Load Factory Default Use this function to reset the WAC-2004 and roll all settings back to the factory default values. 3-21... -
Page 37: Username/Password
Web Console Configuration Username/Password You can change the administration username and password for each of the WAC-2004’s console managers by using the Password function. Before you set up a new password, you must input the current password and reenter the new password for confirmation. For your security, do not use the default password moxa, and remember to change the administration password regularly. -
Page 38: Save Configuration
The following figure shows how the WAC-2004 stores the setting changes into volatile and non-volatile memory. All data stored in volatile memory will disappear when the WAC-2004 is shutdown or rebooted unless they are saved onto the flash (non-volatile) memory. Because the WAC-2004 starts up and initializes with the settings stored in flash memory, all new changes must be saved to flash memory before restarting the WAC-2004. -
Page 39: Restart
If you made changes recently but did not save, you will be given two options. Clicking the Restart button here will reboot the WAC-2004, and all setting changes will be ignored. Clicking the Save and Restart button will apply all setting changes and then reboot the WAC-2004. -
Page 40: Software Installation And Configuration
Software Installation and Configuration The following topics are covered in this chapter: Overview AWK Search Utility Installing AWK Search Utility Configuring AWK Search Utility ... -
Page 41: Overview
Software Installation and Configuration Overview The Documentation & Software CD included with your WAC-2004 is designed to make the installation and configuration procedure easy and straightforward. This auto-run CD includes AWK Search Utility (to broadcast search for all WAC/AWK’s accessible over the network), the WAC-2004 User’s Manual, and Quick Installation Guide. - Page 42 WAC-2004 Software Installation and Configuration 3. Click Next to create the program’s shortcut files to the default directory, or click Browse to select an alternate location. 4. Click Next to select additional tasks. 5. Click Next to proceed with the installation. The installer then displays a summary of the installation options.
-
Page 43: Configuring Awk Search Utility
WAC-2004 Software Installation and Configuration 6. Click Install to begin the installation. The setup window will report the progress of the installation. To change the installation settings, click Back and navigate to the previous screen. 7. Click Finish to complete the installation of AWK Search Utility. - Page 44 WAC-2004 Software Installation and Configuration 3. The “Searching” window indicates the progress of the search. When the search is complete, all WAC and AWK units that were located will be displayed in the AWK Search Utility window. 4. Click Locate to cause the selected device to beep.
- Page 45 WAC-2004 Software Installation and Configuration To modify the configuration of the highlighted WAC or AWK, click on the Web icon to open the Web Console. This will take you to the Web Console, where you can make all configuration changes. Refer to Chapter 3, “Using the Web Console,”...
- Page 46 WAC-2004 Software Installation and Configuration Go to Tools Advanced Options to find Search, Connection and Miscellaneous settings. See following for detail explanation: Search • Retry count (default=5): Indicates how many times the search will be retried automatically. • Retry interval (ms): The time lapse between retries.
-
Page 47: References
References This chapter provides more detailed information about wireless-related technologies. The information in this chapter can help you administer your WAC-2004s and plan your industrial wireless network better. The following topics are covered in this appendix: Roaming Domain... -
Page 48: Roaming Domain
WAC-2004 References Roaming Domain A roaming domain defines an area where all related wireless controllers, APs, and clients work together to enable fast roaming. Such a domain is specified as six groups of two hexadecimal digits beginning with the fixed identifier, FF:90:E8. -
Page 49: Supporting Information
Supporting Information This chapter presents additional information about this manual and product. You can also learn how to contact Moxa for technical support. The following topics are covered in this appendix: About This User’s Manual DoC (Declaration of Conformity) ... -
Page 50: About This User's Manual
WAC-2004 Supporting Information About This User’s Manual This manual is mainly designed for, but not limited to, the following hardware and firmware for the WAC-2004: • Hardware Rev: 1.0 • Firmware Ver: 1.2 You are strongly recommended to check with your sales representative for the latest product datasheet, firmware, QIG (Quick Installation Guide), UM (User’s Manual), and related information.
Need help?
Do you have a question about the WAC-2004 and is the answer not in the manual?
Questions and answers