
Related Manuals for Honda EU22i


Summary of Contents for Honda EU22i
- Page 1 GENERATOR EU22i OWNER'S MANUAL Honda Motor Co., Ltd. 2018 英 32Z44600 00X32-Z44-6000 Printed in Thailand...
- Page 2 The information and specifications included in this publication were in effect at the time of approval for printing. Honda Motor Co., Ltd. reserves the right, however, to discontinue or change specifications or design at any time without notice and without incurring any obligation whatsoever.
- Page 3 INTRODUCTION Congratulations on your selection of a Honda generator. We are certain you will be pleased with your purchase of one of the finest generators on the market. We want to help you get the best results from your new generator and to operate it safely.
- Page 4 A FEW WORDS ABOUT SAFETY Your safety and the safety of others are very important. And using this generator safely is an important responsibility. To help you make informed decisions about safety, we have provided operating procedures and other information on labels and in this manual.
-
Page 5: Table Of Contents
CONTENTS GENERATOR SAFETY ................6 IMPORTANT SAFETY INFORMATION ..........6 Operator Responsibility..............6 Carbon Monoxide Hazards..............6 Electric Shock Hazards ..............7 Fire and Burn Hazards ...............7 Refuel With Care ................8 SAFETY LABEL LOCATIONS..............9 CONTROLS & FEATURES...............10 COMPONENT & CONTROL LOCATIONS...........10 CONTROLS...................12 Engine Switch ..................12 Starter Grip..................12 Fuel Filler Cap Vent Lever ...............13 Choke Lever..................13... - Page 6 CONTENTS OPERATION .....................22 SAFE OPERATING PRECAUTIONS.............22 STARTING THE ENGINE ..............23 STOPPING THE ENGINE ..............26 AC OPERATION..................28 AC Applications................30 AC PARALLEL OPERATION (optional equipment)......31 Parallel operation with EU20i ............34 AC Parallel Operation Applications ..........35 DC OPERATION..................37 ECO THROTTLE SYSTEM..............40 STANDBY POWER ................41 Connections to a Building’s Electrical System ......41 System Ground ................41 Special Requirements..............42...
- Page 7 CONTENTS TRANSPORTING..................61 TAKING CARE OF UNEXPECTED PROBLEMS ........62 ENGINE WILL NOT START..............62 ENGINE LACKS POWER..............63 NO POWER AT THE AC RECEPTACLES..........64 NO POWER AT THE DC RECEPTACLES..........64 TECHNICAL INFORMATION ..............65 Serial Number Location ..............65 Carburetor Modification for High Altitude Operation.......66 Specifications..................67 WIRING DIAGRAM................68 CONSUMER INFORMATION ..............70...
-
Page 8: Generator Safety
GENERATOR SAFETY IMPORTANT SAFETY INFORMATION Honda generators are designed for use with electrical equipment that has suitable power requirements. Other uses can result in injury to the operator or damage to the generator and other property. Most injuries or property damage can be prevented if you follow all the instructions in this manual and on the generator. -
Page 9: Electric Shock Hazards
(optional equipment) when connecting the generator combinations shown below. EU22i and EU22i EU22i and EU20i * * An EU22i can only be paired with EU20i models that have serial numbers within the ranges shown below. EAAJ -2032188 and later Applicable frame serial number of EU20i EACT -1000001 and later •... -
Page 10: Refuel With Care
GENERATOR SAFETY Refuel With Care Gasoline is extremely flammable, and gasoline vapor can explode. Do not refuel during operation. Allow the engine to cool if it has been in operation. Refuel only outdoors in a well-ventilated area and on a level surface. Never smoke near gasoline, and keep other flames and sparks away. -
Page 11: Safety Label Locations
GENERATOR SAFETY SAFETY LABEL LOCATIONS These labels warn you of potential hazards that can cause serious injury. Read them carefully. If a label comes off or becomes hard to read, contact your Honda servicing dealer for a replacement. -
Page 12: Controls & Features
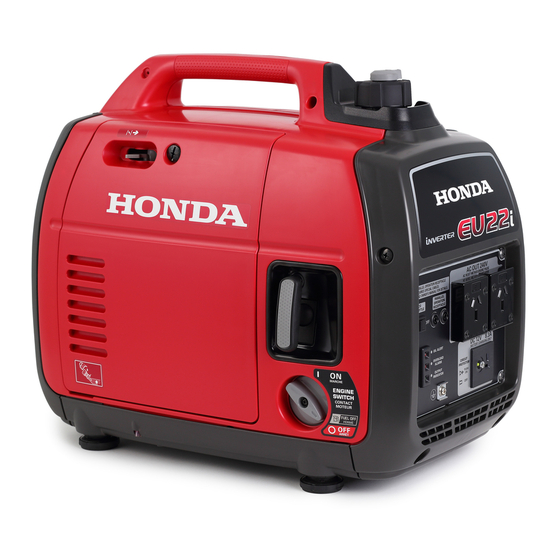
CONTROLS & FEATURES COMPONENT & CONTROL LOCATIONS Use the illustrations on these pages to locate and identify the most frequently used controls. AIR CLEANER CHOKE LEVER FUEL FILLER CAP VENT LEVER FUEL FILLER CAP MAINTENANCE COVER STARTER GRIP ENGINE SWITCH SPARK PLUG SPARK PLUG MAINTENANCE COVER MUFFLER... - Page 13 CONTROLS & FEATURES PARALLEL OPERATION OUTLETS AC RECEPTACLES ECO THROTTLE SWITCH OIL ALERT INDICATOR OVERLOAD INDICATOR DC RECEPTACLE OUTPUT INDICATOR DC CIRCUIT PROTECTOR GROUND TERMINAL...
-
Page 14: Controls
CONTROLS & FEATURES CONTROLS Engine Switch ENGINE SWITCH The engine switch controls the ignition system and the fuel valve. OFF – Stops the engine and closes the fuel valve. FUEL OFF – Keeps the ignition FUEL OFF system ON, and closes only the fuel valve. -
Page 15: Fuel Filler Cap Vent Lever
CONTROLS & FEATURES Fuel Filler Cap Vent Lever The fuel filler cap is provided with a vent lever to seal the fuel tank. The vent lever must be in the ON position for the engine to run. When the engine is not in use, leave the vent lever in the OFF position to reduce the possibility of fuel leakage. -
Page 16: Eco Throttle Switch
OFF: The Eco Throttle system does not operate. ECO THROTTLE SWITCH Parallel Operation Outlets These outlets are used for connecting both types of the EU22i generator or EU20i generator for parallel operation (see page 31 through 36). A Honda approved receptacle box (optional equipment) is required for parallel operation. -
Page 17: Dc Receptacle
CONTROLS & FEATURES DC Receptacle The DC receptacle should ONLY be used for charging 12-volt automotive type batteries. The DC charging output is not regulated. This means that the charging output does not decrease as the battery reaches full charge. Check the battery voltage frequently while charging to prevent overcharging the battery. -
Page 18: Features
CONTROLS & FEATURES FEATURES Ground Terminal The generator ground terminal is connected to the frame of the generator, the metal non-current-carrying parts of the generator, and the ground terminals of each receptacle. Before using the ground terminal, consult a qualified electrician, electrical inspector, or local agency having jurisdiction for local codes or ordinances that apply to the intended use of the generator. -
Page 19: Output Indicator
CONTROLS & FEATURES Output Indicator The output indicator (green) is illuminated when the generator is operating normally. It indicates that the generator is producing electrical power at the receptacles. In addition, the output indicator has a simplified hour meter function. When you start the engine, the indicator blinks according to the generator’s cumulative operating hours as follows: •... -
Page 20: Overload Alarm (Indicator)
CONTROLS & FEATURES Overload Alarm (Indicator) If the generator is overloaded (in excess of 2.2 kVA), or if there is a short circuit in a connected appliance, the overload indicator (red) will come ON. The overload indicator (red) will stay ON, and after about four seconds, current to the connected appliance(s) will shut off, and the output indicator (green) will go OFF. -
Page 21: Led Light Patterns
CONTROLS & FEATURES LED Light Patterns OIL ALERT INDICATOR OVERLOAD INDICATOR OUTPUT INDICATOR Status Possible cause Output Indicator Overload indicator Oil Alert Indicator Normal Operating normally Malfunction Inverter unit failure Abnormal Output overcurrent Inverter unit overheat Warning Engine oil low : ON : OFF : Blinking... -
Page 22: Before Operation
BEFORE OPERATION ARE YOU READY TO GET STARTED? Your safety is your responsibility. A little time spent in preparation will significantly reduce your risk of injury. Knowledge Read and understand this manual. Know what the controls do and how to operate them. Familiarize yourself with the generator and its operation before you begin using it. -
Page 23: Check The Engine
BEFORE OPERATION To prevent a possible fire, keep the generator at least 1 meter away from building walls and other equipment during operation. Do not place flammable objects close to the engine. Before beginning your pre-operation checks, be sure the generator is on a level surface and the engine switch is in the OFF position. -
Page 24: Operation
OPERATION SAFE OPERATING PRECAUTIONS Before operating the generator for the first time, review chapters GENERATOR SAFETY BEFORE OPERATION (see page 6) and (see page 20). For your safety, do not operate the generator in an enclosed area such as a garage. Your generator’s exhaust contains poisonous carbon monoxide gas that can collect rapidly in an enclosed area and cause illness or death. -
Page 25: Starting The Engine
OPERATION STARTING THE ENGINE To prevent a possible fire, keep the generator at least 1 meter away from building walls and other equipment during operation. Do not place flammable objects close to the engine. • Operating this generator less than 1 meter from a building or other obstruction can cause overheating and damage the generator. - Page 26 OPERATION 3. Make sure the Eco Throttle ECO THROTTLE SWITCH switch is in the OFF position, or more time will be required for warm-up. 4. To start a cold engine, move CHOKE LEVER the choke lever to the CLOSED position. To restart a warm engine, leave the choke lever in the OPEN position.
- Page 27 OPERATION 6. Pull the starter grip lightly until you feel resistance; then pull briskly in the direction of the arrow as shown. Direction to pull Do not allow the starter grip to snap back against the generator. Return it gently to prevent damage to the starter.
-
Page 28: Stopping The Engine
OPERATION STOPPING THE ENGINE To stop the engine in an emergency, simply turn the engine switch to the OFF position securely. Under normal conditions, use the following procedure. 1. Turn off or disconnect all appliances that are connected to the generator. - Page 29 OPERATION 4. If two generators were connected for parallel operation, disconnect the receptacle box for parallel operation after stopping the engines if you do not wish to resume parallel operation. RECEPTACLE BOX FOR PARALLEL OPERATION (optional equipment) If the generator will not be used for a long period of time, refer to Draining the Fuel Tank and Carburetor page 57 for information on...
-
Page 30: Ac Operation
OPERATION AC OPERATION Before connecting an appliance to the generator, make sure that it is in good working order and that its electrical rating does not exceed that of the generator. Most motorized appliances require more than their electrical rating for startup. - Page 31 OPERATION 2. Plug in the appliance into the receptacle. PLUG 3. Turn on the appliance. If the generator is overloaded (see page 30), or if there is a short circuit in a connected appliance, the overload indicator (red) will go ON.
-
Page 32: Ac Applications
OPERATION AC Applications Before connecting an appliance or power cord to the generator: • Make sure that it is in good working order. A faulty appliance or power cord can create a potential for electrical shock. • If an appliance begins to operate abnormally, becomes sluggish, or stops suddenly, turn it off immediately. -
Page 33: Ac Parallel Operation (Optional Equipment)
OPERATION AC PARALLEL OPERATION (optional equipment) Both types of EU22i generator can be connected to each other to increase the available power using a receptacle box. Before connecting an appliance to either generator, make sure that it is in good working order and that its electrical rating does not exceed that of the receptacle. - Page 34 OPERATION 2. Connect the cable connectors and ground terminals of the receptacle box for parallel operation to the generators and secure the cord clamp to handle. • Place two generators at least 1 meter away from each other during parallel operation. •...
- Page 35 OPERATION 4. Start the engines and make sure the output indicators (green) come 5. Confirm that the appliance to be used is switched off, and plug in the appliance. 6. Switch on the equipment to be used. OUTPUT INDICATOR LIGHT (GREEN) PLUG If the generators are overloaded (see page 36), or if there is a short circuit in a connected appliance, the overload indicator (red) will go...
-
Page 36: Parallel Operation With Eu20I
For instructions on how to connect the parallel operation cable, refer to pages 31 through 33. An EU22i generator may only be connected to EU20i generator that have specific frame serial numbers. Refer to the table below to confirm that your EU20i generator is compatible with an EU22i. -
Page 37: Ac Parallel Operation Applications
• Never connect other than the specified generator models (see page 7). • For parallel operation, use only a Honda approved receptacle box (optional equipment). • Never connect or remove the receptacle box when the generator is running. - Page 38 Make sure the electrical rating of the tool or appliance does not exceed the maximum power rating of the generator. Maximum power in parallel operation is: EU22i and EU22i 4.4kVA EU22i and EU20i 4.2kVA For continuous operation, do not exceed the rated power.
-
Page 39: Dc Operation
OPERATION DC OPERATION The DC receptacle should ONLY be used for charging 12-volt automotive type batteries. The DC charging output is not regulated. This means that the charging output is constant; it does not decrease as the battery reaches full charge. Check the battery voltage frequently while charging to prevent overcharging the battery. - Page 40 If this happens, wait a few minutes before pushing in the circuit protector to resume operation. If the DC circuit protector continues to go OFF, discontinue charging and see your authorized Honda generator dealer. The circuit protector does not prevent overcharging...
- Page 41 OPERATION Disconnecting the battery charging cable: 1. Stop the engine. 2. Disconnect the black lead of the battery charging cable from the negative (–) battery terminal. 3. Disconnect the red lead of the battery charging cable from the positive (+) battery terminal. 4.
-
Page 42: Eco Throttle System
OPERATION ECO THROTTLE SYSTEM With the switch in the ON position, engine speed is automatically lowered when loads are reduced, turned off, or disconnected. When appliances are turned on or reconnected, the engine returns to the proper speed to power the electrical load. In the OFF position, the Eco Throttle system does not operate. -
Page 43: Standby Power
OPERATION STANDBY POWER Connections to a Building’s Electrical System Connections for standby power to a building’s electrical system must be made by a qualified electrician. The connection must isolate the generator power from utility power, and must comply with all applicable laws and electrical codes. -
Page 44: Special Requirements
OPERATION Special Requirements Do not lay the generator on its side when moving, storing, or operating it. Oil may leak and damage the engine or your property. There may be applicable laws, local codes, or ordinances that apply to the intended use of the generator. Please consult a qualified electrician, electrical inspector, or the local agency having jurisdiction. -
Page 45: Servicing Your Generator
Remember that an authorized Honda servicing dealer knows your generator best and is fully equipped to maintain and repair it. To ensure the best quality and reliability, use only new, Honda Genuine parts or their equivalents for repair and replacement. -
Page 46: Maintenance Safety
SERVICING YOUR GENERATOR MAINTENANCE SAFETY Some of the most important safety precautions follow. However, we cannot warn you of every conceivable hazard that can arise in performing maintenance. Only you can decide whether or not you should perform a given task. Improper maintenance can cause an unsafe condition. -
Page 47: Maintenance Schedule
(2) These items should be serviced by your servicing dealer, unless you have the proper tools and are mechanically proficient. Refer to the Honda shop manual for service procedures. (3) For commercial use, log hours of operation to determine proper maintenance intervals. -
Page 48: Refueling
SERVICING YOUR GENERATOR REFUELING With the engine stopped, remove the fuel filler cap and check the fuel level. Refill the fuel tank if the fuel level is low. Gasoline is highly flammable and explosive. You can be burned or seriously injured when handling fuel. -
Page 49: Fuel Recommendations
SERVICING YOUR GENERATOR FUEL FILLER CAP UPPER LEVEL MARK (RED) FUEL FILTER After refueling, tighten the fuel filler cap securely. FUEL RECOMMENDATIONS This engine is certified to operate on regular unleaded gasoline with a research octane rating of 91 or higher (a pump octane rating of 86 or higher). -
Page 50: Engine Oil Level Check
SERVICING YOUR GENERATOR ENGINE OIL LEVEL CHECK Check the engine oil level with the generator on a level surface and the engine stopped. 1. Loosen the maintenance cover screw and remove the maintenance cover. MAINTENANCE COVER SCREW MAINTENANCE COVER 2. Remove the oil filler cap and wipe the dipstick clean. 3. -
Page 51: Engine Oil Change
SERVICING YOUR GENERATOR ENGINE OIL CHANGE Drain the oil while the engine is warm to assure rapid and complete draining. 1. Turn the engine switch and fuel filler cap vent lever to the OFF position (see page 26) to reduce the possibility of fuel leakage. 2. -
Page 52: Engine Oil Recommendations
AMBIENT TEMPERATURE The SAE oil viscosity and service category are in the API label on the oil container. Honda recommends that you use API service category SE or later (or equivalent) oil. -
Page 53: Air Cleaner Service
SERVICING YOUR GENERATOR AIR CLEANER SERVICE MAINTENANCE COVER SCREW 1. Loosen the maintenance cover screw and remove the maintenance cover. MAINTENANCE COVER 2. Loosen the air cleaner cover MAIN FILTER screw, and remove the air cleaner cover. AIR CLEANER COVER SCREW OUTER FILTER AIR CLEANER COVER 3. - Page 54 SERVICING YOUR GENERATOR 5. Reinstall the air filters. AIR CLEANER COVER 6. Make sure that the rubber seal is set in the groove of the air cleaner cover. 7. Reinstall the air cleaner cover, and tighten the air cleaner cover screw.
-
Page 55: Main And Outer Filter Cleaning
SERVICING YOUR GENERATOR MAIN AND OUTER FILTER CLEANING Dirty air filters will restrict air flow to the carburetor, reducing engine performance. If you operate the generator in very dusty areas, clean the main and outer filters more frequently than specified in the Maintenance Schedule. -
Page 56: Spark Plug Service
SERVICING YOUR GENERATOR SPARK PLUG SERVICE Spark plug: CR5HSB (NGK) To ensure proper engine operation, the spark plug must be properly gapped and free of deposits. An incorrect spark plug can cause engine damage. If the engine is hot, allow it to cool before servicing the spark plug. 1. - Page 57 SERVICING YOUR GENERATOR 5. Inspect the spark plug. Replace it SIDE ELECTRODE if the electrodes are worn or if SEALING WASHER the insulator is cracked, chipped, 0.6–0.7 mm or fouled. 6. Measure the spark plug electrode gap with a wire-type feeler gauge.
-
Page 58: Storage
STORAGE STORAGE PREPARATION Proper storage preparation is essential for keeping your generator trouble-free and looking good. The following steps will help to keep rust and corrosion from impairing your generator’s function and appearance, and will make the engine easier to start when you use the generator again. - Page 59 STORAGE Draining the Fuel Tank and Carburetor Gasoline is highly flammable and explosive. You can be burned or seriously injured when handling fuel. • Stop the engine and let it cool before handling fuel. • Keep heat, sparks, and flame away. •...
- Page 60 STORAGE 3. Loosen the carburetor drain screw, and drain the gasoline from the carburetor into a suitable container. CARBURETOR DRAIN SCREW 4. Remove the spark plug maintenance cover and the spark plug cap (see page 54). 5. Turn the engine switch to the ON position. 6.
-
Page 61: Engine Oil
STORAGE Engine Oil Change the engine oil (see page 49). Engine Cylinder 1. Remove the spark plug (see page 54), and pour approximately one teaspoon (5 cc) of clean engine oil into the cylinder. Crank the engine several revolutions to distribute the oil, then reinstall the spark plug. 2. -
Page 62: Storage Precautions
STORAGE STORAGE PRECAUTIONS If your generator will be stored with gasoline in the fuel tank and carburetor, it is important to reduce the hazard of gasoline vapor ignition. Select a well-ventilated storage area away from any appliance that operates with a flame, such as a furnace, water heater, or clothes dryer. -
Page 63: Transporting
TRANSPORTING Do not lay the generator on its side when moving, storing, or operating it. Oil may leak and damage the engine or your property. If the generator has been used, allow it cool for at least 15 minutes before loading the generator on the transport vehicle. A hot engine and exhaust system can burn you and can ignite some material. -
Page 64: Taking Care Of Unexpected Problems
(see page 54). Spark plug wet with fuel Dry and reinstall spark plug. (flooded engine). Fuel filter restricted, carburetor Take the generator to an malfunction, ignition authorized Honda servicing malfunction, valves stuck, etc. dealer, or refer to the shop manual. -
Page 65: Engine Lacks Power
(see page 57). gasoline, or refueled with bad Refuel with fresh gasoline gasoline. (see page 46). Fuel filter restricted, carburetor Take the generator to an malfunction, ignition authorized Honda servicing malfunction, valves stuck, etc. dealer, or refer to the shop manual. -
Page 66: No Power At The Ac Receptacles
Check the cooling air inlet. Stop and restart the engine. Overload indicator blink. Take the generator to an authorized Honda servicing dealer, or refer to the shop manual. Faulty power tool or appliance. Replace or repair power tool or appliance. -
Page 67: Technical Information
TECHNICAL INFORMATION Serial Number Location FRAME SERIAL NUMBER Record the frame serial number and date purchased in the spaces below. You will need this information when ordering parts and when making technical or warranty inquiries. Frame serial number: Date purchased:... -
Page 68: Carburetor Modification For High Altitude Operation
High altitude performance can be improved by specific modifications to the carburetor. If you always operate your generator at altitudes above 1,500 meters, have your authorized Honda servicing dealer perform this carburetor modification. This engine, when operated at high altitude with the carburetor modifications for high altitude use, will meet each emission standard throughout its useful life. -
Page 69: Specifications
Spark plug gap 0.6 – 0.7 mm Refer to page 54. Valve clearance IN: 0.15 ± 0.04 mm See your authorized (cold) EX: 0.20 ± 0.04 mm Honda dealer. Other specifications No other adjustments needed. Specifications are subject to change without notice. -
Page 70: Wiring Diagram
TECHNICAL INFORMATION WIRING DIAGRAM ACOR AC Output Receptacle BLACK Parallel operation socket YELLOW Control Panel Block BLUE DC, CP DC Circuit Protector GREEN DC, D DC Diode DCOR DC Output Receptacle WHITE DC, W DC Winding BROWN EcoSw Eco throttle switch LIGHT GREEN Engine Block GRAY... - Page 71 TECHNICAL INFORMATION...
-
Page 72: Consumer Information
CONSUMER INFORMATION Australia Distributor Information NAME OF FIRM ADDRESS TEL: FAX: (COMPANY) Honda Australia 1954-1956 Hume Tel: (03) 9270 1111 Motorcycle and Power Highway Campbellfield Fax: (03) 9270 1133 Equipment Pty. Ltd. Victoria 3061... - Page 73 MEMO...
- Page 74 MEMO...
Need help?
Do you have a question about the EU22i and is the answer not in the manual?
Questions and answers
Время обкатки