Table of Contents
Advertisement
Advertisement
Table of Contents

Related Manuals for Conviron CMP6010

Summary of Contents for Conviron CMP6010
- Page 1 CMP6010 USER MANUAL Software Version 1.12 257249R04...
- Page 3 Winnipeg, Manitoba Canada R3H 0R9 www.conviron.com January 2016 Printed in Canada. ©2016 Controlled Environments Limited. Conviron is a registered trademark of Controlled Environments Limited. All other trademarks are the property of their respective owners. Information subject to change without written notice.
- Page 5 Conviron welcomes the opportunity to provide assistance and to answer any technical questions related to the start-up, use and troubleshooting of the CMP6010 control system. If you are having a problem using your CMP6010, please ensure you have read this CMP6010 User Manual in its entirety for information about the feature(s) with which you are experiencing trouble.
-
Page 7: Table Of Contents
TABLE OF CONTENTS PREFACE ......................... xi PRECAUTIONS ......................13 1.0 CONTROLLER NAVIGATION ...............1-1 1.1 User Interface ..........................1-1 1.2 Button Functions ........................1-1 1.3 Menu Map ..........................1-2 2.0 STATUS SCREENS ..................2-1 3.0 PROGRAM MENU ..................3-1 3.1 Introduction to Programs ......................3-1 3.2 Creating a Program ........................3-2 3.3 Editing a Program ........................3-4 3.4 Deleting a Program ........................3-6 4.0 SCHEDULE MENU ..................4-1... - Page 8 7.0 ALARM TROUBLESHOOTING ..............7-1 7.1 Alarm State Indication ......................7-1 7.2 Alarm Types ..........................7-2 7.2.1 Viewing and Acknowledging an Alarm ............7-2 7.2.2 Temperature Alarm: High Limit Exceeded (chamber: off) ......7-2 7.2.3 Temperature Alarm: Low Limit Exceeded (chamber: off) ......7-3 7.2.4 Humidity Alarm: High Limit Exceeded (chamber: on) ........
- Page 9 9.0 SERVICE MENU ....................9-1 9.1 I/O Status ...........................9-1 9.1.1 Accessing and Manipulating I/O Status Screens ........... 9-1 9.1.2 Controller Analog Inputs .................. 9-2 9.1.3 Controller Analog Outputs ................9-2 9.1.4 Controller Digital Inputs ................... 9-3 9.1.5 Controller Digital Outputs ................9-4 9.2 System ............................9-6 9.3 PID Sets ............................9-7 9.4 Config ............................9-8...
-
Page 11: Preface
PREFACE This manual is intended for users of the CMP6010 control system. Although it is not intended as a service manual, the Service menu of the controller and its functions are detailed as a reference for service personnel. The manual is presented in a visual format, using representative screen images to guide the user through each set of instructions. -
Page 13: Precautions
COULD BE HAZARDOUS AND MAY RESULT IN PERSONAL INJURY. As such, manipulation of output parameters must be performed with either a qualified service technician present or via phone support with Conviron’s Technical Services group. January 2016 | 256573R04... - Page 14 OFF. Use extreme caution when working on the control panel to prevent injury. If you have any doubts as to whether your unit comes equipped with a UPS, contact Conviron. •...
-
Page 15: Controller Navigation
CHAPTER 1 | CMP6010 User Manual 1.0 CONTROLLER NAVIGATION Using the current menu location (indicated at the top of every controller screen) and menu map (located on the following page), it is easy for the user to navigate the controller interface. -
Page 16: Menu Map
CHAPTER 1 | CONTROLLER NAVIGATION Menu Map MAIN MENU PROGRAM PROGRAM MENU CREATE DELETE EDIT SCHEDULE MENU SCHEDULE EDIT SECURITY CLEAR SECURITY MENU LOGIN LOGOUT PASSWORDS ALARM ALARM MENU SETTINGS VIEW CLEAR SERVICE SERVICE MENU IO STATUS SYSTEM PID SETS CONFIG MENU CONFIG TEMP... -
Page 17: Status Screens
CHAPTER 2 | CMP6010 User Manual 2.0 STATUS SCREENS The Status screens display actual and set point conditions for the three controlled parameters: temperature, relative humidity, and light level. Large type indicates actual measured values (temperature, humidity) and current level (light), while smaller icons indicate set point values. A padlock icon in the lower right of the screen indicates security has been enabled via the options menu (if security is disabled no icon is present). -
Page 19: Program Menu
CHAPTER 3 | CMP6010 User Manual 3.0 PROGRAM MENU Introduction to Programs A program is a list of timelines, each of which specifies chamber environmental conditions— temperature, humidity, and light—for a specific point in time. Each program represents a single 24 hour period and can contain up to 24 timelines. -
Page 20: Creating A Program
PROGRAM MENU Creating a Program Creating new programs using the CMP6010 interface is a simple procedure. The user must designate a number under which to save the program, input desired set point values at their respective time lines, and save the program once complete. - Page 21 CHAPTER 3 | CMP6010 User Manual SAVE CHANGES W a r n i n g Save changes to program # 01? Program contains duplicate time lines! < > to c o n t i n u e < > to c o n t i n u e...
-
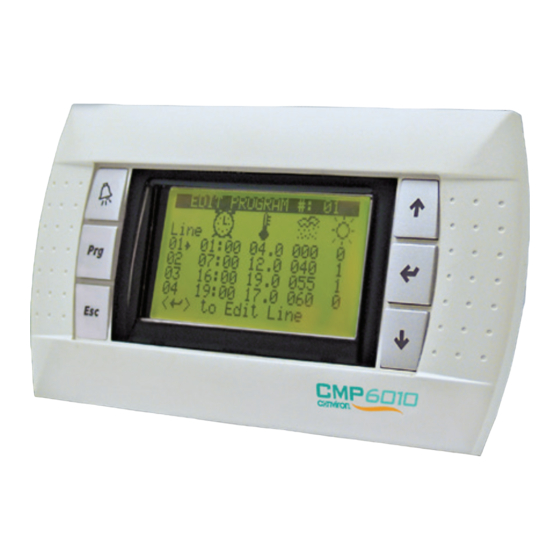
Page 22: Editing A Program
CHAPTER 3 | PROGRAM MENU Editing a Program The Edit menu item in the Program menu allows the user to make changes to an existing program. The Edit Program screen is accessed from either the Create program or Edit program menu items (see section 3.2 Creating a Program). - Page 23 CHAPTER 3 | CMP6010 User Manual SAVE CHANGES W a r n i n g Save changes to program # 01? Program contains duplicate time lines! < > to c o n t i n u e < > to c o n t i n u e...
-
Page 24: Deleting A Program
CHAPTER 3 | PROGRAM MENU Deleting a Program To delete a program, select Delete from the Program menu and identify the number of the program to be deleted. ---MAIN MENU--- ---PROGRAM MENU--- W a r n i n g Status Edit No programs stored! P r o g r a m... -
Page 25: Schedule Menu
The schedule is a list of entries, with each entry designating a saved program and the number of times for that program to run before moving to the next entry listed in the schedule. The CMP6010 controller can store one schedule. The schedule can contain up to eight entries, each of which can be set for up to 99 repetitions, or set to run continuously (indicated by ∞... -
Page 26: Schedule Hierarchy
CHAPTER 4 | SCHEDULE MENU Schedule Hierarchy The table below illustrates the relationship between the Schedule and the Programs which comprise the Schedule. Schedule (0-99 Repetitions) Entry 1 Entry 2 Entry 3 Entry 4 Entry 5 Entry 6 Entry 7 Entry 8 0-99 0-99... -
Page 27: Creating Or Editing The Schedule
CHAPTER 4 | CMP6010 User Manual Creating or Editing the Schedule The process of creating and editing the schedule is very similar to the process of creating and editing programs. The user must access the Edit Schedule screen from the Schedule menu, create or edit the desired schedule entries, and save the schedule upon completion. - Page 28 CHAPTER 4 | SCHEDULE MENU EDIT SCHEDULE W a r n i n g E D I T S C H E D U L E Enter the number of No programs available schedule repeats for scheduling! Use -Create- from the program menu.
-
Page 29: Running The Schedule
CHAPTER 4 | CMP6010 User Manual Running the Schedule To run the schedule, a user has only to choose a starting point for the schedule and confirm that it is ready to be run. The starting point can be any entry and repetition within the schedule. - Page 30 CHAPTER 4 | SCHEDULE MENU RUN SCHEDULE RUN SCHEDULE Are you sure you want Schedule started. to run the schedule? < > to c o n t i n u e < > to c o n t i n u e Schedule has been started <...
-
Page 31: Security Menu
There are three security access levels possible: Factory, User and Public. • Factory: Allows authorized/qualified personnel to access the Service menu. Factory level security is always enabled, and cannot be disabled by the user. Call Conviron if the Factory password is required •... - Page 32 > to access Security menu < > to access Login screen a user to login using the Factory password (which can be obtained by calling Conviron) LOGIN LOGIN LOGIN Select User: _ser 1 Select User: User 1 Select User: User 1...
-
Page 33: Logging Out
CHAPTER 5 | CMP6010 User Manual Logging Out Users should log out immediately after completing necessary tasks at the controller to ensure that no changes are made unintentionally to programs or chamber parameters by anyone other than the intended user. As a safeguard, all users are automatically logged out after a period of five minutes of inactivity. -
Page 34: Changing A Password
CHAPTER 5 | SECURITY MENU Changing a Password To change the password for a specific User, follow the procedure below. If a password has been forgotten, the corresponding User account must be reset using the Reset User item from the Service menu, which requires the Factory login password (see section 9.5 Reset User). -
Page 35: Alarm Menu
CHAPTER 6 | CMP6010 User Manual 6.0 ALARM MENU From the Alarm menu the user can view and clear the alarm history and change alarm settings for temperature and humidity processes. For information on specific alarms and alarm troubleshooting, see section 7.0 ALARM TROUBLESHOOTING... -
Page 36: Clearing Alarm History
CHAPTER 6 | ALARM MENU Clearing Alarm History The Clear menu item allows the user to clear all entries from the alarm history. Users should clear the alarm history after it has been viewed to avoid confusion between old and new alarms. CLEAR ALARM HISTORY Are you sure you want to clear all alarms? -
Page 37: Alarm Troubleshooting
ON. Alarm State Indication The CMP6010 Controller uses two warning devices to indicate alarm state. The Alarm button on the keypad will illuminate red (either flashing or solid depending on alarm state), and the alarm buzzer will sound. The table below indicates the meaning of each alarm state based on the behavior of the warning devices. -
Page 38: Alarm Types
ALARM TROUBLESHOOTING Alarm Types The CMP6010 Controller uses five different primary alarm types with a total of 12 possible alarms to monitor and alert the user to problems affecting chamber operations. All alarms are listed in the following section, along with user troubleshooting suggestions that address the most common cause(s) of each. -
Page 39: Temperature Alarm: Low Limit Exceeded (Chamber: Off)
4.0 C 2. Ensure the door is closed properly < > to A c k n o w l e d g e 3. Call your local representative or contact Conviron for more Indicates the actual temperature information (see page... -
Page 40: Humidity Alarm: Low Limit Exceeded (Chamber: On)
5. If the Humidity Alarm ‘Low Limit’ is set to 0 and the alarm persists, the sensor must be replaced. Contact Conviron for more information (see page 6. Call your local representative or contact Conviron for more information (see page 7.2.6... -
Page 41: High Pressure Alarm: Warning (Chamber: On)
If this Alarm occurs frequently, it may be an indication pressure cut-out limit. that the refrigeration system requires service. • < > to acknowledge alarm User corrective action(s): 1. Call your local representative or contact Conviron for more information (see page 7.2.9 High Pressure Alarm: Repeat (chamber: off) -
Page 42: Low Pressure Alarm: Warning (Chamber: On)
> to A c k n o w l e d g e User corrective action(s): Indicates the refrigerant pressure has exceeded the factory set low pressure cut-out limit and 1. Call your local representative or contact Conviron for more recovered 3 times in a 30 minute information (see page timespan. -
Page 43: Options Menu
CHAPTER 8 | CMP6010 User Manual 8.0 OPTIONS MENU The Options menu contains items that allow the user to configure time and date, on-delay, enable/ disable security, set up network communications, and designate light range and temperature/ humidity offsets (if required). -
Page 44: Enabling And Disabling Security
CHAPTER 8 | OPTIONS MENU Enabling and Disabling Security The Security item from the Options menu allows the user to enable or disable User level security (for more information on using Security features, see section 5.0 SECURITY MENU). 8.3.1 Enabling Security ---MAIN MENU--- ---OPTIONS MENU--- CLEAR ALARM HISTORY... -
Page 45: Setting Light Level And Input Offset
CHAPTER 8 | CMP6010 User Manual Setting Light Level and Input Offset 8.4.1 Setting Number of Discrete Light Levels The number of discrete light levels available differs depending on chamber model and kit configuration. Use the table below to input the correct values for the chamber kit/model. -
Page 46: Setting Input Offset
CHAPTER 8 | OPTIONS MENU 8.4.2 Setting Input Offset The temperature and humidity sensor input to the controller can be offset if necessary to allow calibration of the chamber sensor and display with a third party measuring device. Flashing Cursor Indicating Screen/Menu Title Selected ---MAIN MENU--- ---OPTIONS MENU---... -
Page 47: Configuring Network Communication
(FTP). The controller can also be connected to an optional Conviron Central Management™ network, which provides additional functionality such as downloading experimental data, trend graphs, and alarm notifications. For more information on Central Management, contact Conviron. -
Page 48: Connecting The Controller To A Network (Lan)
CHAPTER 8 | OPTIONS MENU 8.5.2 Connecting the Controller to a Network (LAN) 1. Ensure that the controller is physically connected to the network on which the computer to be used for downloading data resides. This requires a straight-through Ethernet cable. 2. -
Page 49: Connecting The Controller To A Single Computer
CHAPTER 8 | CMP6010 User Manual 8.5.3 Connecting the Controller to a Single Computer 1. Ensure that the controller is physically connected to the computer to be used for downloading data. This requires a cross-over Ethernet cable. 2. Navigate to the controller Communication Settings screen via the Options > Network menu. See section 8.5.1 Inputting Network Communication Settings... -
Page 51: Service Menu
Access to this menu and all sub-menus requires Factory level login. Call Conviron if the Factory password is required. The Service menu provides technicians and other authorized personnel access to fundamental chamber settings and diagnostic tools required for troubleshooting and service. -
Page 52: Controller Analog Inputs
CHAPTER 1 | SERVICE MENU 9.1.2 Controller Analog Inputs Temperature Controller Terminal: B4 • 24.0 °C Displays the current chamber temperature in °C. Humidity Controller Terminal: B3 • 045 %RH Displays the current chamber humidity in percentage relative humidity (%RH) Controller Terminal: B2 •... -
Page 53: Controller Digital Inputs
CHAPTER 1 | CMP6010 User Manual 9.1.4 Controller Digital Inputs DI - COASW Controller Terminal: ID1 = CLOSED. Normal Chamber Off Alarm. Generated when the Schedule is running and the chamber should be running but is not for a Operation period of 60 seconds. -
Page 54: Controller Digital Outputs
CHAPTER 1 | SERVICE MENU 9.1.5 Controller Digital Outputs RSVLV Controller Terminal: (if Float Switch Alarm = ENABLED): NO2 = CLOSED. Solenoid valve Ultrasonic humidifier reservoir fill solenoid digital output. Active when Float Switch Alarm is enabled in the Service > open and filling. - Page 55 CHAPTER 1 | CMP6010 User Manual HTR - DUTY (if Valve Type = STEPPER and Controller Terminal: Enable Boost Heat = YES) : = CLOSED. Electric heaters Electric boost heater control digital output. Enabled when ‘Valve Type = Stepper’ and ‘Boost Heat = Yes’ in the Service energized.
-
Page 56: System
CHAPTER 1 | SERVICE MENU System The System screens provide general information about controller memory and communications status. Clock Card The clock card contains a battery that allows the controller SYSTEM to maintain time/date settings through power outages and Clock Card: Not Working chamber down time. -
Page 57: Pid Sets
PID Sets The PID Settings screens contain the proportional, integral, and derivative values for controlled processes (temperature and humidity). These values are factory set by Conviron, and should not require modification, except under strict guidance from Conviron Technical Service. ---MAIN MENU---... -
Page 58: Config
CHAPTER 1 | SERVICE MENU Config The Config screen contains fundamental settings related to process control and the ability to select which alarm type (Low Water or Door Open) will monitored by the controller. These settings are configured at the factory based on chamber type and additional options. 9.4.1 Temperature Process Configuration ---MAIN MENU---... -
Page 59: Carbon Dioxide Monitoring Configuration
9.4.4 Alarm Type Configuration The standard alarm type configured CMP6010 equipped chambers is the Float Switch alarm. The controller can only enable one of the two alarm types at any given time. The Door Open alarm is an optional feature. -
Page 60: Reset User
CHAPTER 1 | SERVICE MENU Reset User The Reset User menu allows a User level account to be reset to default settings. ---MAIN MENU--- ---SERVICE MENU--- ---SERVICE MENU--- Alarm PID Sets Config S e r v i c e C o n f i g R e s e t U s e r Options Reset User... -
Page 61: Glossary
CHAPTER 10 | CMP6010 User Manual 10.0 GLOSSARY Central Management A optional remote control and monitoring system. Contact System™ (CM) Conviron for more information. Chamber The entire unit is called the chamber. Parts of the chamber include the control screen, the electrical panel, the refrigeration system and the plant growth area (chamber interior). - Page 62 The numbered list of entries which the controller executes sequentially in ascending order. A timeline designates a set point value for each controlled Timeline parameter at a specified point in real time. Each program in the CMP6010 can store up to 24 timelines. 10-2 Janaury 2016 | 256573R04...
- Page 64 Tel: +49 30 367 006 60 Tel: 1300 438 912 www.conviron.com info@conviron.com ISO9001 ©2016 Controlled Environments Limited. Conviron is a registered trademark of Controlled Environments Limited. All other trademarks are the property of their respective owners. Information subject to change without written notice.
Need help?
Do you have a question about the CMP6010 and is the answer not in the manual?
Questions and answers