
Related Manuals for GreenWorks BA09B00


Summary of Contents for GreenWorks BA09B00
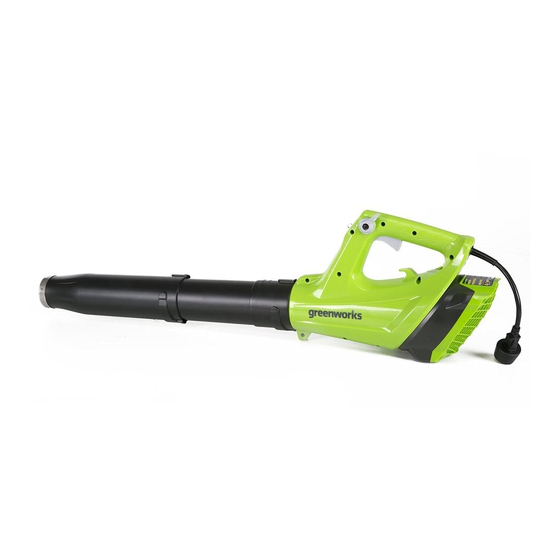
- Page 1 9A AXIAL BLOWER BA09B00 Owner’s Manual TOLL-FREE HELPLINE: 1-888-90WORKS (888.909.6757) www.GreenWorksTools.com Read all safety rules and instructions carefully before operating this tool.
-
Page 2: Table Of Contents
CONTENTS Contents ..........................2 Product Specifications ......................2 Safety Rules ........................3 Symbols ..........................6 Know Your Blower ........................ 8 Assembly ..........................9 Operation ..........................12 Maintenance..........................15 Troubleshooting........................16 Warranty..........................17 Exploded View ........................18 Part List ..........................19 PRODUCT SPECIFICATIONS 9A AXIAL BLOWER Type ........................... -
Page 3: Safety Rules
SAFETY RULES W A R N I N G Disconnect before cleaning or changing accessories. W A R N I N G Do not use on wet ground. W A R N I N G Read and understand all instructions before using this product. Failure to follow all instructions listed below may result in electric shock, fire, and/or serious personal injury. - Page 4 SAFETY RULES • Wear heavy long pants, boots, and gloves. Avoid loose garments or jewellery that could get caught in moving parts of the machine or its motor. • Do not force the tool. Use the correct tool for your application. The correct tool will work more efficiently and safely when it is used at the rate that it was designed to work at.
- Page 5 SAFETY RULES W A R N I N G To reduce the risk of electric shock, this blower has a polarized plug (one blade is wider than the other) and will require the use of a polarized extension cord. The blower plug will fit into a polarized extension cord only one way.
-
Page 6: Symbols
SYMBOLS Some of the following symbols may be used on this product. Please study them and learn their meaning. Proper interpretation of these symbols will allow you to operate the product better and safer. SYMBOL NAME DESIGNATION/EXPLANATION Volts Voltage Amperes Current Hertz Frequency (cycles per second) - Page 7 SYMBOLS The following signal words and meanings are intended to explain the levels of risk associated with this product. SYMBOL SIGNAL MEANING DANGER Indicates an imminently hazardous situation, which, if not avoided, will result in death or serious injury. WARNING Indicates a potentially hazardous situation, which, if not avoided, could result in death or serious injury.
-
Page 8: Know Your Blower
KNOW YOUR BLOWER Cruise Control Lever Trigger Cord Lock Power Cord Blower Tube Fig. 1 KNOW YOUR BLOWER See Figure 1 The safe use of this product requires an understanding of the information on the product and in this operator’s manual as well as a knowledge of the project you are attempting. Before use of this product, familiarize yourself with all operating features and safety rules. -
Page 9: Assembly
ASSEMBLY W A R N I N G To avoid serious personal injury, the blower tube must be used when operating this unit. NOTE: The blower tube is not assembled on this unit. Installation is required to provide safe and easy use for the operator. - Page 10 ASSEMBLY BLOWER ASSEMBLY 1. Slide the blower tube back onto the blower and turn until the tube locked. (See Figure 2) 2. Twist the blower tube clockwise until the tube locks into position. Fig. 2 3. Install tube A onto tube B and twist clockwise until the tube locks into position. (See Figure 3) Fig.
- Page 11 ASSEMBLY INSTRUCTION CONNECTING THE POWER CORD (See Figure 4) 1. Secure the extension cord to the unit by using the cord retainer at the rear of the blower. 2. Make a loop in the extension cord and pass it through the gap at the rear of the blower and place it over the hook.
-
Page 12: Operation
OPERATION STARTING/STOPPING THE BLOWER (See figure 5) • Squeeze the trigger to start. • This blower has a variable speed trigger, which allows you to increase or decrease speed based on how much you pull the trigger. • Pull backwards on the Cruise Control Lever to lock and increase speed. Push forward on the Cruise Control Lever to decrease speed and release lock. - Page 13 OPERATION W A R N I N G • To avoid serious personal injury, wear goggles or safety glasses at all times when operating this unit. Wear a face mask or dust mask in dusty locations. • To prevent serious personal injury or damage to the unit, make sure the blower tube is in place before operating the unit.
- Page 14 OPERATION AIR VENTS Never cover the rear air vent. Keep them free of obstructions and debris. The rear vent must be clear for proper motor cooling. OPERATING THE BLOWER (See Figure 6) Hold the blower firmly. Sweep from side to side with the nozzle several inches above the ground.
-
Page 15: Maintenance
MAINTENANCE W A R N I N G To avoid serious personal injury, always turn the unit off and unplug it before cleaning or servicing. Use a small brush to clean off the outside of the unit. Do not use strong detergents, household cleaners that contain aromatic oils such as pine and lemon, and solvents such as kerosene, because they can damage plastic housings or handles. -
Page 16: Troubleshooting
TROUBLESHOOTING PROBLEM CAUSE SOLUTION 1. Plug the cord into an electrical outlet. 1. Unit is unplugged. Motor fails to start when the trigger is depressed. 2. Call Toll-Free Helpline: 2. Defective Power Switch. 1-888-909-6757 The unit will start, but air will Blocked tube. -
Page 17: Warranty
(4) years against defects in materials, parts or workmanship. GREENWORKS™, at its own discretion will repair or replace any and all parts found to be defective, through normal use, free of charge to the customer. This warranty is valid only for... -
Page 18: Exploded View
EXPLODED VIEW... -
Page 19: Part List
ITEM NO. PART NO. DESCRIPTION 341071816 Blower Tube A 341061816 Blower Tube B 311011807 Blower Assembly 341031807 Rear Vent Housing 32201572 Rear Vent Screws Greenworks Tools P.O. Box 3130 Mooresville, North Carolina 28117 TOLL-FREE HELPLINE: 1-888-90WORKS (888.909.6757) Rev: 00 (02-05-16)
Need help?
Do you have a question about the BA09B00 and is the answer not in the manual?
Questions and answers