Advertisement
Quick Links
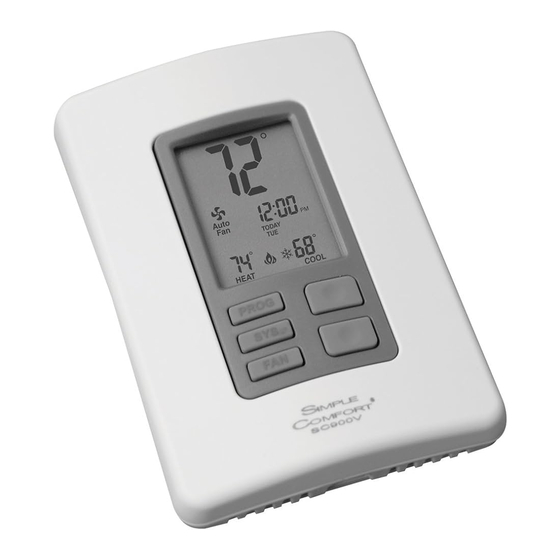
SC900V
Auto Changeover
24-277 VAC Hardwire
2 or 4 Pipe Fan Coil Thermostat, 3 Speed
• 2-pipe systems
• 4-pipe systems
• Pipe sensor compatible
• Configurable
• Large display with backlight
• Selectable fahrenheit or celsius
• Relay outputs (minimum voltage drop in thermostat)
• Remote sensor compatible
Installation, Operation & Application Guide
For more information on our complete range of American-made
products – plus wiring diagrams, troubleshooting tips and more,
visit us at www.icmcontrols.com
Icon Descriptions
Fan
operation
icon
Auto
Fan
HEAT
COOL
Cooling operation icon
Heating operation icon
Specifications
Electrical rating: 24-277 VAC, 6 amp maximum per output
Temperature control range: 45°F to 90°F (7°C to 32°C)
Accuracy: ± 1°F (± 0.5°C)
Timing: Backlight Operation: 10 seconds
Terminations: L, N, Heat, Cool, FH, FM, FL, PS, RS, SB, SC
Important Safety Information
ELECTRICAL SHOCK HAZARD – Turn off power at the main service panel by removing
the fuse or switching the appropriate circuit breaker to the OFF position before working
on a high voltage thermostat.
WARNING!: Always turn off power at the main power supply before installing, cleaning,
or removing thermostat.
• This thermostat is for 24-277 VAC applications only; do not use on voltages over 277 VAC
• Use this thermostat only as described in this manual
Package Contents/Tools Required
Package includes: SC900V thermostat on base, thermostat cover, wiring labels, screws and wall
anchors, Installation, Operation and Application Guide
Tools required for installation: Drill with 3/16" bit, hammer, screwdriver
To Remove Existing Thermostat
ELECTRICAL SHOCK HAZARD – Turn off power at the main service panel by removing the fuse or switching the appropriate circuit breaker to the OFF position before removing the existing
thermostat.
1. Turn off power to the heating and cooling system by removing the fuse or switching the appropriate circuit breaker off.
2. Remove cover of old thermostat. This should expose the wires.
3. Label the existing wires with the enclosed wire labels before removing wires.
4. After labeling wires, remove wires from wire terminals or remove wire nuts.
5. Remove existing thermostat base from wall.
6. Refer to the following section for instructions on how to install this thermostat.
ELECTRICAL SHOCK HAZARD – Turn off power at the main service panel by removing the fuse or switching the appropriate circuit breaker to the OFF position before removing the existing
thermostat.
IMPORTANT: Thermostat installation must conform to local and national building and electrical codes and ordinances.
Note: Mount the thermostat about five feet above the floor. Do not mount the thermostat on an outside wall, in direct sunlight, behind a door, or in an area affected by a vent or duct.
1. Turn off power by removing the fuse or switching the appropriate circuit breaker off.
2. To remove cover, remove screw and pull gently at the seam at the top.
3. Set thermostat away from working area.
4. Align thermostat base with junction box mounting holes and feed the control wires through hole.
5. Use supplied screws to mount thermostat base to junction box.
CAUTION!: Be sure exposed portion of wires does not touch other wires.
System 1
System 2
Heat Only
Cool Only
Black
L
24-277
24-277
VAC
White
VAC
N
Red
Heat
H
C
Cool
Purple
Purple
FH
Fan High
Fan High
Yellow
Yellow
Fan Medium
FM
Fan Medium
Gray
FL
Fan Low
Fan Low
Orange/White
Orange/White
Pipe Sensor
PS
Pipe Sensor
(Optional)
(Optional)
Red/White
Red/White
Remote Sensor
RS
Remote Sensor
(Optional)
(Optional)
White/Black
White/Black
Set Back
SB
Set Back
(Optional)
(Optional)
Blue/White
Blue/White
SC
System 5
System 6
2-Pipe Manual Changeover
with Auxiliary
4-Pipe Manual Changeover
Black
L
24-277
24-277
VAC
White
VAC
N
Red
Heat/Cool
H
Heat
Blue
Auxiliary
C
Cool
Purple
Purple
Fan High
FH
Fan High
Yellow
Yellow
Fan Medium
FM
Fan Medium
Gray
Fan Low
FL
Fan Low
Orange/White
Pipe Sensor
PS
(Required)
Red/White
Red/White
Remote Sensor
RS
Remote Sensor
(Optional)
(Optional)
White/Black
White/Black
Set Back
SB
Set Back
(Optional)
(Optional)
Blue/White
Blue/White
SC
To Install Thermostat
6. Wire nut the thermostat wires to your system wires.
7. Gently tug wire to be sure of proper connection. Double check that each wire is connected to the
proper terminal.
8. Snap thermostat to base that is mounted on the wall. Refasten with screw.
9. Turn on power to the system at the main service panel.
10. Test thermostat operation as described in "Testing the Thermostat".
Wiring Diagrams
System 3
2-Pipe Manual Changeover
Black
Black
L
L
24-277
24-277
White
VAC
White
VAC
N
N
Red
H
Heat/Cool
H
Blue
C
C
Purple
FH
FH
Fan High
Yellow
FM
Fan Medium
FM
Gray
Gray
FL
FL
Fan Low
Orange/White
PS
Pipe Sensor
PS
(Optional)
Red/White
RS
Remote Sensor
RS
(Optional)
White/Black
SB
Set Back
SB
(Optional)
Blue/White
SC
SC
System 7
4-Pipe Auto Changeover
Black
Black
L
L
24-277
White
VAC
White
N
N
Red
Red
H
Heat
H
Blue
Blue
C
Cool
C
Purple
FH
Fan High
FH
Yellow
FM
Fan Medium
FM
Gray
Gray
FL
Fan Low
FL
PS
PS
Red/White
RS
Remote Sensor
RS
(Optional)
White/Black
SB
Set Back
SB
(Optional)
Blue/White
SC
SC
Wire Designator Descriptions
L – 120 VAC Hot
Black
N – 120 VAC Neutral
White
H – Heat
Red
C – Cool
Blue
FH – Fan High
Purple
FM – Fan Medium
Yellow
The configuration mode is used to set the SC900V to match your heating/cooling system.
To configure the SC900V, perform the following steps:
1. Verify the SC900V is in the OFF mode. Press the SYS (left) button until off mode displays.
2. Press the PROG button for 5 seconds while the SC900V is in OFF mode.
Press the up or down button to change settings within each screen.
Press the PROG button to advance to the next screen.
Note: Pressing the SYS button will return you to the previous screen.
To exit configuration mode, press the PROG switch for 5 seconds.
Configuration Mode Settings
1 – System
Select the type of operation you require.
1. Heat Only is for a system with only heating.
System 4
2. Cool Only is for a system with only cooling.
2-Pipe Seasonal Changeover
3. 2-Pipe Manual Changeover is for a 2 pipe system that handles both heating and cooling. The user
selects whether the system will be set to heating or set to cooling.
Black
L
4. 2-Pipe Seasonal Changeover is for a 2 pipe system that handles both heating and cooling. The
thermostat selects whether the system will be set to heat or set to cool based on the pipe sensor
White
N
temperature.
Red
5. 2-Pipe Manual Changeover with Auxiliary is for a 2 pipe system that handles both heating and
Heat/Cool
H
cooling. The user selects whether the system will be set to heat or set to cool. If set to heat and the
pipe sensor indicates there is not heat, the auxiliary output will be turned on.
C
6. 4-Pipe Manual Changeover is for a 4 pipe system. The user selects whether the system will be set
to heat, cool or off.
Purple
FH
Fan High
7. 4-Pipe Auto Changeover is for a 4 pipe system. The user selects whether the system will be set to
Yellow
heat, cool, heat & cool or off.
Fan Medium
FM
"1" Heat only
Gray
FL
Fan Low
"2" Cool only
Orange/White
"3" 2-pipe manual changeover
Pipe Sensor
PS
"4" 2-pipe seasonal changeover
(Required)
Red/White
Remote Sensor
RS
(Optional)
White/Black
2 – Temperature Scale
Set Back
SB
(Optional)
This thermostat can function in Fahrenheit and Celsius.
Blue/White
SC
F = Fahrenheit (Default)
C = Celsius
3 – Valve Type
This thermostat operates with Normally Open or Normally Closed valves. Select the correct valve
type for your system.
no = Normally Open (Default)
nc = Normally Closed
4 – Temperature Sensor
Select the type of room temperature sensor you are using.
o = Onboard temperature sensor (Default)
r = Remote temperature senso
5 – Fan Operation
Select either Automatic Fan or Continuous Fan.
Automatic Fan will automatically adjust the fan speed (Low, Medium, High) based on the set point
and room temperature. The more the room temperature is from the set point the faster the fan will
operate. The fan will be off in OFF mode.
Continuous Fan will run the fan at the fan speed that is selected with the FAN button. It can be
turned OFF only when in OFF mode.
A = Automatic Fan (Default)
C = Continuous Fan
FL – Fan Low
Gray
PS – Pipe Sensor (optional)
Orange/White
RS – Remote Sensor (optional)
Red/White
SB – Set Back (optional)
White/Black
SC – Set Back/Sensor Common
Blue/White
Configuration Mode
SYS
Up
button
PROG
Down
FAN
button
"5" 2-pipe seasonal changeover w auxiliary
"6" 4-pipe manual changeover
"7" 4-pipe auto changeover (Default)
r
Advertisement

Related Manuals for ICM Controls SC900V


Summary of Contents for ICM Controls SC900V
- Page 1 To configure the SC900V, perform the following steps: • Relay outputs (minimum voltage drop in thermostat) ELECTRICAL SHOCK HAZARD – Turn off power at the main service panel by removing the fuse or switching the appropriate circuit breaker to the OFF position before removing the existing 1. Verify the SC900V is in the OFF mode. Press the SYS (left) button until off mode displays. • Remote sensor compatible thermostat. 2. Press the PROG button for 5 seconds while the SC900V is in OFF mode.
- Page 2 Differential is the number of degrees between the set point temperature and the turn on The SC900V high voltage fan coil thermostat can be used for two pipe or four pipe systems. It can The SC900V has a button lockout feature so the mode cannot be changed temperature.
Need help?
Do you have a question about the SC900V and is the answer not in the manual?
Questions and answers