Table of Contents
Advertisement
Advertisement
Table of Contents

Related Manuals for Monoprice MP Strata Vacuum 2.0


Summary of Contents for Monoprice MP Strata Vacuum 2.0
- Page 1 MONOPRICE MP Strata Vacuum 2.0 P/N 21714 User's Manual...
-
Page 2: Table Of Contents
CONTENTS SAFETY WARNINGS AND GUIDELINES ..........................4 INTRODUCTION ....................................... 5 FEATURES ........................................5 CUSTOMER SERVICE ................................... 5 PACKAGE CONTENTS ..................................6 PRODUCT OVERVIEW ..................................7 Vacuum ........................................7 Roller Brush Attachment ................................8 Charging Station ....................................8 Remote Control ....................................9 Display/Control Panel ................................ - Page 3 USING THE MOPPING ATTACHMENT ..........................19 CHANGING ATTACHMENTS ................................ 19 USING THE VIRTUAL WALL ............................... 20 MAINTENANCE ..................................... 20 Cleaning the Dust Bin and Filters ..........................20 Clean the Side Brushes ................................22 Cleaning Sensors and Wheels ............................22 Cleaning the Charging Poles .............................. 22 Cleaning the Suction Passage and Dust Sensor ....................
-
Page 4: Safety Warnings And Guidelines
SAFETY WARNINGS AND GUIDELINES Please read this entire manual before using this device, paying extra attention to these safety warnings and guidelines. Please keep this manual in a safe place for future reference. This device is intended for indoor use only. ... -
Page 5: Introduction
INTRODUCTION Experience the best of both worlds with the MP Strata Vacuum 2.0. Featuring high power suction in a sleek (3.46" tall) design, it is ready to tackle pet hair, hardwood floors, and carpets. The large (0.5 liter) dust bin is washable and includes a preinstalled HEPA filter. -
Page 6: Package Contents
PACKAGE CONTENTS Please take an inventory of the package contents to ensure you have all the items listed below. If anything is missing or damaged, please contact Monoprice Customer Service for a replacement. 1x Strata Vacuum 2.0 with installed Suction Attachment, Dust Bin, and HEPA... -
Page 7: Product Overview
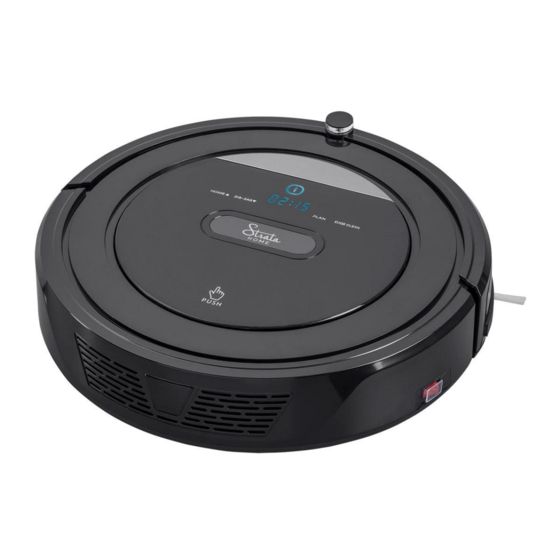
PRODUCT OVERVIEW Vacuum... -
Page 8: Roller Brush Attachment
Roller Brush Attachment Charging Station... -
Page 9: Remote Control
Remote Control 1. ON/OFF Button (Clean): With the vacuum in Standby mode, press the ON/OFF button to start or stop cleaning. 2. Directional Buttons: While cleaning is in progress, press the directional buttons to alter the vacuum's path. The left and right buttons will cause the vacuum to turn in those directions, the forward button will cause the vacuum to move forward and the back button causes it to back... -
Page 10: Display/Control Panel
Display/Control Panel : The LED Panel displays the Time Setting, Charging Status, and Error Codes, using numbers, letters, or graphs. Non-error code displays are: : The battery is fully charged. : The battery charge is low. : The battery is being charged. : The suction passage is blocked. -
Page 11: Operating Modes
: The button performs the following functions: A: When in Scheduling mode, press the button to decrease the displayed value. B: When in any mode except Scheduling mode, press the button to begin the Zig-Zag Cleaning mode. : Press the button to enter or exit Scheduling mode. -
Page 12: Edge Cleaning Mode
Edge Cleaning Mode The vacuum cleans along walls and obstacles when it detects a wall or obstacle or when the Edge Cleaning mode is manually activated. Schedule Mode Once a cleaning schedule time has been set, the vacuum will automatically start cleaning in Normal Cleaning mode at the scheduled time. - Page 13 5. Press the button on the vacuum or the HOME button on the included remote control. The vacuum will automatically position itself against the power station and charging will begin. While charging is in progress, the LED display on the Display/Control Panel will show a series of 1s ( ), from left to right.
-
Page 14: Operation
OPERATION Power On/Off Flip the Power Switch on the right side of the vacuum to power it on or off. While powered on and not in actual operation, the vacuum can be placed in Sleep or Standby mode. Standby and Sleep Modes ... -
Page 15: Cleaning Modes
Press the ON/OFF button on the remote control to stop cleaning and re- enter Standby mode. Press it again to start Normal Cleaning mode again. Press the MODE button on the remote control to cycle through Normal Cleaning, Spot Cleaning, and Edge Cleaning modes. ... - Page 16 by pressing the SPOT button on the remote control. You can also select Spot Cleaning mode by pressing the MODE button on the remote control to cycle through the four cleaning modes. The LED Panel will show 1111 when in Spot Cleaning mode.
-
Page 17: Scheduling
SCHEDULING Setting the Clock Prior to scheduling, the vacuum's clock should be set to the current time. Perform the following steps to set the clock. 1. Ensure that the vacuum is in Standby mode or is charging. If it is in Sleep mode, press the button on the vacuum to enter Standby mode. -
Page 18: Clearing The Schedule Time
3. Press and hold the button on the vacuum for two seconds, then release the button to enter Scheduling Mode. The LED display will show either the currently set scheduled time or 00:00 if no scheduled time is set. The hour value will be flashing. -
Page 19: Using The Mopping Attachment
USING THE MOPPING ATTACHMENT Perform the following steps to use the included Mopping Pad and Water Tank Attachment. 1. If the Mopping Pad has been removed from the Water Tank, attach it to the Water Tank. The Water Tank has hook and loop pads that allow the Mopping Pad to stay attached. -
Page 20: Using The Virtual Wall
USING THE VIRTUAL WALL The Virtual Wall allows you to create a virtual barrier, beyond which the vacuum will not go. Perform the following steps to use the Virtual Wall. 1. Release the latch on the bottom of the Virtual Wall, then remove the battery cover. - Page 21 3. Use the handle to lift the Dust Bin out of the compartment. 4. Use your thumb to pry the rubber lip at the bottom of the HEPA filter to remove it from the Dust Bin. 5. Remove the brush from the top of the Dust Bin lid. 6.
-
Page 22: Clean The Side Brushes
14. Reinstall the brush onto the retaining clips on the Dust Bin lid. 15. Reinstall the HEPA filter onto the side of the Dust Bin. 16. Insert the Dust Bin into the vacuum. 17. Close the lid, then press the area to latch it into place. -
Page 23: Cleaning The Suction Passage And Dust Sensor
Cleaning the Suction Passage and Dust Sensor After each use, remove the Suction Attachment and clean the suction passage and dust sensors with a soft, dry cloth. Do not allow the sensors to get wet! Cleaning the Roller Brush Attachment Periodically clean the Roller Brush Attachment using warm water. -
Page 25: Troubleshooting
TROUBLESHOOTING Whenever a fault or error occurs, the LED Display will show a fault code. Refer to the following table for the probable cause and possible solution for each fault code. Error Code Cause Solution AUBF Suction passage blocked Clean the suction passage Ensure that the dust bin is AUBN Dust bin missing or improperly installed... - Page 26 Left and right wheels off the ground, left Edxx collision switch fault Put the vacuum on solid Left and right wheels off the ground, right Eexx ground, check front collision switch fault bumper Left and right wheels off the ground, left Efxx and right collision switch fault Exx1...
- Page 27 Left and right anti-drop sensors detect a ExxD drop, front bumper right infrared sensor detects an obstacle Front and right anti-drop sensors detect a Clean front sensor lens and ExxE drop, front bumper right infrared sensor bottom anti-drop sensor detects an obstacle Front, left, and right anti-drop sensors ExxF detect a drop, front bumper right infrared...
- Page 28 Front bumper wall detection sensor and ExBx left and middle infrared sensors detect an obstacle Front bumper wall detection sensor and ExCx right infrared sensors detect an obstacle Front bumper wall detection sensor and ExDx left and right infrared sensors detect an Clean front bumper sensor obstacle lens...
-
Page 29: Technical Support
TECHNICAL SUPPORT Monoprice is pleased to provide free, live, online technical support to assist you with any questions you may have about installation, setup, troubleshooting, or product recommendations. If you ever need assistance with your new product, please come online to talk to one of our friendly and knowledgeable Tech Support Associates. -
Page 30: Specifications
Modifying the equipment without Monoprice’s authorization may result in the equipment no longer complying with FCC requirements for Class B digital devices. In that event, your right to use the equipment may be limited by FCC regulations, and you may be required to correct any interference to radio or television communications at your own expense. - Page 31 equipment generates, uses and can radiate radio frequency energy and, if not installed and used in accordance with the instructions, may cause harmful interference to radio communications. However, there is no guarantee that interference will not occur in a particular installation. If this equipment does cause harmful interference to radio or television reception, which can be determined by turning the equipment off and on, the user is encouraged to try to correct the interference by one or more of the following measures:...
Need help?
Do you have a question about the MP Strata Vacuum 2.0 and is the answer not in the manual?
Questions and answers
What does "please open the power switch" mean?
For the Monoprice MP Strata Vacuum 2.0, "please open the power switch" means flipping the Power Switch located on the right side of the vacuum to the "on" position. This powers on the vacuum and allows it to operate.
This answer is automatically generated