Advertisement
Available languages
Available languages
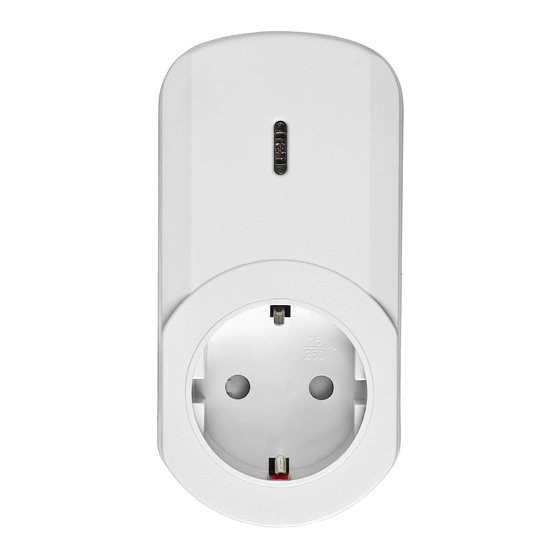
Remote Switch, 3-Pack
Art.no 18-1255
Model 3 x 51058GBX10 + 50074
36-6010
3 x 51058X10 + 50074
Please read the entire instruction manual before using
the product and then save it for future reference. We reserve
the right for any errors in text or images and any necessary
changes made to technical data. In the event of technical
problems or other queries, please contact our Customer
Services.
Safety
• This product is suitable for switching products such as
lights on and off.
• Make sure that the light is turned off before connecting it
to the product.
• Never connect a light with a higher power rating than
1000 W.
• This product is intended for indoor use, do not expose it
to rain or moisture.
• Make sure that the electrical socket that the remote
control switch is plugged into is easily accessible in
case the switch and connected product need to be
disconnected from the mains electricity quickly.
• Do not connect after each other.
• Do not cover the product.
Operating instructions
Installation
In order to use the remote switches, the receivers and
the remote control must first be wirelessly connected (paired).
This is where you get to decide which receiver is to be
controlled by which button on the remote control.
1. Remove the plastic
2. Plug the receiver into
tab from the back of
a wall socket.
the remote control to
activate the battery.
GREAT BRITAIN • CUSTOMER SERVICE tel 020 8247 9300 e-mail customerservice@clasohlson.co.uk internet www.clasohlson.co.uk postal 10 – 13 Market Place, Kingston upon Thames, Surrey, KT1 1JZ
3. Hold in the button on
4. The LED button will
the front of the receiver
start flashing slowly.
for at least 3 seconds and
The receiver is now
then release it.
in learning mode and
ready to be paired with
the remote control.
5. Single-press one of
6. Connect a light to
the on-buttons on
the receiver and
the remote control (A,
check that the light is
B, C or D). The LED on
switched on.
the receiver will shine
steadily once the remote
control has been paired.
7. Repeat steps 2 to 5 for the other receivers.
Tip:
• You can connect more than one receiver to the same
button, e.g. [ A ], on the remote control. This could
be useful if you like switching several lights on at
the same time.
• You can connect multiple remote controls to the receivers.
Each receiver has a memory for up to 6 different remote
controls or transmitters.
Switching on/off
Use the buttons in the left-
hand "ON" row to switch
the paired light on and
the buttons in the right-
hand "OFF" row to switch
the light off.
Deleting a paired remote control
You might need to delete a remote control from the memory
of the receiver in case you want to:
• control the receiver using another button on the remote
control.
• pair an additional remote control, but all 6 memory slots
are occupied.
1. Hold in the button on
the receiver you wish to
delete the remote control
from for 3 seconds and
then release it.
2. The LED in the button will start flashing slowly.
The receiver is now ready to delete the remote control.
3. Press in the off-button on the remote control (make sure
to choose the correct off-button). The remote control will
now be deleted from the receiver.
Note: The light can still be switched on/off manually by
pressing the button on the receiver.
Deleting all paired remote controls
1. Hold in the button on the front of the receiver for 6 seconds
until the LED in the button starts flashing quickly.
2. When the LED stops flashing, all the remote controls
which were paired with the receiver will have been deleted.
Changing the batteries
1. Pry off the battery cover using a coin or screwdriver.
2. Remove the battery and replace it with a new CR2032
battery. The positive terminal (+) of the battery should face
upwards as shown in the picture.
Care and maintenance
• Unplug the receiver from the wall socket and remove
the battery from the remote control if they are not to be
used for an extended period.
• Clean the units by wiping them with a dry cloth.
Troubleshooting guide
The remote
• Has the receiver been paired with
switch set is
a remote control as described above?
not working.
Try pairing them again.
• Check the battery of the remote control.
• Is the remote control too far away from
the receiver (25 m)?
• Check that the light is properly
connected to the receiver and that it is
switched on and not faulty.
• Try plugging the light into another
electrical outlet to make sure that
it works.
• Is there electricity in the outlet
the receiver is plugged into?
Responsible disposal
This symbol indicates that this product
should not be disposed of with general
household waste. This applies throughout
the entire EU. In order to prevent any harm to
the environment or health hazards caused by
incorrect waste disposal, the product must
be handed in for recycling so that the material
can be disposed of in a responsible manner.
When recycling your product, take it to your
local collection facility or contact the place of
purchase. They will ensure that the product is
disposed of in an environmentally sound manner.
Specifications
Frequency
433.92 MHz
Receiver
Power supply
220–240 V AC, 50 Hz
Max range
25 m
Max load
1000 W (resistive load)
Memory slots
6
Remote control
Battery
1 × CR2032, 3 V DC (included)
Number of channels 4
Advertisement
Table of Contents

Related Manuals for Cotech 18-125


Summary of Contents for Cotech 18-125
-
Page 1: Troubleshooting Guide
Remote Switch, 3-Pack Deleting a paired remote control Care and maintenance You might need to delete a remote control from the memory • Unplug the receiver from the wall socket and remove Art.no 18-1255 Model 3 x 51058GBX10 + 50074 of the receiver in case you want to: the battery from the remote control if they are not to be 36-6010 3 x 51058X10 + 50074... - Page 2 Fjärrströmbrytare 3-pack 2. LED-indikatorn i knappen börjar blinka långsamt. Avfallshantering Mottagaren är nu redo att radera fjärrkontrollen. Denna symbol innebär att produkten inte får 3. Tryck in av-knappen på fjärrkontrollen (tänk på att välja rätt Art.nr 18-1255 Modell 3 x 51058GBX10 + 50074 kastas tillsammans med annat hushållsavfall.
- Page 3 Fjernstrømbryter 3-pack 2. LED-indikatoren på knappen begynner å blinke langsomt. Avfallshåndtering Mottakeren er nå klar til å slette fjernkontrollen. Symbolet viser til at produktet ikke skal kastes 3. Trykk inn av-knappen på fjernkontrollen (husk å velg riktig Art.nr. 18-1255 Modell 3 x 51058GBX10 + 50074 sammen med husholdningsavfallet.
- Page 4 Kaukokytkinsarja 3 kpl 2. Painikkeen LED-merkkivalo vilkkuu hitaasti. Vastaanotin voi Kierrättäminen nyt poistaa kaukosäätimen. Tämä kuvake tarkoittaa, että tuotetta ei saa 3. Paina kaukosäätimen OFF-painiketta (paina oikeaa OFF- Tuotenro 18-1255 Malli 3 x 51058GBX10 + 50074 hävittää kotitalousjätteen seassa. Tämä koskee painiketta). Kaukosäädin poistuu vastaanottimesta. 36-6010 3 x 51058X10 + 50074 koko EU-aluetta.
- Page 5 Funksteckdose 3er-Pack Die Verbindung mit einer Fernbedienung aufheben Pflege und Wartung In folgenden Fällen kann es nötig sein, einen Fernbedienung • Bei längerer Nichtbenutzung die Funksteckdose Art.Nr. 18-1255 Modell 3 x 51058GBX10 + 50074 aus dem Speicher des Empfängers zu löschen: aus der Steckdose ziehen und die Batterien aus 36-6010 3 x 51058X10 + 50074 der Fernbedienung nehmen.
-
Page 6: Declaration Of Conformity
Declaration of Conformity EG-försäkran om överensstämmelse / Egenerklæring / EY-vaatimustenmukaisuusvakuutus / EU-Konformitätserklärung This declaration of conformity is issued under the sole responsibility of the manufacturer. Denna EG-försäkran om överensstämmelse utfärdas på tillverkarens eget ansvar. / Egenerkläringen er utstedt under produsentens eget ansvar.
Need help?
Do you have a question about the 18-125 and is the answer not in the manual?
Questions and answers