Advertisement
Quick Links
the back-up battery. n 08. Connect the TX and RX com-
20° (± 25%). n RX field angle: 8° (± 25%). n Range:
ENGLISH
ponents in "parallel" (fig. 13) using a two-wire bus cable.
useful range 15m; maximum range 30m. The range may
Then, connect the bus cable to the "BlueBus" terminal
be reduced by 50% in poor atmospheric conditions (fog,
on the control unit (or interface). Matching polarity is not
rain, dust, etc.). n Detection capacity: opaque objects
required. n 09. Photocells used as the "automatic
larger than 50 mm along the line of sight between TX
1 - Safety and installation instructions
opening control device" – If the photocells are set up
and RX (max. speed 1.6 m/s). n Number of photocells
n CAUTION! IMPORTANT INSTRUCTIONS: for per-
for this function (check in point 03), complete their in-
that may be connected: Up to 7 pairs of safety func-
sonal safety it is important to read and follow these
stallation by cutting the electrical bridge between points
tion photocells may be installed and 2 pairs to control the
instructions, and store them in a safe place. In case
"A", on the TX and RX circuit cards (fig. 14). n 10. In-
open command (automatic synchronisation avoids inter-
of doubt, contact the Nice Support Service. Incor-
stall the TX and RX modules on their supports (fig. 15).
ference among the different detectors). n Maximum
rect installation is a safety hazard and can lead to
n 11. Power the automation and perform the "BlueBus
length of the wire: all components must be connected
faulty operation. n Installation, hookup, programming
device learning procedure", found in the control unit (or
in parallel. The sum of the lengths of all of the wires used
and maintenance shall only be performed by qualified
interface) instruction manual. Note – If this photocell is
to connect the different components, including the wire
technicians, in compliance with the applicable laws,
going to be used to replace a previously existing photo-
coming from the control unit shall not be greater than 50
standards, local regulations and these instructions. n
cell, the jumpers must be positioned in the same man-
metres. n Protection rating: IP 44 n Use in acid, sa-
The transmitter component (TX) and the receiver com-
ner as before. In this case the device learning procedure
line or potentially explosive atmosphere: no. n Op-
ponent (RX) on the device shall be permanently installed
is not required. n 12. Perform the test procedure as de-
erating temperature: -20 to +50°C n Installation: el-
opposite one another on two vertical and parallel walls.
scribed in Chapter 4. n 13. Complete the installation as
ements installed facing each other on two vertical paral-
The walls shall be solid so they do not transmit any vi-
shown in fig. 18, 19.
lel walls, or on an appropriate column support. n TX/
brations to the photocells. n The photocells shall be in-
RX alignment adjustment: no. n Dimensions (single
4 - Automation Testing
stalled in a position that protects them from accidental
component) / Weight (sum of two components): –
impacts and that ensures easy access for maintenance.
To make sure that the photocells are operating proper-
EPLB - EPLB/A, 70 x 70(h) x 30 mm / 165 g – EPMB
n The photocells must be connected only to a NICE
ly or to detect any interference from other devices, take
- EPMB/A, 50 x 80(h) x 28.5 mm / 143 g
control unit (or interface) equipped with "BlueBus" tech-
these steps. n 01. Power the automation and observe
9 - CE Declaration of Conformity
nology. n The photocell must operate only when an ob-
the status of the LEDs on the TX and RX (fig. 15). Use
ject is placed between the TX and the RX). Operation by
Table B to find out the meaning of the different statuses,
Nice S.p.A. hereby declares that the products: EPLB,
reflection is prohibited. n To increase the level of safety
EPMB comply with the essential requirements and oth-
keeping in mind that proper operation is indicated only
against malfunction, the photocells shall be connected to
when the two LEDs flash very slowly. If the status is not
er pertinent provisions defined by Directive 2004/108/
a command control unit (or interface) equipped with the
EC. The CE declaration of conformity can be viewed and
compliant, perform the operations provided for in Table
"phototest" function. n The product is protected against
B. In particular, if the alignment between TX and RX re-
printed at the website www.nice-service.com, or may be
water and dust; it is therefore suited for normal outdoors
requested directly from Nice S.p.A.
quires adjustment, move one or both the photocells un-
applications. It is however not suited for use in heavily
til they are aimed at one another; that is, once the two
Mr. Mauro Sordini (Chief Executive Officer)
saline, acidic or potentially explosive atmospheres. Do
LEDs flash very slowly (= optimum reciprocal alignment).
not install the equipment in areas subject to flooding or
n 02. Check their operation by blocking the line of sight
water stagnation. n The electrical cables must enter the
between them with a cylinder (Ø = 5 cm; L = 30 cm): first
ITALIANO
photocell through one of the holes located on the bottom
pass the object close to the TX, then to the RX and, fi-
of its mount and must be inserted from below. This so as
nally, halfway between them (fig. 16). Make sure that in
to prevent water dripping inside the product.
each case the output switches from "Active" to "Alarm"
Istruzioni originali e complete
and back, and that the automation responds properly to
2 - Product description and intended use
1 - Avvertenze per la sicurezza e l'instal-
actuation of the photocell. n 03. Verify the correct ob-
This device is a photocell, namely a type-D presence de-
lazione
stacle detection as required by the EN 12445 standard,
tector, pursuant to the EN 12453 standard. It is part of
using a parallelepiped (700 x 300 x 200 mm) with three
n ATTENZIONE! ISTRUZIONI IMPORTANTI: per la
the Era-EP series, and is intended to be used on auto-
faces (one per dimension) with a matt black surface and
sicurezza delle persone è importante leggere, ri-
mation systems for doors, gates, garage doors and simi-
the others with glossy reflective surface (fig. 17).
spettare e conservare queste istruzioni. In caso di
lar installations. Any use other than that described is
dubbi, chiedere chiarimenti al Servizio Assistenza
Caution! – After having added, removed or replaced
to be considered improper and prohibited! The de-
Nice. L'installazione non corretta pregiudica la si-
any automation photocells, the entire automation system
vice uses "BlueBus" technology, which enables the con-
curezza e provoca guasti. n Tutte le operazioni di in-
must be tested, referring to the manuals for each of the
nection and communication among the photocells and
stallazione, collegamento, programmazione e manuten-
different devices.
the command control unit (or interface) with two wires.
zione devono es sere effettuate esclusivamente da per-
This is a "parallel" connection. Each pair of photocells
5 - User warnings
sonale tecnico qualificato, rispettando le leggi, le norma-
shall be assigned a specific task in the automation by the
tive, i regolamenti locali e le presenti is truzioni. n L'ele-
Caution! – Photocells do not constitute actual safety de-
insertion of jumpers. The product may be used together
mento trasmittente (TX) e l'elemento ricevente (RX) del
vices, but are rather safety aids. Although constructed
with "FT210B" series devices, equipped with the "Blue-
dispositivo devono essere fissati uno di fronte all'altro, in
for maximum reliability, in extreme conditions they may
Bus" technology (see fig. 6 and 7), which enable the res-
modo permanente, su due pareti verticali e parallele tra
malfunction or fail, and this may not be immediately evi-
olution of problem of electric connection with the sensi-
loro. Queste devono essere di materiale solido e non de-
dent. For this reason, and as a matter of good practice,
tive edges installed on moving door leafs.
vono trasmettere vibrazioni alle fotocellule. n La posizio-
observe the following instructions: • Transit can only oc-
ne scelta per il fissaggio deve proteggere la fotocellula da
3 - Installation and connections
cur if the gate or door are completely open and with the
urti accidentali e deve garantire un facile accesso per la
leaves stationary. • NEVER TRANSIT while the gate or
VERY IMPORTANT! – So that there is optical alignment
manutenzione. n Le fotocellule devono essere collegate
door are closing or are about to close. • If you note any
between the TX and the RX, make sure to check, prior
esclusivamente a una centrale (o a un'interfaccia) di co-
sign of malfunction, shut off power to the automation im-
to installation, that the walls where the photocells
mando Nice, dotata di tecnologia "BlueBus". n Il dispo-
mediately and use manual mode only (refer to the au-
are to be mounted are parallel to one another. If the
sitivo deve funzionare esclusivamente per interpolazione
tomation instruction manual). Contact your maintenance
walls are not parallel, it is suggested that adjustable pho-
diretta tra l'elemento Tx e RX: è vietato il funzionamen-
staff/person for the control and the possible repair.
tocells (e.g. EPLOB) be used, as the alignment of these
to per riflessione. n Per innalzare il livello di sicurezza ai
photocells cannot be adjusted once their installation has
6 - Maintenance
guasti è necesario collegare la fotocellula a una centra-
been completed.
Service the photocells at least every 6 months as follows:
le (o a un'interfaccia) di comando dotata della funzione
n 01. Prior to installation read the warnings in Chapter 1
"fototest". n Il prodotto è protetto contro le infiltrazioni
1) release the motor as instructed in the user manual to
and the data in Chapter 8. n 02. Disassemble and pre-
prevent the automation operating unexpectedly during
di pioggia e polvere; quindi è adatto all'uso nei norma-
pare th photocells (fig. 1, 2, 3, 4 and 5). n 03. Consult
maintenance; 2) check for humidity, oxidation and for-
li "ambienti esterni". In ogni caso non è adatto all'uso in
the instruction manual for your control unit (or interface)
eign bodies (such as insects) and remove them. In case
ambienti con atmosfera particolarmente salina, acida o
(or fig. 6, 7, 8, 9 and 10) to choose the detection func-
of doubt, replace the equipment; 3) clean the housing
potenzialmente esplosiva. Evitare l'installazione anche in
– especially the lenses and glass panels – with a soft,
tion and the corresponding installation position, that are
luoghi soggetti a ristagni d'acqua e allagamenti. n I ca-
to be assigned to the pair of photocells. Note their iden-
slightly damp cloth. Do not use alcohol, benzene, abra-
vi elettrici devono entrare nella fotocellula attraverso uno
sive or other cleaning products; these can affect the pol-
tification code number (e.g. "PHOTO 2"). To use one or
dei fori predisposti nella zona inferiore del suo supporto;
two pairs of photocells as the automatic opening control
ished surfaces and compromise the operation of the
inoltre i cavi devono provenire dal basso. Questo eviterà
photocells; 4) run the tests indicated in "Tests"; 5) the
device, choose either the FA1 and/or the FA2 functions.
lo stillicidio di acqua all'interno del prodotto.
product is designed to work for at least 10 years in nor-
n 04. Identify the identification code number chosen
2 - Descrizione del prodotto e
mal conditions; we recommend increasing the frequency
previously in Table A (e.g. "PHOTO 2"). Note the dia-
of maintenance thereafter.
destinazione d'uso
gram found under the code number and insert the jump-
ers in the TX and RX photocells, in the same position as
7 - Scrapping
Il presente dispositivo è una fotocellula, ovvero un rive-
shown in the diagram. Note – Keep any unused jumpers
latore di presenza del tipo D, secondo la EN 12453. Fa
This product is an integral part of the automation and
for any possible future need (fig. 11). n 05. If other pairs
parte della serie Era-EP ed è destinato agli impianti di
must therefore be scrapped together with it, in the same
of photocells are to be installed, repeat points 03 and 04
automazione per porte, cancelli, portoni da garage e si-
way as indicated in the automation's instruction manual.
for each. Caution! – Each pair of photocells must use a
milari. Qualsiasi altro uso diverso da quello descrit-
different jumper configuration than that used for the oth-
8 - Technical specifications
to è da considerarsi improprio e vietato! Il dispositivo
er photocells in the automation. n 06. Attach the pho-
è dotato di tecnologia "BlueBus" che consente il collega-
Please note: the technical features refer to an ambient
tocell brackets to the walls in the pre-established loca-
mento e la comunicazione tra le fotocellule e la centrale
temperature of 20°C. Nice S.p.a. reserves the right to
tions. Caution! – The two elements must be aligned on
(o l'interfaccia) di comando, con due conduttori elettri-
modify the products without altering their intended use
a single axis (fig. 12-a), to facilitate the subsequent opti-
ci. Il collegamento avviene "in parallelo"; ad ogni cop-
and essential functions.
cal aiming of the TX to the RX. If the walls do not facilitate
pia di fotocellule viene assegnata una funzione specifica
this alignment, it is suggested that, at this point, the pho-
n Type of product: presence detector for automated
nell'automazione, attraverso l'inserimento di alcuni jum-
tocell brackets be installed provisionally (using adhesive
gates and doors (type D per EN 12453). n Technol-
per. Il prodotto è utilizzabile insieme ai dispositivi della
tape or other method), to then install them definitively
ogy adopted: direct optical interpolation between TX
serie "FT210B", dotati di tecnologia "BlueBus" (vedere
(fig. 12-b) only once testing has been completed (Chap-
and RX units, with modulated IR beam. n Power sup-
la fig. 6 e 7), che consentono di risolvere il problema dei
ter 4). Note – Only for single or double leaf sliding
ply / output: The device may be connected only to a
collegamenti elettrici dei bordi sensibili installati su ante
gates – To avoid interference among the different "Blue-
control unit (or interface) equipped with "BlueBus" tech-
in movimento.
Bus" devices, position the TX and RX components as in-
nology. The electrical power is drawn from this device,
3 - Installazione e collegamenti
dicated on the tags in fig. 6 or 7. n 07. Disconnect the
where the output signals are sent. n Maximum ab-
power from the automation and if present, disconnect
sorbed power: 1 "BlueBus" unit. n TX beam angle:
MOLTO IMPORTANTE! – Per ottenere l'allineamen-
1
2
3
1
to ottico tra TX e RX, è necessario controllare pri-
Table A • Tabella A • Tableau A • Tabla A • Tabelle A • Tabela A • Tabel A
ma dell'installazione che le pareti scelte per il fis-
saggio degli elementi siano perfettamente paralle-
Photocells
FOTO
FOTO II
le tra loro. Se non lo sono, si consiglia l'uso di fotocellu-
positions
le orientabili (es. EPLOB) in quanto le presenti fotocellule
non hanno un sistema per regolare l'allineamento dopo il
Jumpers
loro fissaggio definitivo.
positions
n 01. Prima dell'installazione leggere le avvertenze nel
(*) • EN – Cut the electrical bridge "A" on the TX and RX wiring diagram (fig. 14). • IT – Tagliare il ponte elettrico "A" sulla scheda elettrica del TX e RX (fig. 14). • FR – Couper le pont
capitolo 1 e i dati nel capitolo 8. n 02. Smontare e pre-
parare le fotocellule (fig. 1, 2, 3, 4, 5). n 03. Consultare il
électrique « A » sur la carte électrique du TX et du RX (fig. 14). • ES – Cortar el puente eléctrico "A" en la tarjeta eléctrica TX y RX (fig. 14). • DE – Schneiden Sie die elektrische Brücke „A"
auf der elektrischen Platine von TX und RX zu (Abb. 14). • PL – Przeciąć mostek elektryczny „A" na płycie elektrycznej nadajnika i odbiornika (rys. 14). • NL – Snijd de elektrische brug "A"
manuale istruzioni della vostra centrale (o dell'interfaccia)
di comando (oppure le fig. 6, 7, 8, 9, 10) per scegliere la
op de elektrische kaart van de TX en RX (afb. 14).
funzione di rilevazione e la posizione d'installazione ab-
binata, che si desidera assegnare alla coppia di fotocel-
lule; annotare la loro sigla identificativa (es. "FOTO 2"). •
Per usare una o due coppie di fotocellule come disposi-
EN
LED STATUS
tivo per il comando automatico della manovra di apertu-
Always off
(TX, RX) – The photocell has no power supply or is
ra, scegliere la funzione FA1 e/o FA2. n 04. Individuare
faulty.
nella Tabella A la sigla scelta in precedenza (es. "FOTO
3 quick flashes, (pause), ...
(TX, RX) – The pair of photocells has not been memo-
2"); osservare lo schema riportato sotto la sigla e inserire
rised in the control unit (or the interface).
i jumper nella fotocellula TX e RX, nella stessa posizione
Very slow flashing
(TX, RX) – The TX is transmitting properly. The RX is
mostrata dallo schema. Nota – Conservare i jumper non
receiving an optimum signal.
utilizzati per un loro eventuale utilizzo futuro (fig. 11). n
Slow flashing
(RX) – The RX is receiving a good signal.
05. Se si desidera installare ulteriori coppie di fotocellule,
Fast flashing
(RX) – The RX is receiving a weak signal.
ripetere per ognuna i punti 03 e 04. Attenzione! – Ogni
Very fast flashing
(RX) – The RX is receiving a poor signal.
coppia di fotocellule deve utilizzare una configurazione di
Always on
(TX, RX) –The RX is receiving no signal.
jumper diversa da quelle utilizzate dalle altre fotocellule
presenti nell'automazione. n 06. Fissare i supporti delle
fotocellule alle pareti, nelle posizioni prestabilite. Atten-
IT
STATO DEL LED
zione! – I due elementi devono essere allineati lungo uno
Sempre spento
(TX, RX) – La fotocellula non è alimentata oppure è
stesso asse (fig. 12-a), in modo da favorire il successivo
guasta.
puntamento ottico tra TX e l'RX. Se le pareti non favo-
3 lampeggi veloci, (pausa), ...
(TX, RX) – La coppia di fotocellule non è memorizzata
riscono questo allineamento si consiglia, in questa fase,
nella centrale (o nell'interfaccia) di comando.
di fissare i supporti delle fotocellule in modo provvisorio
Lampeggio molto lento
(TX, RX) – Il TX trasmette regolarmente. L'RX riceve un
(con nastro adesivo o altro), per poi fissarli in modo de-
segnale ottimo.
finitivo (fig. 12-b) soltanto alla fine del collaudo (capitolo
Lampeggio lento
(RX) – L'RX riceve un segnale buono.
4). Nota – Solo per cancelli scorrevoli a singola o a
Lampeggio veloce
(RX) – L'RX riceve un segnale scarso.
doppia anta – Per evitare interferenze fra i diversi dispo-
Lampeggio molto veloce
(RX) – L'RX riceve un segnale pessimo.
sitivi "BlueBus" presenti, posizionare gli elementi TX e RX
come indicato dai cartigli presenti nella fig. 6 o 7. n 07.
Sempre acceso
(TX, RX) – L'RX non riceve alcun segnale.
Togliere l'alimentazione all'automazione; se è presente la
FR
ETAT DE LA LED
batteria tampone, scollegare anche questa. n 08. Colle-
Toujours éteinte
(TX, RX) – La photocellule n'est pas alimentée ou est
gare gli elementi TX e RX in "parallelo" (fig. 13) utilizzan-
endommagée.
do un cavo bus con due conduttori elettrici; infine col-
3 clignotements rapides,
(TX, RX) – La paire de photocellules n'est pas mémori-
legare il cavo bus al morsetto "BlueBus" presente sulla
(pause), ...
sée dans la logique (ou dans l'interface) de commande.
centrale (o sull'interfaccia) di comando: non è necessario
Clignotement très lent
(TX, RX) – Le TX transmet normalement. Le RX reçoit
rispettare alcuna polarità. n 09. Fotocellule usate co-
un excellent signal.
me "dispositivo di comando automatico della ma-
Clignotement lent
(RX) – Le RX reçoit un bon signal.
novra di apertura" – Se le fotocellule sono state predi-
Clignotement rapide
(RX) – Le RX reçoit un signal faible.
sposte per questa funzione (verificare al punto 03), com-
Clignotement très rapide
(RX) – Le RX reçoit un signal très mauvais.
pletare la loro installazione tagliando il ponte elettrico tra
i punti "A", presenti sulle schede degli elementi TX e RX
Toujours allumée
(TX, RX) – RX ne reçoit aucun signal.
(fig. 14). n 10. Fissare i moduli TX e RX nei loro suppor-
ti (fig. 15). n 11. Alimentare l'automazione ed eseguire
la "procedura di apprendimento dei dispositivi BlueBus",
riportata nel manuale istruzione della centrale (o dell'in-
rezza. Nonostante siano costruite per la massima affi-
terfaccia) di comando. Nota – Se la presente fotocellula
viene usata per sostituire un'altra esistente, è necessario
dabilità, in situazioni estreme possono avere malfunzio-
namenti o guastarsi e il problema potrebbe non esse-
posizionare i jumper nella stessa posizione precedente.
In questo caso non è necessario eseguire la procedura di
re subito evidente. Per questi motivi, e comunque come
buona regola, rispettare le seguenti avvertenze: • Il tran-
apprendimento dei dispositivi. n 12. Eseguire il Collaudo
descritto nel Capitolo 4. n 13. Completare l'installazione
sito attraverso il varco è consentito solo se il cancello o il
portone è completamente aperto e con le ante ferme. •
come indicato nella fig. 18, 19.
È ASSOLUTAMENTE VIETATO transitare mentre il can-
4 - Collaudo dell'installazione
cello o il portone si sta chiudendo o si prevede che la
Per verificare il corretto funzionamento delle fotocellule o
chiusura sia imminente. • Se si verificano segni di mal-
rilevare le interferenze con altri dispositivi, procedere nel
funzionamento togliere immediatamente l'alimentazione
modo seguente: n 01. Alimentare l'automazione e os-
all'automazione; eventualmente utilizzarla in modo esclu-
servare lo stato del Led posizionato sul TX e sull'RX (fig.
sivamente manuale facendo riferimento al suo manuale
15); quindi, trovare nella Tabella B il significato dello sta-
istruzioni. Quindi chiamare immediatamente il personale
to tenendo presente che il funzionamento è ottimale solo
abilitato per il controllo e l'eventuale riparazione.
quando i due Led lampeggiano molto lentamente. Se lo
6 - Manutenzione
stato rilevato non è conforme, effettuare le azioni previste
Eseguire la manutenzione delle fotocellule almeno ogni 6
nella Tabella B. In particolare, se serve migliorare l'alline-
amento tra TX e RX spostare di poco una o entrambe le
mesi, effettuando le seguenti operazioni: 1) sbloccare il
motore come descritto nel suo manuale istruzioni per im-
fotocellule affinché puntino una verso l'altra, fino a quan-
pedire l'azionamento involontario dell'automazione du-
do i loro Led iniziano a lampeggiare molto lentamente (=
rante la manutenzione; 2) controllare l'eventuale presen-
allineamento reciproco ottimale). n 02. Verificare l'effi-
za di umidità, ossidazioni e corpi estranei (ad esempio,
cienza della rilevazione interrompendo l'asse ottico tra le
insetti), ed eliminarne la presenza. In caso di dubbi sosti-
due fotocellule con l'ausilio di un cilindro (Ø = 5 cm; L =
tuire il dispositivo; 3) pulire l'involucro esterno, – in par-
30 cm): passare l'oggetto prima vicino al TX, poi vicino
ticolare, le lenti e i vetrini, – utilizzando un panno morbi-
all'RX e, infine, a una distanza intermedia tra i due (fig.
do leggermente umido. Non usare sostanze detergenti a
16). Durante ogni passaggio accertarsi che l'uscita passi
base di alcol, benzene, abrasivi o similari; queste posso-
dallo stato di "Attivo" a quello di "Allarme", e viceversa, e
no opacizzare le superfici lucide e pregiudicare il funzio-
che l'automazione esegua l'azione prevista, conseguen-
namento della fotocellula; 4) eseguire il controllo funzio-
te all'intervento della fotocellula. n 03. Verificare il corret-
nale come descritto nel capitolo "Collaudo"; 5) il prodot-
to rilevamento dell'ostacolo come richiesto dalla norma
to è progettato per funzionare almeno 10 anni in condi-
EN 12445, utilizzando un parallelepipedo (700 x 300 x
zioni normali; trascorso questo periodo si consiglia di in-
200 mm) con tre facce (una per ogni dimensione) di ma-
tensificare la frequenza degli interventi di manutenzione.
teriale nero opaco e le restanti facce in materiale lucido
7 - Smaltimento
riflettente (fig. 17).
Attenzione! – Dopo aver aggiunto, tolto o sostituito del-
Questo prodotto è parte integrante dell'automazione e
deve essere smaltito con essa, applicando gli stessi cri-
le fotocellule dall'automazione è necessario eseguire di
nuovo il collaudo dell'intera automazione, facendo riferi-
teri riportati nel manuale istruzioni dell'automazione.
mento ai manuali dei vari dispositivi.
8 - Caratteristiche tecniche
5 - Avvertenze per l'uso
Avvertenze: le caratteristiche tecniche sono riferite alla
Attenzione! – Le fotocellule non sono un dispositivo di
temperatura ambientale di 20°C. Nice S.p.a. si riserva il
sicurezza ma soltanto un dispositivo ausiliario alla sicu-
diritto di modificare i prodotti mantenendone comunque
4
5
6
4
2
TX
FOTO 1
FOTO 1 II
FOTO 2
FOTO 2 II
FOTO 3
FA1(*)
FA2(*)
Table B • Tabella B • Tableau B
MEANING
ACTION
Check that on the terminals of the photocell there is a voltage of approximately 8 to 12 V DC. If the voltage
is correct, it is likely that the photocell is faulty.
Make sure that each pair of photocells has a different jumper configuration than the others. Perform the de-
vice learning procedure (Chapter 3, point 11).
None; optimum TX - RX alignment.
None; good operation.
Fair operation; the photocell glass should be cleaned.
Barely operational; clean the photocell glass and realign the TX and RX photocells.
Check if there is an obstacle between the TX and the RX; clean the photocell glass and realign the TX and
RX photocells.
SIGNIFICATO
AZIONE
Accertarsi che sui morsetti della fotocellula sia presente una tensione di circa 8 - 12 Vdc; se la tensione è
corretta è probabile che la fotocellula sia guasta.
Accertarsi che ogni coppia di fotocellule abbia una configurazione di jumper diversa dalle altre. Fare la proce-
dura di apprendimento dei dispositivi (capitolo 3, punto 11).
Nessuna; allineamento TX-RX ottimale.
Nessuna; funzionamento buono.
Funzionamento discreto; si consiglia di eseguire la pulizia dei vetrini.
Funzionamento al limite; eseguire la pulizia dei vetrini; fare di nuovo l'allineamento tra TX e RX.
Verificare se c'è un ostacolo tra TX e RX; eseguire la pulizia dei vetrini; fare di nuovo l'allineamento tra TX e RX.
SIGNIFICATION
ACTION
S'assurer qu'une tension d'environ 8 - 12 Vcc est présente sur les bornes de la photocellule ; si la tension
est correcte, la photocellule est probablement en panne.
S'assurer que chaque paire de photocellules a une configuration de cavaliers différente des autres. Procé-
der à la reconnaissance des dispositifs (chapitre 3, point 11).
Aucune ; alignement TX-RX optimal.
Aucune ; bon fonctionnement.
Fonctionnement moyen : nous conseillons de procéder au nettoyage des verres de protection.
Fonctionnement limite ; procéder au nettoyage des verres de protection ; procéder à un nouvel alignement
entre TX et RX.
Vérifier s'il y a un obstacle entre TX et RX ; procéder au nettoyage des verres de protection ; procéder à un
nouvel alignement entre TX et RX.
la destinazione d'uso e le funzionalità essenziali.
essere richiesta a Nice S.p.A.
n Tipologia del prodotto: rilevatore di presenza per
Ing. Mauro Sordini (Amministratore delegato)
automazioni su cancelli e portoni (tipo D secondo la nor-
ma EN 12453). n Tecnologia adottata: interpolazione
ottica diretta tra TX ed RX, con raggio infrarosso modu-
FRANÇAIS
lato. n Alimentazione/uscita: il dispositivo può essere
collegato esclusivamente a una centrale (o un'interfac-
cia) di comando con tecnologia "BlueBus". Da questa
1 - Consignes de sécurité et d'installation
preleva l'alimentazione elettrica e a questa invia i segna-
li di uscita. n Corrente massima assorbita: 1 unità
n ATTENTION ! INSTRUCTIONS IMPORTANTES :
"Bluebus". n Angolo del raggio emesso dal TX: 20°
pour la sécurité des personnes, il est important de
(± 25%). n Angolo dell'area di rilevamento dell'RX:
lire, de respecter et de conserver ces instructions.
8° (± 25%). n Portata: portata utile 15m; portata mas-
En cas de doutes, demander des précisions au ser-
sima 30m. La portata può ridursi del 50% in presenza di
vice après-vente Nice. Une installation incorrecte
fenomeni atmosferici (nebbia, pioggia, polvere, ecc.). n
compromet la sécurité et cause des dommages.
Capacità di rilevamento: oggetti opachi con dimen-
n Toutes les opérations d'installation, de raccordement,
sioni maggiori di 50 mm, presenti sull'asse ottico tra TX
de programmation et de maintenance doivent être ef-
ed RX (velocità massima di 1,6 m/s). n Numero di fo-
fectuées uniquement par des techniciens qualifiés, en
tocellule collegabili: fino a 7 coppie di fotocellule con
observant les lois, les règlementations, les règlements
funzione di protezione e 2 con funzione di comando di
locaux et les présentes instructions. n L'élément émet-
apertura (il sincronismo automatico evita l'interferenza fra
teur (TX) et l'élément récepteur (RX) du dispositif doivent
i vari rilevatori). n Lunghezza massima del cavo: tutti
être fixés l'un en face de l'autre, de façon permanente,
gli elementi devono essere collegati in parallelo. La som-
sur deux murs verticaux, parallèles entre eux. Ces der-
ma delle lunghezze di tutti i cavi impiegati per collegare
niers doivent être composés d'un matériau solide et ne
i vari elementi tra loro, compreso il cavo che arriva alla
doivent pas transmettre de vibrations aux photocellules.
centrale, non deve superare i 50 m. n Grado di pro-
n L'emplacement choisi pour la fixation doit protéger la
tezione: IP 44 n Utilizzo in atmosfera acida, salina
photocellule contre les chocs accidentels et garantir un
o potenzialmente esplosiva: no. n Temperatura di
accès facile pour l'entretien. n Les photocellules doivent
funzionamento: -20 ÷ +50°C n Montaggio: elementi
être reliés uniquement à une logique (ou à une interface)
fissati uno di fronte all'altro, su due pareti verticali e paral-
de commande Nice, équipée de technologie « BlueBus
lele tra loro o su apposito supporto a colonna. n Siste-
». n Le dispositif doit être utilisé uniquement par inter-
ma per regolare l'allineamento tra TX e RX: no. n
polation directe entre l'élément TX et RX : le fonction-
Dimensioni (elemento singolo) / Peso (somma dei
nement par réflexion est interdit. n Pour augmenter le
due elementi): – EPLB - EPLB/A, 70 x 70(h) x 30 mm /
niveau de sécurité face aux pannes, relier la photocel-
165 g – EPMB - EPMB/A, 50 x 80(h) x 28,5 mm / 143 g
lule à une logique de commande (ou à une interface)
équipée de la fonction « phototest ». n Le produit est
9 - Dichiarazione CE di conformità
protégé contre les infiltrations de la pluie et de la pous-
Nice S.p.A. dichiara che i prodotti: EPLB, EPMB sono
sière. Il peut donc être utilisé à l'extérieur. Dans tous les
conformi ai requisiti essenziali ed alle altre disposizio-
cas, il n'est pas adapté pour une utilisation dans des
ni pertinenti, stabilite dalle direttive 2004/108/CE. La
environnements à l'atmosphère particulièrement riche en
dichiarazione di conformità CE può essere consultata
sel, acide ou potentiellement explosive. Éviter l'installa-
e stampata nel sito www.nice-service.com oppure può
tion dans des zones soumises à la stagnation de l'eau et
• EN - Single leaf sliding gate • IT - Cancello scorrevole ad anta singola • FR - Portail coulissant à un seul vantail • ES - Puerta de corredera de
una hoja • DE - Einteiliges schiebetor • PL - Brama przesuwna z jednym skrzydłem • NL - Schuifpoort met enkele vleugel
RX
TX
RX
TX
FA 2
TX
II
RX
FO TO
TX
1 II
FO TO
FO TO
RX
FT A
1
FO TO
TX
RX
FA 1
RX
TX
RX
RX
2
FO TO
RX
TX
RX
FT B
2 II
FO TO
TX
TX
Tabla B • Tabelle B • Tabela B • Tabel B
ES
ESTADO DEL LED
SIGNIFICADO
ACCIÓN
Siempre apagado
(TX, RX) – La fotocélula no está alimentada o está
Cerciorarse de que en los bornes de la fotocélula haya una tensión de 8 - 12 Vdc; si la tensión es correcta, es
averiada.
probable que la fotocélula esté averiada.
3 parpadeos rápidos, (pau-
(TX, RX) – El par de fotocélulas no está memorizado
Cerciorarse de que cada par de fotocélulas tenga una configuración de jumpers diferente de los otros. Ejecutar el
sa), ...
en la central (o en la interfaz) de mando.
procedimiento de adquisición de los dispositivos (capítulo 3, punto 11).
Parpadeo muy lento
(TX, RX) – El TX transmite regularmente. El RX recibe
Ninguna; alineación TX-RX óptima.
una señal óptima.
Parpadeo lento
(RX) – El RX recibe una señal buena.
Ninguna, funcionamiento correcto.
Parpadeo rápido
(RX) – El RX recibe una señal escasa.
Funcionamiento discreto; se recomienda limpiar los vidrios.
Parpadeo muy rápido
(RX) – El RX recibe una señal pésima.
Funcionamiento al límite; limpiar los vidrios y repetir la alineación entre TX y RX.
Siempre encendido
(TX, RX) – El RX no recibe ninguna señal.
Verificar si hay un obstáculo entre TX y RX; limpiar los vidrios; repetir la alineación entre TX y RX.
DE
LED-STATUS
BEDEUTUNG
AKTION
Immer ausgeschaltet
(TX, RX) – Die Fotozelle wird nicht mit Spannung ver-
Vergewissern Sie sich, dass an den Klemmen der Fotozellen eine Spannung von ca. 8-12 V DC vorhanden ist.
sorgt oder ist defekt.
Falls der Spannungswert korrekt ist, ist die Fotozelle wahrscheinlich beschädigt.
3 Mal schnelles Blinken,
(TX, RX) – Das Fotozellenpaar ist nicht in der Steue-
Vergewissern Sie sich, dass jedes Fotozellenpaar über eine Jumper-Konfiguration verfügt, die sich von den ande-
(Pause), ...
rungszentrale (oder in der Schnittstelle) gespeichert.
ren unterscheidet. Führen Sie das Einlernungsverfahren der Vorrichtungen durch (Kapitel 3, Punkt 11).
Sehr langsames Blinken
(TX, RX) – TX übermittelt regelmäßige Signale. RX
Keine; Ausrichtung TX-RX optimal.
empfängt ein optimales Signal.
Langsames Blinken
(RX) – RX empfängt ein gutes Signal.
Keine; gute Betriebstüchtigkeit
Schnelles Blinken
(RX) – RX empfängt ein mangelhaftes Signal.
Ausreichende Funktionstüchtigkeit; es wird empfohlen, die Gläser zu reinigen.
Sehr schnelles Blinken
(RX) – RX empfängt ein sehr schlechtes Signal.
Betriebsfähigkeit grenzwertig; reinigen Sie die Gläser; führen Sie eine neuerliche Ausrichtung zwischen TX und RX
durch.
Immer eingeschaltet
(TX, RX) – RX empfängt überhaupt kein Signal.
Vergewissern Sie sich, dass kein Hindernis zwischen TX und RX vorhanden ist; reinigen Sie die Gläser; führen Sie
eine neuerliche Ausrichtung zwischen TX und RX durch.
PL
STAN DIODY LED
ZNACZENIE
DZIAŁANIE
Zgaszona
(nadajnik, odbiornik) – Fotokomórka nie jest zasilana
Sprawdzić, czy w zaciskach fotokomórki jest obecne napięcie około 8 - 12 Vdc; jeżeli napięcie jest prawidłowe,
lub jest uszkodzona.
prawdopodobnie nastąpiło uszkodzenie fotokomórki.
3 szybkie mignięcia, (pau-
(nadajnik, odbiornik) – Para fotokomórek nie jest
Należy się upewnić, że każda para fotokomórek posiada konfigurację zworek inną od pozostałych. Przeprowadzić
za), ...
wczytana do centrali sterującej (lub interfejsu).
procedurę wczytywania urządzeń (rozdział 3, punkt 11).
Bardzo wolne miganie
(nadajnik, odbiornik) – Nadajnik nadaje w sposób
Brak; optymalne wyrównanie nadajnika i odbiornika.
prawidłowy. Odbiornik odbiera optymalny sygnał.
Wolne miganie
(odbiornik) – Odbiornik odbiera sygnał dobrej jakości. Brak; prawidłowe funkcjonowanie.
Szybkie miganie
(odbiornik) – Odbiornik odbiera sygnał słabej jakości.
Średnia jakość funkcjonowania; zaleca się wyczyszczenie szybek.
Bardzo szybkie miganie
(odbiornik) – Odbiornik odbiera sygnał złej jakości.
Bardzo złe funkcjonowanie; wyczyścić szybki; wykonać nowe wyrównanie nadajnika i odbiornika.
Świeci
(nadajnik, odbiornik) – Odbiornik nie odbiera żad-
Sprawdzić, czy między nadajnikiem i odbiornikiem znajduje się przeszkoda, wyczyścić szybki; wykonać nowe wy-
nego sygnału.
równanie między nadajnikiem i odbiornikiem.
NL
STATUS VAN DE LED
BETEKENIS
HANDELING
Altijd uit
(TX, RX) – De fotocel wordt niet gevoed of is defect.
Controleer of op de klemmen van de fotocel een spanning van ca. 8 - 12 Vdc aanwezig is; als de spanning cor-
rect is, is de fotocel waarschijnlijk defect.
3 keer snel knipperen,
(TX, RX) – Het paar fotocellen is niet opgeslagen in de
Controleer of iedere paar fotocellen een andere jumperconfiguratie heeft dan de rest. Voer de leerprocedure van
(pauze), ...
besturingseenheid (of in de interface).
de inrichtingen uit (hoofdstuk 3, punt 11).
Heel langzaam knipperend
(TX, RX) – De TX verzendt normaal. De RX ontvangt
Geen; optimale uitlijning TX-RX.
een optimaal signaal.
Langzaam knipperend
(RX) – De RX ontvangt een goed signaal.
Geen; goede werking.
Snel knipperend
(RX) – De RX ontvangt een slecht signaal.
Discrete werking; er wordt aanbevolen de glaasjes te reinigen.
Zeer snel knipperend
(RX) – De RX ontvangt een zeer slecht signaal.
Werking heeft de limiet bereikt; voer de reiniging van de glaasjes uit; voer opnieuw de uitlijning tussen TX en RX uit.
Altijd aan
(TX, RX) – De RX ontvangt geen enkel signaal.
Controleer of er zich een obstakel tussen TX en RX bevindt; voer de reiniging van de glaasjes uit; voer opnieuw de
uitlijning tussen TX en RX uit.
aux inondations. n Les câbles électriques doivent entrer
»). • Pour utiliser une ou deux paires de photocellules
Alimenter l'automatisme et effectuer la « procédure de
dans la photocellule à travers un des trous prévus dans
comme dispositif de commande automatique de la ma-
reconnaissance des dispositifs BlueBus », décrite dans
la partie inférieure de son support ; en outre, les câbles
nœuvre d'ouverture, choisir la fonction FA1 et/ou FA2. n
le manuel d'instructions de la logique (ou de l'interface)
doivent arriver par le bas. Cela empêchera que l'eau ne
04. Identifier dans le Tableau A le sigle choisi précédem-
de commande. Remarque – Si la présente photocellule
goutte à l'intérieur du produit.
ment (par ex. « FOTO 2 ») ; observer le schéma figurant
est utilisée pour en remplacer une autre déjà existante,
sous le sigle et introduire les cavaliers dans les photo-
il faut positionner les cavaliers dans la même position
2 - Description du produit et application
cellules TX et RX, dans la même position indiquée sur le
qu'avant. Dans ce cas, il n'est pas nécessaire de procé-
Cet appareil dispose d'une photocellule, un détecteur de
schéma. Remarque – Conserver les cavaliers non utili-
der à la reconnaissance des dispositifs. n 12. Effectuer
présence de type D, selon la norme EN 12453. Il fait
sés pour une éventuelle utilisation future (fig. 11). n 05.
la procédure d'essai décrite au Chapitre 4. n 13. Com-
partie de la série Era-EP et est destiné à des systèmes
Pour installer des paires de photocellules supplémen-
pléter l'installation tel que décrit fig. 18, 19.
d'automatisme pour portails, portes, portes de garage,
taires, répéter pour chacune d'elles les instructions des
4 - Essai de l'automatisme
etc. Toute autre utilisation que celle décrite doit
points 03 et 04. Attention ! – Chaque paire de photocel-
être considérée comme impropre et interdite ! Le
lules doit utiliser une configuration de cavalier autre que
Pour s'assurer du bon fonctionnement des photocellules
dispositif est équipé de technologie « BlueBus » qui per-
celles utilisées par les autres photocellules présentes
ou pour détecter des interférences avec d'autres dispo-
met la connexion et la communication entre les photo-
dans l'automatisme. n 06. Fixer les supports des photo-
sitifs, procéder comme suit. n 01. Alimenter l'automa-
cellules et la logique (ou l'interface) de commande, avec
cellules aux murs, aux endroits prévus. Attention ! – Les
tisme et observer l'état de la Led située sur TX et sur RX
deux conducteurs électriques. La connexion a lieu « en
deux éléments doivent être alignés sur un axe unique
(fig. 15) ; trouver ensuite dans le Tableau B à quoi cor-
parallèle » ; une fonction spéciale est attribuée à chaque
(fig. 12-a), de manière à favoriser ensuite le pointement
respond cet état en sachant que le fonctionnement est
paire de photocellules dans l'automatisme, à travers l'in-
optique entre TX et RX. Si les murs ne favorisent pas ce
optimal quand les deux Led clignotent très lentement. Si
sertion de cavaliers. Le produit est utilisable avec les dis-
alignement, nous conseillons, au cours de cette phase,
l'état constaté n'est pas conforme, effectuer les actions
positifs de la série « FT210B », équipés de technologie «
de fixer les supports des photocellules de façon provi-
prévues dans le Tableau B. S'il s'avère notamment né-
BlueBus » (voir fig. 6 et 7), qui permettent de résoudre
soire (avec du ruban adhésif ou autre), et de les fixer en-
cessaire d'améliorer l'alignement entre TX et RX, dépla-
le problème des connexions électriques des bords sen-
suite de façon définitive (fig. 12-b) uniquement à la fin de
cer légèrement une photocellule ou les deux afin qu'elles
sibles sur des vantaux en mouvement.
la procédure d'essai (chapitre 4). Remarque – Unique-
pointent l'une vers l'autre, jusqu'à ce que leurs Led com-
ment pour portails coulissants à un ou à deux van-
3 - Installation et connexions
mencent à clignoter très lentement (= alignement réci-
taux – Pour éviter des interférences entre les différents
proque optimal). n 02. Vérifier l'efficacité de la détection
TRÈS IMPORTANT ! – Pour obtenir l'alignement op-
dispositifs « BlueBus » présents, positionner les éléments
en interrompant l'axe optique entre les deux photocel-
tique entre TX et RX, il faut s'assurer, avant l'installa-
TX et RX comme indiqué par les encadrements présents
lules à l'aide d'un cylindre (Ø = 5 cm, L = 30 cm) : pas-
tion, que les murs choisis pour la fixation des élé-
à la fig. 6 ou 7. n 07. Couper l'alimentation de l'auto-
ser l'objet tout d'abord à proximité du TX, puis du RX et,
ments sont parfaitement parallèles entre eux. S'ils
matisme ; en cas de présence de batterie tampon, la
enfin, à une distance intermédiaire entre les deux (fig. 16).
ne le sont pas, nous conseillons l'utilisation de photocel-
déconnecter elle aussi. n 08. Connecter les éléments TX
Lors de chaque passage, s'assurer que la sortie passe
lules orientables (par ex. EPLOB) car les photocellules
et RX en « parallèle » (fig. 13) en utilisant un câble bus à
de l'état de « actif » à « alarme », et vice-versa, et que l'au-
présentes ne disposent pas d'un système permettant de
deux conducteurs électriques ; connecter enfin le câble
tomatisme effectue l'action prévue suite à l'intervention
régler l'alignement après leur fixation définitive.
bus à la borne « BlueBus » présente sur la logique (ou
de la photocellule. n 03. Vérifier la bonne détection de
n 01. Avant de procéder à l'installation, consulter atten-
sur l'interface) de commande : il n'est pas nécessaire
l'obstacle comme l'exige la norme EN 12445, en utilisant
tivement les avertissements du chapitre 1 et les données
de respecter une polarité quelconque. n 09. Photocel-
un parallélépipède (700 x 300 x 200 mm) avec trois faces
du chapitre 8. n 02. Démonter et préparer les photocel-
lules utilisées comme « dispositif de commande
(une pour chaque dimension) de matériau noir mat et les
lules (fig. 1, 2, 3, 4, 5). n 03. Consulter la notice d'ins-
automatique de la manœuvre d'ouverture » – Si les
autres faces en matériau brillant réfléchissant (fig. 17).
tructions de votre logique (ou interface) de commande
photocellules ont été prévues pour cette fonction (véri-
(ou bien les fig. 6, 7, 8, 9, 10) pour choisir la fonction
fier au point 03), compléter leur installation en coupant
Attention ! – Après avoir ajouté, enlevé ou remplacé des
de détection et la position d'installation associée, que
le pont électrique entre les points « A », présents sur
photocellules de l'automatisme, il faut effectuer une nou-
vous souhaitez attribuer à la paire de photocellules ; pre-
les cartes des éléments TX et RX (fig. 14). n 10. Fixer
velle procédure d'essai de tout l'automatisme, en suivant
nez note de leur sigle d'identification (par ex. « FOTO 2
les modules TX et RX sur leurs supports (fig. 15). n 11.
les instructions des notices des différents dispositifs.
7
• EN - Synchronised leafs sliding gate • IT - Cancello scorrevole ad ante contrapposte • FR - Portail coulissant
à vantaux opposés • ES - Puerta de corredera de hojas contrapuestas • DE - Schiebetor mit entge-
gengesetzt angebrachten torflügeln • PL - Brama przesuwna z dwoma przeciwleżącymi
skrzydłami • NL - Schuifpoort met tegengestelde vleugels
TX
TX
RX
RX
TX
2 II
FO TO
TX
TX
TX
FT C
FA 2
RX
RX
II
FO TO
1 II
RX
FO TO
RX
FO TO
TX
1
FO TO
RX
RX
FA 1
TX
2
FO TO
FT B
RX
TX
TX
RX
Nice
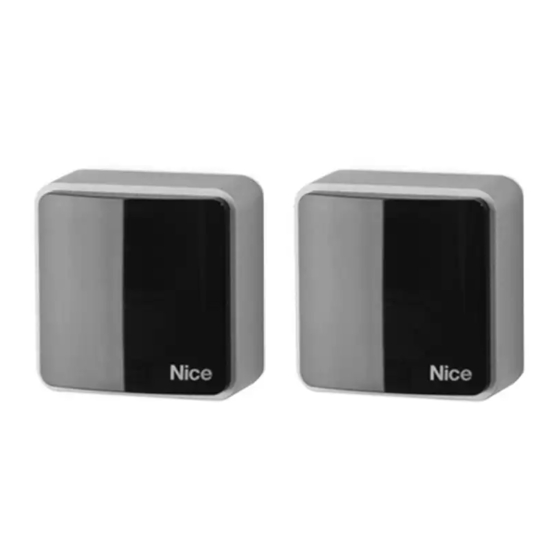
Photocells
EPLB
EN - Instructions and warnings for
installation and use
EPLB/A
EPMB
IT - Istruzioni ed avvertenze per
l'installazione e l'uso
EPMB/A
FR - Instructions et avertissements
EPMB - EPMB/A
pour l'installation et l'utilisation
EPLB - EPLB/A
ES - Instrucciones y advertencias
para la instalación y el uso
DE - Installierungs-und
Gebrauchsanleitungen und
Hinweise
PL - Instrukcje i ostrzeżenia do
instalacji i użytkowania
IS0262A01MM_24-02-2016
Nice SpA
NL - Aanwijzingen en aanbe-
Oderzo TV Italia
info@niceforyou.com
velingen voor installatie en gebruik
www.niceforyou.com
5 - Recommandations pour l'utilisation
mentation / sortie : le dispositif ne peut être connecté
qu'à une logique (ou à une interface) de commande à
Attention ! - Les photocellules ne sont pas un disposi-
technologie « BlueBus ». C'est de celle-ci qu'il prélève
tif de sécurité mais uniquement un dispositif auxiliaire de
son alimentation électrique et c'est à elle qu'il envoie les
sécurité. Même si elles sont construites pour une fiabilité
signaux de sortie. n Courant maximum absorbé : 1
maximale, dans les situations extrêmes, elles peuvent mal
unité « BlueBus ». n Angle du rayon émis par TX :
fonctionner ou tomber en panne, et le problème risque
20° (+/- 25 %). n Angle de la détection de RX : 8° (±
de ne pas être immédiatement évident. Pour ces raisons,
25%). n Portée : portée utile 15 m ; portée maximum
et comme bonne règle de base, prendre les précautions
30 m. La portée peut être réduite de 50 % en présence
suivantes : • Le passage n'est possible que si le por-
de phénomènes atmosphériques (brouillard, pluie, pous-
tail ou la porte est complètement ouverte et ses vantaux
sière, etc.). n Capacité de détection : objets opaques
à l'arrêt. • IL EST STRICTEMENT INTERDIT de passer
ayant des tailles supérieures à 50 mm, présents sur l'axe
quand le portail ou la porte se referme ou si on s'attend à
optique entre TX et RX (vitesse maximale de 1,6 m/s). n
ce que la fermeture soit imminente. • En cas de mauvais
Nombre de photocellules raccordables : jusqu'à 7
fonctionnement, couper immédiatement l'alimentation de
paires de photocellules avec fonction de protection et 2
l'automatisme ; l'utiliser au besoin uniquement en mode
avec fonction de commande d'ouverture (la synchroni-
manuel en se référant à sa notice d'instruction. Ensuite,
sation automatique évite l'interférence entre les différents
appeler immédiatement un technicien qualifié pour une
détecteurs). n Longueur maximale du câble : tous les
inspection et, éventuellement, une réparation.
éléments doivent être connectés en parallèle. La somme
6 - Entretien
des longueurs de tous les câbles utilisés pour raccor-
der les divers éléments entre eux, y compris le câble qui
Effectuer l'entretien des photocellules, au moins tous les
arrive à la logique de commande, ne doit pas dépas-
6 mois, en procédant comme suit : 1) débrayer le moteur
ser 50 m de long. n Indice de protection : IP 44 n
comme décrit dans sa notice d'instructions pour éviter
Utilisation dans une atmosphère acide, saline ou
toute manipulation involontaire de l'automatisme pen-
potentiellement explosive : non. n Température de
dant les travaux d'entretien ; 2) vérifier la présence éven-
fonctionnement : de -20 à +50 °C n Installation : élé-
tuelle d'humidité, d'oxydation et de corps étrangers (par
ments fixés l'un en face de l'autre, sur deux murs ver-
exemple, insectes), et éliminer le cas échéant. En cas de
ticaux, parallèles entre eux ou sur un support colonne
doute, remplacer le dispositif ; 3) nettoyer le boîtier et
prévu à cet effet. n Système pour régler l'aligne-
notamment les lentilles et les vitres, en utilisant un chiffon
ment entre TX et RX : non. n Dimensions (élément
doux imbibé d'un peu d'eau. Ne pas utiliser de produits
individuel) / Poids (somme des deux éléments) : –
de nettoyage contenant de l'alcool, du benzène, des
EPLB - EPLB/A, 70 x 70(h) x 30 mm / 165 g – EPMB
abrasifs ou autres produits similaires ; ils risquent d'opa-
- EPMB/A, 50 x 80(h) x 28,5 mm / 143 g
cifier les surfaces brillantes et de compromettre le fonc-
tionnement de la photocellule ; 4) effectuer le contrôle
9 - Déclaration de conformité
du fonctionnement comme décrit dans le chapitre « Es-
Nice S.p.A. déclare que les produits : EPLB, EPMB sont
sais » ; 5) le produit est conçu pour fonctionner au moins
conformes aux exigences essentielles et autres disposi-
10 ans dans des conditions normales, après quoi nous
tions pertinentes, prévues par les directives 2004/108/
conseillons d'augmenter la fréquence des opérations de
CE. La déclaration de conformité CE peut être consultée
maintenance.
et imprimée sur le site www.nice-service.com ou bien
7 - Mise au rebut
peut être demandée à Nice S.p.A.
Ce produit est partie intégrante de l'automatisme et doit
Ing. Mauro Sordini (Chief Executive Officer)
être éliminé avec ce dernier, en appliquant les mêmes
critères indiqués dans le manuel d'instruction de l'auto-
matisme.
8 - Caractéristiques techniques
Avertissements : les caractéristiques techniques se ré-
fèrent à une température ambiante de 20 °C. Nice S.p.a.
se réserve le droit de modifier les produits, tout en conser-
vant l'usage prévu et les caractéristiques essentielles.
n Type de produit : détecteur de présence pour auto-
matisme de portails et portes (type D selon la norme EN
12453). n Technologie adoptée : interpolation optique
directe entre TX et RX, avec infrarouge modulé. n Ali-
8
• EN - Swing gate • IT - Cancello a battente • FR - Portail battant • ES - Puerta de batiente • DE - Drehtor
• PL - Brama skrzydłowa • NL - Kanteldeur voor garage
FA 2
II
FO TO
FO TO
2
FO TO
1 II
FO TO
FO TO
1
FO TO
2 II
FA 1
Advertisement

Related Manuals for Nice EPLB/A


Summary of Contents for Nice EPLB/A
- Page 1 To make sure that the photocells are operating proper- EPLB - EPLB/A, 70 x 70(h) x 30 mm / 165 g – EPMB para la instalación y el uso mostrata dallo schema. Nota – Conservare i jumper non receiving an optimum signal.
- Page 2 – EPLB - EPLB/A, 70 x 70(h) x 30 mm / 165 g – EPMB die in Tabelle B vorgesehenen Maßnahmen durch. Falls nami z połyskliwego materiału odblaskowego (rys.