Table of Contents
Advertisement
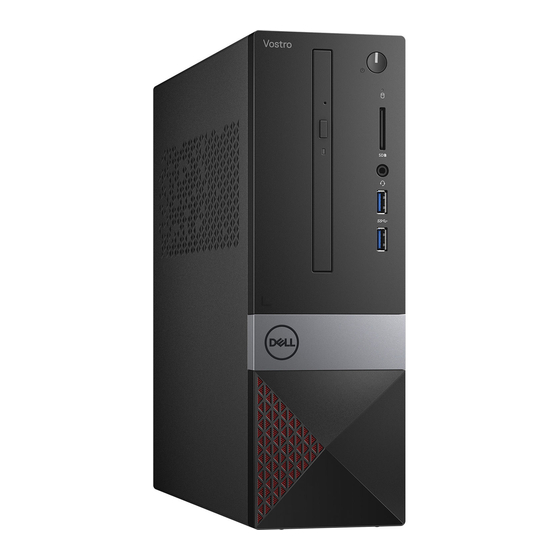
Quick Links
Advertisement
Table of Contents

Related Manuals for Dell Vostro 3470


Summary of Contents for Dell Vostro 3470
- Page 1 Dell Vostro 3470 Service Manual Regulatory Model: D13S Regulatory Type: D13S003...
- Page 2 A WARNING indicates a potential for property damage, personal injury, or death. © 2018 Dell Inc. or its subsidiaries. All rights reserved. Dell, EMC, and other trademarks are trademarks of Dell Inc. or its subsidiaries. Other trademarks may be trademarks of their respective owners.
-
Page 3: Table Of Contents
Contents 1 Working on your computer..........................5 Safety instructions................................5 Turning off your computer — Windows 10........................5 Before working inside your computer..........................5 After working inside your computer..........................6 2 Technology and components..........................7 USB features..................................7 USB 3.0/USB 3.1 Gen 1 (SuperSpeed USB)......................7 Speed.....................................7 Applications...................................8 Compatibility................................. - Page 4 System board..................................64 Removing the system board.............................64 Installing the system board............................69 4 Troubleshooting............................75 Enhanced Pre-Boot System Assessment — ePSA diagnostics................75 Running the ePSA Diagnostics..........................75 Diagnostics..................................75 Diagnostic error messages..............................76 System error messages..............................79 5 Getting help..............................80 Contacting Dell.................................80 Contents...
-
Page 5: Working On Your Computer
Damage due to servicing that is not authorized by Dell is not covered by your warranty. Read and follow the safety instructions that came with the product. -
Page 6: After Working Inside Your Computer
Turn off your computer. Disconnect all network cables from the computer. CAUTION: To disconnect a network cable, first unplug the cable from your computer and then unplug the cable from the network device. Disconnect your computer and all attached devices from their electrical outlets. Press and hold the power button while the computer is unplugged to ground the system board. -
Page 7: Technology And Components
Technology and components USB features Universal Serial Bus, or USB, was introduced in 1996. It dramatically simplified the connection between host computers and peripheral devices like mice, keyboards, external drivers, and printers. Let's take a quick look on the USB evolution referencing to the table below. Table 1. -
Page 8: Applications
• An additional physical bus that is added in parallel with the existing USB 2.0 bus (refer to the picture below). • USB 2.0 previously had four wires (power, ground, and a pair for differential data); USB 3.0/USB 3.1 Gen 1 adds four more for two pairs of differential signals (receive and transmit) for a combined total of eight connections in the connectors and cabling. -
Page 9: Hdmi 1.4
the new protocol, the connector itself remains the same rectangular shape with the four USB 2.0 contacts in the exact same location as before. Five new connections to carry receive and transmitted data independently are present on USB 3.0/USB 3.1 Gen 1 cables and only come into contact when connected to a proper SuperSpeed USB connection. -
Page 10: Removing And Installing Components
The procedures in this document require the following tools: • Phillips # 1 screwdriver • Phillips # 2 screwdriver • Small plastic scribe Screw size list Table 2. Vostro 3470 Component Screw type Quantity Image Color System board 6-32xL6.35 Black Power Supply Unit 6-32xL6.35... -
Page 11: System Board Layout
System board layout Power switch connector M.2 connector for WIFI card Coin cell battery connector SATA power connector (Black) SATA0 connector (Blue) SATA3 connector (Black) ATX Power Connector(ATX_SYS) SATA2 connector (White) Service mode / password clear/CMOS clear jumpers PCI-e X16 Connector(SLOT2) PCI-e X1 Connector(SLOT1) M.2 SATA Connector for SSD Processor socket... - Page 12 Lift and remove the cover from the computer . Removing and installing components...
-
Page 13: Installing The Cover
Installing the cover Slide the cover from the back of the computer, until the latches snap-in [1]. Replace the two 6-32xL6.35 screws to secure the cover [2]. Follow the procedures in After Working Inside Your Computer Front Bezel Removing the front bezel Follow the procedure in Before working inside your computer. - Page 14 b Rotate the front bezel away from the computer [1] and pull to release the tabs on the front bezel from the front-panel slots [2]. Removing and installing components...
-
Page 15: Installing The Front Bezel
Installing the front bezel Hold the bezel and ensure that the hooks on the tabs snap into the notches on the computer [1]. Rotate the front bezel toward the front of the computer [2]. Removing and installing components... - Page 16 Press the front bezel until the tabs snap in. Removing and installing components...
-
Page 17: Cooling Shroud
Install the cover. Follow the procedure in After Working Inside Your Computer. Cooling shroud Removing the cooling shroud NOTE: Cooling shroud is not a mandatory removal but recommended for easier access to the cables. Follow the procedure in Before working inside your computer. -
Page 18: Installing The Cooling Shroud
Installing the cooling shroud Align the tabs on the cooling shroud with the securing slots on the computer. Lower the cooling shroud into the chassis until the notches secure with a click sound and the cooling shroud is firmly seated. Removing and installing components... -
Page 19: Expansion Card
NOTE: Make sure the cooling shroud is placed such that the 'REAR' mark on the cooling shroud is towards the rear side of the system. Install the cover. Follow the procedure in After Working Inside Your Computer. Expansion card Removing the PCIe X1 expansion card-optional Follow the procedure in Before working inside your computer. - Page 20 b Remove the expansion card from the slot on the computer Removing and installing components...
-
Page 21: Installing The Pcie X1 Expansion Card-Optional
Installing the PCIe X1 expansion card–optional Insert the expansion card on the slot. Removing and installing components... - Page 22 Push the metal tab until it snaps in place. Removing and installing components...
-
Page 23: Removing The Pcie X16 Expansion Card-Optional
Install the cover Follow the procedure in After Working Inside Your Computer. Removing the PCIe X16 expansion card–optional Follow the procedure in Before working inside your computer. Remove the cover. Perform the following steps to remove the expansion card: Pull the metal tab to release the expansion card. Removing and installing components... - Page 24 b Pull the card-retention tab [1], and remove the expansion card from the slot on the computer [2]. Removing and installing components...
-
Page 25: Installing The Pcie X16 Expansion Card-Optional
Installing the PCIe X16 expansion card–optional Insert the expansion card on the slot [1]. Push the card-retention latch to secure the expansion card [2]. Removing and installing components... - Page 26 Push the metal tab until it snaps in place. Removing and installing components...
-
Page 27: Installing Pcie Expansion Card In Slot 1- Optional
Install the cover Follow the procedure in After Working Inside Your Computer. Installing PCIe expansion card in slot 1– optional Pull the release latch to open . Removing and installing components... - Page 28 To remove the PCIe bracket as shown below, insert a flathead screwdriver in the hole of PCIe bracket [1], and repeatedly spin screwdriver from 0-45 degrees to release the bracket [2]. Removing and installing components...
- Page 29 Insert the PCIe expansion card to the connector on the system board. Removing and installing components...
-
Page 30: 3.5-Inch Hard Drive Chassis
Close the release latch. Install the: cover Follow the procedure in After working inside your computer. 3.5-inch hard drive chassis Removing the 3.5-inch hard drive chassis Follow the procedure in Before working inside your computer. Remove the: cover front bezel Disconnect the power and the data cables from the hard drive [1]. - Page 31 Slide the 3.5-inch hard drive chassis and lift it from the system. Removing and installing components...
-
Page 32: Installing The 3.5-Inch Hard Drive Chassis
Installing the 3.5-inch hard drive chassis Slide the 3.5-inch hard drive chassis into the drive bay. Removing and installing components... - Page 33 Replace the two 6-32xL3.5 screws to secure the 3.5-inch hard drive chassis to the computer [1]. Connect the data and power cables to the hard drive [2]. Removing and installing components...
-
Page 34: 3.5-Inch Hard Drive
Install: front bezel cover Follow the procedures in After Working Inside Your Computer. 3.5-inch hard drive Removing the 3.5-inch hard drive from the hard drive bracket Follow the procedures in Before Working Inside Your Computer. Remove: cover front bezel 3.5-inch hard drive chassis Follow the steps to remove hard drive: Remove the two 6-32xL3.6 screws that secure the hard drive to the bracket [1]. - Page 35 b Slide and remove the hard drive from the bracket [2]. Installing the 3.5-inch hard drive into the hard drive bracket Slide the hard drive into the hard drive bracket [1]. Replace the two 6-32xL3.6 screws to secure the hard drive to the bracket [2]. Install: 3.5-inch hard drive chassis front bezel...
-
Page 36: Drive Cage
Drive cage Removing the drive cage Follow the procedure in Before working inside your computer. Remove the: cover front bezel cooling shroud 3.5-inch hard drive chassis Follow the steps to release the drive cage: Remove the 6-32xL6.35 screw that secures the drive cage to the drive bay [1]. b Press the blue tab to release the drive cage [2]. -
Page 37: Installing The Drive Cage
Installing the drive cage Place the drive cage in the chassis [1] and connect the data and power cables to the optical drive [2]. Removing and installing components... - Page 38 Insert the drive cage into the slot until it clicks into place [1]. Replace the 6-32xL6.35 screw to secure the drive cage to the chassis [2]. Removing and installing components...
-
Page 39: Optical Drive
Install the: 3.5-inch hard drive chassis cooling shroud front bezel cover Follow the procedure in After Working Inside Your Computer. Optical drive Removing the optical drive bracket Follow the procedure in Before working inside your computer. Remove the: cover front bezel cooling shroud 3.5-inch hard drive chassis drive cage... - Page 40 Installing the optical drive bracket Slide the optical drive into the drive bay until it snaps [1]. Tighten the three M2x2 screws to secure the optical drive to the bracket [2]. Install the: drive cage 3.5-inch hard drive chassis cooling shroud front bezel cover Follow the procedures in...
-
Page 41: M.2 Sata Ssd
M.2 SATA SSD Removing M.2 SATA SSD Follow the procedure in Before working inside your computer. Remove the: cover To remove the M.2 SATA SSD: Pull the blue tab that secures the M.2 SATA SSD to the system board [1]. b Slide out the M.2 SATA SSD from the connector on the system board [2]. -
Page 42: Wlan Card
Install the: cover Follow the procedure in After working inside your computer. WLAN card Removing the WLAN card Follow the procedure in Before working inside your computer. Remove the: cover front bezel cooling shroud 3.5-inch hard drive chassis optical drive Perform the following steps to remove the WLAN card from the computer: Remove the M2L3.5 screw to release the plastic tab that secures the WLAN card to the computer [1, 2]. -
Page 43: Installing The Wlan Card
b Disconnect the WLAN cables from the connectors on the WLAN card [3]. Remove the WLAN card from its connector on the system board [4]. Installing the WLAN card Insert the WLAN card to the connector on the system board [1]. Connect the WLAN cables to the connectors on the WLAN card[ 2] . -
Page 44: Heat Sink Assembly
Install: optical drive 3.5-inch hard drive chassis cooling shroud front bezel cover Follow the procedure in After Working Inside Your Computer. Heat sink assembly Removing the heat sink assembly Follow the procedure in Before working inside your computer. Remove the: cover cooling shroud Follow the steps to remove the heat sink assembly:... - Page 45 Disconnect the heat sink assembly cable from the system board. b Remove the screws securing the heatsink assembly in a sequential order [1,2,3,4]. Lift the heat sink and remove it from the chassis. Removing and installing components...
-
Page 46: Installing The Heat Sink Assembly
Installing the heat sink assembly Place the heat sink assembly in the slot by aligning with the screw holders. Tighten the screws in a sequential order to secure the heat sink assembly to the system board [1,2,3,4]. Removing and installing components... - Page 47 Connect the heat sink assembly cable to the connector on the system board. Removing and installing components...
-
Page 48: Memory Modules
Install: cooling shroud cover Follow the procedure in After Working Inside Your Computer. Memory modules Removing the memory module Follow the procedure in Before working inside your computer. Remove the: . cover front bezel 3.5-inch hard drive chassis drive cage Cooling shroud To remove the front memory module: Pull the clips securing the memory module until the memory module pops up [1]. -
Page 49: Installing The Memory Module
Installing the memory module Insert the memory module into the memory module socket until the clips secure the memory module. Removing and installing components... -
Page 50: Power Switch
Install the: . cooling shroud drive cage 3.5-inch hard drive chassis front bezel cover Follow the procedure in After working inside your computer. Power switch Removing power switch Follow the procedure in Before working inside your computer. Remove the: cover front bezel 3.5-inch hard drive chassis Removing and installing components... - Page 51 optical drive assmebly To remove the power switch: Remove the 6-32xL6.35 screw that secures the IO bracket [1] to the chassis and open the IO bracket[2]. b Disconnect the power switch cable from the connector on the system board [1]. Press the power switch retention tabs [2] and pull the power switch out from the computer [3].
-
Page 52: Installing The Power Switch
Installing the power switch Slide the power switch module into the slot on the chassis until it clicks into place [1]. Connect the power switch cable to the connector on the system board [2]. Removing and installing components... - Page 53 Push the IO bracket until it secures to the chassis [1]. Replace the 6-32xL6.35 screw to secure the IO bracket to the system [2]. Removing and installing components...
-
Page 54: Power Supply Unit
Install the: drive cage 3.5-inch hard drive chassis front bezel cover Follow the procedure in After working inside your computer. Power supply unit Removing the power supply unit PSU Follow the procedure in Before working inside your computer. Remove the: cover front bezel cooling shroud... - Page 55 Perform the following steps to remove the PSU: Remove the three 6-32xL6.35 screws that secure the PSU [1]. b Press the blue release tab to release the PSU [2]. Removing and installing components...
- Page 56 Slide and lift the PSU from the computer. Removing and installing components...
-
Page 57: Installing The Power Supply Unit Psu
Installing the power supply unit PSU Slide the PSU towards the back of the computer until it snaps into place. Removing and installing components... - Page 58 Replace the three 6-32xL6.35 screws to secure the power supply unit to the computer. Removing and installing components...
- Page 59 Route the PSU cables through the placeholder. Connect the PSU cables to their connectors on the system board. Removing and installing components...
-
Page 60: Coin Cell Battery
Install the: drive cage 3.5-inch hard drive chassis cooling shroud front bezel cover Follow the procedure in After Working Inside Your Computer. Coin cell battery Removing the coin cell battery Follow the procedures in Before working inside your computer. Remove the: cover front bezel cooling shroud... -
Page 61: Installing The Coin Cell Battery
Press the coin cell battery on the open space of the socket using your finger so that the battery pops up from the socket [1]. b Lift the coin cell battery out of the computer [2]. Installing the coin cell battery Place the coin cell battery in its slot on the system board [1] and press until it snaps in place [2].. -
Page 62: Processor
Install the: drive cage 3.5-inch hard drive chassis cooling shroud front bezel cover Follow the procedures in After Working Inside Your Computer. Processor Removing the processor Follow the procedure in Before working inside your computer. Remove the: cover cooling shroud heatsink assembly Removing and installing components... -
Page 63: Installing The Processor
To remove the processor: Press the release lever down and then move it outward to release it from the retention hook [1]. CAUTION: The processor socket pins are fragile and can be permanently damaged. Be careful not to bend the pins in the processor socket when removing the processor out of the socket. -
Page 64: System Board
Install the: heat sink assembly cooling shroud cover Follow the procedure in After working inside your computer. System board Removing the system board Follow the procedure in Before working inside your computer. Remove the cover front bezel 3.5-inch hard drive chassis drive cage memory module Removing and installing components... - Page 65 cooling shroud expansion card (optional) M.2 SATA SSD heat sink assembly WLAN card Follow the steps to open the IO bracket: Remove the 6-32xL6.35 screw that secures the IO bracket to the chassis [1]. b Pull the IO bracket to open the IO bracket [2]. Disconnect the following cables from the system board- ODD SATA cable and PSU cable [1], HDD SATA cable and HDD/ODD power cable [2], power switch cable [3], and PSU cable [4] Removing and installing components...
- Page 66 Follow the steps to remove the system board: Remove the six 6-32xL6.35 screws that secure system board to the chassis. Removing and installing components...
- Page 67 b Pull the system board towards the front of the system. Removing and installing components...
- Page 68 Lift the system board from the chassis. Removing and installing components...
-
Page 69: Installing The System Board
Installing the system board Insert the system board and ensure that ports are aligned to the holes on the back panel. NOTE: Make sure to open the IO bracket before placing the system board in the system. Removing and installing components... - Page 70 Push the system board towards the rear side of the system. Removing and installing components...
- Page 71 Replace the six 6-32xL6.35 screws to secure the system board. Removing and installing components...
- Page 72 Connect the following cables to the system board- PSU cable [1], power switch cable [2], HDD SATA cable and HDD/ODD power cable [3], ODD SATA cable and PSU cable [4]. Removing and installing components...
- Page 73 Close the IO bracket [1] and replace the 6-32xL6.35 screw to secure the IO bracket to the chassis [2]. Removing and installing components...
- Page 74 Install the: heat sink assembly WLAN card expansion card (optional) M.2 SATA SSD drive cage 3.5-inch hard drive chassis cooling shroud memory module front bezel cover Follow the procedures in After Working Inside Your Computer. Removing and installing components...
-
Page 75: Troubleshooting
The items detected are listed and will be tested If there are any issues, error codes are displayed. Note the error code and validation number and contact Dell. To run a diagnostic test on a specific device Press Esc and click Yes to stop the diagnostic test. -
Page 76: Diagnostic Error Messages
One or more memory modules may be faulty or improperly seated. Reinstall the memory modules or, if necessary, replace them. DISK C: FAILED INITIALIZATION The hard drive failed initialization. Run the hard drive tests in Dell Diagnostics. DRIVE NOT READY The operation requires a hard drive in the bay before it can continue. - Page 77 Shut down the computer, remove the hard drive, and boot the computer from an optical drive. Then, shut down the computer, reinstall the hard drive, and restart the computer. If the problem persists, try another drive. Run the Hard Disk Drive tests in Dell Diagnostics. HARD-DISK DRIVE FAILURE The hard drive does not respond to commands from the computer.
- Page 78 The reserve battery that supports the system configuration settings may require recharging. Connect your computer to an electrical outlet to charge the battery. If the problem persists, Contact Dell. TIME-OF-DAY NOT SET-PLEASE RUN THE SYSTEM SETUP The time or date stored in the system setup program does not PROGRAM match the system clock.
-
Page 79: System Error Messages
[nnnn]. For help in times for the same error. resolving this problem, please note this checkpoint and contact Dell Technical Support CMOS checksum error RTC is reset, BIOS Setup default has been loaded. CPU fan failure CPU fan has failed. -
Page 80: Getting Help
Dell product catalog. Dell provides several online and telephone-based support and service options. Availability varies by country and product, and some services may not be available in your area. To contact Dell for sales, technical support, or customer service issues: Go to Dell.com/support.
Need help?
Do you have a question about the Vostro 3470 and is the answer not in the manual?
Questions and answers