Table of Contents
Advertisement
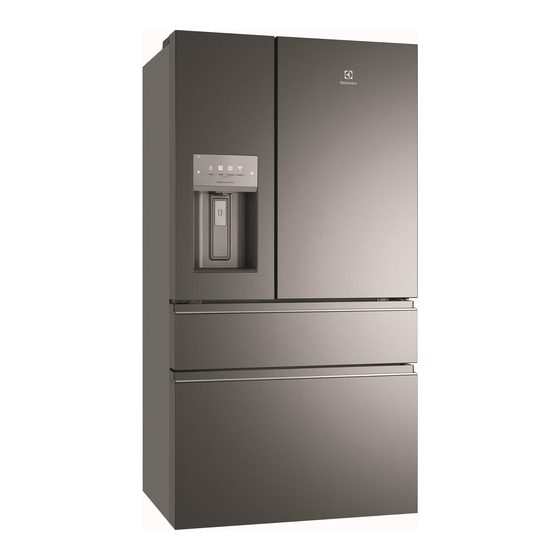
EHE6899
Refrigeration
REGISTER YOUR FRIDGE
WITH YOUR SMARTPHONE
1
Locate the label
on the inside of
your fridge
Easy register with your smartphone
1. Photograph the camera icon,
including the 4 dots( ).
2. Then text it to 0488 446 622
(Australia only)
00000000000
2
Photograph the
camera icon, including
the 4 dots ( )
3
Text image to
0488 446 622
(Australia only)
© 2017 Electrolux Home Products Pty Ltd. EST_PhotoRegister_Fridge_70x70_Dec17
User manual
00000000000
Advertisement
Table of Contents

Related Manuals for Electrolux EHE6899


Summary of Contents for Electrolux EHE6899
-
Page 1: User Manual
4 dots( ). 2. Then text it to 0488 446 622 (Australia only) 00000000000 Photograph the camera icon, including the 4 dots ( ) 00000000000 Text image to 0488 446 622 (Australia only) © 2017 Electrolux Home Products Pty Ltd. EST_PhotoRegister_Fridge_70x70_Dec17... -
Page 2: Conditions Of Use
CONGRATULATIONS CONTENTS rtant ……...…………….… Dear Customer, at a ……………………….……....……. Congratulations and thank you for choosing our refrigerator. We are sure you will find your new ………………..………....…... refrigerator a pleasure to use. Before you use the relevant sections of this manual, which provides a descript ion of your refrigerator and its functions. -
Page 3: Important Safety Instructions
IMPORTANT SAFETY INSTRUCTIONS • The plug must be accessible when the appliance is in NOTE: You must read these warnings carefully position. before installing or using the refrigerator. If you need assistance, contact your customer care • Never try to repair the refrigerator yourself, only centre. -
Page 4: Features At A Glance
FEATURES AT A GLANCE Ice Maker TasteLock crisper Bottle storage bin Air distributor - Multiflow TasteLock crisper Adjustable left hinge Deodoriser Left Snack Zone compartment Adjustable right hinge Right Snack Zone Compartment Convertible drawer Water filter Upper fixed door bin... -
Page 5: Installing Your New Appliance
INSTALLING YOUR NEW APPLIANCE Unpacking ENVIRONMENT Most of the packing materials are recyclable. Please Front face of bench dispose of those materials through your local aligned to front corner recycling depot or by placing them in appropriate collection containers. edge of cabinet. Important –... -
Page 6: Door Opening
Door opening To make final door height adjustments: 1. Open freezer drawer to make lower hinge visible. Your refrigerator should be positioned to allow easy access to a counter when removing food. For best use of 2. Insert 6mm Allen wrench into the shaft of the lower refrigerator drawers and freezer baskets, the refrigerator hinge. -
Page 7: Connecting The Water Supply
CONNECTING THE WATER SUPPLY WARNING To avoid electric shock, which can cause death or Figure 1 severe personal injury, disconnect the refrigerator from electrical power before connecting a water supply line to the refrigerator. A - Adapter ½ to ¼ inch to connect the water supply outlet to the water supply line. - Page 8 Replacement water filters are available from Electrolux Home Products Spare Parts Centres and can be posted to you for your convenience (refer to spare parts contact numbers on the warranty page).
-
Page 9: About The User Interface
ABOUT THE USER INTERFACE Controls –External User interface BUTTON / ICON DESCRIPTION PRIMARY FUNCTION Lock Icon Indicates if the user interface is locked. WATER Selects operation water mode of appliance. CUBES Selects operation cubes mode of appliance. CRUSHED Selects operation crushed mode of appliance. Press and hold for 3 second to enable / disable wireless connection. -
Page 10: Wi-Fi Connectivity Setup
IEEE 802.11b/g/n Connect your appliance: iOS Go to ‘SETTINGS’ on your phone and select your Download the Electrolux Life app for free now. appliance’s Wi-Fi network, that begins with “AJ_”. Requires Iphone6/IOS 9.3/ Return to the app screen for connection to next step. - Page 11 ‘SETTINGS’ on your phone and select your Home Wi-Fi, then return to refrigerator is the ultimate Ultra Chill the Electrolux Life app. secret to the perfect night of entertainment. Planning meals for the week ahead?
- Page 12 ABOUT THE USER INTERFACE Controls – Internal User interface BUTTON / ICON DESCRIPTION PRIMARY FUNCTION Compartment Selector button Selects controllable compartment. Lock Icon Indicates if the user interface is locked. Digital display Indicates temperature of selected compartment. Decrease button Decreases temperature of selected compartment.
- Page 13 Function Icon Operation (depending on model) Press either the + or - to adjust to desired temperature setting. Freezer temp - Control temperatures range Setting the temperature From -23°C to -15°C. Refrigerator temp - Control temperatures range From +1°C to +7°C. Quick Freeze (on/off) Activates a faster rate for freezing Press button 10 until the snowflake icon is illuminated.
- Page 14 ABOUT THE USER INTERFACE Controls – FlexSpace TM Drawer control panel BUTTON / ICON DESCRIPTION PRIMARY FUNCTION Press the UNLOCK icon. It will lock automatically after 3 seconds Unlock without any interaction. A tone will sound once panel is locked/unlocked.
-
Page 15: Setting Cooling Temperatures
SETTING COOLING TEMPERATURES Automatic Ice & Water Dispenser NOTE: The recommended settings for a product Using the ice maker after installation installed in a kitchen is 3˚C for the fresh food Before making ice for the first time, be sure to prime compartment and -17˚C for the freezer. -
Page 16: Turning The Ice Maker On And Off
Ice Maker Operation & care • If you need a large quantity of ice at one time, it is best to get cubes directly from the ice bin. After the refrigerator is installed properly and has cooled for several hours, the ice maker can produce ice •... -
Page 17: Storage Features
STORAGE FEATURES CAUTION NEVER use an ice pick or similar sharp instrument to CAUTION break up the ice. This could damage the ice bin and dispenser mechanism. To avoid personal injury or property damage, handle To loosen stuck ice, use warm water. Before tempered glass shelves carefully. - Page 18 2. With front half fully below back half, lift front of shelf to flip it upwards toward the back of the cabinet. Removing the TasteLock Crisper Slide-Under/Flip Shelf Recessed SnackZone This drawer is ideal for storage of deli meats and Drawers cheese.
-
Page 19: Adjustable Door Bins
Dividers Grab hand hold on lower divider and pull up slightly to slide to next position. (The divider cannot be removed.) Lower Basket Divider Adjustable Door Bins Freezer Features Lower Basket Divider Freezer Basket To remove upper freezer basket: 1. Open freezer compartment completely. 2. -
Page 20: General Information
GENERAL INFORMATION CAUTION To clean a crisper or freezer bin with telescopic extension slides, simply wipe with a damp cloth and CLEANING YOUR REFRIGERATOR warm soapy water. Never immerse the cover in water, as this could affect the operation of the slide. - Page 21 Water Filter (selected models) 5. Engage the filter by firmly rotating clockwise until the filter snaps into position (once engaged the Your refrigerator is equipped with a water filtering filter cannot be rotated further). system. The water filtering system filters all dispensed drinking water, as well as the water used to produce ice.
-
Page 22: Food Storage Guide
FOOD STORAGE GUIDE RECOMMENDED STORAGE TIMES FOR FRESH FOODS * CATEGORY PRODUCT STORAGE TIPS ULTRA CHILL REFRIGERATOR FREEZER MEAT Sausages and Mince 1-2 Days 3-5 Days 2-3 Months Keep cold meat at the back of the refrigerator where it is coldest. -
Page 23: Troubleshooting
TROUBLESHOOTING Appliance does not operate at desired temperature In a modern frost free refrigerator / freezer, cold air is circulated around the various compartments through air vents using a high efficiency fan. Concern What to do Refrigerator is too warm. Ensure food is allowed to cool before placing inside the refrigerator. -
Page 24: Refrigerator Operation
TROUBLESHOOTING Refrigerator operation Concern What to do Ensure that the cord is plugged into a live power outlet and outlet is switched on. Appliance will not run It is normal for the freezer fan not to operate during the automatic defrost Ensure that the household circuit breaker has not tripped or that the fuse has not blown. -
Page 25: Door Operation
If you have a problem, and the problem persists after you have made the checks mentioned, contact your nearest Electrolux approved Service Centre or the dealer you bought the refrigerator from. Be ready to quote the model number, the 9-digit PNC and 8-digit serial number, which is... -
Page 26: Warranty
Guarantee Act does not apply. warranty. 11. C onfidentiality: You accept that if you make a warranty claim, Electrolux 7. Exclusions: You may not make a claim under this warranty unless the and its agents including ASC may exchange information in relation to you defect claimed is due to faulty or defective parts or workmanship. - Page 27 NOTES ...............................................................................................................................................................................................................................................................................................................................................................................................................................................................................................................................................................................................................................................................................................................................................................................................................................................................................................................................................................................................................................................................................................................................................................................................................................................................................................
- Page 28 0800 225 088 email: customercare@electrolux.co.nz web: electrolux.co.nz To add a touch of professional inspiration to your home, visit electrolux.com.au or electrolux.co.nz electrolux.com.au or electrolux.co.nz P/No. A10883109/B © 2016 Electrolux Home Products Pty Ltd. ABN 51 004 762 341 MDR4_JUN'18...
Need help?
Do you have a question about the EHE6899 and is the answer not in the manual?
Questions and answers