Table of Contents
Advertisement
Advertisement
Table of Contents

Related Manuals for MAJORITY SCH-DVD-BLK


Summary of Contents for MAJORITY SCH-DVD-BLK
- Page 1 SCHOLARS DVD PLAYER SCH-DVD-BLK Instructions Guide...
-
Page 2: Table Of Contents
Contents Controls And Functions ���������������������������������������������� What’s In The Box? ��������������������������������������������������� Support ��������������������������������������������������������������������� Instructions Guide ���������������������������������������������������� Getting Started ��������������������������������������������������������� DVD Operation ���������������������������������������������������������� USB Operation ��������������������������������������������������������� Playing JPEG/Picture CD discs and MP3 discs ����������� System Set-up ���������������������������������������������������������� Menu 1: General Set-up ������������������������������������������� Menu 2: Audio Set-up ����������������������������������������������... -
Page 3: Controls And Functions
2. Remote Sensor 6. Play/Pause 3. Display 7. Stop 4. USB Port 8. Power On/Off Rear Panel MODEL:SCH-DVD-BLK POWER SOURCE:100-240V ~ 50/60HZ POWER CONSUMPTION:≤15W 9. (Y.Pb/Cb.Pr/Cr) Output 12. 2 x Audio Output ports 10. Power Cable Outlet 13. Video Output... - Page 4 Controls And Functions Remote Control...
- Page 5 Controls And Functions 1. POWER ON/OFF 12. NEXT (>>I) Press to Power On, press again for In DVD mode, press to go to next chapter. With SVCD, VCD, CD, MP3 Standby mode. discs, press to go to next track. 2. OSD 13.
- Page 6 Controls And Functions 18. LANGUAGE 29. N/P Press to select on-screen display Press to switch the TV system language options between NTSC and PAL. 19. SUBTITLE 30. REWIND Press to begin showing subtitles Press for rewind search 20. OPEN/CLOSE 31. VOLUME UP (+) Press to load and remove discs.
- Page 7 Controls And Functions Remote Control Operation Insert the batteries into the battery compartment. 2 x AAA batteries are required. Point the remote at the remote sensor in front of the player and make sure there are no obstacles in the way between the remote and the player.
-
Page 8: What's In The Box
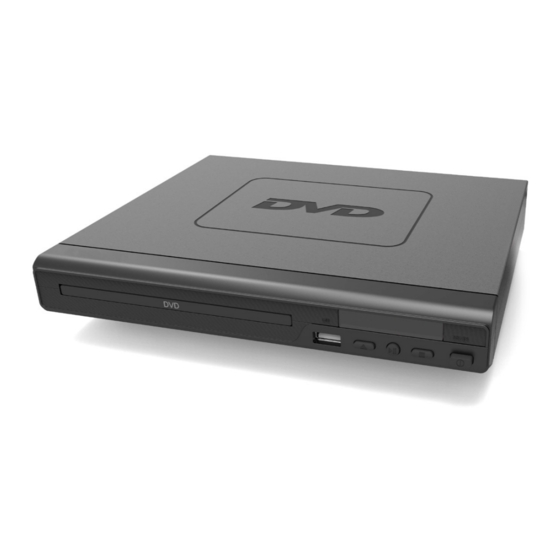
What’s In The Box? Box Contents 1. Majority Scholars DVD Player 3. RCA AV cable 2. Remote Control 4. Instruction Manual 1. Majority Scholars DVD Player POWER OPEN/CLOSE PLAY/PAUSE STOP 4. Instruction Guide 2. Remote Control 3. RCA AV Cable... -
Page 9: Support
Support Support Thank you for your purchase of the Majority Scholars DVD player. Please follow the guidance of the manual to set up your new purchase and begin enjoying its features. If you require further assistance with your new DVD player, please contact our support team on the Majority website: https://www.majorityradios.co.uk/support... -
Page 10: Instructions Guide
Instructions Guide Getting Started Setting Up Connect the power plug of the DVD player to a wall outlet. The power indicator and clock on the front panel will illuminate. Follow the below guidance for cable connections to get your DVD player set up: Cable Connection Options: 1a. -
Page 11: Dvd Operation
Instructions Guide DVD Operation Once your DVD player has been connected to the TV and to a power source, the product is ready for use. The following DVD formats can be played: DVD, DVD-R-RW, CD Video, Mpeg4, DivX. Please complete the following guidance to complete the set up of the DVD player: 1. -
Page 12: Usb Operation
Instructions Guide USB Operation This product has a USB port at the DVD front face for MP3/ Movies playback. Insert a USB unit into the USB port on the front panel of the DVD player (Ref.4). Press the DVD/USB button on the remote control (Rem.4) to enter the USB source. -
Page 13: Playing Jpeg/Picture Cd Discs And Mp3 Discs
Instructions Guide Playing JPEG/Picture CD discs and MP3 discs Playing JPEG/Picture CD discs The following formats can be played: Jpg, Jpeg, CD Photo Press the STOP button and 12 small pictures will show on the TV screen. Press the buttons to select the desired picture to view. (Rem . - Page 14 Instructions Guide Playing MP3 Discs The following formats can be played: Mp3, WMA, CD Audio, CD- R-RW, CD Whilst a MP3 disc is playing, there is a menu screen on the TV. buttons (Rem. 24/28) to scroll through tracks or Press the folders.
-
Page 15: System Set-Up
Instructions Guide System Set-up Menu Operation Press the SET-UP button (Rem.8) on the remote control and the SET-UP menu will display. There are five different menus in the setup: General, Audio, Dolby, Video and Preference. Follow the instructions in the individual paragraphs for a choice of set up options: •... -
Page 16: Menu 1: General Set-Up
Instructions Guide Menu 1: General Set-up 1. Press the buttons on the remote control to open the ‘General’ menu (Rem. 7, 24, 25, 28). 2. Seven submenus will appear that you can select between. Press the buttons on the remote control to scroll between the sub-menus: a) TV Display Different values will show here depending on your TV set:... - Page 17 Instructions Guide d) Captions The default set-up is Caption off. You can display closed captions (if available). e) Screen saver Select a screen saver for when the TV display goes into standby or a disc is not played for several minutes. Press any remote on the remote control to wake it up.
-
Page 18: Menu 2: Audio Set-Up
Instructions Guide Menu 2: Audio Set-up 1. Press the buttons on the remote control to open the ‘Audio’ menu (Rem. 7, 24, 25, 28). 2. Two different submenus will appear on the menu. Press the buttons on the remote control to scroll to browse between the sub-menus to select the stereo output: a) LT/RT: The audio output is Left and Right channels format. -
Page 19: Menu 3: Dolby Digital Set-Up
Instructions Guide Menu 3: Dolby Digital Set-up 1. Press the buttons on the remote control to open the ‘Dolby’ menu (Rem. 7, 24, 25, 28). 2. Two different submenus will appear on the menu. Press the buttons on the remote control to scroll to browse between the sub-menus: a) Dual Mono •... -
Page 20: Menu 4: Video Set-Up
Instructions Guide Menu 4: Video Set-up 1. Press the buttons on the remote control to open the ‘Video’ menu (Rem. 7, 24, 25, 28). 2. Three different submenus will appear on the menu. Press the buttons on the remote control to scroll to browse between the sub-menus: a) Component Adjust the video output when connecting to video terminals. -
Page 21: Menu 5: Preference Set-Up
Instructions Guide Menu 5: Preference Set-up 1. Press the buttons on the remote control to open the ‘Preference’ menu (Rem. 7, 24, 25, 28). 2. Seven different submenus will appear on the menu. Press the buttons on the remote control to scroll to browse between the sub-menus to select the stereo output: a) TV Type This unit is suitable for all makes for TV’s. - Page 22 Instructions Guide f) Password Set-up The initial factory password is 0000. You can change the password here. g) Default Set-up Select to revert to original factory set up on this unit.
-
Page 23: Troubleshooting
Troubleshooting Troubleshooting Malfunction Possible causes/measures Check whether the power is switched on or off at the wall. No power / function Check whether the power adaptor is properly connected to power outlet or not. Make sure that the video cables are connected correctly. -
Page 24: Specification
Specifications Specification AC 100-240V Power Supply 0.5A ~ 50/60Hz Frequency Response <15W Power Consumption HDMI A/V RCA Output Compatible Connections USB Input (Y Pb/Cb Pr/Cr) R/L/Video DVD: DVD, DVD-R-RW, CD Video, Mpeg4, Compatible Formats DivX AUDIO: Mp3, WMA, CD Audio, CD-R-RW, CD PHOTO: Jpg, Jpeg, CD Photo Dimension (WxHxD) 22.5 x 19 x 4.5 cm... -
Page 25: Safety Information
Safety Information ADDITIONAL WARNINGS 1. Read these instructions. 2. Keep these instructions. Instructions are also The apparatus shall not be exposed to dripping or available for download at www.majorityradios.co.uk splashing and no objects filled with liquid, such as 3. Heed all Warnings vases, shall be places on the apparatus. - Page 27 www.majorityradios.co.uk...
Need help?
Do you have a question about the SCH-DVD-BLK and is the answer not in the manual?
Questions and answers