
Related Manuals for Axioma QALCOSONIC E 1


Summary of Contents for Axioma QALCOSONIC E 1
- Page 1 Axioma LEZ UAB ULTRASONIC THERMAL ENERGY METER QALCOSONIC E 1 TECHNICAL DESCRIPTION, INSTALLATION AND USER INSTRUCTIONS PEE1V03 KAUNAS...
-
Page 2: Table Of Contents
Annex C ..............................32 WARRANTY ............................33 EU DECLARATION OF CONFORMITY Axioma LEZ UAB herewith declares, that this product complies with the relevant requirements of the following directives: 2014/32/EU Directive 2014/32/EU of the European Parliament and of the Council of 26 February 2014... -
Page 3: Safety Information
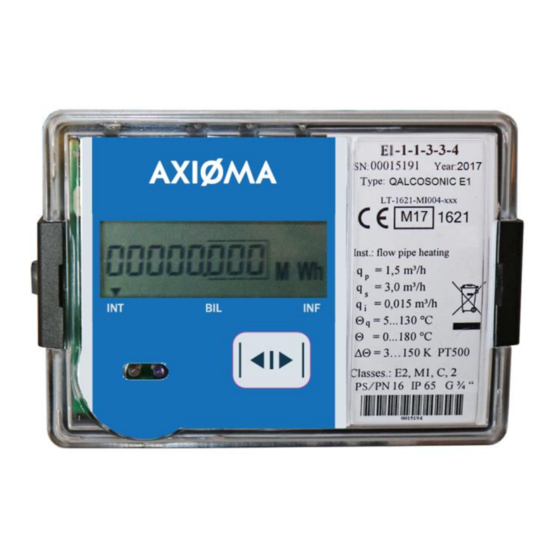
1. APPLICATION FIELD The ultrasonic thermal energy meter QALCOSONIC E 1 is designed for measuring heating and cooling energy and the recording of data in two separate registers. It is intended for commercial accounting of energy consumption in objects of local or district heating systems: in dwelling houses, office buildings or energy plants and the like. - Page 4 Type number combination of the heat meter : E1 – Meter QALCOSONIC - - - - - *- *- *- *-15* Type Installation of the flow sensor: Code In supply pipe In return pipe Destination of the meter: Code Meter for heating (for measuring heating energy only) Meter for heating and cooling Ratio of the flow rates (q ): Limits of temperature differences:...
-
Page 5: Technical Data
2. TECHNICAL DATA Accuracy class 2 by LST EN1434-1:2007. Energy units kWh, MWh, GJ, Gcal Maximum value of thermal power 5,28 MW Flow measurement The ratio of the permanent flow rate to the lower limit of the flow-rate (the user selects during order): ... - Page 6 Type of pulses IB by LST EN1434-2 Maximum permissible frequency of input pulses 3 Hz Maximum permissible voltage of input pulses 3,6 V Condition of maintenance of high level 3,6V via 3,3M resistor Temperature measurement Temperature measuring ranges (for calculator) C..180 Temperature difference measuring range 3K..150 K* or 2 K…150 K*...
- Page 7 External communication modules and interfaces Optical interface Integrated into the front panel of calculator. It is designed for data reading via M-bus protocol parameterization of the meter. The optical interface starts work (is activated) only after pressing control button and automatically shuts down after 5 minutes, after the last pressing any button or after completing data transmission via interface.
-
Page 8: Operating Principle
G1 ¼“ DN25 G2“ DN40 DN50 DN65 DN80 DN100 Environmental class Meets EN1434 class C Ambient temperature: Calculator at +5 C to +55 (condensing, indoor installation) Flow sensors at -30 C to 55 < 93 Relative humidity Mechanical environment class: Electromagnetic environment class: Protection class of calculator enclosure IP65... -
Page 9: Installation
Numbers of terminal pins are marked close to the terminal Flow sensor There are following information on the flow sensor: -connection type to the pipeline (Thread – G, flange–DN) - arrow for indication of a flow direction 4.2. Security seals The following heat meter calculator sealing is provided: Manufacturer adhesive seal-sticker on the access to the adjustment activation jumper (see Annex C, Fig.C1, pos.1). - Page 10 5.3 Mounting 5.3.1. Mounting of calculator Heat meter calculator may be installed in heated premises, working ambient temperature shall be not more than 55 ° C. It may not be exposed to direct sunlight. Calculator can be mounted in several different ways: - Wall mounting, without possibility sealing of mounting - Wall mounting, with possibility sealing of mounting - Mounting on standard DIN-rail...
- Page 11 - Adapter plate according to figure 8 of EN1434-2:2007 for wall mounting of calculator can be used (if the aperture in the wall is too large for the calculator) : Important: It is forbidden to attach the calculator directly to a wall if there is a risk that on walls can be condensed humidity or temperature of a surface of a wall can fall lower than 5 °.
- Page 12 The direction of the sensor installation (is indicated with the arrow on the label of flow sensor) must match with the flow direction in pipeline. Before installing the flow sensor, rinse the pipe well; mount the spacer for this purpose. The flange gaskets must match with the pipe diameter.
-
Page 13: Operation
6. OPERATION The information can be displayed using control button which are on the top of the calculator Control button Display function The calculator of heat meter is equipped with 8-digits LCD (Liquid Crystal Display) with special symbols to display parameters, measurement units and operation modes. Destination of the special symbols: →... - Page 14 6.3. Menu structure The menu structure in a normal operating mode is presented in the Fig 6.1 Fig. 6.1 Viewing the readings in normal mode. Integral parameters values (1.2) or– if at least one error has been detected – error code (1.1) are displayed if the button has not been pressed for more than 60 seconds.
- Page 15 6.3.1. Viewing the readings in normal mode (Users menu) Remark: Here the full list of shown parameters is represented. For the specific meter it can be reduced Parameter Value Description All three displays, will be displayed Error code with data stamp of starting of in turns in one second interval error Calculator errors...
- Page 16 Quantity of thermal energy for cooling When meter is intended for heating on set day with date stamp and cooling, the two separate displays are shown. Changing with date stamp every 1 second Tariff register 1 on set day with date Changing with date stamp every 1 stamp second...
- Page 17 2.10 Tariff register 1 on set day of previous Changing with date stamp every 1 month with date stamp second 2.11 Tariff register 2 on set day of previous Changing with date stamp every 1 month with date stamp second 2.12 Volume of liquid on set day of previous Changing with date stamp every 1...
- Page 18 2.19 Maximum temperature in return pipe of Changing with date stamp every 1 previous month with date stamp second 2.20 Maximum temperature difference of Changing with date stamp every 1 previous month with date stamp second 2.21 Minimum temperature in flow pipe of Changing with date stamp every 1 previous month with date stamp second...
- Page 19 3.7* Real time calendar 3.8* Real time clock 3.9* Yearly set day 3.10* Monthly set day 3.11* Tariff 1 Tariff 1, when It is possible to choose: T1-T2 < 10.0 oC One of the measured parameters, or 2 pulse input (if it is configured as an input), one of the temperature or the temperature difference.
- Page 20 Tariff Tariff condition: 3.14* pulse input/output configuration Similarly ID 3.13, See 3.13 only „1“,changes in the „2“ 3.15 Type of heat-conveying liquid Type of heat-conveying liquid: “---“ (crosses) - water 3.16 Pressure value for energy calculations "160E4"-corresponds to the pressure 1.6 MPa 3.17* Customer number Are transferred on telegram Mbus...
- Page 21 Fig.6.2. Viewing the readings in verification (test) mode - short press ( 3 s) - shift to the right - long press ( 3 s) – shift down) Viewing the readings in verification (test) mode ( Service menu) Parameter Value Description High- resolution energy...
- Page 22 6.3.3. Error codes Error code may consist from up to 4 symbols. Each symbol may have values 0…8 Code Description Status of calculator 0 - no error, normal operation 1 - warning – ending battery life 2- temperature difference is greater than the permitted limits 4- temperature difference is less than the permitted limits 8- electronics failure Status of temperature...
- Page 23 Fig.6.3. Destination of contacts of connector J Activation of test (verification) mode In test mode it is possible to achieve precise results within short measuring time. For activation of Verification (Test) mode you must opening device and set up jumper on the connector (J) contacts as shown in Figure 6.4.
-
Page 24: Verification
6.5. Remote data reading For data transmission from meter it can be used optical interface. The optical head is placed on the calculator and is connected to RS-232 interface of reading device. In addition for remote reading of data can be used two pulse outputs, or one of the following communication modules: M-Bus module CL module (Current loop) -
Page 25: Annex A
Annex A Fig.A1. Electrical wiring diagrams T1 –flow temperature sensor, T2 –return temperature sensor, V1-additional pulse input / output 1, V2 –additional pulse input / output 2 PEE1V03 20-11- 2017... - Page 26 Fig.A2. Wiring diagrams for connecting of the meter to the external power supply Table A1. Numbering of terminals Calculator: Terminal Nr. Destination High temperature sensor (T1) High temperature sensor (T1) Low temperature sensor (T2) Low temperature sensor (T2) additionl pulse input/output GND additionl pulse input/output (In/Out2) (Volume output for TEST mode) additionl pulse input/output GND...
-
Page 27: Annex B
Annex B Fig. B1. Mechanical dimensions of calculator of heat meter QALCOSONIC E 1 Fig. B2. Sizes and dimensions of heat meter QALCOSONIC E 1 Fig.B2.1. Flow sensor q = 0,6/1,0/1,5m Fig.B2.2. Flow sensor q = 2,5/1,5 m Threaded end connections G3/4“ , Threaded end connections G1“,... - Page 28 Annex B a) Threaded end connection b) Flanged end connection Fig.B2.3. Flow sensor q = 0,6/1,0/1,5/2,5 m Threaded end connection G1“ (a), flanged end connection DN20 (b), Mounting length L=190 mm PEE1V03 20-11- 2017...
- Page 29 Annex B B2.4 pav. Flow sensor q = 3,5/6,0 m Threaded end connections G1 1/4“(a) ; b) flanged end connection DN25 (b) Mounting length L=260 mm PEE1V03 20-11- 2017...
- Page 30 Annex B Fig.B2.5. Flow sensor q = 10,0 m Threaded end connections G2“ (a) ; flanged end connection DN40 (b;c) (two design options) Mounting length L=260 mm Fig.B2.6. Flow sensor q = 15,0 m flanged end connection DN50, Mounting length L=270 mm PEE1V03 20-11- 2017...
- Page 31 Fig.B2.7. Flow sensor q = 25,0 m flanged end connection DN65, Mounting length L=300 mm Fig.B2.8. Flow sensor q = 40,0 m flanged end connection DN80, Mounting length L=300 mm Fig.B2.9. Flow sensor q = 60,0 m flanged end connection DN100, Mounting length L=360 mm PEE1V03 20-11- 2017...
-
Page 32: Annex C
Annex C Security sealing Fig.C1. Calculator sealing Calculator general view: the cover is closed, and the cover is opened (1- manufacturer adhesive seal-sticker on the access to the adjustment activation jumper -verification seal, 2- manufacturer adhesive seal-sticker on the fixer of the cover protecting electronic module -manufacturer security seal, 3 –mounting seal after installation) a) Flow sensor qp = 0,6/1,0/1,5/2,5 m b) Flow sensor qp = 3,5/6,0 m... -
Page 33: Warranty
Warranty period - 12 months from bringing into operation, but not more than 18 months from manufacturing date. Manufacturer’s address: UAB “Axioma LEZ ”, Kulautuvos g. 45a, Kaunas LT-47190, Lithuania tel. +370 37 360234; fax. +370 37 360358. PEE1V03 20-11- 2017...
Need help?
Do you have a question about the QALCOSONIC E 1 and is the answer not in the manual?
Questions and answers