Table of Contents
Advertisement
Advertisement
Table of Contents

Related Manuals for Shark DuoClean NV200 Series


Summary of Contents for Shark DuoClean NV200 Series
- Page 1 NV200 Series INSTRUCTIONS sharkclean.com 1-800-798-7398...
-
Page 2: Specifications
THANK YOU for purchasing the Shark® Slim with DuoClean ™ REGISTER YOUR PURCHASE sharkclean.com 1-800-798-7398 TIP: You can find the RECORD THIS INFORMATION model number on the Model Number: �������������������������������������� rating label located on Date Code: ����������������������������������������� the back of your unit. -
Page 3: Table Of Contents
Important Safety Instructions ......3 Getting to Know Your Shark® Slim with DuoClean ..5 ™... -
Page 4: Important Safety Instructions
IMPORTANT SAFETY INSTRUCTIONS FOR HOUSEHOLD USE ONLY WARNING To reduce the risk of injury, fire, electric shock, and property damage resulting from improper use of the appliance, carefully observe the following instructions. This unit contains electrical connections and moving parts that potentially present risk to the user. - Page 5 36 Use extra care when cleaning on stairs. blockages and keep openings away from face and body. POLARIZED PLUG 26 Use only Shark brand filters and ® To reduce the risk of electric shock, this accessories. Using other brands will void vacuum cleaner has a polarized plug (one warranty.
-
Page 6: Getting To Know Your Shark® Slim With Duoclean
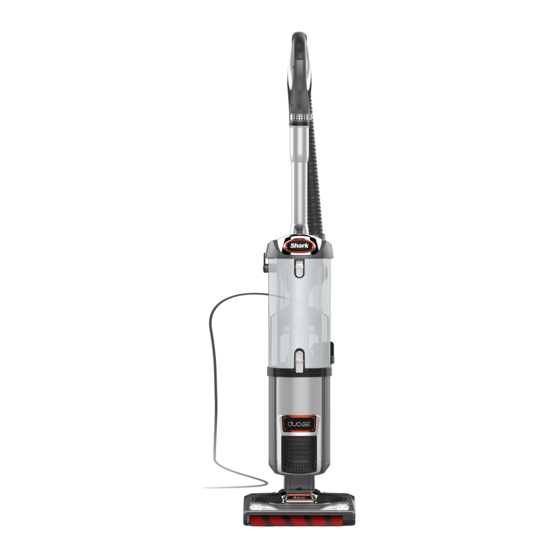
GETTING TO KNOW YOUR SHARK® SLIM WITH DUOCLEAN ™ WELCOME! Congratulations on your purchase. Use this instruction manual to learn about your new vacuum’s great features. From assembly to use to maintenance, you will find it all in here. MAIN UNIT... - Page 7 s h a r kc l e a n . c o m...
-
Page 8: Assembling Your Vacuum
ASSEMBLING YOUR VACUUM DID YOU KNOW? STEP 1 STEP 2 The Shark Slim with ® DuoClean is less than 13 ™ pounds without the cord, making it an ultra-light upright. TIP: Use cord clip located on the back of wand to hold cord in place while vacuuming. - Page 9 STEP 3 STEP 4 STEP 5 CLICK CLICK 3 Insert handle into top of 4 Store tools on the 5 To remove the accessory extension wand and click accessory posts. holder, first take off the into place. Insert hose into dust cup.
-
Page 10: Using Your Vacuum In Upright Mode
USING YOUR VACUUM IN UPRIGHT MODE NOTE: The brushroll will spin only when the vacuum cleaner handle is tilted back. WHAT DOES THE BRUSHROLL INDICATOR LIGHT ON THE NOZZLE MEAN? Solid Green The brushroll is on and working as it should. Solid Red There is a jam in the brushroll area. -
Page 11: Using Your Vacuum In Above-Floor Mode
USING YOUR VACUUM IN ABOVE-FLOOR MODE STEP 1 STEP 2 STEP 3 ABOVE-FLOOR MODE LIFT-AWAY MODE ™ 3 To use in Lift-Away mode, Stand the vacuum upright. 2 Attach desired cleaning To attach an accessory press the Floor Nozzle accessory. directly to the handle, Release button at the press the Handle release... -
Page 12: Compatible Accessories
COMPATIBLE ACCESSORIES There are a variety of 12” Crevice Tool accessories that are compatible Clean tight spaces and reach baseboards and ceilings with with this vacuum series. this slim crevice tool. Pet Power Brush The top flap of your box shows Designed to remove pet hair and ground-in dirt from the select accessories that are carpeted stairs and upholstery. - Page 13 s h a r kc l e a n . c o m...
-
Page 14: Maintenance
MAINTENANCE To keep your vacuum’s suction power optimal, follow STEP 1 STEP 2 these instructions. Make sure unit is off and cord is unplugged. WARNING: To reduce the risk of shock and unintended operation, turn off power and unplug unit before servicing. -
Page 15: Cleaning The Filters
STEP 3 FOAM FILTER FELT FILTER HEPA CLEANING THE FILTERS Pre-Motor 3 Press top Dust Cup Post-Motor (HEPA): (foam and felt): Release latch to access To access the HEPA filter, With the dust cup dust screen and remove remove the floor nozzle removed, take the foam built-up debris as required. -
Page 16: Checking For Blockages
MAINTENANCE - CONT. WARNING: To reduce the risk of shock and STEP 1 STEP 2 unintended operation, turn off power and unplug unit before servicing. WARNING: When cleaning brushroll, be sure not to cut anything other than hair, string, fibers, or other debris. -
Page 17: Bottom Of Floor Nozzle
STEP 1 STEP 3 STEP 2 BOTTOM OF FLOOR NOZZLE 3 Remove any string, carpet fibers, or hair Open the three locks on the bottom of the floor nozzle. To open each lock, insert that may be wrapped around the brushroll. the edge of a coin into the slot and turn To loosen debris, run scissors along the counterclockwise. -
Page 18: Maintaining The Soft Roller
MAINTENANCE - CONT. WARNING: To reduce the risk of shock and unintended operation, turn off power and unplug unit before servicing. WARNING: When cleaning brushroll, be sure to not cut anything other than hair, string, fibers, or other debris. TIP: Ensure the bottom of the floor nozzle is completely sealed and locked before using. - Page 19 2 To clean Soft Roller, first tap lightly to loosen debris, then wipe with a dry towel to remove any fibers or hair in the teeth behind the Soft Roller. 3 Wash the Soft Roller as needed. Use only water, and let air-dry completely for at least 24 hours. 4 Reinsert the Soft Roller by sliding it into the front of the nozzle until it clicks into place.
-
Page 20: Troubleshooting Guide
TROUBLESHOOTING GUIDE WARNING: To reduce the risk of shock and unintended operation, turn off power and unplug unit before servicing. Vacuum is not picking up debris. No suction or light suction. (Refer to Maintenance section for more information.) • Check filters to see if they need cleaning. Follow instructions for rinsing and completely air-drying the filters before reinserting into the vacuum. - Page 21 NOTES s h a r kc l e a n . c o m...
- Page 22 NOTES 1-800-798-7398...
-
Page 23: Warranty
FIVE (5) YEAR LIMITED WARRANTY The 5-Year Limited Warranty applies to purchases made from authorized retailers of SharkNinja Operating LLC. Warranty coverage applies to the original owner and to the original product only and is not transferable. SharkNinja warrants that the unit shall be free from defects in material and workmanship for a period of 5 years from the date of purchase when it is used under normal household conditions and maintained according to the requirements outlined in this instruction manual, subject to the following conditions and exclusions. - Page 24 Illustrations may differ from actual product. We are constantly striving to improve our products; therefore the specifications contained herein are subject to change without notice. SHARK is registered trademark of SharkNinja Operating LLC. DUOCLEAN and LIFT-AWAY are trademarks of SharkNinja Operating LLC. For SharkNinja U.S. Patent information visit sharkninja.com/USPatents ©...
Need help?
Do you have a question about the DuoClean NV200 Series and is the answer not in the manual?
Questions and answers