Table of Contents
Advertisement
Quick Links
A S S E M B LY- A N D I N S T R U C T I O N S M A N U A L
GB
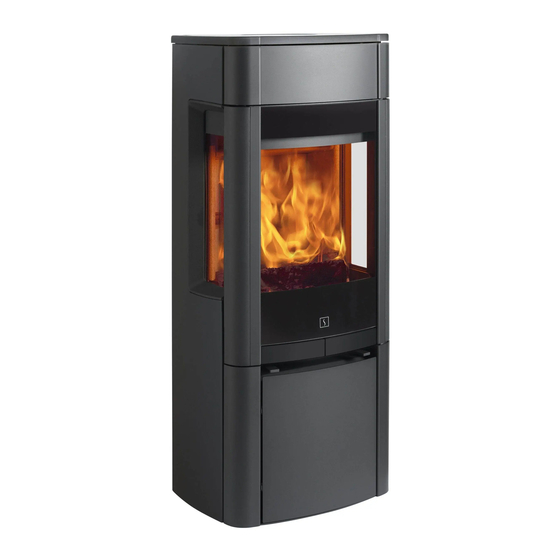
Scan 65 - series
Congratulations on your new Scan wood-burning stove
You have purchased a product by one of Europe's leading manufacturer's of wood-burning stoves, and we are sure that you will have years of plea-
sure with your purchase. To make the best possible use of your stove, it is important that you follow our advice and instructions.
Please read this Assembly- and instructions manual before you start to assemble your stove.
Product registration number
Please indicate the product registration number at any enquiry
S C A N A / S - D K- 5 4 9 2 V I S S E N B J E R G
Advertisement
Table of Contents

Related Manuals for Jøtul Scan 65-1


Summary of Contents for Jøtul Scan 65-1
- Page 1 A S S E M B LY- A N D I N S T R U C T I O N S M A N U A L Scan 65 - series Congratulations on your new Scan wood-burning stove You have purchased a product by one of Europe’s leading manufacturer’s of wood-burning stoves, and we are sure that you will have years of plea- sure with your purchase.
-
Page 2: Table Of Contents
C O N T E N T S Table of contents Technical data ......................3 Installation Safety Technical data and dimensions Dimension sketch Type plate Product registration number Additional accessories Loose parts Assembly ........................8 Remove packaging Positioning your wood-burning stove Distance to furniture Distance to flammable materials, shown with insulated flue pipe Distance to flammable materials, shown with un-insulated flue pipe... -
Page 3: Technical Data
The same applies to the fitting of accessories or extra equipment not supplied by Scan A/S. This could also be the case if parts that are necessary for the operation and safety of the stove are dismantled or removed. Scan 65-1 Scan 65-2... -
Page 4: Technical Data And Dimensions
Weight Scan 64-8: ................ca. 246 kg Connecting piece internal diameter: ..........144 mm Connecting piece external diameter: ..........148 mm Approval type: ..............Intermittent fuelling Test in compliance with EN 13240 Scan 65-1/3/5/7 Technical data Unit CO Emission at 13% O 2 0,08... -
Page 5: Dimension Sketch
T E C H N I C A L D ATA Dimension sketch Scan 65 - 1/2/3/4 Scan 64 Målskitse Scan 64 NAVN: EMNE: MATERIALE: VÆ DIMENSION: AREAL: C:\Working Folder\Designs\Scan 64\90064001.idw STI: Bund Centre rear outlet Height to the begin- Scan 65 - 5/6/7/8 ning of the connecting piece at top outlet... -
Page 6: Type Plate
All Scan wood-burning stoves are fitted with a type plate, that specifies the approval standards and the distance to flammable materials. The type plate is located at the back of the stove. Type plate Scan 65-1, Scan 65-3, Scan 65-5 & Scan 65-7(Without side Scan 65-2, Scan 65-4, Scan 65-6 & Scan 65-8 windows) -
Page 7: Product Registration Number
T E C H N I C A L D ATA Product registration number Additional accessories All wood-burning stoves are provided with a product registration • Small shaped floor plate in glass or steel number. • Large shaped floor plate in glass or steel The product registration number is located at the back of the stove. -
Page 8: Assembly
A S S E M B LY Remove packaging Remove the protection between the baffle plates, before taking the stove into use! Check that the stove is not damaged before installing it. Scan 65 is supplied attached to a wooden pallet. Remove the two screws from the wood compartment store, as illustrated below, and lift the stove off the wooden pallet. -
Page 9: Positioning Your Wood-Burning Stove
Distance to flammable materials, shown with insulated flue pipe The distances presuppose the use of an insulated flue pipe with min. 30 insulation all the way to the stove. Scan 65-1, Scan 65-3, Scan 65-5 and Scan 65-7 Scan 65-2, Scan 65-4, Scan 65-6 and Scan 65-8... -
Page 10: Distance To Flammable Materials, Shown With Un-Insulated Flue Pipe
A S S E M B LY Distance to flammable materials, shown with un-insulated flue pipe Scan 65-1, Scan 65-3, Scan 65-5 and Scan 65-7 Scan 65-2, Scan 65-4, Scan 65-6 and Scan 65-8 (without side windows) (with side windows) Brændbar + uisoleret røgrør - Scan 64 uden sideglas... -
Page 11: Distance To Firewall
110 mm brick or other material with a corresponding insulation ability. The distances presuppose the use of an insulated flue pipe with min. 30 insulation all the way to the stove. Scan 65-1, Scan 65-3, Scan 65-5 and Scan 65-7 Scan 65-2, Scan 65-4, Scan 65-6 and Scan 65-8... -
Page 12: Height Adjustment Of Stove
A S S E M B LY Height adjustment of stove Load bearing underlay All of the products in our portfolio are classified as light-duty firepla- The Scan 65 has four adjustment screws under the stove. Use the ces; in most cases, there is no need to reinforce the floor, so that you adjustment screws to get the stove to stand straight and level. -
Page 13: Existing Chimney And Pre-Fabricated Element Chimney
A S S E M B LY Connecting piece / top outlet Existing chimney and pre-fabricated element chimney The stove is prepared from the factory for top outlet. If you intend to connect your stove to an existing chimney, it makes The connecting piece is placed loosely in the top outlet of the stove. -
Page 14: Connecting Piece / Rear Outlet
A S S E M B LY Connection piece / rear outlet Fasten the connecting piece with screws from the ash drawer and replace the top plate. The stove is prepared from the factory for top outlet. The connecting piece is placed loosely in the top outlet of the stove. The gasket for the connecting piece is in the service box. - Page 15 A S S E M B LY Cut off the cover plate from the rear plate with cutting pliers at the Lift the heat shield off the stove and cut the cover plate free using fastening points. cutting pliers at the fastening points and remove. Varmeskjold løftes af ovn Scan 64 NAVN:...
- Page 16 A S S E M B LY Remove the cover. This is to be used later as a seal and cover at the top Fit the cover and tighten it. Replace the top plate. of the smoke outlet. Dæksel Fit the connecting piece with the four screws found in the stove’s ash drawer.
-
Page 17: Fitting The Natural Stones/Tiles
A S S E M B LY Fitting the natural stones/tiles The delivered gasket (4,5/7 m) should be cut in appropiate lengths and sticked onto the sides of the stove as shown below. Scan 65-3, Scan 65-4, Scan 65-7 and Scan 65-8 are delivered with loose natural stone/tiles plates for mounting on the sides of the stove. -
Page 18: Fresh Air Intake
A S S E M B LY Fresh air intake Hook the natural stone/tile sides onto the stove. In a well-insulated house, the air used up by the burning process has to be replaced. This particularly applies to houses with mechanical ventilation. -
Page 19: Scan 65 Open Plinth
A S S E M B LY / A C C E S S O R I E S Scan 65 with open plinth Fitting the top plate of natural stone/tile If you want your Scan 65 with open plinth, remove the wood compart- You can buy a natural stone/tile top as an accessory. -
Page 20: Accessories
A C C E S S O R I E S Handle Black handles are available as an option. Mount the handles on the stove as shown below. Remove the handle screw Screws to be removed (picture 5+6) Remove the handle Fit the black handle Remove the handle Tighten the handle... -
Page 21: Instruction For Use
I N S T R U C T I O N S F O R U S E CB-technique (Clean Burning) Baffle plates The wood-burning stove is equipped with CB technology. In order to The baffle plates are located in the upper part of the combustion ensure an optimal combustion of released gases under the incinera- chamber. - Page 22 I N S T R U C T I O N S F O R H E AT I N G Important! "Top down" lighting This screw (M5 x 6) must be placed as shown in the picture, 4 pieces of wood approx. 20 - 23 cm long with a weight of approx. 0.5 to prevent secondary air control closure beyond the 35mm open –...
-
Page 23: Instructions For Heating
I N S T R U C T I O N S F O R H E AT I N G Using your stove in the spring or autumn In the transition period (spring/autumn), where there is less need for heating, we recommend to make a single „top down“ lighting, perhaps with one stoke up to ensure that the combustion chamber lining burns clean again. -
Page 24: Handling Fuel
M A I N T E N A N C E Maintaining your wood-burning stove Handling fuels Apart from regular chimney sweeping, your wood-burning stove Selecting Wood/Fuel does not require any regular maintenance. However, we recommend You can use any type of wood as firewood, however, harder types, servicing at least once every two years such as beech, ash, are generally better for heating as they burn more Use only original replacement parts for maintenance and repairs of... - Page 25 Scan 65-2, Scan 65-4, Scan 65-6, Scan 65-8 and Scan 65-10 (with side windows) Upper baffle plate Lower baffle plate Scan 65-1, Scan 65-3, Scan 65-5, Scan 65-7 and Scan 65-9 (without side windows) Brændkammerforing med sideruder Scan 64 NAVN: EMNE: 90064035 TG.NR:...
-
Page 26: Troubleshooting
T R O U B L E S H O O T I N G Smoke escaping Warranty All wood-fired Scan products are made of high-quality materials and • Damp wood subject to strict quality controls before leaving the factory. We give a •... - Page 27 Own comments...
- Page 28 Ausgabe: Scan A/S - DK-5492 Vissenbjerg GB 90065500 23.02.2016...
Need help?
Do you have a question about the Scan 65-1 and is the answer not in the manual?
Questions and answers