Table of Contents
Advertisement
PRESSURE BALANCED
SHOWER CONTROL
Installation and
User Guide
THESE INSTRUCTIONS ARE TO BE LEFT WITH THE USER
Advertisement
Table of Contents

Related Manuals for Mira Combiforce 415


Summary of Contents for Mira Combiforce 415
- Page 1 PRESSURE BALANCED SHOWER CONTROL Installation and User Guide THESE INSTRUCTIONS ARE TO BE LEFT WITH THE USER...
-
Page 2: Table Of Contents
Contents Section Page 1 ..Introduction ..............3 2 ..Important Safety Information ........... 4 3 ..Pack Contents Checklist ..........5 4 ..Dimensions ..............7 5 ..Specifications ..............8 6 ..Installation Requirements ..........9 7 ..Installation .............. -
Page 3: Introduction
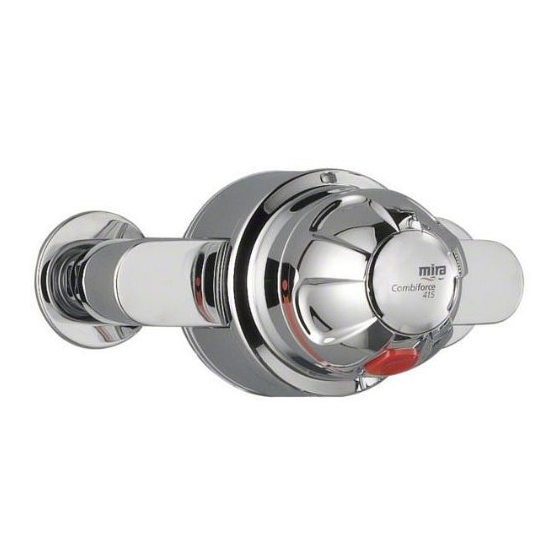
Section Introduction Thank you for purchasing a quality Mira product. To enjoy the full potential of your new product, please take time to read this guide thoroughly, having done so, keep it handy for future reference. The Mira CombiForce 415 is a pressure balanced shower control which maintains a constant outlet temperature irrespective of changes in inlet pressures as long as the inlet water temperatures remain the same. -
Page 4: Important Safety Information
Section Important Safety Information Important Safety Information Section Warning! Products manufactured by us are safe and without risk provided they are installed, used and maintained in good working order in accordance with our instructions and recommendations. Caution! Read all of these instructions. Retain this guide for later use. -
Page 5: Pack Contents Checklist
❏ ✔ Tick the appropriate boxes to familiarise yourself with the part names and to confirm that the parts are included. 1. Mira CombiForce 415 Surface Mounted Shower Control ❏ ❏ 1 x CombiForce 415 Shower Control 2 x Pipe Concealing Plates ❏... - Page 6 2. Mira CombiForce 415B Built-in Shower Control ❏ 1 x Wall Mounting Bracket 1 x CombiForce 415 Shower Control ❏ with Building-in Shroud 1 x Concealing Plate, Circular Mounting Bracket ❏ and Foam Sea 1 x Control ❏ ❏ ❏...
-
Page 7: Dimensions
Section Dimensions Top Inlet (Falling) Back Inlet Supplies Supplies Ø56 Ø92 188.5 Bottom Inlet (Rising) Supplies Mira CombiForce 415 132 A/F 92 A/F Ø76 57 to 74 Ø163 Mira CombiForce 415B All dimensions are nominal and in millimetres... -
Page 8: Specifications
Section Specifications SPECIFICATIONS Mira CombiForce 415 and 415B Pressure Range Minimum maintained pressure: 1 bar. Maximum maintained pressure: 5 bar. Maximum static pressure: 10 bar. Note! For optimum performance, the initial supply pressures should be nominally equal. Temperatures Hot and cold water supply temperatures MUST remain relatively constant. -
Page 9: Installation Requirements
Commissioning: “Multipoint gas water heaters” or “Combination boilers”. 2. The Mira CombiForce 415 is not suitable for installation as part of a gravity-fed plumbing system (i.e. in conjunction with a hot water cylinder and cold water storage cistern), unless used in conjunction with an inlet pump producing a maintained pressure of at least 1 bar. - Page 10 Typical Suitable Installations Instantaneous multipoint water heaters and combination boilers The shower MUST be installed with a multipoint gas water heater or combination boiler of a fully modulating design (i.e. where the water draw-off rate indirectly controls the gas flow rate to the burner). An expansion vessel MUST be fitted (and regularly maintained) if any form of backflow prevention device is fitted, e.g.
- Page 11 Unvented mains pressure showers The shower can be installed with an unvented, stored hot water cylinder. Only a "competent person" as defined by the Building Regulations may fit this type of system. For packages with no cold water take off after the appliance reducing valve, it will be necessary to fit an additional drop tight pressure reducing valve when the mains pressure is over 5 bar.
- Page 12 Mains pressurised instantaneous hot water shower, heated from a thermal store Packages of this type, fitted with a tempering valve can be used. A drop tight pressure reducing valve MUST be fitted if the supply pressures exceed 5 bar maintained. An expansion vessel MUST be fitted (and regularly maintained) if any form of backflow prevention device is fitted, e.g.
- Page 13 General It is important that the system pressures are within the range specified for the Mira CombiForce 415 (refer to the Specifications section). If the system pressure is not known then the system pressure MUST be measured as explained in this section.
-
Page 14: Installation
Mira CombiForce 415 Surface Mounted Shower Control Rising or Falling Inlet Supplies Note! The Mira CombiForce 415 is supplied with inlet connections hot left, cold right and bottom outlet as standard. For installations with reversed hot and cold supplies complete the installation and refer to the section Installation: "Reversed Inlet Supplies". - Page 15 2. Remove the backplate by releasing, Backplate anticlockwise, the two recessed grub screws which retain the backplate against the brass shower control body, using the 2.5 mm A/F hexagon wrench (supplied). Grub Screws 3. Mark the final position of the shower control on the finished wall surface using the backplate as a template.
- Page 16 Backplate 7. Fit the shower control body onto the backplate and secure by tightening, clockwise, the two recessed grub screws, using the 2.5 mm A/F hexagon wrench (supplied). Grub Screws Shower Control Body 8. Refit the elbows in the required position, i.e.
- Page 17 12 mm A/F hexagon wrench (not supplied). This will leave the flat face for connection to the shower hose. 11. This completes the installation of the Mira CombiForce 415 for “Rising or Falling Inlet Supplies”. 'O' Seal...
- Page 18 Back Inlet Supplies 1. Follow the shower control installation procedure as for “Rising or Falling Inlet Supplies”: instructions 1. to 4. inclusive. 2. Using a spirit level, mark the route of incoming hot and cold water supply pipes at a distance of 153 mm centres. 3.
- Page 19 12 mm A/F hexagon wrench (not supplied). This will leave the flat face for connection to the shower hose. 11. This completes the installation of the Mira CombiForce 415 for “Back Inlet 'O' Seal Supplies”. Connector Nipple 'O' Seal...
- Page 20 Mira CombiForce 415B Built-in Shower Control The built-in shower control incorporates an integral wall mounting bracket assembly Wall which can be used to install the shower into Mounting Bracket a solid, dry-lined, stud partition or dry partition wall structure, shower cubicle or laminated panel.
- Page 21 3. Familiarise yourself with the hot and cold water inlet ports and outlet port. They can be identified as follows: The Mira CombiForce 415B is supplied with inlet connections hot left, cold right and top outlet as standard. To change the position of the outlet refer to “Reversed Outlet Connection”:...
- Page 22 5. Mark the wall surface for an opening measuring approximately 245 mm x 125 mm. Mark the route of the incoming and outgoing pipework services. Using the building-in shroud as a guide remove the plaster and brickwork/dry- lining to the required depth of concealment.
- Page 23 11. Connect the incoming hot and cold water supply pipes : 11.1 Slide the compression nut, then the olive, over the pipe end. If necessary, sparingly smear liquid jointing on the pipe end and the outside of the olive. 11.2 Insert the pipe end into the opening of the inlet connector then slide the olive and compression nut into place.
- Page 24 18. Push the concealing plate firmly over Concealing the circular mounting bracket until it Plate locates on the four clips. 19. This completes the installation of the Mira CombiForce 415B for installation into “Solid, Dry-lined, Stud Partition or Dry Partition Wall Structures”.
- Page 25 Shower Cubicle or Laminated Panel The built-in shower control incorporates an integral wall mounting bracket assembly which can be used to install the shower into the front or back face of a shower cubicle or laminated panel. Installation on to the Front Face of a Shower Cubicle or Laminated Panel Depending on the structure of the shower cubicle or laminated panel it may be possible to conceal the flanges of the integral wall mounting bracket assembly into the front face...
- Page 26 Installation on to the Back Face of a Shower Cubicle or Laminated Panel The building-in depth for the integral wall mounting bracket assembly is 58 mm. The integral wall mounting bracket assembly can be used to install the shower control into a shower cubicle or laminated panel of between 4 and 21 mm.
- Page 27 Reversed Outlet Connection Mira CombiForce 415 shower controls are supplied with inlet connections hot left, cold right and bottom outlet. The Mira CombiForce 415B is supplied with inlet connections hot left, cold right and top outlet as standard. To reverse the outlet position: 1.
- Page 28 Reversed Inlet Supplies Mira CombiForce 415 shower controls are supplied with inlet connections hot left, cold right and bottom outlet. The Mira CombiForce 415B is supplied with inlet connections hot left, cold right and top outlet as standard. Both shower controls are fitted with a single sequential control knob.
-
Page 29: Commissioning
Section Commissioning All heater appliances must have a fully modulating heat output for the domestic hot water, to provide a constant temperature of hot water to the Mira CombiForce 415 shower control. Multipoint Gas Water Heaters These notes are based on a heater with an effective output power of 23.5 kW. Heaters with higher or lower effective output powers will proportionally affect the following information. - Page 30 Mira CombiForce 415 to approximately 3.5 bar. Additional benefits may be obtained by fitting the water pressure reducing valve after the premises internal stop valve, drain valve and if fitted, outside tap.
- Page 31 To decrease the temperature, reposition the stop one serration clockwise. Repeat the check as necessary. Control Knob Control Knob Retaining Screw Adjustable Plastic Temperature Override Temperature Stop Stop Concealing Override Button Adjustable Temperature Indentations Stop 8. Refit the control knob (with the override button at the bottom), control knob retaining screw/plastic override stop and concealing cap.Please ensure the plastic override stop is correctly seated.
- Page 32 Temperature Override Button Disable The Mira CombiForce 415 incorporates a safety feature which prevents the temperature override button from being depressed, enabling the user to access a higher shower temperature. The shower control is despatched from the factory with the button in the “enabled” position.
-
Page 33: Operation
Section Operation Mira CombiForce 415 shower has a single control knob which turns the shower control on/off and adjusts the water temperature. Turn the control knob anticlockwise to start the flow of water and clockwise to stop. To increase the showering temperature turn the control anticlockwise and clockwise to decrease the water temperature. - Page 34 This will maintain a constant outlet temperature provided the inlet water temperatures remain stable. The Mira CombiForce 415 is not a thermostatic shower control and does not sense supply temperature variations. Therefore, inlet water temperatures especially the hot, must remain relatively constant.
-
Page 35: Fault Diagnosis
Section Fault Diagnosis Customer Fault Diagnosis The trouble shooting information tabled below gives details on what you can do as a user should you encounter difficulties whilst operating the shower. Note! Should these remedies prove to be unsuccessful in solving your problem, contact your installer for further advice. - Page 36 A B C Malfunction Cause Remedy Shower pattern Reduce the (a) The heater is not collapses when simultaneous demand. capable of supplying another hot tap is several outlets at turned on. the same time. (b) Inlet strainer Check and clean inlet blocked.
- Page 37 Malfunction Cause Remedy A B C Shower force too High pressure supplies. Fit 9 l/m flow regulator. strong. No hot water (a) Heater appliance Contact the local water available not igniting due to supplier or a CORGI insufficient mains registered installer. pressure.
- Page 38 Installer Fault Diagnosis: refer to appliance diagram and customer fault diagnosis Read the section “Important Safety Information” first. Providing the shower has been correctly installed and is operated in accordance with the instructions contained in this guide, difficulties should not arise. If any maintenance is required then it must be carried out by a competent tradesperson for whom the fault diagnosis chart and maintenance instructions are provided.
- Page 39 A B C Malfunction Cause Remedy Shower pattern Reduce the (a) The heater is not collapses when simultaneous demand. capable of supplying another hot tap is several outlets at turned on. the same time. (b) Inlet strainer Check and clean inlet blocked.
- Page 40 Malfunction Cause Remedy A B C Shower force too High pressure supplies. Fit 9 l/m flow regulator. strong. No hot water (a) Heater appliance Contact the local water available not igniting due to supplier or increase insufficient mains supply pipe size to pressure.
-
Page 41: Maintenance
Component Interchangeability Some parts of the latest Mira CombiForce 415 are not interchangeable with earlier models of the Mira range. Spare parts, where different, are available for earlier models. Refer to the specific IO&M guide supplied with your shower or contact customer services for further information (telephone and fax numbers can be found on the back cover of this guide). - Page 42 Plastic Pins Retaining Bush 'O' Seal 'O' Seal Cover Retaining Screws Cartridge Cover Shroud 'O' Seal Retaining Screws Cover 'O' Seal Skid Cover Washer Plastic Override Adjustable Stop Temperature Stop Cover Shroud Control Knob Retaining Screw Figure 1 Concealing Cap 5.
- Page 43 Arrow Flat On Spindle End View Of Cartridge Figure 2 12. Refit the adjustable temperature stop in its original position. 13. Temporarily fit the control knob (with the override button at the bottom). Rotate the control knob anticlockwise until the desired temperature is achieved. Note the final position of the override button, e.g.
- Page 44 ‘O’ Seal/Inlet Strainer Renewal Should the ‘O’ seals require renewing then follow the procedure below: Important! Use only silicone based lubricants when reassembling. 1. Follow the procedure detailed in “Cartridge Renewal”: instructions 1. to 5. to dismantle the shower control. 2.
- Page 45 Inlet Strainer Cleaning Should the inlet strainer units require cleaning or renewal then follow the procedure below: Important! Use only silicone based lubricants when reassembling. 1. Follow the procedure detailed in “Cartridge Renewal”: instructions 1. to 5. to dismantle the shower control. 2.
-
Page 46: Spare Parts
Control Knob Assembly CombiForce 415 - chrome 617.29 Shroud Pack CombiForce 415 - white/light golden 802.27 Inlet Elbow Assembly - chrome 802.33 Inlet Elbow Assembly - light golden 902.55 Cartridge Assembly 932.25 Hub Pack 936.22 CombiForce 415 Service Pack - components identified 'A'... - Page 47 CombiForce 415 Spare Parts Diagram 617.20 280.07 617.21 280.15 617.29 802.27 802.33 617.20 617.21 617.29 012.12 575.12 617.18 242.55 902.55 553.35 553.54 932.25 617.22 617.23...
- Page 48 Control Knob Assembly - white 617.23 Control Knob Assembly - chrome 807.28 Backplate Assembly - components identified 'B' 902.55 Cartridge Assembly 932.04 Inlet Compression Fitting 932.25 Hub Pack 936.22 CombiForce 415 Service Pack - components identified 'A' 937.59 Screw Pack - components identified 'C'...
- Page 49 CombiForce 415B Spare Parts Diagram 119.85 555.67 617.19 932.04 012.12 575.12 902.55 242.55 932.25 617.22 617.23 410.53 410.54 410.55...
-
Page 50: Accessories
If the maximum obtainable water temperature at the shower outlet is not sufficiently hot, fitting a flow regulator may increase the outlet water temperature and may also reduce the shower force at the outlet (see Commissioning). Available from Mira customer services. 9 litre/minute Flow Regulator... - Page 51 Appendix Notes...
- Page 52 (2 years for Mira Select and 3 years for Mira Excel Spare Parts ranges).
Need help?
Do you have a question about the Combiforce 415 and is the answer not in the manual?
Questions and answers