
Related Manuals for CohuHD Costar RISE 4220HD


Summary of Contents for CohuHD Costar RISE 4220HD
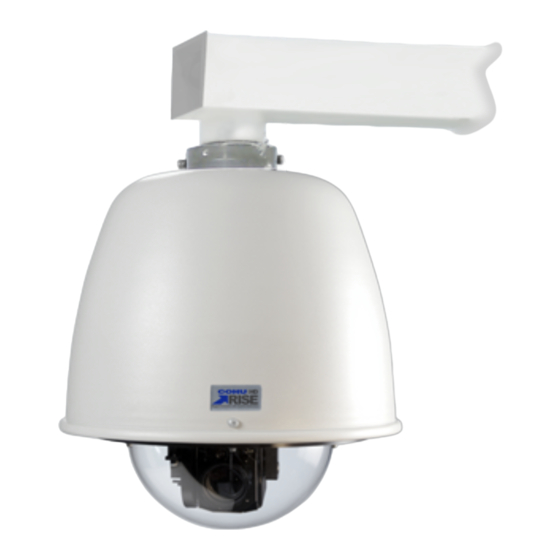
- Page 1 RISE™ Series 4220HD Dome Positioning System Installation Manual 6x-1116C www.CohuHD.com...
- Page 2 - 2 -...
-
Page 3: Table Of Contents
Table of Contents 1.0 General Information 1.1 About this document 1.2 Additional information and documents related to the camera system 1.3 Copyright/Intellectual Property Rights Statement 1.4 FCC compliance 1.5 Support services 1.6 Returns 1.7 Shipment 2.0 Safety Instructions 2.1 Important Information 2.2 Grounding 3.0 Installation 3.1 4220HD Camera Dome System Overview... - Page 4 4.6 Assigning the New Camera IP Address 4.7 Using the RISE Camera Discovery Tool 4.8 Accessing the Camera Using Web Interface 4.9 Users' Accounts 5.0 Maintenance 6.0 Warranty...
-
Page 5: General Information
1.3 Copyright/Intellectual Property Rights Statement Copyright 2015, 2016, 2017 CohuHD Costar, LLC. CohuHD Costar, LLC has intellectual property rights to technology embodied in the product described in this manual. CohuHD Costar™, RISE™, and Command Core™ are trademarks of CohuHD Costar, LLC. -
Page 6: Shipment
If a visual inspection shows damage upon receipt of this shipment, it must be noted on the freight bill or express receipt and the notation signed by the carrier’s agent. Failure to do this can result in the carrier refus- ing to honor the claim. -
Page 7: Safety Instructions
2.0 Safety Instructions 2.1 Important Information Warning: Do not remove the covers or housing. There are no user-serviceable parts inside. Warning: The Schrader Valves on the camera's dome are for factory use only. Do not attempt to add any gas to the camera head. ®... - Page 8 grounding requirements. All system cables must be shielded, and the shield(s) must be bonded to earth ground. - 8 -...
-
Page 9: Installation
3.0 Installation 3.1 4220HD Camera Dome System Overview The 4220HD Camera System is an IP camera system inside an environmentally sealed and pressurized dome enclosure. The camera system provides IP video streams with H.264 and MJPEG compression. The positioning system provides continuous 360° pan (azimuth) motion range with +/- 95° of tilt (elevation). Control interfaces are via Ethernet network connection or RS422 serial control. - Page 10 Field Connector Mating Connector: Amphenol p/n PT06E-14-18SX(476) or equivalent, CohuHD p/n 1310230-212. See "18-pin MS Connector and its Mating System Cable Connector " on page 14. Waterproof RJ45 Coupler Waterproof RJ45 Coupler: VPI CAT5e-WTP-FF or equivalent, CohuHD p/n 7610203-001. 24 Vac Power Transformer AC Outdoor Power Supply: Altronix WayPoint-10A or equivalent, CohuHD p/n 7411543-010.
-
Page 11: 4220Hd Interconnection Diagrams
3.3 4220HD Interconnection Diagrams The following are interconnection diagrams for the 4220HD camera system: 3.3.1 Interconnection Diagram with 24 Vac Power Supply, Analog and IP Output 3.3.2 Interconnection Diagram with PoE++ Switch - 11 -... -
Page 12: Interconnection Diagram With I/O And Non-Poe Switch
3.3.3 Interconnection Diagram with I/O and Non-PoE Switch 3.3.4 Interconnection Diagram for 4221HD The 4221HD Series is shipped with a 45-inch Cat5e pigtail cable (CohuHD p/n 8196401-001) and a coupler (CohuHD p/n 7610203-001). Important: For proper sealing, the diameter of the Cat5e cable jacket must be between 6 and 7mm. The CA276A cable is recommended for use with the 4221HD model. -
Page 13: Power Over Ethernet (Poe++)
3.3.5 Power over Ethernet (PoE++) The 4220 camera system is compliant with the LTPoE++™ (Linear Technology) specification. LTPoE++ maintains interoperability with existing PoE and PoE+ standard equipment and specifies backward compatibility with IEEE 802.3af (PoE) and 802.3at (PoE+) power sourcing equipment (PSE) and powered devices (PD). -
Page 14: 4220Hd Cables
3.4 4220HD Cables 3.4.1 18-pin MS Connector and its Mating System Cable Connector All system electrical connections for the 4220HD series route through an MS-type metal connector installed in the dome housing. The connector can be wired for PoE++ or 24 Vac operation. Camera connector: Amphenol p/n PT07C-14-18X(027) or equivalent, CohuHD p/n 1310225-212. -
Page 15: Ms Connector Pinouts (24 Vac)
3.4.1.2 MS Connector Pinouts (24 Vac) MS Connector Function I/O 1 I/O 2 Alarm I/O Common RS422 RX+ RS422 RX- RS422 TX+ RS422 TX- Analog Video Output Analog Video Shield Overall Shield Ethernet TX+ Ethernet TX- Ethernet RX+ Ethernet RX- 24 Vac Hi Not Connected 24 Vac Low... -
Page 16: Field Cables
3.4.3 Field Cables All system cables must be shielded, and the shield(s) must be bonded to earth ground. All Ethernet wiring must be done in accordance with TIA/EIA 568-C standards. To connect two outdoor Cat5e cables together use a waterproof coupler. For proper sealing, the dia- meter of the Cat5e cable jacket must be between 6 and 7 mm. -
Page 17: 4220Hd Cohuhd-Manufactured System Cables
Wiring to the PoE pins is the same for the NIC in a PC as for system connections to a hub, switch, router or similar device. For Power: Two wires, insulated for 300 V minimum, 18 AWG cord for power. Use for distances up to 80 feet (29 m) for 24 Vac cables. - Page 18 Cables are made with prepared leads and/or with combinations of connectors. “Prepared” indicates that the wire leads are stripped and pre-tinned with solder for attachment to a terminal strip or similar device. Maximum cable length for camera systems with operating power 24 Vac is 80 feet (29 meters). The length lim- itation is due to voltage drop in the wires.
-
Page 19: 4220Hd Camera System Mounting Methods
3.5 4220HD Camera System Mounting Methods 3.5.1 Camera System Mounts The 4220HD series is designed for outdoor installation. For installation: Use stainless steel (SS) hardware to fasten the camera system to the mounting bracket and mounting brackets to surfaces. Use anti-seize compound in order to prevent galling on the threads. CohuHD recommends Never Seez®... -
Page 20: 4220Hd Camera System Mounting Diagrams
3.6 4220HD Camera System Mounting Diagrams 3.6.1 Wall Mount Installation Use the wall mount for installation to a wall. See "Wall Mount" on page 25. 3.6.2 Pole Mount Installation Use the mount adapter, wall mount, and large pole mount for installation to a pole. See "Pole Mount" on page 25. - 20 -... -
Page 21: Installation Procedure
3.7 Installation Procedure Warning: The camera is top heavy and may tip over if not supported. Always support a camera until it has been fastened securely. Caution: Do not use the cable to support the weight of the camera. Provisions must be made for routing the system cable up to the camera system location: Pole: If the cable routes up through the pole, support the cable inside the pole to strain relieve the cam- era connector. - Page 22 Connect two outdoor CAT5e cables together using the IP67-rated weatherproof RJ45 coupler. See "Instructions on How to Assemble the Waterproof Shielded RJ45 Coupler" on page 23. See "Getting Started", to set up and check out the camera system. - 22 -...
-
Page 23: Instructions On How To Assemble The Waterproof Shielded Rj45 Coupler
3.7.1 Instructions on How to Assemble the Waterproof Shielded RJ45 Coupler To connect two outdoor Ethernet cables together use a waterproof coupler. CohuHD recommends a waterproof shielded RJ45 female to female field installable coupler. CohuHD p/n 7610203-001 Important: For proper sealing, the diameter of the cable jacket must be between 5 and 6 mm (0.197 and 0.236 inches). -
Page 24: Overall Dimensions
3.8 Overall Dimensions All dimensions in inches (mm). - 24 -... -
Page 25: Mounting Brackets Dimensions
3.9 Mounting Brackets Dimensions All dimensions in inches (mm). 3.9.1 Wall Mount 3.9.2 Pole Mount - 25 -... -
Page 26: Getting Started
4.0 Getting Started 4.1 Recommended Computer Specifications The following are recommended computer specifications to run and operate a camera system: CPU: Intel i7-860S 2.53 GHz or better Operating system: Windows 7 or later Memory: 4GB DDR3@1066MHz or better Hard Drive: 7200 rpm – minimum speed with sufficient free space Video card: NVIDIA®... -
Page 27: Assigning The Static Ip Address
4.5 Assigning the Static IP Address Important: In order to make changes in network settings in the local machine the user must be logged in as Administrator. Please contact your local IT department if you do not have Admin privileges. Set your computer IP address to the same subnet as the camera system IP address: 1. - Page 28 5. Click the Close button to close the Local Area Connections Properties dialog box. 6. Click the Close button to close the Local Area Connection Status dialog box. - 28 -...
-
Page 29: Assigning The New Camera Ip Address
4.6 Assigning the New Camera IP Address No two devices on a single Ethernet network can have the same IP address. Use the following steps to change a camera IP address before a second camera is added to the subnet. 1. -
Page 30: Using The Rise Camera Discovery Tool
4.7 Using the RISE Camera Discovery Tool 1. Download the RISE Camera Discovery Tool. The software is available as a free download at: http://www.cohuhd.com/Support/Software-Downloads. Under RISE Camera Discovery Tool, click “Download Now”. Run the RiseDiscoveryClient.exe file. Click to start it.The Rise Discovery Client win- dow will be displayed. - Page 31 Scan Interval: Move the slider indicator to establish a desired scan interval. A minimum interval is one second. To schedule scans: Check the Periodic Scan box. Move the slider indicator to set a scan interval value. Note: If the Periodic Scan box is unchecked, the scan will be initiated only once. 3.
-
Page 32: Accessing The Camera Using Web Interface
5. For Internet Explorer only: The camera will attempt to install an ActiveX control on your PC. Allow the camera to install ActiveX control by clicking on the prompt “This website wants to install the following add-on: CohuRTPControl.cab from CohuHD Costar.” Click the Install button. 6. Type user name and password. Click OK. -
Page 33: Users' Accounts
7. The Home page appears. 4.9 Users' Accounts Four users’ accounts are defined in the web interface to allow differ ent levels of access. Those accounts are: Administrator Operator User Anonymous - 33 -... -
Page 34: Maintenance
5.0 Maintenance The system is intended for long-term unattended use, and maintenance requirements are minimal: Clean exterior as needed. Clean the clear dome on the camera as needed. Use soft nonabrasive cloth like terry cloth or microfiber cloth, and a mild detergent suitable for polycarbonate. Periodically check cables for deterioration and connectors for corrosion. -
Page 35: Warranty
6.0 Warranty Please refer to the CohuHD website for product warranty information: http://www.cohuhd.com/Support/Warranty. - 35 -... - Page 36 For more information please visit us at: www.CohuHD.com To report errors, omissions, or provide any suggestions please send an email to TechPub@CohuHD.com Revision History Revision Date Comments 3/17/16 Initial Release 4221HD option - added Cat5e pigtail cable 8/11/16 and CA276A cable The manual was revised to reflect a new UI, 3/14/17 Command Core™...
Need help?
Do you have a question about the RISE 4220HD and is the answer not in the manual?
Questions and answers