Table of Contents
Advertisement
Advertisement
Table of Contents

Related Manuals for Franke F3D3S


Summary of Contents for Franke F3D3S
- Page 1 F3D3 Dual and Single Lane Versions Frozen French Fry Dispenser Service Manual...
- Page 2 Temperature Controller Sensor Cable Replacement 5-22-12 2.18 24-Volt Power Supply Replacement 5-22-12 2.19 Compressor Relay Replacement (DIN Mounted) 5-22-12 2.20 Main PC Control Board Replacement 5-30-12 Copyright 2012 Franke, Inc. All rights reserved. Questions? Call Franke Technical Support Group For Your Area. Page...
- Page 3 Repair System [Refrigerant] Leak 5-24-12 Replace Thermostatic Expansion Valve & Filter 5-24-12 Condenser Unit Replacement 5-24-12 Service Bulletins none Rev. 2 11-13-12 Copyright 2012 Franke, Inc. All rights reserved. Questions? Call Franke Technical Support Group For Your Area. Page...
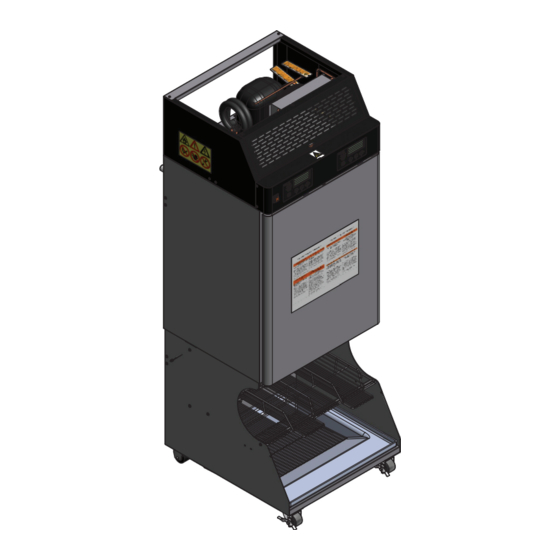
- Page 4 Lanes & Controls: Single Lane Unit Width: Unit Width: 711 mm (28”) 559 mm (22”) Refrigerant Type R-290 PROPANE Refrigerant Type R-290 PROPANE Copyright 2012 Franke, Inc. All rights reserved. Questions? Call Franke Technical Support Group For Your Area.
- Page 5 Loadcell = 00XX [Tar Value] All Clear ? Exit Press touchpad 1 = OK NOTE: See SM Section LCC for Load Cell Calibration Instructions. Rev. 1 6/2012 Copyright 2012Franke, Inc. All rights reserved. Questions? Call Franke Technical Support Group For Your Area.
- Page 6 (after Calibration Values), when the Main POWER-ON switch is first turned ON. It appears as: Firmware = H47C1, etc. on the second line. Rev. 1 11/2012 Copyright 2012 Franke, Inc. All rights reserved. Questions? Call Franke Technical Support Group For Your Area.
- Page 7 Press 2 = -- to decrease temp. value [- 0006 ] P02 = -0005 F Example: Press 3 = == to accept (new) setting Rev. 1 6/2012 Copyright 2012 Franke, Inc. All rights reserved. Questions? Call Franke Technical Support Group For Your Area.
- Page 8 1500 to trigger a dispense cycle NOTES: 1) No Main Board Chip Label. Software Vers(ion): BL 2.00; APP 2.12a appears on Lane Display. Copyright 2012 Franke, Inc. All rights reserved. Questions? Call Franke Technical Support Group For Your Area.
- Page 9 2) Country Exceptions Abbreviations: US = North America; EU = Europe; JP = Japan; LA = Latin America (South & Central); CN = Canada; AP = Asia, Pacific, Middle East & Australia 3) Unit Abbreviation: mS = Milliseconds Copyright 2012 Franke, Inc. All rights reserved. Questions? Call Franke Technical Support Group For Your Area.
- Page 10 Press 2 = -- to decrease temp. value [- 0006 ] P02 = -0005 F Example: Press 3 = == to accept (new) setting Rev. 1 11/2012 Copyright 2012 Franke, Inc. All rights reserved. Questions? Call Franke Technical Support Group For Your Area.
- Page 11 Motor stops if threshold Torq(ue) exceeded. Approx 250 Thres(hold) 1500 counts/motor current. NOTES: 1) Software version is printed on label on Main Control Board Chip. Copyright 2012 Franke, Inc. All rights reserved. Questions? Call Franke Technical Support Group For Your Area.
- Page 12 2) Country Exceptions Abbreviations: US = North America; EU = Europe; JP = Japan; LA = Latin America (South & Central); CN = Canada; AP = Asia, Pacific, Middle East & Australia 3) Unit Abbreviation: mS = Milliseconds Copyright 2012 Franke, Inc. All rights reserved. Questions? Call Franke Technical Support Group For Your Area.
- Page 13 Press 2 = -- to decrease temp. value [- 0006 ] P02 = -0005 F Example: Press 3 = == to accept (new) setting Rev. 1 11/2012 Copyright 2012 Franke, Inc. All rights reserved. Questions? Call Franke Technical Support Group For Your Area.
- Page 14 2) Country Exceptions Abbreviations: US = North America; EU = Europe; JP = Japan; LA = Latin America (South & Central); CN = Canada; AP = Asia, Pacific, Middle East & Australia Copyright 2012 Franke, Inc. All rights reserved. Questions? Call Franke Technical Support Group For Your Area.
- Page 15 2) Country Exceptions Abbreviations: US = North America; EU = Europe; JP = Japan; LA = Latin America (South & Central); CN = Canada; AP = Asia, Pacific, Middle East & Australia 3) Unit Abbreviation: mS = Milliseconds Copyright 2012 Franke, Inc. All rights reserved. Questions? Call Franke Technical Support Group For Your Area.
- Page 16 Press touchpad 2 = OK Special Mode Select (Go to Page 2) Follow Flow Chart Diagram on pages 2-12 to access Parameters. Rev. 1 11/2012 Copyright 2012 Franke, Inc. All rights reserved. Questions? Call Franke Technical Support Group For Your Area.
- Page 17 For Models with Firmware F3D3 Main Version: H46N ONLY (Go to Page 3) Page 2 Copyright 2012 Franke, Inc. All rights reserved. Questions? Call Franke Technical Support Group For Your Area.
- Page 18 Display Menu for H46N Firmware/ 1.11.4 For Models with Firmware F3D3 Main Version: H46N ONLY (From Page 2) (Go to Page 4) Page 3 Copyright 2012 Franke, Inc. All rights reserved. Questions? Call Franke Technical Support Group For Your Area.
- Page 19 Display Menu for H46N Firmware/ 1.11.4 For Models with Firmware F3D3 Main Version: H46N ONLY (From Page 3) (Go to Page 5) Page 4 Copyright 2012 Franke, Inc. All rights reserved. Questions? Call Franke Technical Support Group For Your Area.
- Page 20 Display Menu for H46N Firmware/ 1.11.4 For Models with Firmware F3D3 Main Version: H46N ONLY (From page 4) (Go to Page 6) Page 5 Copyright 2012 Franke, Inc. All rights reserved. Questions? Call Franke Technical Support Group For Your Area.
- Page 21 Display Menu for H46N Firmware/ 1.11.4 For Models with Firmware F3D3 Main Version: H46N ONLY (From page 5) (Go to Page 7) Page 6 Copyright 2012 Franke, Inc. All rights reserved. Questions? Call Franke Technical Support Group For Your Area.
- Page 22 Display Menu for H46N Firmware/ 1.11.4 For Models with Firmware F3D3 Main Version: H46N ONLY (From page 6) (Go to Page 8) Page 7 Copyright 2012 Franke, Inc. All rights reserved. Questions? Call Franke Technical Support Group For Your Area.
- Page 23 Display Menu for H46N Firmware/ 1.11.4 For Models with Firmware F3D3 Main Version: H46N ONLY (From Page 7) (Go to Page 9) Page 8 Copyright 2012 Franke, Inc. All rights reserved. Questions? Call Franke Technical Support Group For Your Area.
- Page 24 Display Menu for H46N Firmware/ 1.11.4 For Models with Firmware F3D3 Main Version: H46N ONLY (From Page 8) (Go to page 10) Page 9 Copyright 2012 Franke, Inc. All rights reserved. Questions? Call Franke Technical Support Group For Your Area.
- Page 25 Display Menu for H46N Firmware/ 1.11.4 For Models with Firmware F3D3 Main Version: H46N ONLY (From Page 9) (Go to Page 11) Page 10 Copyright 2012 Franke, Inc. All rights reserved. Questions? Call Franke Technical Support Group For Your Area.
- Page 26 Display Menu for H46N Firmware/ 1.11.4 For Models with Firmware F3D3 Main Version: H46N ONLY (From Page 10) Page 11 (Go to Page 12) Copyright 2012 Franke, Inc. All rights reserved. Questions? Call Franke Technical Support Group For Your Area.
- Page 27 F3D3 Series Service Manual Display Menu for H46N Firmware/ 1.11.4 For Models with Firmware F3D3 Main Version: H46N ONLY (From page 11) Page 12 Copyright 2012 Franke, Inc. All rights reserved. Questions? Call Franke Technical Support Group For Your Area.
- Page 28 Press 2 = -- to decrease temp. value [- 0006 ] P02 = -0005 F Example: Press 3 = == to accept (new) setting Rev. 1 6/2012 Copyright 2012 Franke, Inc. All rights reserved. Questions? Call Franke Technical Support Group For Your Area.
- Page 29 1500 to trigger a dispense cycle NOTES: 1) No Main Board Chip Label. Software Vers(ion): BL 2.00; APP 2.12a appears on Lane Display. Copyright 2012 Franke, Inc. All rights reserved. Questions? Call Franke Technical Support Group For Your Area.
- Page 30 2) Country Exceptions Abbreviations: US = North America; EU = Europe; JP = Japan; LA = Latin America (South & Central); CN = Canada; AP = Asia, Pacific, Middle East & Australia 3) Unit Abbreviation: mS = Milliseconds Copyright 2012 Franke, Inc. All rights reserved. Questions? Call Franke Technical Support Group For Your Area.
- Page 31 Services at the numbers listed in Section 1.2.2 - Service Commitment & Contact Information. Be prepared to provide the Model and Serial Number from the Manufacturers Data Plate located under the louvered condenser filter access panel (F3D3 & F3D3S) or the upper right side of the freezer on (F3D3P & F3D3PS) propane models.
- Page 32 In these situations, Franke Technical Support will work directly with the customer to find mutually acceptable options. Franke reserves the right to use service agents outside of the Service Network, as needed.
- Page 33 For two lane (F3D3 or F3D3P) Models, See Section 3.6 for Backup Temperature Display jumper re-cabling instructions compartment temperature appear For single lane (F3D3S or F3D3SP) Models, Check Temperature Controller Sensor Cable; OK? Yes = Continue No = Replace in left lane display? Sensor Cable per Section 2.17 ...
- Page 34 Check Bump Switch. OK? Yes = Continue No = Replace Basket Fill Plunger Switch per Section 2.13 Yes! The darn thing works. Don’t bother us! Rev. 1 6/2012 Copyright 2012 Franke, Inc. All rights reserved. Questions? Call Franke Technical Support Group For Your Area.
- Page 35 * When Hopper Level is below Low Product Sensor, display flashes “Low Fry Level” and three LEDs around ‘!’ warning triangle illuminate. Copyright 2012 Franke, Inc. All rights reserved. Questions? Call Franke Technical Support Group For Your Area. Page 1...
- Page 36 Enter PN/SN (part number/serial Err09 information not available number) information, per LON Missing PN/SN for LON communications. Installation Instructions Enter PN/SN Reset Copyright 2012 Franke, Inc. All rights reserved. Questions? Call Franke Technical Support Group For Your Area. Page 2...
- Page 37 F3D3 Series Service Manual Error Message Guide / Section 1.4 Issued 4/2011 Copyright 2012 Franke, Inc. All rights reserved. Questions? Call Franke Technical Support Group For Your Area. Page 3...
- Page 38 562501 2 ea. Swivel Caster (front) with Brake 19000746 19000746 2 ea. Swivel Caster (rear) 19000801 19000826 1 ea. Cord Set Copyright 2011 Franke, Inc. All rights reserved. Questions? Call Franke Technical Support Group For Your Area. Page 1...
- Page 39 Removable Bottom (red silicone rubber) 19004013 19004013 1 ea. Wire-form Drip Tray (dispense lane guide) 19003757 19003757 1 ea. Wire Rack, Bottom Fry Basket Support Copyright 2011 Franke, Inc. All rights reserved. Questions? Call Franke Technical Support Group For Your Area. Page 2...
- Page 40 18002224 1 ea. Door Hinge, Top (RH)/Bottom (LH) 3700894 3700894 2 ea. Door Bushing, Bronze 19003057 19003057 4 ea. Screw, Flanged Copyright 2011 Franke, Inc. All rights reserved. Questions? Call Franke Technical Support Group For Your Area. Page 3...
- Page 41 19000238 19000238 1 ea. Retaining Ring, External 17002997 17002997 1 ea. Washer, Sensor Retaining 19000384 19000384 1 ea. Product (present) Sensor Copyright 2011 Franke, Inc. All rights reserved. Questions? Call Franke Technical Support Group For Your Area. Page 4...
- Page 42 Screw, Overlay Mounting (M4 x 8) 385.151 385.151 1 ea. Rocker Switch, Main Power-ON/OFF 19004012 19004012 1 ea. Front Bezel, Control Panel, w/studs Copyright 2011 Franke, Inc. All rights reserved. Questions? Call Franke Technical Support Group For Your Area. Page 5...
- Page 43 1 ea. Relay, 30A/24V DC DPST - Schneider 3588201 3588201 2 ea. Terminal Block Module 3588202 3588202 3 ea. Terminal Block Module Copyright 2011 Franke, Inc. All rights reserved. Questions? Call Franke Technical Support Group For Your Area. Page 6...
- Page 44 1 ea. Bushing, Bronze (6.3 mm long) 19003682 19003682 1 ea. Bushing, Plastic (5.6 mm) 19002985 19002985 1 ea. Cotter Pin, Brass Copyright 2011 Franke, Inc. All rights reserved. Questions? Call Franke Technical Support Group For Your Area. Page 7...
- Page 45 1 ea. Nut, Stop Bolt, Stainless Steel (M6) 19001564 19001564 2 ea. Screw, Cell-to-Base (M6x50) 19001570 19001570 4 ea. Lock Washers (M6) Copyright 2011 Franke, Inc. All rights reserved. Questions? Call Franke Technical Support Group For Your Area. Page 8...
- Page 46 Optical Sensor with Mounting Bracket 5046 5046 8 ea. Lock Washer #10 19002765 19002765 6 ea. Screw, Motor Mounting - M5 40 mm long Copyright 2011 Franke, Inc. All rights reserved. Questions? Call Franke Technical Support Group For Your Area. Page 9...
- Page 47 230-Volt/50 Hz Quantity Description Key No. 19002725 19002725 1 ea. Bucket, Silicone (fries) 19003534 19003534 2 ea. Doors, Product Dispensing w/screws Copyright 2011 Franke, Inc. All rights reserved. Questions? Call Franke Technical Support Group For Your Area. Page 10...
- Page 48 Clevis Pin (4.55 x 38.1) 19000211 19000211 1 ea. Clevis Pin (6.35 x 50.8) 19000212 19000212 1 ea. Clevis Pin (6.35 x 38.1) Copyright 2011 Franke, Inc. All rights reserved. Questions? Call Franke Technical Support Group For Your Area. Page 11...
- Page 49 F3D3 Series Service Manual Parts List & Component Diagrams / Section 1.5 19000214 19000214 2 ea. Spacer 19000170 19000170 1 ea. Cotter Pin, Ring Locking Rev. 1 6/2011 Copyright 2011 Franke, Inc. All rights reserved. Questions? Call Franke Technical Support Group For Your Area. Page 12...
- Page 50 F3D3 Series Service Manual Electric Schematics / Section 1.6 120-Volt Wiring Diagram Copyright 2012 Franke, Inc. All rights reserved. Questions? Call Franke Technical Support Group For Your Area. Page 1...
- Page 51 F3D3 Series Service Manual Electric Schematics / Section 1.6 230-Volt Wiring Diagram Copyright 2012 Franke, Inc. All rights reserved. Questions? Call Franke Technical Support Group For Your Area. Page 2...
- Page 52 F3D3 Series Service Manual Electric Schematics / Section 1.6 24-Volt Wiring Diagram (All F3D3S Models) (Also Covers Dual Lane F3D3 Models) Copyright 2012 Franke, Inc. All rights reserved. Questions? Call Franke Technical Support Group For Your Area. Page 3...
- Page 53 F3D3 Series Service Manual Electric Schematics / Section 1.6 Danfoss Condensing Unit Model LCHC0065RC____B Electric Schematic Rev.1 7/2011 Copyright 2012 Franke, Inc. All rights reserved. Questions? Call Franke Technical Support Group For Your Area. Page 4...
- Page 54 Three touch pads are evenly spaced under the Display Screen, which displays options: Inc (increase) Dec (decrease) OK etc. Use the Action touch pad under the option (Inc/Dec/OK) to initiate that action. Rev.1 6/2012 Copyright 2012 Franke, Inc. All rights reserved. Questions? Call Franke Technical Support Group For Your Area.
- Page 55 Press touchpad 3 = Next [Goes back to Set Language] See Page 2 Customer Function Guide for Sub-Menus & Options Rev. 1 6/2012 Copyright 2012 Franke, Inc. All rights reserved. Questions? Call Franke Technical Support Group For Your Area. Page 1...
- Page 56 Large (C) = 00000 Z Default is 40 Pre (P) = 00000 C Default is 326 Prev Exit P (Pre-Load) Default is 2900 Copyright 2012 Franke, Inc. All rights reserved. Questions? Call Franke Technical Support Group For Your Area. Page 2...
- Page 57 Lev2 – Customer Access Large = XXXX product loading bucket... then Lev2 – Customer Access Press touchpad 1 = OK XXXX XXXX XXXX Recal Accept Copyright 2012 Franke, Inc. All rights reserved. Questions? Call Franke Technical Support Group For Your Area.
- Page 58 TIP: If a calibrated 1.5 pound/680 gram weight is not available, use six 4:1 frozen hamburger patties. Clean Product Bucket after calibration. Rev. 1 6/2012 Copyright 2012 Franke, Inc. All rights reserved. Questions? Call Franke Technical Support Group For Your Area.
- Page 59 Service start relay & capacitor via right-side access panel Copyright 2012 Franke, Inc. All rights reserved. Questions? Call Franke Technical Support Group For Your Area.
- Page 60 Condenser Air Filter NOTE: Part numbers are subject to change, as product improvements are implemented. When In Doubt… Call the Franke Technical Support Group for your area. Tools Required: [For Mechanical Systems Repair] 10 mm [3/8”] flat screwdriver 6-7 mm [¼”] flat screwdriver ...
- Page 61 Phillips screws removed earlier. 18) Reposition front control bezel and secure with four Phillips screws removed earlier. Remove the two Load Cell Bracket mounting screws. Continued… Copyright 2012 Franke, Inc. All rights reserved. Questions? Call Franke Technical Support Group For Your Area.
- Page 62 5 mm [3/16”] Allen/Hex Wrench 10 mm [3/8”] open end wrench Feeler or gap gauge Fish tape or string Rev. 1 6/2012 Copyright 2012 Franke, Inc. All rights reserved. Questions? Call Franke Technical Support Group For Your Area.
- Page 63 [Photo 4] Right-Long Bushing Continued… Ensure cotter pin legs are bent around pin. Copyright 2012 Franke, Inc. All rights reserved. Questions? Call Franke Technical Support Group For Your Area.
- Page 64 Medium Phillips screwdriver 8 mm [5/16”] box wrench or socket 3 mm [1/8”] Allen/Hex Wrench Needle-nose pliers Rev. 1 6/2012 Copyright 2012 Franke, Inc. All rights reserved. Questions? Call Franke Technical Support Group For Your Area.
- Page 65 ‘C’ ring pliers 19) Re-hang and secure rear service access panel and return Dispenser to normal operating position. Rev. 1 6/2012 Copyright 2012 Franke, Inc. All rights reserved. Questions? Call Franke Technical Support Group For Your Area.
- Page 66 Dispenser to normal operating position. Tools Required: Medium Phillips screwdriver Rev. 1 11/2012 From front turn switch clockwise to remove switch from backwall. Copyright 2012 Franke, Inc. All rights reserved. Questions? Call Franke Technical Support Group For Your Area.
- Page 67 Dispenser to normal operating position. Tools Required: Small & Medium Phillips screwdrivers Small pliers 4 mm [5/32”] Allen/Hex Wrench Rev. 1 6/2012 Copyright 2012 Franke, Inc. All rights reserved. Questions? Call Franke Technical Support Group For Your Area.
- Page 68 14) Return Dispenser to normal operating position. Tools Required: Small & Medium Phillips screwdrivers Rev. 1 6/2012 Detach panel ribbon harness from main control board. Copyright 2012 Franke, Inc. All rights reserved. Questions? Call Franke Technical Support Group For Your Area.
- Page 69 6 mm [¼”] flat blade screwdriver Needle nose pliers Rev. 1 6/2012 Push in new switch until locking tabs engage & bezel is flush. Copyright 2012 Franke, Inc. All rights reserved. Questions? Call Franke Technical Support Group For Your Area.
- Page 70 21) Secure sensor bracket flush to back of freezer using the two 8 mm bolts removed earlier. Sensor slides into slot in 22) Replace hopper in freezer. mounting bracket. Continued… Copyright 2012 Franke, Inc. All rights reserved. Questions? Call Franke Technical Support Group For Your Area.
- Page 71 Medium Phillips screwdriver 8 mm socket & wrench Plastic wire ties Electric tape Rev 1 6/2012 String or fish tape Copyright 2012 Franke, Inc. All rights reserved. Questions? Call Franke Technical Support Group For Your Area.
- Page 72 [Photo 1] A F3D3S Model 2.18 24-Volt Power Supply Replacement [1 ea. on F3D3S & F3D3SP; 2 ea. on F3D3 & F3D3P] Roll the unit out to allow access to rear service panel. Disconnect power at outlet. [Pull power cord plug.] Remove Phillips screws securing rear service access panel.
- Page 73 Tools Required: Medium Phillips screwdriver 2-3 mm [1/8”] flat blade screwdriver 6-7 mm [1/4”] flat blade screwdriver Rev. 1 6/2012 Copyright 2012 Franke, Inc. All rights reserved. Questions? Call Franke Technical Support Group For Your Area.
- Page 74 6-7 mm [1/4”] flat blade screwdriver Push up on bottom of relay, Needle nose pliers angle top off upper rail flange to release. Rev. 1 6/2012 Copyright 2012 Franke, Inc. All rights reserved. Questions? Call Franke Technical Support Group For Your Area.
- Page 75 Needle-nose pliers Rubber mallet Align gasket tailpiece with door slot and hammer carefully into place around door perimeter. Rev. 1 6/2012 Copyright 2012 Franke, Inc. All rights reserved. Questions? Call Franke Technical Support Group For Your Area.
- Page 76 14) Secure cover/bezel with the four screws removed earlier. Continued… Disconnect the touchpad overlay ribbon harness from control board. Copyright 2012 Franke, Inc. All rights reserved. Questions? Call Franke Technical Support Group For Your Area.
- Page 77 [Photo 7] Lift off main control broad. Tools Required: Medium Phillips screwdriver 6 mm [1/4”] nut driver Rev. 1 6/2012 Copyright 2012 Franke, Inc. All rights reserved. Questions? Call Franke Technical Support Group For Your Area.
- Page 78 Control Board PC Chip is replaced. See Section LCC for Load Cell Calibration instructions. Continued… Allow touchpad to hang from overlay ribbon harness. Copyright 2012 Franke, Inc. All rights reserved. Questions? Call Franke Technical Support Group For Your Area.
- Page 79 & apply gentle pressure. Tools Required: Medium Phillips screwdriver Small plastic chip removal screwdriver or small pocket knife Rev. 1 6/2012 Copyright 2012 Franke, Inc. All rights reserved. Questions? Call Franke Technical Support Group For Your Area.
- Page 80 12) Obtain new Door Perimeter Cable Heater and remove any protective packaging and uncoil the cable and wire leads. Door heater copper tubing loop is located behind control panel. Continued… Copyright 2012 Franke, Inc. All rights reserved. For Technical Support, Call 800-537-2653.
- Page 81 3) If reading is OK, replace and secure rear access panel; [If replacing Door Perimeter Heater, replace and secure Rev. 1 6/2012 front control bezel/cover]; and return F3D3S to normal operating position. Copyright 2012 Franke, Inc. All rights reserved.
- Page 82 [See Photos 2 & 3] Remove the 10 mm [3/8”] nut and washer to power cord power ground. NOTE: On F3D3S/P/SP Models, power cord ground is the first-on (last off) of three grounds, each secured to post with their own nut.
- Page 83 Tools Required: Medium Phillips screwdriver Pliers or channel locks 10 mm [3/8”] wrench Electric tape Rev. 1 6/2012 Copyright 2012 Franke, Inc. All rights reserved. For Technical Support, Call 800-537-2653.
- Page 84 Hopper enough to free the rotor hubs. Tools Required: Large Flat Screwdriver or small flat pry bar Rev. 1 6/2012 Copyright 2012 Franke, Inc. All rights reserved. Questions? Call Franke Technical Support Group For Your Area.
- Page 85 Hinge up rubber hopper, open load doors and remove three …Continued shaft-mounting screws on each. Copyright 2012 Franke, Inc. All rights reserved. Questions? Call Franke Technical Support Group For Your Area.
- Page 86 Medium Phillips screwdriver 3 mm [1/8”] Allen wrench 10 mm box or socket wrench Needle-nose pliers Rev. 1 6/2012 Copyright 2012 Franke, Inc. All rights reserved. Questions? Call Franke Technical Support Group For Your Area.
- Page 87 Rubber mallet 20) Replace the two ‘C’ Rings on each shaft. Needle-nose pliers …Continued Copyright 2012 Franke, Inc. All rights reserved. Questions? Call Franke Technical Support Group For Your Area.
- Page 88 Lane properly dispenses fries, the Automation Assembly is working properly. 30) Re-hang and secure rear service access panel and Rev. 1 6/2012 return Dispenser to normal operating location. Copyright 2012 Franke, Inc. All rights reserved. Questions? Call Franke Technical Support Group For Your Area.
- Page 89 Dispenser to normal operating position. Tools Required: Medium Phillips screwdriver 4 mm [5/32”] Allen/hex Wrench Needle nose pliers Rev. 1 6/2012 Copyright 2012 Franke, Inc. All rights reserved. Questions? Call Franke Technical Support Group For Your Area.
- Page 90 Cut or pry off old shaft gasket 20) Turning ON main power switch & pressing LANE- and discard. POWER touch pad on front control overlay. Continued… Copyright 2012 Franke, Inc. All rights reserved. Questions? Call Franke Technical Support Group For Your Area.
- Page 91 Press seal over shaft Medium Phillips screwdriver & tight against freezer wall. 4 mm [5/32”] Allen Wrench Rev. 1 6/2012 Copyright 2012 Franke, Inc. All rights reserved. Questions? Call Franke Technical Support Group For Your Area.
- Page 92 Medium Phillips Screwdriver 10 mm [3/8”] box wrench 4 mm [5/32”] Allen/Hex Wrench Feeler or Gap Gauge Rev. 1 6/2012 Copyright 2012 Franke, Inc. All rights reserved. Questions? Call Franke Technical Support Group For Your Area.
- Page 93 19) Re-hang and secure rear service access panel and Rev. 1 6/2012 return Dispenser to normal operating position. Copyright 2012 Franke, Inc. All rights reserved. Questions? Call Franke Technical Support Group For Your Area.
- Page 94 Bucket and doors should be square, without Rotate door down & remove any gaps. [See Photo 2] three mounting screws using 3 mm [1/8”] hex wrench. Copyright 2012 Franke, Inc. All rights reserved. Questions? Call Franke Technical Support Group For Your Area.
- Page 95 Medium Phillips screwdriver 8 mm [5/16”] box wrench or socket 3 mm [1/8”] Allen/hex wrench Needle-nose pliers Rev. 1 6/2012 Copyright 2012 Franke, Inc. All rights reserved. Questions? Call Franke Technical Support Group For Your Area.
- Page 96 2 mm [1/16”] flat blade screwdriver 13) Position and secure rear service access panel and return Dispenser to normal operating position. Rev. 1 6/2012 Copyright 2012 Franke, Inc. All rights reserved. Questions? Call Franke Technical Support Group For Your Area.
- Page 97 To reverse the door swing, just reverse 8 mm [5/16”] Box Wrench these instructions: right-for-left; left-for-right. or Socket/Ratchet Rev. 1 6/2012 Copyright 2012 Franke, Inc. All rights reserved. Questions? Call Franke Technical Support Group For Your Area.
- Page 98 10 mm box wrench freezer compartment bottom with a business card, from inside the freezer. There should be a snug fit, bucket-to- bottom. Rev. 1 6/2012 Copyright 2012 Franke, Inc. All rights reserved. Questions? Call Franke Technical Support Group For Your Area.
- Page 99 Tools Required: Medium Phillips screwdriver 4 mm [5/32”] Allen/hex wrench Rev. 1 6/2012 8 mm [5/16”] wrench or socket Copyright 2012 Franke, Inc. All rights reserved. Questions? Call Franke Technical Support Group For Your Area.
- Page 100 (& center support on two lane models) have slotted holes to allow up/down adjustment of brackets. Tools Required: 10 mm [5/16”] wrench or socket Rev. 1 6/2012 Copyright 2012 Franke, Inc. All rights reserved. Questions? Call Franke Technical Support Group For Your Area.
- Page 101 16) Secure cover/bezel with the four screws removed earlier. Connect 12-pin B-B Master & 3- 17) Plug in unit power cord to power supply. pin, 2-wire RELAY-to-right-main- control-board terminals. Continued… Copyright 2012 Franke, Inc. All rights reserved. Questions? Call Franke Technical Support Group For Your Area.
- Page 102 NOTE: These models may be equipped with a simple 12-pin connector with a single (black) jumper wire. They ship from Franke with the connector plugged in to the left Main PC Control Board, in place of a ribbon cable. To active the right...
- Page 103 Section 4.1 (Preventive Maintenance) of this Service Manual. If those steps do not resolve a Rev. 1 6/2012 refrigeration system problem, contact the Franke Technical Support Group. Copyright 2012 Franke, Inc. All rights reserved. Questions? Call Franke Technical Support Group For Your Area.
- Page 104 4) If unit is plugged in, turned on and power is present at the Rev. 1 6/2012 outlet but Refrigeration System will not power-up, contact Franke Technical Support Group. Copyright 2012 Franke, Inc. All rights reserved. Questions? Call Franke Technical Support Group For Your Area.
- Page 105 19) Replace and secure right side access panel screws Access the condenser fan motor removed earlier and return dispenser to normal operating from open top of compartment. position. More photos… Copyright 2012 Franke, Inc. All rights reserved. Questions? Call Franke Technical Support Group For Your Area.
- Page 106 Medium Phillips screwdriver 10 mm [3/8”] wrench or socket/driver 8 mm [5/16”] wrench or socket/driver Needle nose pliers Rev. 1 6/2012 Copyright 2012 Franke, Inc. All rights reserved. Questions? Call Franke Technical Support Group For Your Area.
- Page 107 Black from compressor. 17) Replace capacitor removed to provide relay access. 18) Replace [and secure] metal relay enclosure cover. Remove relay terminal connections. Continued… Copyright 2012 Franke, Inc. All rights reserved. Questions? Call Franke Technical Support Group For Your Area.
- Page 108 Tools Required: Medium Phillips screwdriver Needle nose pliers Rev. 1 6/2012 Copyright 2012 Franke, Inc. All rights reserved. Questions? Call Franke Technical Support Group For Your Area.
- Page 109 4.4B for Nitrogen Pressure Testing of Evaporator. Detector or Liquid leak-detection soap 12) If a leak is found, see Section 4.5 for Leak Repair Procedures. Rev. 1 6/2012 Copyright 2012 Franke, Inc. All rights reserved. Questions? Call Franke Technical Support Group For Your Area.
- Page 110 The foam Liquid leak-detection soap insulation used inside the evaporator housing contains HFCs, which will generate false readings. Rev. 1 11/2012 Copyright 2012 Franke, Inc. All rights reserved. Questions? Call Franke Technical Support Group For Your Area.
- Page 111 Refrigeration / Section 4.4.2 [Photo 1] 4.4.2 Cold Wall Evaporator Leak Detection NOTE: F3D3 & F3D3S Models ONLY - This procedure for leak detection should be used when electronic detection or soap failed to locate a leak in the system HIGH SIDE. (See procedure 4.4 &...
- Page 112 13) Return Dispenser to normal operating position and lock & fittings front casters. Nitrogen Charge Tank R404A Refrigerant Brazing Torch, etc. Rev. 1 6/2012 Copyright 2012 Franke, Inc. All rights reserved. Questions? Call Franke Technical Support Group For Your Area.
- Page 113 Secure Electrician’s tape insulation with electrician’s tape. Rev. 1 6/2012 15) Return Dispenser to normal operating position. Copyright 2012 Franke, Inc. All rights reserved. Questions? Call Franke Technical Support Group For Your Area.
- Page 114 11) Clean and prepare the refrigeration line fittings, then braise those line connections. Replace or repair any split insulation on the return line. Continued… Copyright 2012 Franke, Inc. All rights reserved. Questions? Call Franke Technical Support Group For Your Area.
- Page 115 Tubing Cutter Brazing Torch, etc. When resealing the system, use a continuous Nitrogen charge to keep contaminants out. Rev. 1 6/2012 Copyright 2012 Franke, Inc. All rights reserved. Questions? Call Franke Technical Support Group For Your Area.
Need help?
Do you have a question about the F3D3S and is the answer not in the manual?
Questions and answers
drum motor doesnt stop
The Franke F3D3S drum motor may not stop if the torque threshold is not exceeded. The motor is designed to stop automatically if the torque exceeds a set threshold (approx. 250 counts per amp of motor current). If the motor continues running, it may indicate that this threshold has not been reached or the sensor is not detecting the torque correctly.
This answer is automatically generated