Table of Contents
Advertisement
Quick Links
Advertisement
Table of Contents

Summary of Contents for Axent AXENT.ONE C PLUS
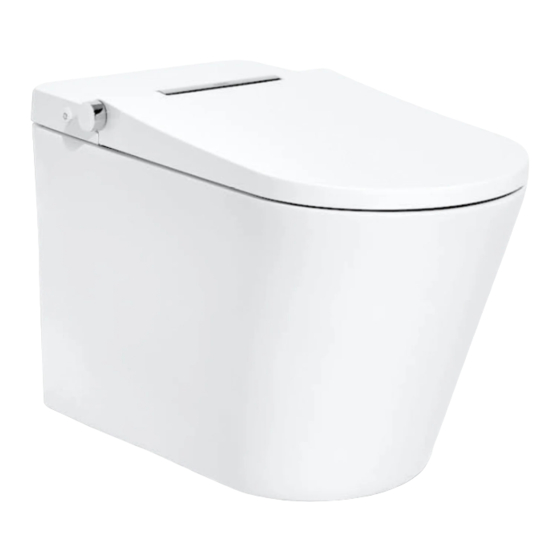
- Page 1 AXENT. O NE C PLUS USER MANUAL...
- Page 2 THANK YOU FOR CHOOSING Thank you for selecting an AXENT Switzerland product. To ensure proper installation, please review these instruction carefully before use. Care- fully unpack and examine the intelligent toilet before installation. For any questions, we may be contacted at 800-769-4857. Thank you again for...
-
Page 3: Table Of Contents
USER MANUAL AXENT.ONE C PLUS Smartphone App Safety Introduction Multi-function Dial Remote Control Maintenance Troubleshooting Technical Data Guarantee... -
Page 4: Smartphone App
SMARTPHONE APP CONNECT YOUR AXENT INTELLIGENT TOILET WITH OUR APP The Axent Remote App can be used as an individualized remote control with the Axent One C Plus. 9:41 AM 100% Rear wash Lady wash Stop Night light Drainage System purge... -
Page 5: Safety
NORMAL USAGE The intelligent toilet’ s spray arm attachment should only be used for Any other usage will not be deemed as normal usage. AXENT under- the rear wash and front wash cleaning functions. The product may takes no liability for abnormal usage. - Page 6 SAFETY Keep the cord away from heated surfaces. Do not block the air vents on this product. Do not place the toilet on or by objects such as long window curtains that could potentially obstruct the air vents during normal usage. Keep air vents free of lint, hair, and other debris. Never use while sleepy or drowsy.
- Page 7 SAFETY GROUNDING INSTRUCTIONS This product must be grounded when plugged in. The power cord on If repair or replacement of the power cord or plug is necessary, do not this product has a grounding plug and must be plugged into an outlet connect the grounding wire to either flat blade terminal.
-
Page 8: Introduction
INTRODUCTION OVERVIEW E322-02 REMOTE CONTROL Activate the remote control by inserting the batteries. For safety purposes, the bidet function of the intelligent toilet is only functional when the user is seated on the toilet seat. Seat Close Flush User Rear Wash Front Wash Stop Massage... - Page 9 INTRODUCTION MAIN The intelligent toilet can be easily operated by the multi-functional dial and flush button. Manual Flush Button Multi-functional Dial MANUAL FLUSH Press the Manual Flush Button located behind the multifunction knob to flush the toilet.
-
Page 10: Multi-Function Dial
MULTI-FUNCTION DIAL QUICK START AXENT. O NE C PLUS offers a Quick Start function. Sit down on the toilet seat and push the dial. Rear Wash starts and will stop after another push on the button. The spray arm is automatically cleaned with water before and after each washing procedure. - Page 11 MULTI-FUNCTION DIAL REGULAR USE Rear Wash Front Wash Adjusting water volume Adjusting water temperature Adjusting nozzle position Stop...
- Page 12 MULTI-FUNCTION DIAL ADDITIONAL FEATURES Additional settings and service functions may also be accessed with the multifunction dial. Access is done at two levels. LEVEL 1 LEVEL 2 - Mute ON / OFF - Night light ON / AUTO / OFF - Seat heating ON / OFF - Deodorizer ON / OFF - Self-cleaning function ON / OFF...
- Page 13 MULTI-FUNCTION DIAL LEVEL 1 MUTE ON / OFF Factory setting: Mute is OFF When the multifunction dial is already at LEVEL 1 (the ambient light will flash slowly): - Turn the multifunction dial counter clockwise. No «beep»: Mute is ON Short «beep»: Mute is OFF LEVEL 1...
- Page 14 MULTI-FUNCTION DIAL LEVEL 1 SELF-CLEANING FUNCTION ON / OFF As soon as you sit down on the toilet seat, the spray arm will be cleaned with fresh water. This function can be turned ON or OFF. Factory setting: Self-cleaning function is ON When the multifunction dial is already at LEVEL 1 (the ambient light will flash slowly): - Press and hold the multifunction dial.
- Page 15 MULTI-FUNCTION DIAL ACTIVATE FUNCTIONS AT LEVEL 2 When the multifunction dial is already at LEVEL 1, press and hold the dial again until the ambient light flashes quickly. The mode level 2 is activated when the ambient light continues to flash quickly. DEACTIVATE FUNCTIONS AT LEVEL 2 When the multifunction dial is already at LEVEL 2, push the dial.
- Page 16 MULTI-FUNCTION DIAL LEVEL 2 DEODORIZER ON / OFF Factory setting: Deodorizer is ON The deodorizer function is activated when a user is seated. When the multifunction dial is already at LEVEL 2 (the ambient light will flash quickly): - Press and hold the multifunction dial. - Turn it clockwise.
- Page 17 MULTI-FUNCTION DIAL LEVEL 2 SPRAY ARM CLEANING When the multifunction dial is already at LEVEL 2 (the ambient light will flash quickly): - Turn the multifunction dial clockwise. The spray arm will move out. - Clean the spray arm with fabric or a soft bristled brush. - Turn the multifunction dial clockwise again to retract the spray arm.
- Page 18 MULTI-FUNCTION DIAL STAND-BY MODE Press and hold the multifunction dial until ambient light off to activate the Stand-by mode. In Stand-by mode, there is no activity for some time. Gently tap the toilet seat lid to deactivate Stand-by mode. PAIRING TO DIAL Cut off the power of the intelligent toilet and then apply power to it.
-
Page 19: Remote Control
REMOTE CONTROL REMOTE CONTROL Seat Close Flush User Rear Wash Front Wash Stop Massage Water Flow Position System Purge Light Descale Mute Setting REMOTE CONTROL ON/OFF/REPLACING BATTERIES Insert batteries. OFF: Remove batteries. Replacing batteries: When power is below 15%, the first and last of Level Indicator will blink on and off, indicating the battery needs to be replaced. - Page 20 REMOTE CONTROL PAIRING Cut off the power of the intelligent toilet and then apply power to it. After three times «beep», start pairing by pressing « Stop » repeatedly until hearing three times long «beep» from the intelligent toilet, which means pairing suc- Stops cessful.
- Page 21 REMOTE CONTROL FRONT OF REMOTE CONTROL Rear Wash Front Wash Stop Massage Water Flow Position REAR WASH Press « Rear Wash » after you are seated to start. Rear Wash Press « Stop », to stop the Rear Wash early. If not stopped manually, the Rear Wash will stop automatically after 3 minutes.
- Page 22 REMOTE CONTROL WATER VOLUME Press « Water Volume » during Rear or Front Wash to adjust the water volume. Water Volume The Level Indicator indicates the selected level. Press « Minus » to reduce the water volume. Minus Press « Plus » to increase the water volume. Plus SPRAY ARM POSITION Press «...
- Page 23 REMOTE CONTROL FRONT OF REMOTE CONTROL Rear Wash Front Wash Stop Massage Water Flow Position TEMPERATURE ADJUSTMENT To adjust the seat, water, or air dryer temperature, press « Temp » repeatedly until the respective icon lights up. Temp Seat Temp Water Temp Air Temp Press «...
- Page 24 REMOTE CONTROL TOP OF REMOTE CONTROL Seat Close Flush User BACK OF REMOTE CONTROL System Purge Light Descale Mute Setting NIGHT LIGHT SETTING Factory setting: AUTO mode – The night light turn ON or OFF automatically according to ambient light levels. Light Press «...
- Page 25 REMOTE CONTROL TOP OF REMOTE CONTROL Seat Close Flush User BACK OF REMOTE CONTROL System Purge Light Descale Mute Setting AUTO OPEN SETTING Factory setting: Auto Open will only open the lid. Setting Press « Setting » at the same time « Lid » to activate Auto Open Setting. Press «...
- Page 26 REMOTE CONTROL AUTO CLOSE SETTING Factory setting: Auto Close function is ON. Setting Press « Setting » at the same time « Close » to activate Auto Close. Press « Close » repeatedly to enable or disable Auto. Close The Level Indicator indicates the selected level: - OFF One indicator on.
- Page 27 REMOTE CONTROL BACK OF REMOTE CONTROL System Purge Light Descale Mute Setting SELF CLEANING SETTING Factory setting: Self Cleaning function is ON. Setting Press « Setting » at the same time « Eco » to turn the function on or off. When the Self Cleaning function is turned on, as soon as you sit down on the toilet seat, the spray arm will be cleaned with fresh wa- ter.
- Page 28 REMOTE CONTROL SPRAY ARM CLEANING Press « Descale » to extend the spray arm for cleaning. Descale The spray arm will move out. - Clean the spray arm with a fabric or a soft bristle brush. - Press « Descale » again to retract the spray arm.. If no other functions are used, the spray arm will automatically retract after 3 minutes.
-
Page 29: Maintenance
- Press the Manual Flush button. FAILURE TO DRAIN SYSTEM MAY RESULT IN DAMAGE TO SYSTEM AND LEAKAGE OR FLOODING. RELATED DAMAGE AND INCIDEN- TALS WILL NOT BE COVERED UNDER WARRANTY OR IN ANY OTHER MANNER BY AXENT. FILTER CLEANING The filter screen will need to be cleaned occasionally. - Page 30 AXENT Easy Clean coating. By following these maintenance guidelines, AXENT Easy Clean should remain effective for many years. AXENT highly recommends the use of acidic cleaners with a pH value between 1 and 4. Cleaners with a pH value in the neutral range (5 to 8) are not always suitable. We strongly advise against using either weak or strong alkaline cleaners, i.e.
- Page 31 MAINTENANCE REMOVING THE TOILET SEAT AND LID The toilet seat and lid can be removed, cleaned and remounted quickly and easily when heavily soiled. 1. Disconnect electrical power. 2. Lift up on the toilet seat and lid. 3. Remove the toilet seat and lid by lifting up vertically so the pins come out of the mounting holes. 4.
-
Page 32: Troubleshooting
ELECTRICAL SHOCK! FATAL DANGER! Never open the unit in order to repair it yourself. Never modify the device or add an any additional modules. The AXENT intelligent toilet carries live power when plugged in and opening it exposes those present to fatal danger! Warranty and liability claims as a result of wrong handling are specifically excluded. - Page 33 TROUBLESHOOTING Malfunction Cause Solution Page Dryer does not work Seat does not sense person Reconfirm position on seat. Low air temperature Air temperature set too low Increase air temperature. Massage does not work Can only be activated Restart massage during Front or Rear wash. during the wash cycle Low seat temperature Seat temperature set too...
- Page 34 TROUBLESHOOTING Malfunction Cause Solution Page Night light does not work Night light in OFF mode Switch night light setting to ON or AUTO mode. Night light always on Night light in ON mode Switch night light setting to AUTO or OFF mode. Spray arm retracts auto- Wand will automatically Please restart the Descale process.
- Page 35 TROUBLESHOOTING REPLACEMENT PARTS LIST Individual instructions will be included with applicable replacement parts. Seat Cover Inlet Hose-set-2 Filter (Left: 1/2”-14NPSM Right: 15/16”-14UNS) Remote Control 12” Flange Bowl Mounting Hardware / Plug Fill Valve Diaphragm Seal...
-
Page 36: Technical Data
Any commitment by AXENT results from the respective warranty. These include the complete and authoritative warranty obligation AXENT. The statements in this manual do not constitute an extension or a restriction of the claims under the warranty provisions. -
Page 37: Guarantee
Proof of purchase is required to show that you are the original purchaser. The warranty is good for one-year from the date of purchase and applies to AXENT products purchased and installed in North America from an AXENT authorized dealers. - Page 38 Place serial number sticker here for reference: AXENT Corporation Ltd. www.axentbath.us support@axentproducts.com 1-800-769-4857...
Need help?
Do you have a question about the AXENT.ONE C PLUS and is the answer not in the manual?
Questions and answers