
Subscribe to Our Youtube Channel
Related Manuals for zapco DSP-Z8 III


Summary of Contents for zapco DSP-Z8 III
- Page 1 DSP and OEM Integration Owner’s Manual Before operating the unit, please read this manual throughly and retain it for future reference.
-
Page 2: Table Of Contents
8......... -
Page 3: Mission Statement
There is absolutely no substitute for experience; that is a simple fact of life. Another simple fact is that for over 30 years, Zapco has been the leader in defining quality standards for the car audio industry. These years of experience have led to a thorough understanding of the challenges that are unique to the world of car audio. -
Page 4: Dsp-Z8
EQ with a multi-order crossover. In addition, all four EQ bands were parametric, so now you could customize the EQ parameters to you car. The result: By the late 80's even non-Zapco dealers had to have a source of PX's for all their competition. -
Page 5: Dsp-Z8 Iii
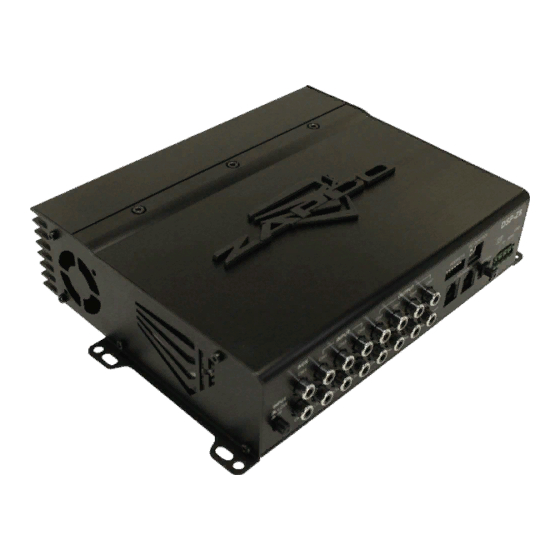
Network which allows an entire system of Zapco DC series amps and stand alone DSPs to be controlled by a single PC screen. For 2015, Zapco presents the DSP-Z8 III and the DSP-Z6 III. These two new DSPs are designed for the customer who is running non-DC amps like the Zapco Z-Series or Studio Series amps. - Page 6 The RCA inputs allow you to use the DSP-Z8 with any after market head unit, and two auxiliary inputs allow an extra source by either RCA or SPDIF Digital. The DSP-Z8 and all Zapco DC Series amplifiers will also accept balanced speaker level signals from a factory amplified system to add high-end sound to factory stereos.
- Page 7 Zapco Digital Programming Network. (Only when used with DC-Series amplifiers) 4) USB Port- Like all Zapco DSP products, the DSP-Z8 has a USB port to interface with a PC for all DSP programming functions. Always use the supplied USB Cable...
- Page 8 The DSP-Z8 and the Digital Programming Network All Zapco DC series amplifiers, and the Zapco DSP-Z8, stand-alone Digital Signal Processor incorporate Zapco's exclusive Digital Programming Network (DPN). This network allows the user to program all amp functions of all DC amps in the system, using a single PC screen.
- Page 9 Addressing Components on the DPN The Digital Programming Network consists of 10 amplifier/DSP nodes numbered 0 through 9. The DIP switches on each DC amp and DSP-Z8 are used to address each device within the network Note: Turn all amps off before setting address switches Binary numbering for nodes on the programming network Up to 10 devices can be addressed using the DIP switch.
- Page 10 The RCA inputs allow you to use the DSP-Z8 with any after market head unit, and two auxiliary inputs allow an extra input by either RCA or SPDIF Digital. The DSP-Z8 III , like the other Zapco DSP’s, The Z8 III will also accept balanced speaker level signals from a factory amplified system to add high-end sound...
- Page 11 2) RCA Outputs- 4 sets of RCA Connectors provide eight channels of output. 3) USB Port- Like all Zapco DSP products, the DSP-Z8 has a USB port to interface with a PC for all DSP programming functions. Always use the supplied USB Cable...
-
Page 12: Dsp-Z6 Iii
The RCA inputs allow you to use the DSP-Z8 with any after market head unit, and two auxiliary inputs allow an extra input by either RCA or SPDIF Digital. The DSP-Z6 III , like the other Zapco DSP’s, The Z6 III will also accept balanced speaker level signals from a factory amplified system to add high-end sound... - Page 13 2) RCA Outputs- 4 sets of RCA Connectors provide eight channels of output. 3) USB Port- Like all Zapco DSP products, the DSP-Z8 has a USB port to interface with a PC for all DSP programming functions. Always use the supplied USB Cable...
- Page 14 COM Ports before you load the program. Then you can put the file Zapco DPN ( V - - -) Install on your desktop. Open the file Zapco DPN (V- - -)Install and follow the directions to load the program.
- Page 15 1) Channel Select: The top section of the PC screen allows you to determine which channels you will be programming. You can adjust the channels individually, or in stereo pairs as required. Simply move the mouse to your choice and click it on. The active channels will light up. 2) Function/Graph: In this section you can turn the processing functions on or off...
- Page 16 With the Zapco Digital pieces this is an easy operation: 1) Measure the distance from your head (at your listening position) to each speaker in millimeters or inches.
- Page 17 1) Put the new version Zapco DPN (V -.-.-.-) Install application file on your desktop but do not open yet. 2) In PC’s Control Panel > Remove Program > Locate the old Zapco DPN at the bottom of the list and click and Uninstall.
- Page 18 Optional DSP-Z8 Dash Remote The Zapco Z8-R is an optional Dash Remote available for those who will use the auxiliary inputs of any of the the Zapco DSP models.* The Z8-R allows auxiliary functions to be accessed without the need to have a PC connected to the system while on the road.
-
Page 19: Z8-R Dash Remote
2) Connect the PC to the DSP-Z8 using the supplied USB cable. 3) Connect the Zapco Z8-R to the DSP-Z8 using the supplied 6 conductor RG (Phone) cable. 4) Open the DPN and note the number of the COM port that the DSP is using. - Page 20 Note to Zapco Dealers: The computer Zapco uses for tuning has had many more than 10 DSPs connected to it. So: We have to re-assign the port now for every DSP we connect to this computer. If...
- Page 21 Signal Level Settings Correct level setting is critical to getting the best possible sound with the least amount of noise. Neither the Input Sensitivity nor the Output Level controls are intended as volume controls. They are designed to allow you to set up the DSP with your head unit and amps for maximum performance. 1) Turn all amplifier gains down to minimum 2) To start you want to set the “Main Level”...
- Page 22 Bringing In the Woofer Setting the signal delay is fairly straight forward. Measure the distance of each speaker to the position of your head in the car. Then add delay distance to each speaker so the apparent distance to each speaker is the same.
- Page 23 Size (mm) W/H/L (L w/feet) 180x55x220(250) 120x41x200(230) 120x41x200(230)
- Page 24 Modesto, California USA Since 1974 zapco.com...
Need help?
Do you have a question about the DSP-Z8 III and is the answer not in the manual?
Questions and answers