Table of Contents
Advertisement
Advertisement
Table of Contents

Subscribe to Our Youtube Channel
Related Manuals for Humanscale TouchPoint T7


Summary of Contents for Humanscale TouchPoint T7
- Page 1 USER MANUAL...
-
Page 2: Table Of Contents
HUMANSCALE T7 POINT-OF-CARE TECHNOLOGY CART This user manual contains information on the installation and operation of Humanscale’s T7 Point-of-Care Technology Cart. It also contains important maintenance information and safety requirements. Read all instructions completely before using the T7. TABLE OF CONTENTS... - Page 3 I N T RO DUC T I ON...
-
Page 4: About Humanscale Healthcare
Humanscale Healthcare designs and manufactures ergonomic products for easier use of today’s technology and creates a safer and more comfortable and efficient environment for the caregiver. As part of the Humanscale Corporation, a world leader in ergonomic design, Humanscale Healthcare brings to the healthcare market a unique understanding of the importance of ergonomics in the workplace. -
Page 5: Introduction To The T7 Point-Of-Care Technology Cart
T7 easy to maneuver and prevents parts from sticking out and breaking. Accommodating PCs, tablets and laptops, the T7 facilitates mobile computing in healthcare environments. Humanscale, the world’s premier ergonomic solutions manufacturer, engineered the T7 to be the new industry standard in cart technology. - Page 6 T7 POWERED T7 Powered T7 Powered T7 Powered Adjustable Monitor Fixed Monitor Laptop T7 NON-POWERED T7 Non-Powered T7 Non-Powered T7 Non-Powered Adjustable Monitor Fixed Monitor Laptop...
-
Page 7: Cart Features
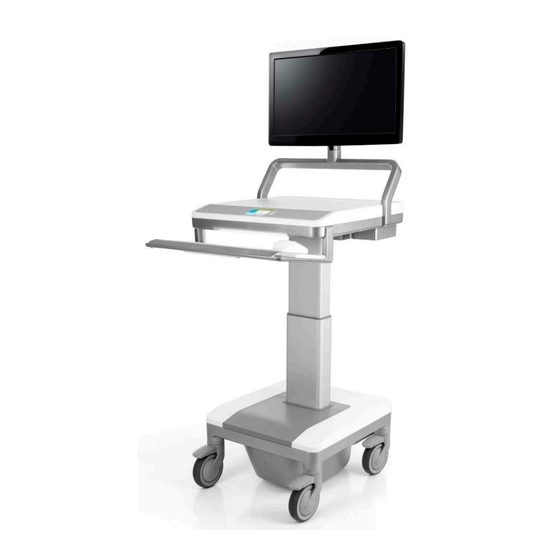
2.2 CART FEATURES Humanscale’s T7 point-of-care mobile technology cart offers unprecedented ease of adjustment for each user in a shared work environment, providing one, simple, combined adjustment for the work surface, keyboard support and display. The T7’s 20” (50.8 cm) height range ensures comfortable ergonomic accommodation for seated and standing workers. - Page 8 T7 Powered Adjustable Monitor Adjustable-Height Monitor Mount w/ Standard VESA FDMI MIS-D; 100/75, C Monitor Interface Power Button (underneath work surface) Rotating and Tilting Monitor Arm Front of Work Surface with Enclosed CPU Storage Option Rear Handle and Cable Management Battery Level Indicator on the Dashboard Back Panel of the Work Surface Touch Screen Interface for AutoFit...
- Page 9 T7 Powered Fixed Monitor Fixed Height Monitor Mount Power Button (underneath work surface) Rotating and Tilting Monitor Arm Front of Work Surface with Enclosed CPU Storage Option Rear Handle and Cable Management Battery Level Indicator on the Dashboard Touch Screen Interface for AutoFit Back Panel of the Work Surface Height Adjustment Automatic LED Lighted Keyboard Area...
- Page 10 T7 Powered Laptop Power Button (underneath work surface) Laptop Screen Opening Front of Work Surface with Enclosed Laptop Storage Option Battery Level Indicator on the Dashboard Rear Handle and Cable Management Touch Screen Interface for AutoFit Back Panel of the Work Surface Height Adjustment Automatic LED Lighted Keyboard Area PC Power Supply Storage and...
- Page 11 T7 Non-Powered Adjustable Monitor Adjustable-Height Monitor Mount w/ Standard VESA FDMI MIS-D; 100/75, C Monitor Interface Rotating and Tilting Monitor Arm Front of Work Surface with Rear Handle Enclosed Laptop Storage Option Back Panel of the Work Surface PC Power Supply Storage and Automatic LED Lighted Keyboard Area Internal Cable Management Optional Mouse Platform...
- Page 12 T7 Non-Powered Fixed Monitor Fixed-Height Monitor Mount Rotating and Tilting Monitor Arm Front of Work Surface with Rear Handle Enclosed Laptop Storage Option Back Panel of the Work Surface PC Power Supply Storage and Automatic LED Lighted Keyboard Area Internal Cable Management Optional Mouse Platform Power Cable Hook Silicone...
- Page 13 T7 Non-Powered Laptop Laptop Screen Opening Rear Handle Front of Work Surface with Enclosed Laptop Storage Option Back Panel of the Work Surface PC Power Supply Storage and Automatic LED Lighted Keyboard Area Internal Cable Management Optional Mouse Platform Power Cable Hook Silicone Palm Rest Standard Mouse Platform...
- Page 14 T7 Rear Locking Panel (all models) Inside Shelf for Laptop Interior Space with Available AC Power Removable Panel Lock...
-
Page 15: Technical Data
External PC USB Hub • • Mouse Blood Pressure Monitors • • Printer Humanscale Branded Accessories • • 2.3 TECHNICAL DATA Battery Level Indicator ( BLI ) AC Power System Indicates charging status 120 VAC, 60 Hz, input • •... -
Page 16: Using The User Interface
3.0 USING THE USER INTERFACE Adjusting Height (4’ 11” – 6’ 3”) Manual height adjustment screen Clock Page indicator Settings button Battery information button Current set height Sit / Stand mode selection buttons Height adjustment buttons Manual height input Press or Press and Hold Field-installed power systems must be installed by an authorized, trained technician... - Page 17 Switching Between Standing And Sitting Position Press “The cart is moving!” screen is displayed while cart is changing mode. See details at 3.04 Preset Height Adjustment Clock Page indicator Settings button Battery information button Sit / Stand mode selection buttons Blank preset spots (6)
- Page 18 Adding a Preset Press Modifying a Preset Press and hold Adjusting Cart Height Using Preset Changing Cart Height in Standing or Sitting Position...
- Page 19 Switching between standing and sitting position using preset Press “The cart is moving!” screen is displayed while cart is changing mode. See details at 3.04 Switching between manual and preset modes Swipe...
- Page 20 Stopping the Cart Height Adjustment Stopping the height adjustment in manual mode Press Press Press...
- Page 21 Stopping the Cart’s Movement Stopping the adjustment - preset mode Press Press Press...
- Page 22 Collision Warning Press Settings Getting into User Settings from Manual and Preset Mode Getting into Admin Settings from User Settings Enter PIN to get into Admin Settings Scroll down to the bottom of the User Press Default Pin: 1234 Settings list...
- Page 23 Settings (cont.) Changing setting display location between User settings and Admin settings Press Selecting check button the setting will Back button returns to User Settings appear in User settings. Exit Settings...
- Page 24 Battery Information Getting into Battery information from manual and preset mode Press Exiting Battery Information Press Power Track Is Activated Screen...
-
Page 25: Interference Detection
3.1 INTERFERENCE DETECTION From the LINAK User Manual: Anti-collision The anti-collision function is a new option for the standard CBD4/CBD5 advanced/control box software version 1.66 and later. A system with anti-collision can limit material damages on a desk if a collision with a solid object should occur. Situations in which the anti-collision function does not work There are situations in which the anti-collision function will not be activated. -
Page 26: Glossary Of Symbols And Warnings
4.0 GLOSSARY OF SYMBOLS AND WARNINGS These symbols provide alerts to safety conditions demanding attention. It is important to recognize and understand the significance of the following safety hazards when encountered on the T7 Point-of-Care Technology Cart or within the manual. Alternating Current Circuit Breaker Engaged (up) IEC 60601-1, 2nd ed. -
Page 27: Cart Warning Review
Do not attempt to service the system while the power is on. Do not attempt to service or replace any part of the T7 unless directed to do so through Humanscale-approved documentation (i.e., this User Manual or other instructions). Only Humanscale or a Humanscale-certified entity may service or replace the cart components. - Page 28 Connecting electrical equipment to the Multi-Socket Outlet effectively leads to creating a Medical Electrical system and can result in a reduced level of safety An extension cord or additional Multi-Socket Outlet may not be connected to the T7’s integrated Multi-Socket Outlet Only equipment to be used as part of the T7 system or compatible with power requirements may be connected to the Multi-Socket Outlet for power Potential loss of data if battery runs out of power.
-
Page 29: Getting Started
GE T T I N G STA R TE D... -
Page 30: Unpacking And Preassembly
5.0 UNPACKING AND PREASSEMBLY The T7 Point-of-Care Technology Cart should arrive upright inside a cardboard carton strapped with two plastic straps. Inside the main carton is a smaller cardboard container storing all standard and optional hardware. The entire outer packaging should be plastic shrink-wrapped. Removal of the T7 from the packaging must proceed as follows to avoid damage and the possibility of lost parts. -
Page 31: List Of Parts
5.2 LIST OF PARTS Some standard and optional accessories will ship disassembled from the T7. These items will be packaged separately and will need to be installed by following the instructions in this manual. Refer to the following List of Parts for help identifying the proper hardware to be used when installing these accessories. - Page 32 5.3 MOUNTING THE KEYBOARD TRAY AND GANTRY The T7 comes equipped with an external, ergonomic keyboard frame and rear gantry handle. These are packaged in the accessories box that comes in the T7 crate. Before the T7 is ready for use, you or a service technician must install the keyboard frame and gantry.
- Page 33 (fig. 4) (fig. 5) (fig. 6) (fig. 7) (fig. 8) (fig. 9) (fig. 10)
-
Page 34: Mounting A Monitor
5.4 MOUNTING A MONITOR The T7 has two types of monitor mounts, fixed and height-adjustable. Both utilize a similar quick-release lock and VESA-style mounting plate. Fixed-Height Monitor Assembly Adjustable-Height (UFEA) Monitor Assembly Mount the VESA plate to your monitor using either the four 75 mm- or 100 mm-spaced holes To detach the VESA plate from the UFEA as needed. -
Page 35: Installing A Computer
5.5 INSTALLING A COMPUTER Prior to reattaching the work surface covers, you must install a computer, using the T7’s computer-strap assembly to stabilize the computer during use. Installing a Computer (Thin Client, Laptop or Small Form Factor PC) To install a computer, first remove the back panel of the work surface and then the front work surface cover by removing the four screws from the underside of the work surface frame. -
Page 36: T7 Configurations
6.0 T7 CONFIGURATIONS Powered T7 • Battery Powered Non-Powered T7 6.1 POWERED T7 The Powered T7 is configured with an electronic lifting system and touch screen interface. The Battery-Powered model has an onboard rechargeable power system that can supply power to the CPU, monitor and other peripheral devices. 6.2 POWER ACCESS The T7 utilizes internal routing of power cables to make the cart easy to operate. -
Page 37: Operation
O PE R AT I ON... -
Page 38: Power System Overview
7.0 POWER SYSTEM OVERVIEW Please read the following details regarding the T7 Point-of-Care Technology Cart’s power system before operation. 7.1 INITIAL SYSTEM STARTUP AND SHUTDOWN Before the T7 can be used for the first time, the battery module must be fully charged. When shipped from the factory, the battery module is disconnected from the electronics portion of the system for storage. -
Page 39: Battery Level Indicator (Bli)
7.3 BATTERY LEVEL INDICATOR The Battery Level Indicator (BLI) indicates the status of the T7’s power system. Several modes are displayed through the BLI. • Standby Mode: All of the T7’s BLI lights are dark. • Charging Mode: The BLI is depicted with four bars representing increments of battery charge level. If the battery is less than 25% charged, the lowest bar will be blinking. -
Page 40: Shutdown Switch
Available as a factory option, a Remote Power Management program allows cart users to monitor the operation and status of the onboard power system. With software provided by Humanscale—installed on a host computer and connected to the power system via USB cable—users can view remaining battery run time, charge status, remaining charge time, and other... -
Page 41: Adjusting The T7
8.0 ADJUSTING THE T7 Proper ergonomics can help reduce and prevent workplace injuries by lessening the physical demands on the worker. Ergonomically designed products, such as the T7 point-of-care technology cart, take into account the wide range of people who will use the product, so that everyone, regardless of their stature, can use the product easily and comfortably—essentially, allowing the job to fit the worker instead of the other way around. -
Page 42: Ergonomic Monitor Positioning
8.2 ERGONOMIC MONITOR POSITIONING Position the monitor so that the top of the screen is slightly below eye level. -
Page 43: Troubleshooting And Frequently Asked Questions
No. Do not attempt to access or repair the power supply. Tampering with the power supply could damage the T7, void the warranty, and/or cause personal injury. You must contact Humanscale so that a trained technician can service the cart. -
Page 44: Technical Information
TEC H N I CAL I N FO R M AT I ON... -
Page 45: Maintenance And Cleaning
11.1 CART MAINTENANCE SERVICE AND REPLACEMENT Do not attempt to service or replace any part of the T7 unless directed to do so through Humanscale- approved documentation (i.e., this User Manual or other instructions). Only Humanscale or a Humanscale-certified entity may service or replace the cart components. If any component on the cart is missing or damaged, the cart must not be used. -
Page 46: Cart Cleaning
11.2 CART CLEANING The following procedures are not guaranteed to control infection. Consult the hospital infection-control administrator or epidemiologist regarding specific cleaning procedures and processes. Always unplug the T7 and power it down before cleaning. All exterior surfaces, excluding electrical components, will withstand cleaning by most commonly used, diluted, non-abrasive solutions such as quaternary ammonium compounds, ammonia, enzyme cleaners, bleach and alcohol solutions. -
Page 47: Dimensions And Range Of Adjustments
12.0 DIMENSIONS AND RANGE OF ADJUSTMENTS T7 POWERED Weight 132 lbs. 59.87 kg. 20.6” 28.1” 52.32 cm 71.35 cm 5.625” 14.3 cm 27.2 - 47.2” 69 - 120 cm 23.6 - 43.7” 60 - 111 cm 10.2” 26 cm 18.1” 19.5”... -
Page 48: Monitor Adjustment Range
12.1 MONITOR ADJUSTMENT RANGE Adjustable Mount Fixed Mount x” x cm 14.9” 5.1-16.9” 37 .7 cm 13-43 cm Rotation Range Tilt Range... -
Page 49: Radiated Emissions
13.0 RADIATED EMISSIONS The use of accessories and cables, other than those specified or sold by the manufacturer of the equipment as replacement parts for internal components, may result in increased emissions or decreased immunity of the equipment. The T7 Point-of-Care Technology Cart may cause interference when used adjacent to or stacked with electrical equipment outside the system and could affect normal operation of said equipment. -
Page 50: Guidance And Manufacturer's Declaration-Emissions
13.2 GUIDANCE AND MANUFACTURER’S DECLARATION—EMISSIONS The T7 is intended for use in the electromagnetic environment specified below. The T7 user should ensure that it is used in such an environment. Emissions Test Compliance Level Electromagnetic Environment—Guidance RF Emissions CISPR 11 Group 1 The T7 uses RF energy only for its internal functions. -
Page 51: Guidance And Manufacturer's Declaration-Immunity
13.3 GUIDANCE AND MANUFACTURER’S DECLARATION—IMMUNITY The T7 is intended for use in the electromagnetic environment specified below. The T7 user should ensure that it is used in such an environment. The T7 has been certified to the safety and EMC requirements of IEC 60601-1, 2nd and 3rd edition. Immunity Test IEC 60601 Test Level Compliance Level... - Page 52 2.5 GHz Equipment and Systems that are not Life-Supporting Do not dispose of the T7 or any associated components at the end of service life. Contact Humanscale for disposal instructions Note 1: At 80 MHz, the higher frequency range applies.
-
Page 53: Shipping And Operating Environment
14.0 SHIPPING AND OPERATING ENVIRONMENT Please note these recommended environmental conditions for the transportation and operation of the T7 Point-of-Care Technology Cart. Shipping, storing or using the T7 in extreme conditions outside the recommended range may adversely affect the performance of the T7 and may void the warranty. -
Page 54: Warranty
For warranty and terms and conditions, please visit www.humanscale.com © 2012 Humanscale. All rights reserved. Patent pending. Humanscale is a registered trademark of Humanscale Corporation. Reproduction of this material in whole or part for any purpose other than that authorized by Humanscale is prohibited.
Need help?
Do you have a question about the TouchPoint T7 and is the answer not in the manual?
Questions and answers