Table of Contents
Advertisement
Advertisement
Table of Contents
Troubleshooting

Related Manuals for Sealife Micro 2.0 UW Camera


Summary of Contents for Sealife Micro 2.0 UW Camera
- Page 1 micro 2.0、SL511、HDV-9B...
-
Page 2: Table Of Contents
Playback Pictures and Videos ................... 12 f. Charge Battery ....................13-15 g. Upload Pictures to PC ..................16-18 IV. WiFi Connection to Smartphone/Tablet (MICRO 2.0 UW CAMERA) ......20-23 a. Download ACTION CAM HD PRO App ............20-21 b. Changing ACTION CAM HD PROUsername and Password ......22-23 V. -
Page 3: Package Contents
I. Package Contents MICRO 2.0 UW CAMERA T V cable (SL51205) (64GB SL51201 ) Wrist strap Wall charger with US plug (SL51202) (SL51206) USB adapter Int’l plug adapters for (SL51203) UK, EU, AU (SL51207) USB cable (SL51204) Camera pouch (SL51208) Not shown: Instruction manual –... -
Page 4: Getting To Know Your Camera
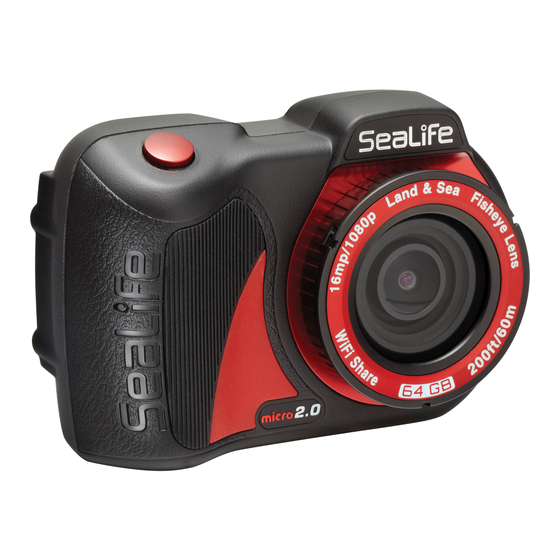
II. Getting to Know Your Camera Front view 1. Shutter button 2. Optical glass lens port 3. Lens adapter ring (For attaching close-up lens accessory – sold separately) 4. Wrist strap connection... -
Page 5: Rear View
II. Getting to Know Your Camera Rear view 1. 2.4” TFT color display 2. Serial # (or located under USB cover) 3. “Piano Key” controls: a. Video (up) b. Menu (down) c. Playback / Power (back 1 step) 4. Waterproof USB contacts (shown w/ USB cover) 5. -
Page 6: Lcd Display: Capture Mode
II. Getting to Know Your Camera LCD Display: Capture Mode 1. Scene modes WiFi On Land 4. Timers Dive Video record time (H:MM:SS) Snorkel Time Lapse countdown time (MM:SS) Ext Light 2 Ext Lights 5. Battery condition Full power 2. Capture mode High power Single Medium power... - Page 7 II. Getting to Know Your Camera LCD Display: Capture Mode 6. Image size resolution 8. ISO value 16MP / 4128 x Auto 3096 / 4:3 / 140° 14MP / 4128 x 2322 / 3:2 / 130° 12MP / 3464 x 2598 / 3:2 / 90°...
-
Page 8: Lcd Display: Playback Mode
II. Getting to Know Your Camera LCD Display: Playback Mode (Thumbnail view) Playback icon - Thumbnail view 2. Thumbnail images (Maximum 4 per page) 3. Battery condition 4. File type: Still image b. Video clip 5. Folder # (100 to 999) 6. - Page 9 II. Getting to Know Your Camera LCD Display: Playback Mode (Single view) Playback icon - Single image view 2. Folder # (100 to 999) 3. File # (0001 to 0999) 4. Battery condition 5. Elapse time H:MM:SS (video files only) 6.
-
Page 10: Basic Camera Operation
III. Basic Camera Operation Power On: Push and hold bottom button for 2 seconds to power camera ON or OFF. -
Page 11: Take A Picture
III. Basic Camera Operation Take a Picture: Aim, hold camera steady and push shutter button. Take a Video: Aim, hold camera steady and push video button to start or stop video recording. Note: elapse record timer on the top right of the LCD display. MP picture while recording video by pushing the shutter button. -
Page 12: Easy Setup
III. Basic Camera Operation Easy Setup: This on-screen guide will help you set the camera correctly. 1. Push MENU button 2. Push shutter button to select “Easy Setup.” 3. Follow the on-screen guide using the Up ( or Down ( ) buttons to select desired option and Shutter button to confirm setting. -
Page 13: Playback Pictures And Videos
III. Basic Camera Operation Playback Pictures and Videos: 1. Push Playback button to display thumbnail images. 2. Use the Up ( ) or Down ( ) buttons to scroll through thumbnails. 3. Push Shutter button to select and display single images/videos. Note: ) button to decrease playback speed. -
Page 14: Charge Battery
III. Basic Camera Operation Charge Battery: 1. Remove USB cover. 2. Make sure camera is dry. Insert USB cable into USB adapter, and insert into waterproof USB port Warning: Dry camera before inserting USB adapter. USB adapter is not waterproof. - Page 15 III. Basic Camera Operation 3. Connect other end of the USB cable into the wall charger, and insert wall charger into outlet. 4. The camera will display PC and Charge options. 5. Use the Up ( ) or Down ( ) buttons to select Charge and push Shutter button to confirm selection.
- Page 16 III. Basic Camera Operation 6. When the camera is charging, the large battery icon in center of display will blink from one to three bars repeatedly. The icon will show three solid bars when the battery is fully charged. 7. After 1 minute of charging, the display will go to sleep in order to save power and charge faster.
-
Page 17: Upload Pictures To Pc
III. Basic Camera Operation Upload pictures to PC: 1. Remove USB cover. 2. Make sure camera is dry. Insert USB cable into USB adapter, and into waterproof USB port. Warning: Dry camera before inserting USB adapter. USB adapter is not waterproof. - Page 18 III. Basic Camera Operation 3. Connect other end of the USB cable into computer. 4. The camera will display PC and Charge options. 5. Use the Up ( ) or Down ( ) buttons to select Charge. Push Shutter button to confirm selection.
- Page 19 III. Basic Camera Operation 6. Display will show PC connection icon for about 1 minute. For Windows For MAC Double click on “untitled” or “My Computer.” “unlabeled” disk drive icon or your desktop. Double click on “Removable Disk” icon. The DCIM folder contains all pictures The DCIM folder contains all pictures and videos.
- Page 20 III. Basic Camera Operation Note: tablet provided you have a USB adapter specific to the make / model of USB connection, which is available at most electronic stores...
-
Page 21: Wifi Connection To Smartphone/Tablet (Micro 2.0 Uw Camera)
IV. WiFi Connection to Smartphone/Tablet 1. Download and install the free “ACTION CAM HD PRO ” app* to your Android or iOS device. 2. In the camera’s “System Settings” menu, turn WiFi setting to “WiFi: On.” Note:... - Page 22 3. On your smartphone (or tablet), select “Settings” icon then select “WiFi.” 4. On the list of available WiFi hotspots, click “MICRO 2.0 UW CAMERA” and enter password 1234567890 Android Apple 5. Open “ACTION CAM HD PRO” app. Camera will automatically connect to your smartphone.
-
Page 23: Changing Action Cam Hd Prousername And Password
IV. WiFi Connection to Smartphone/Tablet Changing ACTION CAM HD PRO username and password (OPTIONAL): Follow these instructions to change the default username (1234567890): 1. Connect camera to PC using USB cable. See page 16 for instructions on connecting camera to PC. 2. - Page 24 IV. WiFi Connection to Smartphone/Tablet 3. Under the section “SoftAP configuration,” change the default username “MICRO 2.0 UW CAMERA” (2) and password “1234567890” (3) to a new username and password of your choice. Username and password must be a minimum of 8 characters and a maximum of 32 characters in length, and may be made up of letters and numbers.
-
Page 25: Care And Maintenance
V. Care and Maintenance fresh water tub for about 10 minutes. to rinse out trapped saltwater. tub. Never let water dry on the lens or LCD window, which can cause water drop stains. time. Keep camera in a shaded area or under a dry towel. in a clean dry area. -
Page 26: Vi. Troubleshooting
VI. Troubleshooting Camera locks up shutter button at the same time to force-off and reset the camera. www.sealife-cameras.com/firmware Camera not connecting to computer or wall charger may also use contact cleaner, available at most electronic parts stores. Be careful not to bend the spring contacts on the USB adapter. -
Page 27: Vi. Troubleshooting
Only” from the dropdown menu on the top left of your iPad. The Action Cam HD PRO app is originally designed for iPhones but More information www.sealife-cameras.com/micro-hd-tips-and-technical-updates Center at service@sealife-cameras.com or the SeaLife distributor in your country. A list of distributors is on the SeaLife website: www.sealife-cameras.com/authorized-dealer-locator... -
Page 28: Spare Parts And Service
Parts To order spare parts, please contact your local SeaLife dealer. Visit the Dealer Locator at www.sealife-cameras.com to find a dealer near you. US residents can also order spare parts online at www. - Page 29 VIII. FCC Statement Applies to SeaLife MICRO 2.0 UW CAMERA (SL512) : 15.105(b) B digital device, pursuant to part 15 of the FCC rules. These limits are designed to provide reasonable protection against harmful interference in a residential and, if not installed and used in accordance with the instructions, may cause harmful interference to radio communications.
-
Page 30: Fcc /Ic Statement
VIII. IC Statement Canada, Industry Canada (IC) Notices This Class B digital apparatus complies with Canadian ICES-003 and RSS-247. Operation is subject to the following two conditions: (1) this device may not cause interference, and (2) this device must accept any interference, including interference that may cause undesired operation of the device. - Page 31 VIII. FCC Statement Canada, avis d’Industry Canada (IC) et RSS-247. Son fonctionnement est soumis aux deux conditions suivantes : (1) cet appareil ne Informations concernant l’exposition aux fr quences radio (RF) é http://www.ic.gc.ca/app/sitt/reltel/srch/nwRdSrch.do?lang=eng...
Need help?
Do you have a question about the Micro 2.0 UW Camera and is the answer not in the manual?
Questions and answers
I need to reset the password for my sealife 2.0. we only ever had 3 email addresses and none of these are reconised when I use the app.
To reset the password for the Sealife Micro 2.0 UW Camera app, open the “wifi.conf” file located in the “MISC” folder on the camera drive using Microsoft Notepad or Mac TextEdit. Under the “SoftAP configuration” section, change the default username and password to a new one of your choice. The new username and password must be 8 to 32 characters long and can include letters and numbers. Save the file after making the changes.
This answer is automatically generated