
Related Manuals for Sealife DC2000


Summary of Contents for Sealife DC2000
-
Page 1: Instruction Manual
Instruction Manual Visit www.sealife-cameras.com/manuals for ENGLISH, FRANÇAIS, DEUTSCH, ITALIANO, ESPAÑOL and NEDERLANDS versions... -
Page 2: About This Manual
About this Manual • Product design, specifications and this manual are subject to change without notice. This User Manual is a general reference guide for the product. • The illustrations in this manual are for the purpose of explanation and may differ from the actual screenshots and design of your camera. • SeaLife and its affiliates assumes no liability for any errors or discrepancies in this user manual. © Copyright 2016 This manual contains proprietary information protected by copyright laws. All rights are reserved. No part of this manual may be reproduced by any mechanical, electronic or other means, in any form, without prior written permission of the manufacturer. FEDERAL COMMUNICATIONS COMMISSION INTERFERENCE STATEMENT This equipment has been tested and found to comply with the limits for a Class B digital device, pursuant to Part 15 of the FCC Rules. These limits are designed to provide reasonable protection against harmful interference in a residential installation. This equipment generates, uses and can radiate radio frequency energy and, if not installed and used in accordance with the instructions, may cause harmful interference to radio communications. However, there is no guarantee that interference will not occur in a particular installation. If this equipment does cause harmful interference to radio or television reception, which can be determined by turning the equipment off and on, the user is encouraged to try to correct the interference by one or more of the following measures: • Reorient or relocate the receiving antenna. • Increase the separation between the equipment and receiver. • Connect the equipment into an outlet on a circuit different from that to which the receiver is connected. • Consult the dealer or an experienced radio/TV technician for help. CAUTION: Any changes or modifications not expressly approved by the agency responsible for compliance could void the user’s authority to operate the equipment. This device complies with Part 15 of the FCC... -
Page 3: Safety And Handling Precautions
CE Mark Warning This is a Class B product, in a domestic environment, this product may cause radio interference, in which case the user may be required to take adequate measures. Safety and Handling Precautions • Do not take apart or attempt to service the camera yourself. Contact your local authorized SeaLife dealer if the camera becomes damaged and requires service. • Do not expose the camera to extreme temperatures or direct sunlight for extended periods of time. • Allow the camera to warm up when moving from cold to warm temperatures. • Avoid sand granules from entering the speaker and microphone holes of the inner camera. Used pressured air can to clean out holes, if necessary. • Make sure you and the camera are perfectly dry before opening or closing the battery door of inner camera • Do not use abrasives, chemicals, cleaning solvents or detergents to clean the camera. Wipe the camera with a slightly damp soft cloth. • Do not use the flash or LED Light near a person’s eyes to prevent possible eye injury. • While the camera is shock protected to 5 feet / 1.5 meters, avoid dropping the camera or exposing to shock. • Do not use the camera in hot water exceeding 110°F temperature. Battery Information • Turn off the camera before removing the battery. • Use only the provided battery or type of battery and wall charger included with your camera. Using other types of batteries or chargers may cause risk of explosion, damage the device and void the warranty. -
Page 4: Usb Adapter Information
• USB cable and wall charger are not waterproof. Do not expose them to high temperatures or moisture. Otherwise, it may cause short circuit, electric shock, risk of explosion and damage the camera. • Only use the USB cable and wall charger included with the camera. • Avoid sudden changes in temperature, which may cause condensation on the adapter’s internal surfaces. Please do not use it immediately in this situation. • Do not touch the plug with wet hands. Otherwise, it may cause electric shock. Important information about using the inner camera underwater • Read and understand the instructions contained in this manual before using underwater. • The inner camera (without the UW housing) is designed and tested to withstand underwater depths down to 60feet/18meters, which is suitable for watersports, snorkeling or shallow diving. For SCUBA diving, we highly recommend using the included underwater housing for maximum waterproofness and easy handling. • Make sure the waterproof rubber seal inside the battery door of the inner camera is perfectly clean and free of hair, sand or debris before closing door. • Inspect battery door and rubber seal and surrounding area are free of any cracks, cuts or damages. If damaged, contacted your local authorized SeaLife dealer for service. • Properly close the battery door until your hear a click sound indicating the door is fully closed. Engage battery door lock to prevent accidental opening. • Regularly clean the inner camera with a moistened soft cloth and allow it to dry before storage. • Warning - the inner camera IS NOT certified to be intrinsically safe. Using the camera in an environment containing combustible gases may result in explosion or fire. -
Page 5: Table Of Contents
Table of Contents About this Manual ....................1 Safety and Handling Precautions ................2 Battery Information..................... 2 USB adapter Information ..................3 Important information about using the inner camera underwater ........ 3 Introduction ......................9 System Requirements ..................10 Inner Camera Performance Features .............. - Page 6 Using the Flash ....................26 Using Self-timer ....................27 Setting the Focus Mode ..................28 Using the Delete Button ..................29 Recording Videos ....................31 About the Mode dial ....................33 Using Intelligent Scene ..................34 Setting the Land Scene Mode - SCN ..............35 Using Time Lapse [Land Scene mode] ..............
- Page 7 Exposure Bracketing ..................52 AF Area ......................52 AF Lamp ......................53 Digital Zoom ....................53 Date Stamp ..................... 54 Auto Review ....................54 Blink Detection ....................54 Grid Line ......................55 Continuous AF Photo ..................55 Movie Mode (Video Resolution) ................55 Continuous AF Video ..................56 Wind Cut ......................
- Page 8 Viewing Series Photo ..................62 Viewing Thumbnails ..................63 Using Calendar view: ..................64 Playing Videos ....................64 Using Movie Edit ....................65 Playing Voice Memo ..................66 Playback Menu ....................67 Using the Wireless function ..................76 Establishing a wireless connection:...............
- Page 9 Camera Specifications ................... 101 Housing Specifications ................... 103 About Folder and File Names .................. 103...
-
Page 10: Introduction
Introduction Thank you for purchasing the SeaLife DC2000 digital underwater camera. This is not your ordinary digital camera in a waterproof housing. The inner camera is waterproof by itself and includes underwater modes with onboard color-correction and exposure programs to ensure sharp, colorful pictures and video underwater or on land. The camera is equipped with the latest digital technology for fast response and easy control. The SeaLife waterproof housing is constructed from the finest materials to ensure long-lasting and reliable performance. Its fully rubber armored body offers superior shock protection. The durable polycarbonate underbody can withstand underwater pressure down to 200ft/60m. It’s large shutter button and wide-spread controls ensures a sure-grip and easy handling, even with dive gloves on. All metallic parts are made of high-grade stainless steel to survive the punishing saltwater and marine environment. The DC2000 is easily expandable with SeaLife Sea Dragon UW Lighting and wide angle lenses. The Sea Dragon external flash or photo-video light will add vibrant colors and brightness to your underwater pictures and video. The seemingly dark and colorless underwater world is actually bursting with magical, vibrant colors - you [and your camera] just need a light to see it. You will be amazed at the great underwater pictures you can take with the addition of the Sea Dragon Flash or photo-video lights. Please visit your local dive shop or www.sealife-cameras.com for more information about the SeaLife underwater lighting. There are so many more features and benefits that you will surely enjoy. All of us at SeaLife hope to exceed your expectations with this new camera. Happy diving! DC2000 Underwater Housing and waterproof Inner Camera (SL740) DC2000 Pro Flash Set (SL745) DC2000 Pro Light Set (SL744) DC2000 Pro Duo Set (SL746) -
Page 11: System Requirements
System Requirements Your computer must meet the following system requirements in order to connect to the camera: For Windows: • Windows XP/Vista/Win7/Win8/Win10 and up • Processor: Intel Pentium D 3.0GHz or equivalent AMD Athlon, or faster • RAM: 2 GB or more • Available memory: 300MB and up • 32bit color display monitor • Microsoft DirectX 9.0C • USB port For Macintosh: • Mac OS 10.4 and up • Memory: 1 GB or more • Quick Time player ver. 6.0.3 and up • USB port Inner Camera Performance Features • 20 mega pixels image resolution • 1080p Full HD video recording with stereo audio • JPEG or RAW (.dng) image format • Auto focus from 4” (10cm) to infinity • 3” 920K color LCD monitor • 1130 mAh, 3.7V lithium rechargeable battery • WiFi to wirelessly preview, download and share pictures and videos... -
Page 12: Package Contents
Package Contents Please check the contents of your camera package. It should contain: Digital camera Rechargeable Battery USB wall charger (with 4 Int’l plug adapters for US, EU, UK and AU) USB cable Wrist strap Camera pouch (for inner camera) Underwater housing Wrist strap Flash Link Adapter (for UW housing) (for connecting optical cable to external flash accessory) Note: If you purchased one of the DC2000 camera sets, which includes a Sea Dragon Ext Flash and/ or photo-video light, additional items will be included in the package. Please refer to instruction manual included with the UW lighting accessories for more details about package contents. -
Page 13: Getting To Know Your Camera
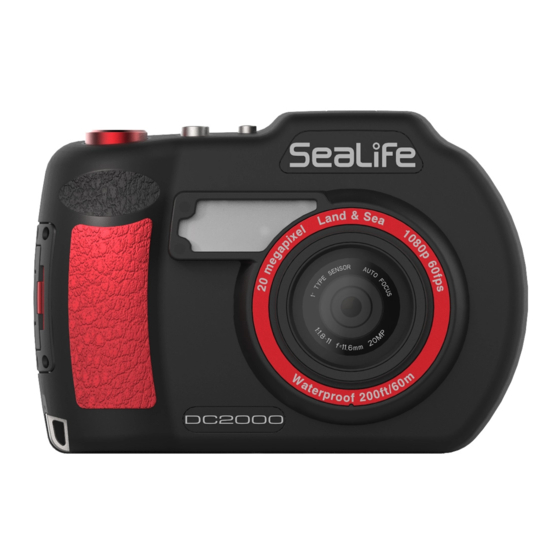
Getting to know your camera Front view 1 - Flash 2 - Self-timer LED / AF Assist Lamp 3 - Lens 4 - Microphones Back view 5 - LCD monitor 6 - LED indicator light 7 - Mode dial 8 - Playback button 9 - Wireless Auto Send button 10 - OK button / 4-way navigation control 11 - Strap connector 12 - Menu button... -
Page 14: Top View
Top view 13 - Shutter button 14 - Video start/stop button 15 - Power button Bottom view 16 - Tripod screw hole Right side view Left side view 17 - Latch and lock for waterproof door (Access to battery, memory card and USB out. 18 - Speaker... -
Page 15: Camera Buttons
Camera Buttons Here is a brief description for each of the 8 push buttons Button Description Power Push the Power button to turn the power on/off. Shutter Push to capture an image (half-push to set and lock focus). Menu Push to enter or exit menu/submenu. There are 8 recording modes can be set. Once turning the mode dial, it enters the Mode dial selected mode immediately even in Playback mode or during movie recording. Playback Push to enable Playback mode or return Record mode. Movie Push to start/stop recording video. Push to enter Auto Send Menu and Quick Send Navigation. Wireless Using the Wireless function” on page 76 for more details. Push to confirm menu selection. Navigation Control The 4-way Navigation Control and the OK button allow you to access the various menus available from the On Screen Display (OSD). Description Focus / Up button Self-timer / Left button (Rotate button in Playback) Flash / Down button EV / Right button (Delete button in Playback OK Button... - Page 16 Button Description In Menu, push to confirm a selection. In Playback, push to select playback view or start video. In Record mode, push to access preset shortcut or launch a submenu for the specified shooting mode. Shortcut only available in Program and UW modes. 1. In Record mode, push to change the EV settings. EV setting is not available in Intelligent Auto, Land Scene or Panorama modes. EV / Right / 2. In playback, push to delete an image, video or audio clip. Delete 3. During video playback, push to Pause/Start video. 4. In Menu, push to navigate right or enter a submenu. 1. In Playback, each push rotates image clockwise 90 degrees. This feature is applicable for still images only. 2. In Record Mode, push to select Self-timer options: Self-timer/ Left / Rotate (Off, 10 sec., 2 sec. or Double [10sec + 2 sec.]) 3. During video playback, push to stop video. 4. In Menu, push to navigate left or exit a submenu. 1. In Record Mode [when zoom is disabled], push to scroll through Focus options: (AF, Macro, Super Macro or Infinity) 2. In Record Mode [when zoom is enabled], push to increase zoom Focus/Up/ AE/AF LOCK/ 3. In Playback mode, push to view the previous image or video. 4. During video playback, push to fast forward video. 5. In Menu, push to navigate up.
-
Page 17: Getting Started
Getting Started Attach the wrist strap to inner camera Note: Remove wrist strap before inserting camera into underwater housing. Inserting the Battery 1) Open the waterproof battery/memory card door by sliding the lock right (1) and latch down (2) -
Page 18: Inserting The Memory Card (Card Sold Separately)
2) Insert the battery as shown with the 3 gold contacts oriented towards the top of the camera. The small orange tab will lock battery into place if battery is oriented correctly. 3) Close the battery/memory card door as shown. Push down firmly until door locks. Important: Make sure the rubber seal inside waterproof door is perfectly clean and undamaged. Inserting the Memory Card (card sold separately) The camera supports Micro SD, Micro SDHC and Micro SDXC and Micro UHS-1 type memory cards up to 64GB. The icon will appear on LCD display to indicate a memory card is installed. All pictures and videos are saved to the memory card when card is installed. The camera is equipped with 80MB of the internal memory used to store some pictures if there is no memory card installed. Video recording requires installing optional memory card. To ensure the memory card is working properly with your camera, we recommend taking the camera with you when purchasing the card. Insert the memory card into the slot with the gold contacts facing the back of the camera. Push until card clicks into place. To remove the memory card, gently push the card and it will eject from the slot... -
Page 19: Charging The Battery
Charging the Battery To charge the battery, connect camera to USB cable and other end of USB cable to the wall charger, as shown. • The LED indicator on the back of the camera will begin flashing slowly when camera is charging and turns off when charging is complete. • If the LED indicator does not flash when attempting to charge the battery, make sure the battery is properly installed and that the contacts are cleaned. • If the LED indicator lights flashes rapidly, the battery may be damaged or useful life may have expired. Replace the battery in this case. Power Camera On and Off There are two ways to power on the camera: • Push and hold the Power button until camera powers on. The camera will power on in Photo mode. • Push and hold the Playback button, the camera will power on in Playback mode. • To power OFF the camera, push the Power button. Initial Settings When powering on the camera for the first time, you will be asked to set your local language and the date/time: Setting the Language 1. Use the 4-way navigation button ( , , or ) to select your preferred language. 2. Push OK to confirm your language selection. -
Page 20: Taking A Picture And Recording A Video Clip
Setting the Date & Time 1. Push or to move through the selection. 2. Push or keys to change the value for the date and time. 3. Push OK to confirm your date/time selection. Note: Pushing the Menu button at any time will exit the language and date/time settings menu. Holding down or keys to change the values continuously. Taking a picture and recording a video clip The camera is ready to take a picture or record video immediately after powering on the camera. 1) Before taking a picture or video [on land], set the mode dial to Intelligent Auto. More details about the mode dial and underwater modes are included later in this manual. 2) Take a picture: Push the shutter button down to take a picture. -
Page 21: Playback Pictures And Video Clips
3) Record a video: Push the video button down to start recording. Push video button again to stop recording. Note: Pushing and holding the shutter button halfway will focus the camera on the subject. A green focus box indicates the camera has accurately focused on a subject. A red focus box indicates the camera has NOT accurately focused on a subject. This function is useful for checking that the camera has focused on a subject before shooting. Playback pictures and video clips Push the Playback button after the camera is turned on to view and edit captured images or playback videos. The recording of voice memo attached to images is available in this mode. Use the and keys to scroll though images. Please see page 62 for more details about Playback mode. -
Page 22: Using The Lcd Monitor
Using the LCD monitor The LCD monitor shows important information about camera settings as well as a live preview for composing your pictures. The display on the LCD monitor is called the On Screen Display or OSD. LCD Monitor Layout - Record Mode Screen Item Description Record Mode Indicates the current shooting mode. Flash Indicates flash setting. Self-timer Indicates Self-timer setting. Zoom indicator Displays zoom. Shots remaining Indicates the remaining shots available. Battery Indicates battery level. Storage media Indicates current storage media in use. Wind Cut Reduces wind noise during movie recording. Movie size Indicates video resolution. Date stamp Indicates date stamp is enabled. Indicates the low light condition, which may cause the picture to be Shake warning blurred. If the shake warning icon appears, it is recommended to enable the Flash or use a tripod to stabilize the camera. Stabilizer Indicates video stabilizer function is enabled. Histogram Graphic display of Brightness. Displays ISO setting. -
Page 23: Lcd Monitor Layout - Video Recording Screen
Item Description Shutter speed Displays shutter speed setting. Aperture value Displays aperture setting. Focus area Indicates focus area. EV Compensation Displays exposure compensation setting. Focus mode Indicates focus setting. White balance Displays white balance setting. Face tracking Indicates face tracking is enabled. Tracking AF Indicates tracking AF is enabled. Metering Displays metering setting. Quality Displays quality setting. Photo size Displays photo size setting. AF lamp Indicates AF lamp is enabled. Exposure bracketing Displays Exposure bracketing setting. LCD Monitor Layout – Video Recording Screen Item Description Indicates that you captured a picture while recording videos. The Picture-in-Video number displayed to the right of the icon indicates how many PIV (PIV) images you captured during the video clip. - Page 24 LCD Monitor Layout – Playback Mode Screen The Playback mode display varies depending on the type of image being viewed. Playback mode display for still images: Item Description Playback Indicates playback mode. mode Protect Indicates file is protected. Button Displays the button info of Playback mode. indicator File no./ Indicates the file number over the total number of files in the storage Total no. card. Battery Indicates battery level. Storage media Indicates used storage memory. Recording Displays recording information of the file. information Photo Size Displays the photo size setting. DPOF Indicates the file is marked for printing.
- Page 25 Playback mode for video clips: Item Description Playback mode Indicates playback mode. Protect Indicates file is protected. Displays the OK button function in Playback mode. Push to start video Button indicator playback. Indicates the file number over the total number of files in the storage File no./Total no. card. Battery Indicates battery level. Storage media Indicates used storage memory. Recording date Displays the date/time of the video recording & time Video size Indicates the size of the video clip. Displays the OK button function in Playback mode. Push to adjust Button indicator audio volume during video playback. Video length Display the total length of the video clip. Played time Indicates the played time of the video. Playing status Displays playing status. Indicates what button to Push on the camera to control video playback. Button indicator You can select Stop, Pause, Fast Forward and Rewind.
-
Page 26: Recording Images And Videos
Recording Images and Videos Taking Images Now that you are familiar with camera controls and menu layout, here are some more important details on using the camera. 1. Push and hold the Power button to power on the camera. 2. Compose the shot using the focus bracket on the LCD monitor. See illustration on the right. 3. Pushing the Shutter button down halfway automatically focuses and adjusts the exposure, and Pushing the Shutter button down fully captures the images. When the shake warning icon appears, hold the camera steady. It is recommend to, turn on Flash or use a tripod to stabilize the camera to prevent blurred images. When pushing the shutter halfway, the focus bracket turns green if the camera has focussed on a subject and red if the camera was unable to focus accurately. Common causes for a red focus bracket include incorrect focus setting, insufficient lighting or subject has low contrast (i.e. white wall) Setting the Zoom Control Use the zoom feature to magnify far-away subjects. To adjust the zoom: 1. Turn ON zoom setting by pushing the Menu button and scrolling down to “Digital Zoom”. As a shortcut, may also push the OK button to turn zoom ON or OFF. 2. Once zoom is activated, push or keys to increase or decrease zoom from 1x to 3x. -
Page 27: Using Ev Compensation
Using EV Compensation Images can be captured with the overall scene intentionally made brighter or darker. These settings are used when a suitable brightness (exposure) cannot otherwise be obtained in circumstances where the difference in brightness between the subject and the background (the contrast) is large, or when the subject that you wish to capture is very small within the scene. Available for still images only. • Push the EV/Delete/Right button to launch the EV Compensation function. EV/Delete/Right • To adjust EV settings, Push the or button keys to increase/decrease the value. As you adjust the EV settings, you will see the resulting effect on the LCD monitor. • Push the OK button to save and apply changes. • The EV setting is only available in shooting still images. Using the Flash When taking pictures in low light or challenging lighting conditions, use the Flash to get brighten the image exposure. The flash function is not available for videos or continuous shooting. To activate Flash: • Push the Flash/Down button to launch the Flash function. • Push the or keys to select the desired flash setting. Flash/Down button • Push the OK button to save and apply changes. -
Page 28: Using Self-Timer
Your camera is equipped with five flash modes: Auto Flash - The flash fires automatically in low light conditions. Red-eye reduction - The flash fires twice to reduce the red-eye effect. Forced on - The flash fires whenever you Push the Shutter button regardless of lighting conditions. Slow sync - The flash fires with a slow shutter speed. This is for artistic effect where you want to illuminate and “freeze” the subject in the foreground while showing motion blur in the background. Forced off - The flash is turned off. Note: Flash function is only available in shooting still images, but not available in Continuous Shooting/Landscape/Sunset/Dawn/Night Scene/Fireworks/Sports/Candlelight/Background Defocus/HDR/Time Lapse/Panorama/GIF Capture/Art Effect (except Fisheye Lens) or when shooting video. Using Self-timer The Self-timer allows you to take images after a pre-defined delay. This function is only available in recording still images. The Self-timer setting is automatically set to off when you turn off the camera. To activate Self-timer: • Push the Rotate/ Self-timer/Left button to Rotate/ launch the Self-timer function. -
Page 29: Setting The Focus Mode
Your camera is equipped with 4 Self-timer modes: Off - Captures an image without time delay. 10 Sec - Sets a 10-second delay to capture image after Pushing the Shutter button. 2 Sec - Sets a 2-second delay to capture image after Pushing the Shutter button. Double – Captures two images; First image with 10 second delay and second image with 2 seconds delay. Note: The Self-timer function resets to Off after every shot or when powering off the camera. Setting the Focus Mode The camera uses auto focus lens to adjust focus from 4” (10cm) to infinity depending on what focus setting is used. To set the Focus mode • Push the Focus/Up button to launch the Focus settings. • Push the or keys to select the desired focus setting. • Push the OK button to save and apply changes. Your camera supports the 4 focus modes: Auto Focus – Use this for most shooting conditions. The camera will automatically focus on subjects at shooting Focus/Up button distance between 12” (25cm) to infinity. -
Page 30: Using The Delete Button
Infinity - Use this for shooting landscapes and moving objects beyond 3ft (90cm) shooting distance . The camera will lock the focus so all subjects are in focus from 3ft (90cm) Note: This function is only available when the Zoom is turned OFF. Using the Delete Button Use the Delete button on your camera to delete a pictures, videos and audio clips. The Delete function allows you to remove unwanted files from the camera’s memory. Protected files cannot be erased, to delete, unprotect the file first. See “Protect” on page 68. To delete an image/video clip: 1. Push the Playback button on the camera. 2. View images/videos clips in Single navigation mode. 3. Use the or keys to scroll through images/videos. 4. When the unwanted image/video clip is displayed on the LCD monitor, Push the Delete/ Right button. 5. A confirmation selection appears on screen. 6. To close the Delete function and go back to the single navigation mode, Push Menu button. - Page 31 To delete a single file: 1. After a confirmation selection appears on screen. Select Single. 2. Push the OK button and select Delete to delete. 3. The next image is displayed on the LCD monitor. To delete another file, use the or keys to scroll through the images/videos clip. Repeat steps 1 to 2. 4. Push the Menu button to exit the Delete function and go back to the single navigation mode. To delete attached voice memo: 1. After a confirmation selection appears on screen. Select Single. 2. A delete voice memo option will be added to the selection. 3. Select and Push OK to delete voice memo. 4. Or select Delete to delete both image and its embedded voice memo. To delete multiple files: 1. After a confirmation selection appears on screen. Select Multi. 2. The images are displayed in thumbnail view on the LCD monitor. 3. Use the or keys to move through the files. 4. When the desired image/video clip is highlighted, use the or keys to mark/unmark image/video clip for deletion.
-
Page 32: Recording Videos
To delete all files: 1. After a confirmation selection appears on screen. Select All. 2. Select Yes. 3. Push the OK button to delete all files. Recording Videos The camera features Full HD 1080p video function for recording movies. The available recording time depends on the capacity of the memory card installed in the camera. Videos can be recorded until the maximum memory capacity has been reached. The length of a single video clip is limited to 29 minutes or 4GB for easier file management. 1. Push the Video button to start recording. 2. If Zoom function is set to On, push the or keys to zoom in and out while recording. 3. Push the OK button during recording can pause/resume the recording. 4. Push the Video button again to stop recording. Note: • The camera will automatically stop recording when the memory capacity is full. • It will automatically stop recording when the recording time is over 29 minutes or the file size is over 4 GB. • When the temperature of CMOS Sensor is over 145ºF (63ºC), the camera will display the warning message. - Page 33 Using Picture-in-Video (PIV) function While recording a video, you can shoot 2MP pictures by pushing the shutter button halfway. An icon displays on the bottom left of the LCD indicating PIV has been captured. The PIV feature is only applicable to movie size: 1080p60, 1080p30 and 720p30. Note: • When the movie size is 1080p (60fps) or 1080p (30fps), the capture photos are saved at 1920 x 1080 resolution. • When the movie size is 720p (30fps), the capture photos are saved at 1280 x 720 resolution. • See page 55 for information about the video settings menu.
-
Page 34: About The Mode Dial
About the Mode dial There are 8 different photography modes that can be quickly set by turning the Mode dial. Each mode is a specific photographic function or effect as described below. Turning the Mode dial will immediately enter the selected mode, even when camera is in Playback mode or during movie recording. Icon Mode Description The camera automatically adjusts exposure based on ambient lighting Program conditions. Allows full access to all menu settings and menu setting changes are saved when powering off the camera. The camera detects the shooting conditions and automatically switches to Intelligent the appropriate scene mode. Menu setting changes are limited. See “Using Scene Intelligent Scene” on page 34 for more details. Select among 25 common land scene mode options. Each scene mode automatically adjusts the camera settings for a specific shooting condition. Land Scene The selected scene will be saved when powering off the camera or returning to the SCN mode later on. Menu setting changes are limited. See “Setting the Land Scene Mode” on page 35 for more details. Use this feature to create a panoramic photo by panning or tilting the Panorama camera. Menu setting changes are limited. See “Using Panorama Mode” on page 41 for more details. Allows full exposure control by manually adjusting the aperture, shutter speed and ISO. Allows full access to most menu settings, except for EV Manual compensation and Exposure Bracketing. See “Using Manual Mode” on page 42 for more details. After selecting Underwater mode, push the Menu button to select among 4 underwater scenes – Dive, Snorkel, Ext Flash or Ext Light. The selected scene will be saved when powering off the camera or returning to the Underwater Underwater mode later on. Each UW scene automatically adjusts the camera settings for a specific shooting condition or camera setup. Allows full access to most menu settings, except Maximum ISO and AF Lamp. See “Setting Underwater Scene Modes” on page 43 for more details. This feature lets you manually adjust the aperture value while the camera Aperture automatically adjusts shutter speed to ensure proper image exposure. -
Page 35: Using Intelligent Scene
Using Intelligent Scene - This feature is most useful for novice users to capture great images on land even without basic knowledge of photography. Simply frame the shot with the help of Intelligent Scene Mode, the camera automatically recognizes 7 kinds of scenes - Portrait, Landscape, Macro, Backlight, Backlight Portrait, Night Scene and Night Portrait - and selects the ideal settings. Intelligent Scene mode is not suitable for underwater. After the camera detects the shooting conditions, In this example, the camera changed to Land- the Intelligent scene icon changes to show the scape mode automatically. detected scene mode. To activate Intelligent Scene 1. Turn the Mode dial to icon 2. Push the shutter button half way to focus the camera on the subject. 3. The camera detects the shooting conditions and switches to an appropriate scene mode. The detected scene mode icon will be displayed on the LCD monitor. 4. Push the Shutter button to take the shot. NOTE: If camera does NOT detect suitable scene mode, it will automatically adjust focus and exposure to capture best possible picture. -
Page 36: Setting The Land Scene Mode - Scn
Setting the Land Scene Mode - Select among 25 common land scene modes. Each scene mode automatically adjusts the camera settings for a specific shooting condition. The selected scene will be saved when powering off the camera or returning to the SCN mode later on. 1. Turn the Mode dial to icon SCN to enter last used Scene mode (Default: Portrait). Push Menu button to select other scene modes. 2. Use the navigation controls to move through the selection. 3. Push the OK button to save and activate the selected scene mode. The table below shows the available scene mode settings. Icon Item Description The camera focuses on the person in the foreground while blurring the Portrait background. This feature is used to emphasize wide scenic views. The camera’s focus Landscape locks to infinity and flash is disabled. This feature enhances the natural warm color tones visible during sunsets. Sunset The camera’s focus locks to infinity and flash is disabled. EV is set to -0.7. This feature makes the sky more visible and enhances bluer color tones. Dawn The camera’s focus locks to infinity and flash is disabled. EV is set to -1.0. The camera exposes properly on subjects standing in front of a bright Backlight background. The camera’s flash is forced ON. - Page 37 This feature slows shutter speed to capture firework in motion. It is Fireworks recommended to use a tripod or place camera on stable surface to prevent motion blur. This feature is used to enhance bright beach scenes with EV Beach compensation set to +0.3. This feature is used to enhance bright snow scenes with EV Snow compensation set to +0.3. This feature uses faster shutter speed to capture images of fast moving Sports subjects. Camera shoots 3 pictures within 1 second, ideal for capturing a fast moving racing car or a golf swing. The flash is disabled. This feature is used for taking pictures of people in low light indoor Party settings, like weddings or parties. The camera’s flash is set to red-eye reduction. This feature is used to capture warm candle light effects. The camera’s Candlelight flash is disabled. This feature is used to capture portrait pictures with night or dark Night Portrait background. The camera’s flash is set to red-eye reduction. Soft Skin This feature enhances skin color tone to make skin appear smoother. This feature increases color saturation to make food appear more Food enticing. The camera’s flash is set to auto and focus is set to macro. Use this feature to take pictures with the sharp focus on the subject in the foreground, while the background is out of focus. If the shooting Background environment is too dark or the background cannot be recognized, an Defocus error message “Defocus Failed” will be displayed on the LCD monitor when pushing Shutter halfway. This feature uses face tracking to auto detect faces and capture a portrait without the help of others. When two faces are detected, Love Portrait the camera automatically focusses and starts 2-second count down before capturing the picture.
- Page 38 This feature uses face tracking to auto detect a face and capture self portrait without the help of others. When one face is detected, the camera automatically focuses and starts 2-second self timer before capturing the picture. Tips to make a great shape by self portrait photography: Self Portrait • Lean in towards the camera to reduce double chin. • Angle your body and bend your arms to look slimmer. • Keep your shoulders back. This feature uses face tracking to auto detect faces and smile detection Smile Shutter to capture continuous pictures whenever the person smiles. This feature applies digital processing to enhance highlights, shadows and contrast. Use for high contrast scenes, for example, when photographing brightly light outdoor scenery through a door/window, or taking pictures of shaded subjects on a sunny day. Hold camera still during image capture. Use this feature to take photos automatically at the specified time Time Lapse intervals. See “Using Time Lapse” on page 38 for more details. Use this feature to take a specified number of images at specified shooting time intervals. The captured images will be combined into a GIF Capture GIF file and no longer exist individually. See “Using GIF Capture” on page 38 for more details. Use this setting to capture creative images using one of 17 different Art Effect artistic effects. See "Using Art Effect" on page 39 for more details. Use this setting to capture a series of images using one of 6 different Continuous shooting modes. See “Using Continuous Shooting mode” on page 40 Shooting for more details.
-
Page 39: Using Time Lapse [Land Scene Mode]
Using Time Lapse [Land Scene mode] Use this feature to take photos automatically at the specified intervals. The photo size will be 16:9 (2M). In Time Lapse mode, Push Left button to launch the Time Lapse menu, and then Push Up/Down button to select the options. Available options are 5 sec. (Default), 10 sec., 30 sec., 1 min., 5 min., 10 min. and 30 min. Push OK button to apply the setting and close the menu. You can full Push the Shutter button to start recording, and full Push the Shutter button again to stop recording. The Time Lapse photos will be merged into a Time Lapse movie at 10 fps. Note: Photos taken from Time Lapse will be combined into a movie and will NOT exist individually. Using GIF Capture [Land Scene mode] Use this feature to take a specific number of images in a specific shooting interval. The captured images will be combined into a GIF file and no longer exist individually. Push OK button in Preview could launch the GIF Setting. Use Up/Down button can adjust the shooting interval. Available options are 1 sec, 2 sec and 3 sec. Use Left/Right button can adjust the number of shot. Available options are 5 pic and 10 pic. A pie chart will be displayed on lower right of the screen during GIF capture to show progress. If all shots have been taken, these JPGs will be combined into a GIF and will be played in loop immediately, then a confirm box shows up. Select Save to save the... -
Page 40: Using Art Effect [Land Scene Mode]
Using Art Effect [Land Scene mode] Show your creative side with one of these 17 artistic effects that can be presented on Preview and also apply to movie recording. Push or keys to select between the following settings: Icon Item Description The camera automatically adjusts exposure based on ambient lighting High Key conditions. Allows full access to all menu settings and menu setting changes are saved when powering off the camera. Low Key This feature reduces the brightness to achieve a darker tone. Images are captured with darkened edges around the image frame and Toy Cam alters color tones. Soft Focus Produces halo around the subject to achieve a soft focus effect. The camera captures the image with more contrast and saturation Vivid emphasizing on the bold colors. Fisheye Lens This feature captures images with fisheye lens effects. This feature heightens a certain tone and increases the contrast to Cross Process achieve a unique style. Extreme Color This feature captures the image with increased saturation and contrast. This feature captures images with painting effects. Please note that Painting Painting is not available in movie recording. B&W Images are captured in black and white. Sepia Images are captured in sepia tones. -
Page 41: Using Continuous Shooting [Land Scene Mode]
Color Accent Retains red tone while the rest of the scene becomes black and white. (Red) Color Accent Retains orange tone while the rest of the scene becomes black and (Orange) white. Color Accent Retains yellow tone while the rest of the scene becomes black and (Yellow) white. Color Accent Retains green tone while the rest of the scene becomes black and (Green) white. Color Accent Retains blue tone while the rest of the scene becomes black and white. (Blue) Color Accent Retains purple tone while the rest of the scene becomes black and (Purple) white. Using Continuous Shooting [Land Scene mode] Continuous Shooting allows you to easily capture fast-moving targets, for example children playing, running dogs or exciting sport events. Push or keys to select between the following settings: Icon Item Description Capture photos any size with 10 frames per second (fps). Push and Endless Burst hold the shutter button to start continuous shooting. The camera will (High) capture images until 10 photos are taken, shutter button is released, or the memory card is full. -
Page 42: Using Panorama Mode
Sporty Burst Use this feature to capture 25 photos at 60 fps. Each image size is 2M (1920 x 1080) resolution. Sporty Burst Use this feature to capture 50 photos at 120 fps. Each image size is 0.3M VGA (480x640) resolution. Capture photos in any size at 10fps. Push and hold the shutter button to start continuous shooting. The camera will capture 5 photos and ONLY Smart Select save the sharpest one of the series. The other 4 photos will be erased automatically. Using Panorama Mode - Use this feature to create a panoramic photo from mul- tiple shots that the camera stitches together into one single image. Note: • The actual size of stitched images may be different due to the panoramic angle and processing. • It is recommended to use a tripod to stabilize the camera, and move the camera slowly. • The longest time of capturing is approximately 30 seconds. • If you select From Top to Bottom or From Bottom to Top in 360-degree panorama, it is recom- mended to turn the camera over 90 degrees in order to make sure the stability during capturing. • In Panorama mode, uneven brightness may result in difference between the captured image and its actual scene. To stitch the still image 1. Push key to launch the Angle Menu. Push key to launch the Direction Use the or keys to select options. Menu. Use the or keys to select options. Push the OK button to save and apply Push the OK button to save and apply changes. changes. -
Page 43: Using Manual Mode - M
3. Fully push the shutter button to start 4. Slowly and steadily move the camera in the shooting. When shooting starts, a white- specified direction, while making sure to keep cross locates on the center and a yellow the white cross centered on the yellow line. If line is displayed horizontally (or verti- you move camera without keeping a straight cally) through the screen. In addition, a line, the yellow line will move with the scene. progress bar on the bottom of the screen The camera will display an error message if shows the relative shooting position of the a straight line is not maintained or camera is panoramic image capture. moved to fast. 5. When the white portion of the progress bar goes to the end, the camera will automatically perform stitching function and save the panorama image. Using Manual Mode - This mode allows you to adjust both shutter speed and aperture values to achieve desired exposure and effect. Aperture may be adjusted from F1.8 to F11 in 1/3 stops. Shutter speed may be adjusted from 15” (seconds) to 1/2000 second. Auto ISO and EV compensation are locked when shooting in Manual mode. The resulting exposure value (EV) is displayed on the bottom of the screen when pushing the shutter button halfway. The EV displayed is only for your personal reference; Actual EV compensation is NOT automatically adjusted. Manual mode is intended for experienced photographers familiar with advanced photographic prin- ciples. You have complete control over image exposure and various effects. More information about learning to shoot in manual mode is available at your local bookstore or online through various photo- graphic training website. -
Page 44: Setting Underwater Scene Mode
To set Aperture and Shutter speed values: Turn the Mode dial to “M” for Manual mode. Push OK button to enter Aperture Adjustment mode, then, use Up/Down button to select the desired aperture. Push OK button again to enter Shutter Speed Adjustment mode, then, use Up/Down button to select the desired shutter speed. Fully push the Shutter button to capture the image. Displays aperture and shutter speed values Setting Underwater Scene Mode - Select among 4 underwater scene modes. Each scene mode automatically adjusts the camera settings for specific underwater environments depending on the type of optional UW lighting ac- cessory being used with your DC2000 camera. Turn the Mode dial to the [fish icon] to enter the last used Underwater Scene mode. Dive mode is the default underwater scene mode. Push the Menu button to set the appropriate underwater scene modes. See table below for more details. - Page 45 Use the navigation controls to move through the selection. Push the OK button to save and activate the selected underwater scene mode. Scene mode is saved when powering off the camera. The following table below shows the available UW scene mode settings. Icon Item Description For diving at depths greater than 25ft/8m without external lighting accessories. The camera automatically adjusts exposure and adds color-correction to compensate for deep underwater blue effect. The default white balance setting is Blue Water Deep, which restores the missing red and yellow colors typical in deeper underwater environments. For greener water conditions where algae bloom is present, change the WB setting to “Green Water”. The built-in underwater color correction is most effective within depths Dive of 60ft/18m. Below 60ft/18m, there is a complete absence of red/ yellow colors and UW lighting is recommended for optimum colors. The default setting for camera’s internal flash is set to OFF but may be turned ON for taking close-up pictures within the flash’s effective range of about 12” / 30cm. Using the cameras’s internal flash will cancel the underwater color correction. For longer effective range, we recommend using the optional Sea Dragon Flash and/or photo-video light. For snorkeling or diving at shallow depths less than 33ft/10m without external lighting accessories. The camera automatically adjusts exposure and adds underwater color-correction to compensate for underwater blue effect at shallow depths. The default white balance setting is Blue Water Shallow, which adds the missing red and yellow colors typical in shallow water. For greener water conditions where algae bloom is present, change the WB setting to “Green Water”. Snorkel The default setting for camera’s internal flash is set to OFF but may be turned ON for taking close-up pictures within the flash’s effective range of about 12” / 30cm. Using the camera’s internal flash will cancel the underwater color correction. For longer effective range, we recommend using the optional Sea Dragon Flash and/or photo-video light.
-
Page 46: Using Aperture Priority Mode
Ideal for any underwater depth using one or two external flash accessories, or combination external flash and photo-video light. The camera automatically adjusts exposure and internal flash always fires to trigger the external flash via optical cable connection. The white balance color setting is locked to match the color temperature Ext Flash typical for underwater flashes resulting in natural colors. The camera will use minimum 1/60 shutter speed to prevent motion blur and minimum F4.0 aperture to prevent over-exposing the subject. To achieve desired exposure, adjust the brightness of the external flash and/or change the camera’s EV compensation setting. Ideal for any underwater depth using one or more photo-video lights. The camera automatically adjusts exposure. The default white balance setting is Auto, but that may be changed to any other white balance setting to match the color temperature of the light source. Daylight WB is recommended for most photo-video lights. Ext Light When shooting beyond the effective range of the photo-video light, it is recommended to use one of the 3 underwater white balance setting options. See page 50 for more details about underwater white balance Using Aperture Priority Mode - This mode allows you to adjust the aperture while the camera automatically adjusts shutter speed to achieve proper exposure. Using a larger aperture, like F1.8, allows more light to enter the lens and will produce a narrow depth-of-field, ideal for shooting close-ups with a sharp foreground and out- of-focus background. A smaller aperture, like F11, allows less light to enter the lens and produces a wide depth-of-field, ideal for producing sharp foreground and background in bright light conditions. Aperture Priority mode may be used for capturing underwater pictures, however, it will be necessary to change the following settings: When using Aperture Priority with one or two external flash accessories, or combination external flash and photo-video light, turn flash setting to Forced ON. You will need to synchronize your external flash with the camera’s internal flash because the internal flash uses a pre-flash when firing. When using Aperture Priority without external lighting, change white balance setting to Blue Water Deep, Blue Water Shallow or Green water according to water conditions and depth. To set Aperture values: Turn the Mode dial to “A” for Aperture Priority. Push OK button to enter Adjustment mode, then, use Up/Down button to select the desired aperture value. -
Page 47: Using Shutter Priority Mode
Using Shutter Priority Mode - This mode allows you to adjust the shutter speed value while the camera automatically adjusts the aperture to achieve proper exposure. A faster shutter speed, like 1/1000 second, is useful for captur- ing fast moving objects, like freezing the motion of a race car speeding by. A slower shutter speed creates a sense of motion, like water flowing. Shutter Priority mode may be used for capturing underwater pictures, however, it will be necessary to change the following settings: When using Shutter Priority with an external flash accessory, turn flash setting to Forced ON. You will need to synchronize your external flash with the camera’s internal flash because there is a pre-flash when flash fires in Shutter Priority mode. When using Shutter Priority without an external flash, keep the camera’s internal flash OFF and change the white balance setting to Blue Water Deep, Blue Water Shallow or Green water according to water conditions and depth. To set shutter speed values: Turn the Mode dial to “S” for Shutter Speed Priority. Push OK button to enter Adjustment mode, then, use Up/Down button to select the desired shutter speed. Fully push the Shutter button to capture the image. Displays the shutter value... -
Page 48: Using The Main Menu
Using the Main Menu The camera’s main menu allows for easy access and adjustment of photo, video and system settings. When the menu is displayed, use the 4-way navigation control and the OK button to move through menu selections and apply your desired settings. To close the menu anytime, Push the menu but- ton again. When the camera is sealed inside the underwater housing, use the Up (Focus) and Down (Flash) keys to scroll through the menu. The main menu may be accessed in any mode, except for the Playback mode. Pushing the Menu button in Playback mode will enter the Playback Menu. Refer to page 62 for details about the Play- back menu. To access the Main menu: Turn on the camera by Pushing Power button. Push to launch the Main Menu. Use the or keys to move through the menu To select an item, Push or OK button. Change the submenu settings using the 4-way navigation control. Push the OK button to save and apply settings. Photo Size/Image Ratio The Photo Size setting determines image resolution (megapixels). The default setting is 20M (20 megapixels), which has a pixel dimension of 5472x3648 pixels. A higher resolution results in larger image and file size. The Image Ratio or “Aspect Ratio” is width of the image relative to its height. Available options are 3:2 (Default), 4:3, 16:9 and 1:1. Different image ratios correspond to different resolution groups. The table below shows the Image Ratio and Photo Size values available for still images. -
Page 49: Focus Mode
Image Ratio Large Size Medium Size Small Size Thumbnail Size 20M (5472x3648) 10M (3888x2592) 5M (2736x1824) 18M (4864x3648) 10M (3648x2736) 5M (2592x1944) VGA (640x480) 16:9 17M (5472x3080) 7.5M (3648x2056) 4.2M (2720x1528) 13M (3648x3648) 6.5M (2560x2560) 3.7M (1920x1920) Focus Mode The camera automatically sets the focus depending on the shooting distance. There are 4 focus settings options available: Auto Focus (AF), Macro, Super Macro and Infinity. Refer to page 26 for more details about focus settings. Flash The flash setting is useful for taking pictures in low light environment. Available options on Flash Menu are Auto, Red-eye Reduction, Forced On, Slow Sync and Forced Off. Refer to page 26 for more details about Flash settings. Self-timer The Self-Timer setting is available for taking pictures only. Available options on Self-timer Menu are Off, 10 sec, 2 sec and Double. Refer to page 27 for more details about the Self-Timer settings. -
Page 50: Ev Compensation
EV Compensation The EV Compensation setting is available for taking pictures only. Available options on EV Compensation are +2.0EV/+1 .7EV/+1.3EV/+1.0EV/+0.7EV/+0.3EV/0EV/-0.3EV /-0.7EV/- 1.0EV/-1.3EV/-1.7EV/-2.0EV. Refer to page 26 for more details about the EV Compensation settings. RAW+JPEG The RAW+JPEG setting is available for taking a RAW image and JPEG image at the same time. When RAW+JPEG is ON, the camera will save two image files (one .dng RAW image and one .jpg JPEG image) each time the shutter button is pushed. When RAW+JPEG is Off, only a JPEG image is saved. The default setting is OFF. RAW images are uncompressed files that allows for virtually unlimited photo editing options. The camera uses Adobe Digital Negative (.dng) format which can be edited using Adobe Photoshop or Lightroom. This setting is recommended for experienced users familiar with advanced photo editing. RAW images cannot be played back on camera. Only the corresponding JPEG image may be played back. Playback functions will not be applied to RAW images (except Delete and Copy). Deleting the JPEG image will also delete the corresponding RAW image file. Quality The Quality setting determines the amount of compression used to save a JPEG image. The Superfine quality setting results in the least amount of compression with sharper details compared to Fine or Normal. However, the higher the quality, the more memory space is required. -
Page 51: White Balance
Icon Available Settings Description Icon Superfine 5x compression rate. Fine 8x compression rate. Normal 12x compression rate. White Balance The WB setting applies to taking videos and White balance (WB) is the process of removing pictures when flash is OFF. When camera’s unnatural color casts created by various flash fires, the WB is locked to match the color lighting environments, so that objects which temperature of the flash. appear white in person are rendered white in your photo. The camera features 6 WB The Auto WB setting (AWB) may be fine-tuned settings for land and 3 for underwater. The according to your personal preference. In the Custom setting option allows you to manually White Balance menu, select AWB and push the set the WB using a white slate. key to enter WB Shift setting. Use the keys to select the desired color shift and push OK As you scroll through the WB settings, you button to save the setting. can see the color effect on the LCD monitor. Underwater WB settings appear red on the LCD monitor on land, but will appear natural when viewed underwater. Item Description The camera automatically adjusts the white balance. This is Auto White Balance the default WB setting and recommended for most shooting... -
Page 52: Iso
Tungsten Ideal for indoor images with tungsten or halogen lighting. Ideal for indoor images with colder (bluish) fluorescent lighting Fluorescent 1 conditions. Ideal for indoor images with warmer (reddish) fluorescent lighting Fluorescent 2 conditions. Allows manual adjustment of WB in any lighting condition, on land or underwater. Select Custom WB setting and aim camera at Custom white card or slate and push OK button to save the setting. If set correctly the white card should appear white on the LCD monitor. The ISO setting controls the light sensitivity of the image sensor for capturing images. A higher ISO value increases the sensor’s light sensitivity and allows for photography in low-light environments, but the more pixelated (grainier) the image will appear. A lower ISO value reduces the sensor’s light sensitivity and is ideal for brighter environments. Available options are Auto (Default), 125, 200, 400, 800, 1600, 3200, 6400 12800 and 25600. Maximum ISO Auto This feature allows the camera to adjust Auto ISO from 125 to the maximum set value. Available options are 200, 400, 800, 1600, 3200, 6400 and 12800 (Default). When camera is set to any of the 4 underwater scene modes, the maximum ISO Auto value is 800. Metering This sets the metering method for calculating the exposure. -
Page 53: Exposure Bracketing
Item Description Multi The entire area of the screen is measured, and the exposure is calculated. Averages the light metered from the entire frame, but gives greater weight Center to the subject matter at the center. A very small portion of the center of the screen is measured, and the Spot exposure is calculated. Exposure Bracketing Use this feature to take photos with different exposure compensation. Bracketing records 3 continuous images in the following order: Standard exposure, Overexposure and Underexposure. Available settings are: Off, +/- 0.3 EV, +/- 0.7 EV and +/- 1.0 EV. AF Area AF stands for Automatic Focus. This feature determines the area of the picture frame on which the camera focuses. The table below shows the available AF area settings. Icon Item Description This feature auto detects faces and tracks continuously. Up to 10 faces Face Tracking can be detected at the same time when using Face Tracking. Wide The camera automatically selects focus area within the wide frame. Center The focus area is fixed on the center. The camera will focus the subject as it moves and keep it continually Tracking AF in focus automatically. If Macro is turned on, Tracking AF will be disabled. -
Page 54: Af Lamp
AF Lamp The AF Lamp is located in the front of the camera and emits an orange/red light to assist the camera in focusing on objects in low light conditions. When AF Lamp can be set to Auto or Off. When set to Auto, the AF Lamp will turn on automatically when needed. The AF Lamp is intended for land applications only and not for underwater. For underwater application, it is recommended to use an external photo-video light accessory. Digital Zoom Use up to 3X digital zoom to enlarge far-away objects. When Digital Zoom is ON, use the or keys to increase or decrease the zoom. The Digital Zoom setting is located in the main menu, but may also be accessed using the shortcut function. When in preview mode, pushing the OK button to launch digital zoom shortcut. The shortcut setting may be changed to launch other desired camera settings. See page 58 for more details about the shortcut function. It is recommended to turn OFF Digital Zoom when the following features have been activated: Portrait mode • Night scene mode • Night Portrait mode • Background Defocus mode • HDR mode • Smile Shutter mode • Blink Detection mode • Love Portrait mode •... -
Page 55: Date Stamp
Date Stamp The date of recording can be printed directly on the still images. This function must be activated before the image is captured. Once date and time are stamped on an image, they can no longer be edited or deleted. Limitations of Date Stamp functions are as follows: Available for still images only. • This feature does not apply to Night Scene, Sports, • Night Portrait, Background Defocus, HDR, Time Lapse, GIF Capture, Panorama, and Continuous Shooting. When camera is held vertically, the date/time stamp on • your images still appear horizontally. Auto Review The Auto Review function lets you view the captured image right after shooting it. If Auto review is On, the camera will display the captured image for 1 second on the LCD monitor. Blink Detection Blink Detection enables the camera to detect if the subjects eyes are closed after taking a picture. If closed eyes are detected, a “Save Image” confirmation appears on the screen, allowing you to save the image or cancel and re-take the shot. Blink Detection appears in Photo menu only when Face Tracking is turned on. To activate Blink Detection 1. Enable Face-Tracking setting in the AF Area menu. 2. E nable Blink Detection from Photo menu. 3. H alf Push the Shutter button to focus the subject. The bracket turns green to indicate focus is set. If bracket turns red, confirm the focus setting is set correctly and there is sufficient lighting/contrast. -
Page 56: Grid Line
Grid Line The Grid Line function will show a framing grid on preview screen, which is useful for composing impressive pictures. Available settings are: On, Off. The configuration of Grid Line will be changed with different aspect ratio. Use the 3 x 3 grid lines to create impressive pictures following the “Rule of Thirds”, where subjects are aligned at the intersection points. Continuous AF Photo When Continuous AF Photo is on, the camera will periodically adjust focusing during preview without pushing the shutter button. More battery power is used when continuous focus is enabled. Movie Mode (Video Resolution) The Movie Mode setting is used to adjust video resolution and frame rate. The maximum recording size per video clip is about 4GB or 30 minutes. The first value refers to the video size and the second value refers to frame rate, expressed in frames per second (fps). For example, 1080p30 means the video size is 1080p (or full HD video) at 30 fps. 1080p30 is the default setting. Using 60fps frame rate is ideal for recording fast moving objects, but will use up more memory space. Higher frame rate videos may also be played back in slow motion at 30fps. -
Page 57: Continuous Af Video
Continuous AF Video When Continuous AF Video is on, the camera will adjust focusing during video record. More battery power is used when continuous focus is enabled. Wind Cut This feature reduces wind noise during movie recording. Stabilizer This function reduces shaky movements when recording video using image sensor shift technology. More battery power is used when stabilizer is enabled. The Stabilizer function only applies to video recording and not photos. -
Page 58: Setup Menu
Setup Menu The Setup menu is the last section of the Main menu and Playback menu, and allows you to configure general camera settings. To go to Setup Menu: 1. Push Menu button to launch the Menu. 2. Use the or keys to switch the menu tab to Setup menu. 3. To select an item, Push the OK button or key. 4. Change the submenu settings using the or keys. 5. Push the OK button to save and apply settings. Note: When the camera is inside the underwater housing, use the or keys to scroll through the Photo and Video menus until you reach the Setup menu. Startup The Startup setting controls the sound when the camera is powered on. Select among 3 sound options or turn start up sound off. Sound 1 is the default. -
Page 59: Shutter
Shutter The Shutter setting controls the sound when shutter button is pushed. You can turn the sound on or off. Shutter sound is not available when recording video. Shutter On is the default. Beep volume Use the Beep Volume setting to adjust the volume of the beep sound when camera focuses, displays a warning message or when setting changes are activated. You can select among 5 volume levels. Volume 2 is the default. Shortcut The OK button can be used as a shortcut to quickly access one of ten popular menu settings. After selecting the desired shortcut option, push the OK button to launch that setting. Available shortcut settings are Off, Focus Mode, Self-timer, EV Compensation, White Balance, ISO, Metering, Exposure Bracketing, AF Area, Digital Zoom (Default) and Grid Line. Note: When Zoom setting is ON, the and keys will override the Flash and Focus setting. Turn Zoom Off to access Flash and Focus settings. -
Page 60: Power Save
Power Save The Power Save function allows you to set the amount of time for the camera to enter sleep mode when no buttons are pushed. The display turns off in sleep mode to conserve battery power. After a minute of being in sleep mode, the camera will automatically power off. This function is not available in the following instances: Recording a video file • Playing a Slide Show/video file • Using the USB connector • During Movie Paste • During interval time on Time Lapse • During Wi-Fi operation • Date & Time Use the Date & Time function to set the date and time of your camera. This function is useful in attaching date stamps on captured images. Your camera uses a 24-hour time format. 1. Push the or keys to move cursor and select the date or time setting you want to change. 2. Push the or keys to change the numeric value. 3. Push the OK button to apply changes. Language This setting specifies the language used for menus and messages. Select among 31 languages. 1. Use the 4-way navigation control to scroll through the list and select the desired language. -
Page 61: Display Mode
Display Mode This function controls the icons displayed on the LCD monitor for both Record and Playback modes. Available settings are: On, Detailed Info, Off. If set Display Mode to Off, the mode icon and remaining shots will display for 2 seconds in following situations: Power on the camera • Switch from Playback to Record mode • After shooting • Close the menu and back to preview • LCD Brightness Select a brightness level for the LCD monitor. Available settings are: Auto. Automatically detects ambient lighting • conditions and adjusts the LCD brightness. Auto is the default setting. Bright. Sets the LCD to brightest setting but uses • more battery power. Normal. Normal LCD brightness. • Format This utility formats current used memory (Internal memory or Memory card) and erases all stored images and data. Formatting cleans the memory of any erroneous files and data. It is recommended to format the camera occasionally or when you experience errors when operating the camera. Important: Make sure to download all pictures and videos before formatting the camera, as formatting deletes ALL files. -
Page 62: Reset All
Reset All Use this function to reset the camera to its factory default settings. However, the following settings are exceptions and not affected by Reset. Date & Time • Language • Custom White Balance data • SSID & Password will be reset to default value. They • can be checked and modified only from the App. -
Page 63: Playback
Playback You can playback the still images, video clips on the LCD monitor. Viewing in Single Navigation The Single navigation mode displays the image one by one on the LCD monitor. To view images/video clips, follow the steps below. 1. Push the Playback button on the camera. 2. The LCD monitor displays an image. To understand the icons and other information on the screen, please see “Record Mode Screen” on page 21. Still Image Video 3. Use the key to view previous image/video or key to view next image/video. 4. To play a video clip, Push the OK button. See “Playing Videos” on page 64 for more details. Viewing Series Photo After shooting a series of photos using Continuous Shooting or Sports mode, the photos will be grouped as a single image called “Unexpanded Series Photo”. An icon will appear to indicate it is a series photo. To view Series Photo, follow the steps below. 1. Push the OK button to expand the selected series photo. 2. Use the or keys to view next/previous image. 3. Push the OK button to collapse the photo series. -
Page 64: Viewing Thumbnails
Viewing Thumbnails This function allows you to view 9 or 36 thumbnail images on the LCD monitor at the same time. Searching numerous images is faster than single view navigation. To set 9-images or 36-images mode 1. Push the Playback button on the camera. 2. If the file is NOT video, GIF, Time Lapse, Burst photos or voice memo in Single Navigation, Push OK button to display playback viewing options. 3. Use the or keys to move through the 5 options: Calendar, 6x6 Thumbnail, 3x3 Thumbnail, Single Navigation (Default) and Enlarge Image. 4. Push the OK button to select the desired viewing option. Using the scroll bar: If a scroll bar appears on the left side of the LCD monitor, it indicates that the screen can be scrolled up or down to display the next page of thumbnails. Use the 4-way navigation control to select the file and Push the OK button to display the selected file in Single Navigation. 3 x 3 thumbnail view 6 x 6 thumbnail view... -
Page 65: Using Calendar View
Using Calendar view: The Calendar viewing mode is useful for finding images/ videos recorded on a specific date. Use the 4-way navigation control to scroll through the calendar and push the Ok button to select the desired date. The first photo or video recorded on each date appears on the screen. Thumbnail icons: When you view the thumbnails, some images may contain icons. These icons indicate the type of file or recording. Icon Type Description File Error Indicates an error file. Video Indicates file is a video clip Playing Videos 1. Push the Playback button on the camera. 2. Use or keys to scroll through the saved images. A video clip has a video icon displayed on screen. 3. Push the OK button to play the video. 4. During playback, Push and hold the / keys to fast forward or rewind the video. The camera supports forward and rewind speed of up to 4x. 5. During playback, Push OK button to adjust volume. 6. Push the key to pause playback. Push the key again to resume. When paused, push the / keys to forward or rewind the video frame by frame. -
Page 66: Using Movie Edit
Using Movie Edit When a video clip is paused, push the Menu button to enter Movie Edit mode. The Edit Panel will be displayed in the lower left corner of the screen while the time bar and movie length is displayed along the bottom of the screen. Star Point End Point Edit Panel Preview Movie Length Save Return Time Bar Set Start/End point: 1. Use or keys to select the start point where you want to trim the beginning of the video clip and the end point where you want to trim the end of the video clip. 2. Use the or keys to move the start and end point tabs in 1/30 second intervals. The movie length must be at least more than 2 seconds. 3. Select the to preview the trimmed video clip or to save the video clip. The edited video clip will be saved as a separate file, The original video clip will be preserved. -
Page 67: Playing Voice Memo
Playing Voice Memo Voice memo is separately recorded .wav audio file and attached to a captured image. See “Voice Memo” on page 69 on how to record voice memo. 1. Push the Playback button on the camera. 2. Use or keys to scroll through the saved images. An image file with voice memo has a voice memo icon located on the bottom left of the LCD monitor. See picture on the right. 3. Push the OK button to play the voice recording. 4. During playback, Push OK button to adjust volume. Volume cannot be adjusted when you pause the voice memo. 5. Push the key to pause playback. Push the key again to resume. When paused, the play info will remain on screen except 6. Push the key to stop the playback. The LCD monitor displays the image in Single navigation mode. -
Page 68: Playback Menu
Playback Menu The Playback menu allows you to edit images, record voice memos, and adjust general playback settings. To go to Playback Menu: 1. Push the Playback button 2. Push Menu button to launch the Playback Menu. 3. Use the or keys to move through the menu selections. 4. Push or the OK button to select the setting you want to change, 5. Change the submenu settings using the 4-way navigation control. 6. Push the OK button to save and apply settings. Slide Show The slide show function enables you to playback your still images automatically in sequential order one image at a time. Using the Slide Show: 1. From the Playback menu, select Slide Show and push the OK button. The Slide Show menu will appear. 2. Use the 4-way navigation control to set the desired slide show time interval (1 sec., 3 sec., 5 sec. or 10 sec.) and if you want the slide show to continuously repeat (Yes or No) itself. - Page 69 Protect Use the Protect setting to prevent images and videos from being erased by mistake. A protected file has a lock icon when viewed on Playback mode. To protect files: 1. From the Playback menu, select Protect. 2. The Protect submenu is displayed on the LCD monitor. Available select settings: Single. Select one file to lock/unlock. • Multi. Select multiple files from the thumbnail view to • lock/unlock. Lock All. Lock all files • Unlock All. Unlock all files. • To protect/unprotect a single file: 1. Select Single in the Protect submenu, the images are displayed on the LCD monitor in single navigation mode. 2. Use or keys to scroll the display. 3. When the desired file is displayed on the LCD monitor, push the OK button to Lock the file. Pushing OK again will Unlock the file. 4. Select Exit to close the protect/unprotect function and go back to the Playback menu.
-
Page 70: Voice Memo
To protect all files: 1. Select Lock all in the Protect submenu. A confirmation message appears. 2. Select Yes. 3. Push the OK button to lock all files. To unlock all files: 1. Select Unlock all in the Protect submenu. A confirmation message appears. 2. Select Yes. 3. Push the OK button to unlock all protected files. Voice Memo You can record up to a 30 second audio clip for each captured still images. The audio recording will be associated with the image sharing the same file name but saved separately as a .wav file. To record voice memo: 1. Push the Playback button 2. Push the or keys to scroll and select an image to attach voice memo. 3. Push the Menu button to launch the Playback menu. 4. Select Voice Memo. 5. Select Start, then Push the OK button to start recording. 6. Push the OK button again to stop recording. -
Page 71: Filter Effects
Filter Effects The filter effects tool is only applicable to photos captured in 4:3 image ratio (aspect ratio). Edited images using this function are saved as new files. To activate Filter Effects: 1. Push the Playback button 2. Push the or keys to scroll and select an image to edit. 3. Push the Menu button to launch the Playback menu. 4. Select Filter Effects. The Filter Effects submenu appears. 5. Push the or keys to scroll and OK button to select an option. The following table shows the available settings. Item Description High Key Enhances the brightness to achieve a lighter tone. Low Key Enhances the brightness to achieve a darker tone. Toy Cam Darkens edges around the image frame and alters the color tones. Soft Focus Produces halo around the subject to achieve a soft focus effect. Vivid Emphasizes bold colors by adding contrast and color saturation. Parts of image will be blurred making the scene look like a miniature scale Miniature Effect model. It is recommended to apply this effect on images captured from a high angle to simulate the miniature effect. - Page 72 Trimming The Trim tool allows you to crop an image. This function is only applicable to photos captured in 4:3 image ratio (aspect ratio) and maintains that ratio. Trim is not available for VGA image sizes. To trim an image: 1. Push the Playback button 2. Push the or keys to scroll and select the image you want to trim. 3. Push the Menu button to launch the Playback menu. 4. Select Trimming. The Trim screen layout is displayed on the LCD monitor. 5. Push the key to zoom in on the the image and to zoom out. 6. Push OK button to switch to the Move mode and use the 4-way navigation controls to move around the image. Description Enlarged image Move mode Switch Current zoom magnification. Image area The approximate location of the trimmed area 7. Push the Menu button and a confirmation menu appears. 8. S elect Yes to save changes as a new file or Cancel to go back to the Playback Menu without saving changes.
-
Page 73: Startup Image
Resize Allows you to create a smaller copy of the original image. Smaller copies are ideal for emailing and sharing photos where file size limitations may apply. This function is only applicable to photos captured in 4:3 image ratio (aspect ratio). The resized image is saved as a new file, so the original file is maintained without changes. To resize an image: 1. Push the Playback button 2. Use the or keys to scroll and select an image to resize. 3. Push the Menu button to launch the Playback menu. 4. Select Resize. The Resize submenu is displayed on the LCD monitor. 5. Select size among: 640 (640x480), 320 (320x240), and 160(160x120). 6. After selecting size, a menu selection appears. 7. Push the OK button to save/cancel changes. 8. The resized image is saved as a new photo. Startup Image You can change the image that appears on the LCD monitor when powering on the camera to a any captured images saved in memory. 1. Push the Playback button 2. Push the Menu button to launch the Playback menu. 3. Select Startup Image and the following menu selection appears. - Page 74 DPOF DPOF is the abbreviation for Digital Print Order Format, which allows you to embed printing information on your memory card. You can select the images to be printed and how many prints to make with the DPOF menu in the camera and insert the memory card to the card compatible printer. When the printer starts printing, it will read the embedded information on the memory card and print the specified images. To set DPOF: 1. Push the Playback button on the camera. 2. Push Menu button to launch the Playback Menu. 3. Select DPOF. The submenu appears. Available settings are as follows: • Select Images: Mark images in the memory card. • Reset: Reset all DPOF settings to initial default settings. To set DPOF on images: 1. Select Select Images on the DPOF submenu. 2. Use the or keys to scroll and select images for DPOF printing. 3. When the desired image is highlighted, use the or to increase/decrease print quantity. 4. After selecting all the images you want to print, push the Menu button to launch the DPOF setting submenu and choose among the following options: • Date: Choose YES to print date on the image.
- Page 75 Copy Use this feature to copy images from internal memory to an installed memory card or from memory card to internal memory. To copy images: 1. Push the Playback button 2. Push Menu button to launch the Playback Menu. 3. Select Copy and choose the location you want to copy images to: • Copy to Card: Copies images saved in internal memory to the installed memory card. • Copy to camera: Copies images save in the installed memory card to the camera’s internal memory. 4. After choosing the copy location, select the images you want to copy. Choices are: • Selected images: Select the specific images you want to copy. See below for details on how to select images. • All images. Copy all images. To copy selected images: 1. Select Selected images on the Copy submenu. 2. Use the or keys to scroll and select images to mark for Copying.
-
Page 76: Movie Paste
Movie Paste Use this feature to combine two videos into one video. The two videos you want to combine need to be of the same resolution (movie size) and frame rate (fps). To combine two videos: 1. Push the Playback button 2. Use the or keys to scroll and select the original video. 3. Push the Menu button to launch the Playback menu. 4. Select Movie Paste. The videos with the same specification as the original video are displayed on the LCD monitor. 5. Use the or keys to scroll and the or keys to mark/unmark the second video. 6. Push the Menu button and select Yes to combine the second video to the end of the original video. Note: The total length of the combined video cannot be over 30 minutes. After combining videos, the second video will no longer exist as a separate file. Face Beauty Use this feature to make skin appear softer and smoother. Only skin that is automatically detected by the camera can be enhanced. This function is only applicable to still images. Images that are enhanced using the Face Beauty feature will be saved as a new image in addition to the original image. -
Page 77: Using The Wireless Function
Using the Wireless function The WiFi feature allows you to wirelessly download photos and videos saved on the camera to a smart phone or tablet running Google Android or Apple iOS operating system. The wireless feature also allows you to operate the camera remotely and automatically download photos/videos as they are capture while connected to a smart device. Before using the Wireless function, download and install the “Link123 Plus” app to your smart devices. The free app is available in Google Play (Android) or Apple Store (iOS). Follow the below steps to establish a wireless connection between the camera and your smart device. DO NOT push the WiFi button on the camera. The purpose of the WiFi button is explained on page Establishing a wireless connection: 1. Power on the camera. 2. Launch the Link123 Plus App on your smart device. 3. Select “Wake up” on your smart device to display a list of cameras within wireless range. The list will include one or more cameras starting with “abcam” and followed by 7 digits corresponding to the camera’s serial #. 4. Select your camera from the list [the one that matches your camera’s serial #.] 5. After waking up the camera, the camera will display a message, “Wating for the mobile phone connection.” 6. Go to the WiFi Settings menu on your smart device and select your camera from the list of available hot spots. Again, your camera name (SSID) will be displayed as “abcam” followed by 7 digits corresponding to your camera’s serial #. 7. Enter the default password “12345678”. The password and camera name (SSID) may be changed later on. 8. Close the WiFi settings menu and launch the Link 123 Plus app again. 9. Select OK on your smart device. Note: If a wireless connection was successfully established, you will see a live view from the camera displayed on your smart device. If connection was not successful, reboot your camera and start over at step 1. -
Page 78: Using The Link 123 Plus App
Using the Link 123 Plus App The following information describes how to use the Link 123 Plus app features. Remote Mode After establishing a wireless connection and launching the Link 123 Plus app, the app will be in Remote mode and display the following live view screen: Settings menu App Menu Current setting Live streaming view from camera Playback Photo Video mode mode... -
Page 79: App Menu
Item Description Adjust camera settings remotely. Access Network settings to change Settings menu camera name (SSID) and password. Includes four app operating modes: Remote, Albums, Geotagging and App menu Camera modes. See “App menu” on page 78 for more details. Current Settings Displays the current camera settings being used. Live view Shows live streaming view from camera. Playback Access pictures and videos saved on camera or on smart device. Photo mode Tap to take a remote picture. Video mode Tap to start video recording. App Menu Tapping the App menu icon will open the following menu with four operating modes: Item Description Allows you to use your smart device to control the camera remotely for taking Remote pictures, recording video or changing the camera settings. Album View and download pictures/videos saved on the camera to your smart device. Use this feature to record and upload GPS data from your smart device to your Geotagging camera. See “Geotagging” on page 79 for more details. Allows you to use all camera functions and operations while being connected to a smart device. Push the WiFi button on the camera to automatically download the Camera captured image to your smart device. See “Camera Mode” on page 81 for more details. -
Page 80: Geotagging
Geotagging The app Geotagging function is useful for knowing the precise location of where a photo was taken. This feature is only applicable on land pictures and will not work underwater. The Link123 Plus app can record GPS latitude/longitude coordinates from your smart device and upload the data to your camera. Once uploaded, the camera will automatically embed the data into the corresponding images by matching the data/time stamp of the recorded GPS coordinate (called a “GeoTag”) with the date/time stamp of the image saved on the camera. Item Description Return key Tap this key to return to the App Menu. RECORD & Tap this key to start or stop recording the GPS data. STOP key Delete key Tap this key to clear the recorded GPS data. Tap this key to upload the GPS data to Camera. The icon will be disabled Upload key during GPS recording or no GPS data is recorded. - Page 81 Recording GeoTags using the app 1. T ap the REC key to start the GPS recording. The REC key will turn into the STOP key while recording GeoTags. 2. O ne GeoTag will be recorded every 1 minute. You may continue recording tags for as long as you want. 3. W hile recording tags, take one or more pictures using the app Remote mode or Camera mode. 4. Tap the STOP key ( ) to stop recording GeoTags. The app will also stop recording GeoTags if you close the App, turn off GPS from the smart device or power off the smart device. Note: Today’s tag quantity will be displayed below the REC/STOP key and the total quantity of tags will also be displayed on screen. Uploading GeoTags from app to the camera 1. A fter recording GeoTags, tap the “Upload to Camera” key to upload all the tags to the camera. 2. A fter uploading is complete, the camera will compare the tags with the photos saved in memory and match the GeoTag with the corresponding photo based on the date/time stamp. The following chart demonstrates how GeoTags are matched with the photos. Once the GeoTags are embedded into the photos, you can use any geotagging software to see the location of where the photo was taken. For example, is a free online software that www.geoimgr.com allows you to upload photos and see the location on a map. Note: Wireless connection between the app and camera will stop when the camera is comparing the GeoTags with the photos saved in memory. GeoTags are recording in GPX format, which includes latitude, longitude, altitude and time. The app can record up to 30 calendar days of GeoTags. After 30 calander days are recorded, new GeoTag recordings will overwrite the oldest GeoTags.
-
Page 82: Camera Mode
Camera Mode Camera mode allows you to operate the camera manually while maintaining a wireless connection to your smart device. In Camera mode, you can Auto Send and Quick Send photos by pushing the WiFi button on the camera, which automatically downloads captured images to your smart device. To enter Camera mode, tap the Camera icon in the App menu. How to use Auto Send: 1) Initiate wireless connection between smart device and camera. 2) In App menu select Camera Mode on the camera to display the Auto Send menu. 3) Push the wireless button 4) Use the key to select On and push OK button. 5) Now, every picture you take will be automatically sent to your smart device. This feature is not available for some shootings, such as Video recording (Including PIV), Time Lapse recording, Continuous Shooting or GIF capture. 6) To exit Auto Send, push the wireless button on the camera and select OFF. How to use Quick Send: 1) Initiate wireless connection between smart device and camera. 2) In App menu select Camera Mode... - Page 83 3) Push the Playback button on the camera to enter Playback mode. 4) Scroll through pictures in Single View mode and locate the picture you want to Quick Send. 5) Push the Wireless button on the camera to display Quick Send icon on the bottom left of the screen. 6) Push the OK button and the picture will be automatically sent to your smart device. 7) Repeat steps 4 to 6 for every picture or video you want to Quick Send to your smart device. Notes: • Quick Send is not available for video clips with file size larger than 1024 MB, GIF files and Voice memos. • If you exit Camera Mode and enter Remote or Album mode during Auto Send or Quick Send file transfer, the following message will appear. Tap No to return to Camera Mode or Yes to stop file transfer. • GeoTags may be recorded while in Camera mode.
-
Page 84: Album Mode
Album Mode In Album mode, you can view pictures/video saved on the camera and download them to your smart device. Downloaded files will automatically be saved to your smart device’s camera roll and maybe shared via email, text or uploaded to social media apps installed on your smart device. Camera Gallery screen Phone Gallery screen Item Description Return key Tap this key to return to Remote mode. Tap this key and select between Camera Gallery (files saved on camera) File location or Phone Gallery (files saved on smart device). Tap this key to select and download pictures/videos from the camera to Download key your smart device. Tap this key to delete pictures/videos from the camera (camera gallery or Delete key smart device (phone gallery). Tap this key to share selected files via email and text or upload to social Share Key media apps installed on your smart device. Notes: You can only view thumbnails in app playback (phone or camera galleries). No full size, except videos. You can play videos in phone gallery but not camera gallery. Tape the video clip in Phone Gallery to play it. GIF files cannot be wirelessly downloaded. Panorama files may be downloaded to app Phone Gallery but may not be saved to your smart device camera roll. You must first disconnect the camera from smart device before files can be shared. Pictures and videos clips cannot be shared at the same time - Select and share them separately. Keep in mind that each Social Media app has different file size/number limitations. -
Page 85: Connecting The Camera To A Computer Or Printer
Connecting the Camera to a computer or printer Follow these steps to download pictures and video clips from the camera to your Windows or Apple computer. 1. Connect one end of the USB cable to the USB port on your computer and connect the other end to the USB jack on the camera. 2. Push and hold power button for one second to turn on the camera. 3. The camera’s LCD monitor will shows a “Connecting…” message while the computer automatically detects the camera connection. The LCD monitor will turn off after the connection is established. 4. On Windows computers, a device notification window will appear, like this:... - Page 86 Double-click “Browse files” and your computer will open Windows Explorer file browser. Click the “Digital Camera” drive. Picture/video files are located in the DCIM folder. The DCIM folder will contain a subfolder called “100DICAM”. The camera will automatically create a new subfolder called “101DICAM” if the first folder reaches 9999 files. On Apple computers, open the Photos app to view and import pictures:...
-
Page 87: How To Print Images Using A Pictbridge Compatible Printer
How to print images using a PictBridge compatible Printer Follow these steps on how to connect the camera to a PictBridge compatible printer and print images. 1. Turn on your printer. 2. Connect one end of the USB cable to the printer’s USB port and the other end to the camera’s USB jack. 3. Print Mode menu appears on the screen after the connection between a printer and your camera is established. See below for details about setting the Print Mode Menu. 4. Enter the desired print mode and print the selected images. For details on the following page “Setting the Print Mode Menu”. Setting the Print Mode Menu The Print Mode menu will appear on the camera screen after the connection between a printer and your camera is established. Print Mode includes three major settings: Print Select. You select the image you want to print. • Print All. Prints all images. •... - Page 88 To set Printer Settings 1. Use the or key to specify a print option. 2. Modify paper size, quality, date and info by the or keys. Available setting: Paper size: Default/A4/4”x6” • Quality: Default/Fine/Normal • Capture Date: Yes/No • Capture Info: Yes/No • 3. Select Print on the screen for printing. Or Cancel to go back Print Mode. Start Printing LCD monitor appears “Now printing…”. • Push Menu button to stop printing anytime. •...
-
Page 89: Underwater Housing Instructions
Underwater Housing Instructions Important: Please carefully read and understand these instructions before using camera and housing underwater. Front view 1 – Shutter button 2 – Video start/stop button 3 – Power on/off button 4 – Cold shoe mount 5 – Flash with built-in diffuser 6 – Lens port ring (for attaching wide angle lenses) 7 – Closing latch 8 – Strap connector Back view 9 – Mode dial 10 – Playback key 11 – Focus / Up key 12 – Flash / Down key 13 – Menu / Back Key 14 – OK button 15 – Tripod mount (1/4-20) 16 – LCD Display Monitor... -
Page 90: Important Care And Maintenance Information
Presses against the O-ring when door is closed to form waterproof seal. 19 – Silicone O-ring (Item SL74017) seated into groove Important Care and Maintenance information Every SeaLife housing is inspected for quality, including a 200ft (60m) pressure chamber test to ensure a waterproof seal. It is your responsibility to properly care for housing and maintain the O-ring sealing area. Carefully follow these important O-ring care instructions. Not following these care instructions may cause the waterproof housing to leak and void your warranty. • The underwater housing is depth tested to 200ft /60m. Exceeding this depth may cause the housing to flood and may result in damaging the underwater housing and inner camera. • Do not use any household cleaners, soaps, detergents or chemicals to clean the inner camera or underwater housing. Chemicals may cause negative reaction with the plastic materials. • Replace O-ring every year to ensure proper seal. Only use official SeaLife O-ring designed for the DC2000 (Item # SL74017). Replacement O-rings are available at your local authorized SeaLife dealer, or online at www.sealifepartsdirect.com (USA Only). • Do not expose the inner camera or housing to direct sunlight for prolonged periods of time. Keep camera and housing in shaded area or under a towel to prevent it from overheating. • Do not disassemble or attempt to repair the camera or housing as this will void your warranty. Contact your local authorized SeaLife dealer or the SeaLife Service Center in your country for repairs. • The camera and housing combination are positively buoyant by 14 grams. Attached included strap to your wrist or buoyancy control device (BCD) when using the camera and housing in or near water. • Store camera and housing only after careful cleaning and when totally dry. • Do not let any moisture or dirt get inside housing when opening. This may result in fogging when using the camera underwater. -
Page 91: Preparing The Camera And Housing For Underwater Use
• Do not expose housing to direct sunlight for prolonged periods of time. • Do not store housing in extreme high temperatures, such as the trunk of your car. • Keep the housing unlatched when storing for more than 3 months. Preparing the camera and housing for underwater use Before your dive, follow these important steps to prepare the inner camera and housing for underwater use. Preparing the inner camera 1) Insert memory card into camera and fully charge the battery. 2) Clean the rubber seal (A) located inside the battery door using a slightly dampened lint-free cotton cloth. Allow the seal to air dry for a minute and close the waterproof door on the camera. 3) Clean the camera lens using a clean, lint-free cotton cloth. 4) Remove the strap from the inner camera. The strap may interfere with the waterproof seal. 5) Set the mode dial to underwater mode 6) Push the menu button and select the appropriate underwater scene mode. See page 43 for information about setting the correct underwater scene mode. - Page 92 Preparing the underwater housing Important: If possible, load the camera into the housing in a dry environment such as an air- conditioned room. This will help to avoid trapping humid air inside the sealed housing, which may cause the housing lens port to fog underwater. The Moisture Muncher capsule will absorb humid air trapped in the housing, but that takes time depending on how humid the environment is, so try to avoid trapping moisture inside the housing in the first place. 1) Open the underwater housing door by pushing in the locking tab (A) and pulling up on the latch (B) until it releases from the housing door (C). Squeeze the housing closed to help release the latch from the door. 2) Inspect O-ring and O-ring contact surfaces for damage (cuts, scratches, tears, cracks, dents and any other imperfections.) Replace O-ring or have waterproof housing serviced if the O-ring or O-ring contact surfaces become damaged. Do not use underwater housing if O-ring or O-ring contact surfaces are damaged. See page 94 for information on replacing the O-ring 3) Clean the O-ring and O-ring contact surfaces using a dampened, lint-free cotton cloth to remove sand, hair and other debris. Avoid stretching the O-ring. Do not lubricate the O-ring. 4) Make sure the inside/outside of the glass lens port is clean. If dirty, clean the lens using a lint- free cotton cloth. Use lens cleaner or dampened clothe to remove stubborn stains. 5) Insert one Moisture Muncher desiccant capsule into the rubber pocket on the inside of the housing door. Insert one end of the capsule (A) and push down until the capsule is securely held in place. 6) Set the Mode Dial of the inner camera and housing to the same mode, so the two are in synch. Note: If the mode dials are not set to the same mode when sealing the housing, it is not a major problem because the inner camera will display the current mode on the LCD monitor. 7) Insert the camera [with camera strap removed] into the housing.
-
Page 93: Before Entering Water
Entering/exiting the water Important: The top priority is to always obey dive safety rules. 1) Do not jump into the water with the camera in your hand. Have someone hand it to you after you have entered the water. 2) Same applies when exiting the water – hand the camera up to someone and then exit the water. 3) Immediately place the sealed housing in fresh water, so sea water drops do not dry on the housing, which may cause water stains and/or salt crystals to form. After using the housing underwater • Soak and rinse the sealed waterproof housing in fresh water for about 2 minutes after underwater use or if the housing becomes dirty. • Push each button several times and rotate mode dial to clean out any trapped saltwater, sand or dirt. • Use clean, soft cloth to dry housing. Make sure that you and the waterproof housing are completely dry before opening the waterproof door or changing the batteries or the memory card. • Store camera and housing only after careful cleaning and when totally dry. • Keep the housing unlatched when storing for more than 3 months. Installing Flash Link optical cable adapter The DC2000 includes a Flash Link adapter used for making optical cable connection between the underwater housing and one or two Sea Dragon Digital Flashes (optional accessory). The Sea Dragon Flash includes the optical cable. If you are not using a Sea Dragon flash accessory, the Flash Link adapter is not needed. Please contact your local authorized SeaLife dealer or refer to www. sealife-cameras.com for more information about the Sea Dragon Flash accessory. - Page 94 How to setup Flash Link adapter and attach to the housing 1) Insert the non-coiled end of the optical cable (A) through one of the grabber holes of the Flash Link adapter (B). 2) Pull about 2” (5cm) of the optical cable through the grabber hole and insert the end of the cable into the other hole as shown below. Push cable end down into the hole until it comes to a stop.
-
Page 95: How To Replace The Housing O-Ring
3) Pull the other end of the camera to remove some of the extra slack, leaving about 1” of cable bend as shown below. It is normal for thin layer of cable sheathing to be scratched off during this procedure. 4) Attach the Flash Link adapter onto the top of the diffuser (A). Then push down on the bottom of the adapter (B) until it locks into the diffuser. Note: Above diagram shows side view of adapter without optical cable for clearer description. How to replace the housing O-ring Replace O-ring or have waterproof housing serviced if the O-ring or O-ring contact surfaces become damaged. The O-ring should be replaced every year to ensure proper seal. Only use official SeaLife O-ring designed for the DC2000 (Item # SL74017). Replacement O-rings are available at your local authorized SeaLife dealer, or online at www.sealifepartsdirect.com (USA Only). Removing the O-ring Important: Do not use tools or sharp objects to remove the O-ring to avoid damaging the soft silicone material. 1) Push the O-ring along its groove until it lifts. Do not use tools or sharp objects to remove the O-ring to avoid damaging the soft silicone material. - Page 96 2) Gently pull the O-ring out of its groove. Inserting the O-ring Important: The O-ring and O-ring groove must be completely clean before installing the O-ring. Use a dampened, lint-free cotton cloth. A micro-fiber cleaning cloth used for cleaning eyeglasses is ideal. 1) Lay the O-ring over the O-ring groove making sure the O-ring is not twisted. Orient the O-ring with the more rounded corners on the hinge side of the housing, as shown below.
-
Page 97: Great Underwater Pictures Made Easy
2) Gently push the O-ring down into the groove. The O-ring should be evenly seated in the groove. 3) Close the housing door to firmly seat O-ring and open housing again to inspect that O-ring is completely seated into groove. Be careful that there are no obstructions, like the wrist strap, trapped between the housing door and O-ring. Great Underwater Pictures Made Easy There are many differences between taking pictures underwater compared to taking pictures on land. The following are some helpful tips on taking great pictures underwater. Crystal Clear water Crystal Clear water is essential for taking great underwater pictures. Tiny particles suspended in the water cause low visibility and diminishes picture quality. Limit your shooting distance to 1/10 of the water visibility. For example, if the visibility is 40 feet (12 m), keep your shooting distance to within 4 feet (1.2m). Avoid stirring up the sea floor with your fins. When using a Sea Dragon Flash and/or photo-video lighting accessory in low visibility water, these suspended particles may cause small spots to appear in your picture (known as “backscatter”). Backscatter can be minimized by moving the flashhead or lighthead farther away from the camera lens. When using the camera’s onboard flash, keep your shooting distance within 4” to 12” (10 to 30cm) Stay close to the subject The ideal shooting distance for sharp colorful pictures is within 6ft (2m) shooting distance, and closer is better. The less water there is between you and the subject, the better the picture results. When using an external flash or photo-video lighting accessory, keep in mind that light does not travel very far underwater, so the closer you are to your subject the more colorful the pictures will be. - Page 98 Expand your camera system with an external flash or photo-video lighting accessory Water filters out light and red/yellow colors resulting in darker, blue images. The SeaLife DC2000 includes Dive and Snorkel modes that correct for lost colors, but color-correction is only effective to about 60ft (18m) depending available sunlight and water visibility. At deeper depths, there is a complete absence of red colors so color-correction modes (and filters) are not as effective. The best way to compensate for lost colors is by using underwater lighting, like the Sea Dragon Digital Flash or photo-video light. Lighting accessories easily mount to the bottom of the housing. To learn more about UW Lighting, please visit your local authorized SeaLife dealer or www.sealife- cameras.com. Ask your local SeaLife dive dealer about underwater photography courses Most SeaLife dive dealers offer underwater photography courses which includes hands-on training as well as many helpful tips and techniques to underwater photography. Visit the SeaLife website for updated tips an advice Updates to this manual and additional tips and advice can be found on the SeaLife website at www. sealife-cameras.com. Also, check out the “Great Pictures Made Easy” tutorial, which is available for free download on the the SeaLife website.
-
Page 99: Troubleshooting - Inner Camera
“No image” not be supported. LCD monitor displays Memory card is full. Replace the memory card with a new one or “Memory full” delete unnecessary images. LCD monitor displays “File This file is locked. Unlock the file. See “Protect” on page 68 locked” LCD monitor displays The card may be damaged. Clean the gold contacts on the memory “Format error” or “Memory card or replace the card. card is damaged” LCD monitor displays The memory card is full. Replace card or delete unnecessary files. “Copy error” • Memory card compatibility issue. Replace memory card with Micro SD/SDHC/SDXC/UHS-1 cards up to 64GB. Camera locks-up • Check if firmware updates are available sealife-cameras.com firmware... -
Page 100: Troubleshooting - Underwater Housing
Troubleshooting – Underwater Housing Problem Cause and/or Action O-ring damaged. Inspect and replace O-ring. See page 103. • O-ring contact surfaces is damaged and no longer smooth. • Housing leaks water Contact your SeaLife dealer or SeaLife Service Center for repairs. Possible obstruction in sealing area when closing the housing. • It is normal to feel some resistance when pressing the housing buttons or turning the dial. If buttons do not return to their normal Buttons/dial action position, soak the sealed housing in fresh water for a few minutes sticks or not smooth and press the buttons several times to flush out any trapped salt, sand or particles. Humidity trapped inside the underwater housing may condense on the glass lens port and cause fogging. To prevent fogging, do this: Store inner camera and housing in cool, dry place. • Lens fogs underwater Avoid opening the housing in high humid environments. • Insert a fresh Moisture Muncher capsule into the pocket located • inside the housing door above the LCD display window. See page Repair Service and Parts We stand behind our product with a pledge to provide superior service to our customers. If your camera needs service or if you need a replacement part, we promise fast, friendly and professional service so you can have your equipment in good working order before your next dive trip. - Page 101 2. Check that you have the most recent firmware loaded on your camera. Firmware updates are included in the Technical Support menu of the sealife-cameras.com website. 3. Contact the dealer from whom you purchased the product. The Dealer Locator page contains a complete list of local dealers that may be able to assist you with trouble shooting your problem. If none of these options help, please follow the return instructions available on the seaLife-cameras.com website.
- Page 102 Camera Specifications Sensor Sony 1” type CMOS sensor / 20 Megapixel 7-element fully, multi-coated optical grade aspheric lens design with mechanical 7-leaf shutter Lens Focal Length: f=11.6 mm (Film equivalent: 31mm) LCD monitor 3” 920K high resolution color LCD Normal: 6” (15 cm) ~ infinity Focusing Range Macro: 4” (10 cm) ~ 20” (50cm) Aperture F1.8 to F11 Auto: 1 ~ 1/2000 sec. Manual: 15 ~ 1/2000 sec. Shutter Speed Night: 1/15 ~ 1/2000 sec. Fireworks: 4 sec. Still Image: JPEG (EXIF 2.3 compatible), RAW (.dng) File Formats MOV (Video: MPEG-4 AVC/H.264, Audio: Linear PCM) 3:2 Aspect ratio: 20M (5472 x 3648), 10M (3888 x 2592), 5M (2736 x 1824) 4:3 Aspect ratio: 18M (4864 x 3648), 10M (3648 x 2736), 5M (2592 x 1944), VGA (640 x 480) Resolution 16:9 Aspect ratio: 17M (5472 x 3080), 7.5M (3648 x 2056), 4.2M (2720 x (Photo) 1528) 1:1 Aspect ratio: 13M (3648 x 3648), 6.5M (2560 x 2560), 3.7M (1920 x 1920) Resolution 1080p60 (FHD), 1080p30 (FHD), 720p30, 1080p15 (Voiceless), 720p60 (Movie) (Voiceless), VGAp120 (Voiceless) Land: Portrait, Landscape, Sunset, Dawn, Backlight, Kids, Night Scene, Fireworks, Beach, Snow, Sports, Party, Candlelight, Night Portrait, Soft Skin, Food, Background Defocus, Love Portrait, Self Portrait, Smile Shutter, HDR,...
- Page 103 Land: Auto, Daylight, Cloudy, Tungsten, Fluorescent 1, Fluorescent 2, Manual, White Balance Underwater: Blue Water Deep, Blue Water Shallow, Green Water Exposure Control From -2.0EV to +2.0EV in 0.3 step increments Metering Multi, Center, Spot Self-timer Off, 10 sec., 2 sec., Double (10 + 2 sec.) Flash Auto Flash, Red-eye Reduction, Forced On, Slow Sync, Forced Off Internal memory: 80MB flash memory Storage External memory: Micro SD, Micro SDHC, Micro SDXC card and UHS-1 English / French / Spanish / German / Italian / Russian / Portuguese / Brazil Portuguese / Dutch / Turkish / Polish / Hungarian / Romanian / Czech / Menu Languages Bulgarian / Croatian / Slovak / Slovenian / Greek / Swedish / Norwegian / Finnish / Danish/ Arabic / Indonesia / Malay / Thai / Japanese / Korean / S. Chinese / T. Chinese Interface USB 2.0 Battery Li-ion battery: FJ-SLB-10A (3.7V, 1130MAH) Full-Half (65% ± 15%), Half-Low (25% ± 15%), Low-Exhausted (10% ± Battery Level 10%) Rated input voltage: AC 100 V ~ 240 V (160 mA, 50/60 Hz) USB Wall Charger Rated output voltage: DC 5 V/1 A Operating temperature: 0ºC ~ 40ºC Operating 0ºC - 40ºC Temperature Microphone Two built-in stereo microphones Depth Rating...
- Page 104 Housing Specifications Depth rating 200ft (60m) Buoyancy Positive +10 grams (measured with inner camera in housing) Top: Power, Video start/stop and Shutter Controls Back: Mode Dial, Playback, Focus(up), Flash(down), Menu and OK Underwater: 33°F to 110°F Operating Temp. Land: 0°F to 120°F O-ring Silicone (item # SL74017) Optical glass lens port with anti-reflective coating. Lens port Accepts SeaLife SL975 Fisheye lens accessory. Tripod mount Standard ¼-20 tripod threads to adapt accessories. Hardware 304 - 316 series marine grade stainless steel metal hardware. Housing material Rubber overmolded polycarbonate housing. 24.4 oz. (691g) UW housing and inner camera Weight 16.1 oz. (457g) UW housing only Dimensions 5.9” x 4.0” x 3.0” (149mm x 102mm x 81mm) Warranty 1 year limited warranty. About Folder and File Names Your camera automatically creates folders to organize captured image and video files. Folder names begin a unique 3-digit number followed by the letters DICAM. The folder number increases in sequence from 100 to 999. A new folder is automatically created after file number 9999. File names begin with the letters “DSCI” followed by a unique 4-digit number that increases in sequence from 0001 to 9999. After file DSCI9999, a new folder is created and file numbering starts...
- Page 105 Share your photos and videos with us! www.sealife-cameras.com Facebook.com/SeaLifeCameras Info@SeaLife-Cameras.com Pioneer Research 97 Foster Road, Suite 5 Moorestown, NJ 08057 USA Item SL74037 | November 2016...
Need help?
Do you have a question about the DC2000 and is the answer not in the manual?
Questions and answers
should the o ring be lubricated?