Table of Contents

Related Manuals for Big Lots HARLOW 6PCS DINING SET


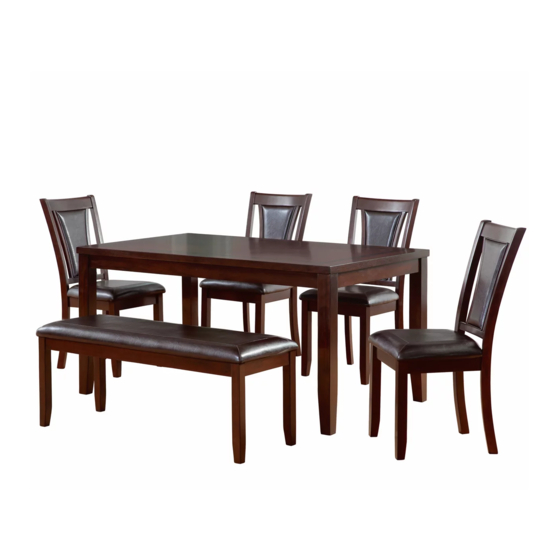
Summary of Contents for Big Lots HARLOW 6PCS DINING SET
- Page 1 BIG LOTS ASSEMBLY INSTRUCTIONS HARLOW 6PCS DINING SET ITEM NO. 15100-6PK SKU NO. 810321491 Big Lots Customer Care Phone # : 1-866-BIGLOTS(1-866-244-5687) Email Add : Talk2Us@BigLots.com 'For spare screw and bolts, please contact big lots customer care'...
- Page 2 GENERAL INFORMATION, TIPS & TRICKS 1. Please read the assembly instructions prior to assembling this product. 2. To avoid damages, assemble this product on a non-abrasive surface such as carpet. 3. Make sure all bolts and nuts are tightly fastened before the product is used. 4.
- Page 3 TABLE PART LIST A. TABLE TOP 1 PC B. TABLE LEG 4 PCS TABLE HARDWARE LIST 1. FLAT WASHER 2. SPRING WASHER 3. BOLT 4. OPEN WRENCH SIZE: 5/16" DIA SIZE: 5/16" DIA SIZE: 5/16" x 3" SIZE: #12mm QTY: 8 PCS QTY: 8 PCS QTY: 8 PCS QTY: 1 PC...
- Page 4 TABLE ASSEMBLY INSTRUCTIONS DIAGRAM #1 1.Place table top (A) upside REQUIRED HARDWARE IN THIS STEP down on a non-abrasive surface SKETCH DESCRIPTION such as carpet (underside of 8 PCS tabletop should be facing up ). FLAT WASHER 8 PCS SPRING WASHER 2.
- Page 5 TABLE ASSEMBLY INSTRUCTIONS DIAGRAM #2 3. With assistance, carefully turn the table upright. Ensure the table is level and tighten all bolts (3) using the open wrench (4). The Table is now ready for use...
- Page 6 CHAIR PART LIST C. CHAIR BACK 4 PCS D. SEAT FRAME 4 PCS E. FRONT LEG 8 PCS F. CUSHION 4 PCS CHAIR HARDWARE LIST 1. FLAT WASHER 2. SPRING WASHER 3. BOLT 4. BOLT SIZE: 5/16" DIA SIZE: 5/16" DIA SIZE: 1/4"...
- Page 7 CHAIR ASSEMBLY INSTRUCTIONS DIAGRAM #3 REQUIRED HARDWARE IN THIS STEP SKETCH DESCRIPTION 4 PCS FLAT WASHER 4 PCS SPRING WASHER BOLT 4 PCS 1 PC OPEN WRENCH 1.Attach 2 front legs (E) to seat frame (D) using 4 bolt (4), 4 spring washers (2) and 4 flat washers (1) as shown.
- Page 8 CHAIR ASSEMBLY INSTRUCTIONS REQUIRED HARDWARE IN THIS STEP SKETCH DESCRIPTION DIAGRAM #4 7 PCS FLAT WASHER 7 PCS SPRING WASHER 3 PCS BOLT 4 PCS BOLT 1 PC OPEN WRENCH 2. Attach the seat frame (D) to the chair back (C) using 3 short bolts (3), 4 bolts (5), 7 spring washers (2) and 7 flat washers (1) as shown.
- Page 9 CHAIR ASSEMBLY INSTRUCTIONS DIAGRAM #5 REQUIRED HARDWARE IN THIS STEP SKETCH DESCRIPTION 6 PCS WOOD SCREW 4. Place cushion (F) upside down on a non-abrasive table surface. The rear (tapered end) of the cushion (F) should be near the table edge. Hint: Protect the non-abrasive table surface and cushion (F) by placing a towel between the table and cushion.
- Page 10 CHAIR ASSEMBLY INSTRUCTIONS DIAGRAM #6 The dining chair is now ready for use. 6. Repeat diagram #3 to #6 to assemble the other chairs.
- Page 11 BENCH PART LIST G. SEAT FRAME 1 PC E. FRONT LEG 4 PCS H. CUSHION 1 PC BENCH HARDWARE LIST 1. FLAT WASHER 2. SPRING WASHER 3. BOLT 4.OPEN WRENCH SIZE: 5/16" DIA SIZE: 5/16" DIA SIZE: 1/4" x 2-5/9"L SIZE: #12mm QTY: 8 PCS QTY: 8 PCS...
- Page 12 BENCH ASSEMBLY INSTRUCTIONS DIAGRAM #7 REQUIRED HARDWARE IN THIS STEP DESCRIPTION SKETCH 8 PCS FLAT WASHER 8 PCS SPRING WASHER 8 PCS BOLT 8 PCS WOOD SCREW 1 PC OPEN WRENCH 1. Attach 4 front legs (E) to seat frame (G) using 8 bolt (4), 8 spring washers (2) and 8 flat washers (1) as shown.
- Page 13 BENCH ASSEMBLY INSTRUCTIONS DIAGRAM #8 REQUIRED HARDWARE IN THIS STEP DESCRIPTION SKETCH 8 PCS WOOD SCREW 4. Place cushion (H) upside down on a non-abrasive table surface. Hint: Protect the non-abrasive table surface and cushion (H) by placing a towel between the table and cushion. 5.
- Page 14 BENCH ASSEMBLY INSTRUCTIONS DIAGRAM #9 The bench is now ready for use. Printed in Viet Nam...
Need help?
Do you have a question about the HARLOW 6PCS DINING SET and is the answer not in the manual?
Questions and answers