Advertisement
Available languages
Available languages
Quick Links
THIS INSTRUCTION BOOKLET CONTAINS IMPORTANT SAFETY INFORMATION. PLEASE
READ INSTRUCTIONS CAREFULLY BEFORE ASSEMBLY
Manufactured by:
Kolcraft Enterprises Inc.
1100 W Monroe St
Chicago, IL 60607
www.kolcraft.com
(800) 453-7673
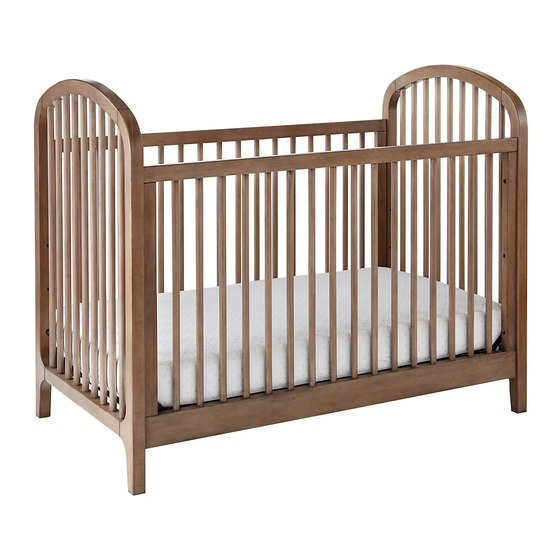
Elston Crib
Assembly Instructions
READ AND KEEP FOR FUTURE REFERENCE.
Record manufacturing date and lot number
from product label here:
Conforms to
ASTM F 1169
Safety Standards
Q055
Advertisement

Related Manuals for Kolcraft Elston


Summary of Contents for Kolcraft Elston
- Page 1 Conforms to ASTM F 1169 Safety Standards Elston Crib Assembly Instructions THIS INSTRUCTION BOOKLET CONTAINS IMPORTANT SAFETY INFORMATION. PLEASE READ AND KEEP FOR FUTURE REFERENCE. READ INSTRUCTIONS CAREFULLY BEFORE ASSEMBLY Record manufacturing date and lot number Manufactured by: from product label here: Kolcraft Enterprises Inc.
- Page 2 AND FREQUENTLY DURING USE. SECURELY TIGHTEN LOOSE BOLTS AND OTHER FASTENERS. DO NOT USE CRIB IF ANY PARTS ARE MISSING, DAMAGED, OR BROKEN. CONTACT KOLCRAFT ENTERPRISES, INC (www.kolcraft.com/customer-service/contact-kolcraft) FOR REPLACEMENT PARTS AND INSTRUCTIONAL LITERATURE IF NEEDED. DO NOT SUBSTITUTE PARTS.
- Page 3 WARNING For conversion to a toddler bed or daybed, the toddler/daybed conversion kit manufactured by Kolcraft MUST BE USED. See Instructions. 2x Ends 2x Sides Allen Wrench Mattress Support...
- Page 4 (B) Side (A) End Step 1: A. Align a Side (B) with the Ends (A). The taller rail goes toward the bottom. B. Tighten the screws with the allen wrench.
- Page 5 Thread and tighten all four screws High Position Middle Position Low Position (C) Mattress Support Label reading “This Side Up” should be facing up Step 2: A. Flip the mattress support so the “This Side Up” label is facing up. If the label is missing, the correct orientation is with the springs at the top of the frame.
- Page 6 (B) Side Thread and tighten all three screws (both sides) (A) End Step 3: A. Align the other Side (B) with the Ends (A). B. Tighten the screws with the allen wrench.
- Page 7 ASTM F 1169 Safety Standards Instructions d’assemblage pour lit de bébé Elston LISEZ TOUTES LES INSTRUCTIONS AVANT D’ASSEMBLER DE LA COMMODE. CONSERVES CES INSTRUCTIONS POUR POUVOIR LES CONSULTER ULTÉRIEUREMENT. LISEZ ATTENTIVEMENT LES INSTRUCTIONS AVANT LE MONTAGE. Enregistrez la date de fabrication et le numéro Fabriqué...
- Page 8 PÉRIODIQUEMENT PENDANT L'UTILISATION DU LIT. SERREZ FERMEMENT TOUS LES BOULONS ET TOUTES LES PIÈCES DE FIXATION LÂCHES. N'UTILISEZ PAS LE LIT POUR BÉBÉ SI L'UNE DES PIÈCES EST MANQUANTE, ENDOMMAGÉE OU BRISÉE. COMMUNIQUEZ AVEC KOLCRAFT ENTERPRISES, INC (www.kolcraft.com/customer-service/contact-kolcraft) POUR OBTENIR DES PIÈCES DE RECHANGE ET LES INSTRUCTIONS, LE CAS ÉCHÉANT.
- Page 9 AVERTISSEMENT Pour la conversion en un lit d'enfant ou un lit de repos, la trousse de conversion fabriquée par Kolcraft DOIT ÊTRE UTILISÉE. Voir les instructions. Pièces du lit pour bébé : 2 côtés 2 extrémités Support de matelas Clé hexagonale...
- Page 10 (B) Côté (A) Extrémité Étape 1 : A. Alignez un côté (B) avec les extrémités (A). Le rail plus grand va vers le bas. B. Serrez les vis avec la clé hexagonale.
- Page 11 Vissez et serrez les quatre vis Position élevée Position du milieu Position basse (C) Support de matelas L'étiquette « This Side Up » doit être placée sur le dessus. Étape 2 : A. Retournez le support de matelas de manière à ce que l'étiquette « This Side Up » soit placée sur le dessus.
- Page 12 (B) Côté Vissez et serrez les trois vis (de chaque côté) (A) Extrémité Étape 3 : A. Alignez l'autre côté (B) avec les extrémités (A). B. Serrez les vis avec la clé hexagonale.
-
Page 13: Instrucciones De Montaje
Conforms to ASTM F 1169 Safety Standards Instrucciones de montaje la cuna Elston ESTE MANUAL DE INSTRUCCIONES CONTIENE INFORMACIÓN IMPORTANTE SEGURIDAD. POR FAVOR LEA Y GUÁRDELAS PARA FUTURA REFERENCIA LAS INSTRUCCIONES PARA USO FUTURO LEA CUIDADOSAMENTE LAS INSTRUCCIONES ANTES DEL MONTAJE. - Page 14 OTROS SUJETADORES FLOJOS, PIEZAS FALTANTES O BORDES FILOSOS. AJUSTE CON FIRMEZA LOS PERNOS Y OTROS SUJETADORES FLOJOS. NO USE LA CUNA SI ALGUNA DE SUS PARTES FALTA, ESTÁ DAÑADA O ESTÁ ROTA. CONTÁCTESE CON KOLCRAFT ENTERPRISES, INC (www.kolcraft.com/customer-service/contact-kolcraft) SI NECESITA PIEZAS DE REPUESTO U OTRAS INSTRUCCIONES IMPRESAS.
- Page 15 ADVERTENCIA DEBE UTILIZARSE el juego de conversión de cama de bebé/cama de día fabricado por Kolcraft para la conversión a cama de bebé o cama de día. Consulte las instrucciones. Partes de la cuna: 2 Barandillas 2 Extremos Base del colchón...
- Page 16 (B) Barandilla (A) Extremo Paso 1: A. Alinee una barandilla (B) con los extremos (A). El carril más alto va hacia el fondo. B. Ajuste los tornillos con la llave allen.
- Page 17 Enrosque y ajuste los cuatro tornillos Posición alta Posición media Posición baja ( C) Base del colchón Si la etiqueta dice “Este lado hacia arriba”, la pieza debe mirar hacia arriba Paso 2: A. Dé vuelta la base del colchón siguiendo la indicación de la etiqueta “Este lado hacia arriba”. Si no hay etiqueta, el lado correcto es el que tiene los resortes en la parte superior del bastidor.
- Page 18 (B) Barandilla Enrosque y ajuste los tres tornillos (ambos lados) (A) Extremo Paso 3: A. Alinee la otra barandilla (B) con los extremos (A). B. Ajuste los tornillos con la llave allen.
Need help?
Do you have a question about the Elston and is the answer not in the manual?
Questions and answers