
Subscribe to Our Youtube Channel
Related Manuals for Autronica Autroprime 2


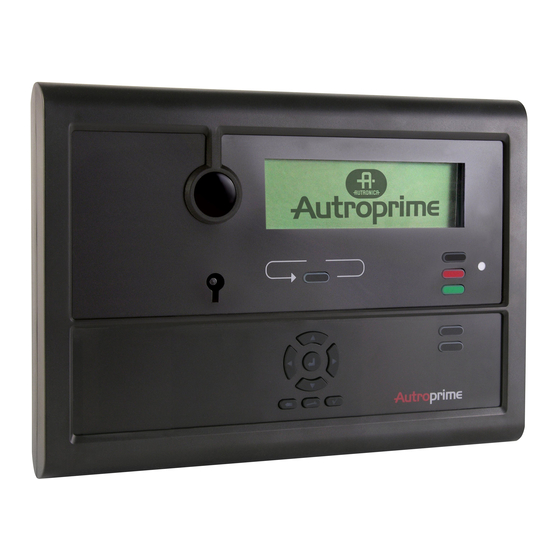
Summary of Contents for Autronica Autroprime 2
- Page 1 Release 2 Configuration Handbook Autroprime Interactive Fire Detection System 116-P-APRIME2-CONFIG/EGB, Rev. A, 2013-04-03 116-P-APRIME2-CONFIG/EGB, Rev. A, 2013-04-03...
- Page 2 This publication, or parts thereof, may not be reproduced in any form, by any method, for any purpose. Autronica Fire and Security AS and its subsidaries assume no responsibility for any errors that may appear in the publication, or for damages arising from the information in it.
-
Page 3: Table Of Contents
Accessing the Menu Selections ............29 Enable ....................30 Disable ....................30 Change Disable Time Span .............. 31 Configuration Handbook, Autroprime Interactive Fire Detection System, 116-P-APRIME2-CONFIG/EGB, Rev. A, 2013-04-03, Autronica Fire and Security AS Page 3... - Page 4 Local Outputs ..................61 5.7.1 Accessing the Menu ..............61 5.7.2 Configure Properties for a Local Output ......... 62 Configuration Handbook, Autroprime Interactive Fire Detection System, 116-P-APRIME2-CONFIG/EGB, Rev. A, 2013-04-03, Autronica Fire and Security AS Page 4...
- Page 5 5.13.7 R emote Access ............... 97 5.14 Detection Loops ................100 5.15 Operator Panels ................101 Configuration Handbook, Autroprime Interactive Fire Detection System, 116-P-APRIME2-CONFIG/EGB, Rev. A, 2013-04-03, Autronica Fire and Security AS Page 5...
- Page 6 (Alarm Zone 2). (5.2.3) ......... 132 9.3.7 Step 5: Define Alarm Zone 1 and Alarm Zone 2 as Neighbour Alarm Zones (5.3.3) ..........132 Configuration Handbook, Autroprime Interactive Fire Detection System, 116-P-APRIME2-CONFIG/EGB, Rev. A, 2013-04-03, Autronica Fire and Security AS Page 6...
- Page 7 S OLAS Detection Zones ............146 12.1.8 S ilent, Small and Large Alarm – Overview ......146 Reader’s Comments ............149 Configuration Handbook, Autroprime Interactive Fire Detection System, 116-P-APRIME2-CONFIG/EGB, Rev. A, 2013-04-03, Autronica Fire and Security AS Page 7...
-
Page 8: Introduction
Datasheet; Repeater Panel BS-211 116-P-BS211/CGB bs211_cgb Datasheet; Information Panel BV-210 116-P-BV210/CGB bv210_cgb Datasheet; Fire Brigade Panel BU-210 116-P-BU210/CGB bu210_cgb Datasheet; Mimic Driver BUR-200 116-P-BUR200/CGB bur200_cgb Configuration Handbook, Autroprime Interactive Fire Detection System, 116-P-APRIME2-CONFIG/EGB, Rev. A, 2013-04-03, Autronica Fire and Security AS Page 8... -
Page 9: Ready-To-Use In A Pre-Configured State
(to simplify the understanding of the configuration principle, the basic configuration example deals with one loop and 8 points only). Configuration Handbook, Autroprime Interactive Fire Detection System, 116-P-APRIME2-CONFIG/EGB, Rev. A, 2013-04-03, Autronica Fire and Security AS Page 9... -
Page 10: Service Commands
Accessible by persons doing repair work and changing firmware. 2.3 Service Menu The entire Service Menu is shown on the next page. Configuration Handbook, Autroprime Interactive Fire Detection System, 116-P-APRIME2-CONFIG/EGB, Rev. A, 2013-04-03, Autronica Fire and Security AS Page 10... - Page 11 Select Configuration & Restart System Backup Current Configuration Server and Web Access User Management Export Configuration Clients Import Configuration Client Proxy Server 116-P-APRIME2-MENUS/MGB, 2012-01-10 Configuration Handbook, Autroprime Interactive Fire Detection System, 116-P-APRIME2-CONFIG/EGB, Rev. A, 2013-04-03, Autronica Fire and Security AS Page 11...
-
Page 12: Entering The Service Menu
To accept the password, press Enter once more. The menu selections Service and Exit Service now appear in the display. Configuration Handbook, Autroprime Interactive Fire Detection System, 116-P-APRIME2-CONFIG/EGB, Rev. A, 2013-04-03, Autronica Fire and Security AS Page 12... - Page 13 Service Commands To enter the Service menu, use the arrow down button to scroll down and select Service, then press the Enter. Configuration Handbook, Autroprime Interactive Fire Detection System, 116-P-APRIME2-CONFIG/EGB, Rev. A, 2013-04-03, Autronica Fire and Security AS Page 13...
-
Page 14: System Settings
Press Enter to type a new Description then press Enter, or accept the existing one by pressing the arrow down button. To confirm, press Enter. Configuration Handbook, Autroprime Interactive Fire Detection System, 116-P-APRIME2-CONFIG/EGB, Rev. A, 2013-04-03, Autronica Fire and Security AS Page 14... -
Page 15: Restart System
The message ”System is now shutting down…” will appear, and a bar will appear at the bottom showing the progress of the reboot. Configuration Handbook, Autroprime Interactive Fire Detection System, 116-P-APRIME2-CONFIG/EGB, Rev. A, 2013-04-03, Autronica Fire and Security AS Page 15... -
Page 16: Day Mode Operation Times
Press and hold down the Function button a few seconds (“Long press to accept or cancel”). To confirm the new settings (Accept), press Enter. Configuration Handbook, Autroprime Interactive Fire Detection System, 116-P-APRIME2-CONFIG/EGB, Rev. A, 2013-04-03, Autronica Fire and Security AS Page 16... -
Page 17: Viewing Existing Day Mode Operation Times
When “Unspecified” is shown in the display, use the left/right arrow button to select among the days that are available, and continue as described in chapter 3.4. Configuration Handbook, Autroprime Interactive Fire Detection System, 116-P-APRIME2-CONFIG/EGB, Rev. A, 2013-04-03, Autronica Fire and Security AS Page 17... -
Page 18: Service Mode Password
To change the date, overwrite the date (day, month, year), then press Enter. To confirm the new settings, press Enter once more. Configuration Handbook, Autroprime Interactive Fire Detection System, 116-P-APRIME2-CONFIG/EGB, Rev. A, 2013-04-03, Autronica Fire and Security AS Page 18... -
Page 19: Set Operator Panel Connection
J4, Auxiliary terminal block if the panel is to be connected to a panel bus. To confirm the chosen settings, press Enter twice. Configuration Handbook, Autroprime Interactive Fire Detection System, 116-P-APRIME2-CONFIG/EGB, Rev. A, 2013-04-03, Autronica Fire and Security AS Page 19... -
Page 20: Sound Patterns
(Not applicable for BBL-100 and BBL-100/IP). Sound Tone: It is possible to choose between Continuous or Slow Whoop. (Not applicable for BBL-100 and BBL-100/IP). Configuration Handbook, Autroprime Interactive Fire Detection System, 116-P-APRIME2-CONFIG/EGB, Rev. A, 2013-04-03, Autronica Fire and Security AS Page 20... - Page 21 To define the Sound Tone (Continuous or Slow Whoop), use the arrow left/right button, then press Enter. To confirm the new settings, press Enter once more. Configuration Handbook, Autroprime Interactive Fire Detection System, 116-P-APRIME2-CONFIG/EGB, Rev. A, 2013-04-03, Autronica Fire and Security AS Page 21...
-
Page 22: Automatic Resound
T1 Delay Timer (seconds), then type the new one and press Enter. Repeat this procedure for the T2 Delay Timer, then press Enter. Configuration Handbook, Autroprime Interactive Fire Detection System, 116-P-APRIME2-CONFIG/EGB, Rev. A, 2013-04-03, Autronica Fire and Security AS Page 22... -
Page 23: Detection Zone (Dz) Global Dependency
Press the right arrow button to select the maximum resistance limit (default 800mOhm, minimum 200mOhm, maximum: 5000 mOhm), then press Enter. To confirm the new setting, press Enter once more. Configuration Handbook, Autroprime Interactive Fire Detection System, 116-P-APRIME2-CONFIG/EGB, Rev. A, 2013-04-03, Autronica Fire and Security AS Page 23... -
Page 24: Panel Name
The import of the new language file may take a couple of minutes. Configuration Handbook, Autroprime Interactive Fire Detection System, 116-P-APRIME2-CONFIG/EGB, Rev. A, 2013-04-03, Autronica Fire and Security AS Page 24... -
Page 25: Fare And Fwre Disablement
Use the right arrow button to choose whether you want to disable the outputs to Fire Warning Routing Equipment (YES/NO), then press Enter. To confirm the settings, press Enter once more. Configuration Handbook, Autroprime Interactive Fire Detection System, 116-P-APRIME2-CONFIG/EGB, Rev. A, 2013-04-03, Autronica Fire and Security AS Page 25... -
Page 26: Printer Setup
Use the right arrow button to choose YES or NO, then press Enter. To confirm the settings, press Enter once more. Configuration Handbook, Autroprime Interactive Fire Detection System, 116-P-APRIME2-CONFIG/EGB, Rev. A, 2013-04-03, Autronica Fire and Security AS Page 26... -
Page 27: System S Hutdown
When state System Fault is entered, it is safe to power off the system.” To execute the command, use the left arrow button, then press Enter. Configuration Handbook, Autroprime Interactive Fire Detection System, 116-P-APRIME2-CONFIG/EGB, Rev. A, 2013-04-03, Autronica Fire and Security AS Page 27... -
Page 28: Restore Factory Settings
To execute the command, use the left arrow button, then press Enter. The following message will appear in the display: “Please Wait…. System is now shutting down.” Configuration Handbook, Autroprime Interactive Fire Detection System, 116-P-APRIME2-CONFIG/EGB, Rev. A, 2013-04-03, Autronica Fire and Security AS Page 28... -
Page 29: Loop Operation
Show Low Current Units (chapter 4.6) Scroll with the arrow up/down buttons to select the desired menu, then follow the instructions in the relevant chapter. Configuration Handbook, Autroprime Interactive Fire Detection System, 116-P-APRIME2-CONFIG/EGB, Rev. A, 2013-04-03, Autronica Fire and Security AS Page 29... -
Page 30: Enable
Enter the hours and minutes, then press Enter. To confirm the disablement, press Enter once more. The display will return to the list of loops. Configuration Handbook, Autroprime Interactive Fire Detection System, 116-P-APRIME2-CONFIG/EGB, Rev. A, 2013-04-03, Autronica Fire and Security AS Page 30... -
Page 31: Change Disable Time Span
Function button Select Reset Compensation Level, then press Enter. To confirm the setting, press Enter once more. Configuration Handbook, Autroprime Interactive Fire Detection System, 116-P-APRIME2-CONFIG/EGB, Rev. A, 2013-04-03, Autronica Fire and Security AS Page 31... -
Page 32: Show Low Current Units
Show Low Current Units, then press Enter twice. All low current units are listed. Configuration Handbook, Autroprime Interactive Fire Detection System, 116-P-APRIME2-CONFIG/EGB, Rev. A, 2013-04-03, Autronica Fire and Security AS Page 32... -
Page 33: Unit Configuration
(Menu selection available only if Mimic Panels are connected). Activation Groups (chapter 5.12) External Interfaces (chapter 5.13) Detection Loops (chapter 5.14) Operator Panels (chapter 5.15) Configuration Handbook, Autroprime Interactive Fire Detection System, 116-P-APRIME2-CONFIG/EGB, Rev. A, 2013-04-03, Autronica Fire and Security AS Page 33... -
Page 34: Detection Zones
Scroll with the arrow up/down buttons to select the desired menu, then follow the instructions in the relevant chapter. * Menu selection available only if a “Mimic” panel is connected. Configuration Handbook, Autroprime Interactive Fire Detection System, 116-P-APRIME2-CONFIG/EGB, Rev. A, 2013-04-03, Autronica Fire and Security AS Page 34... -
Page 35: Configure Properties For A Detection Zone
Use the left or right arrow button to select the detection zone type, then press Enter. To confirm the setting, press Enter once more. Configuration Handbook, Autroprime Interactive Fire Detection System, 116-P-APRIME2-CONFIG/EGB, Rev. A, 2013-04-03, Autronica Fire and Security AS Page 35... -
Page 36: Connect To Alarm Zone
Use the arrow left/right buttons to select the Detection Activation State (Prealarm, Small Alarm, Large Alarm, Silent Alarm), then press Enter. To confirm the setting, press Enter once more. Configuration Handbook, Autroprime Interactive Fire Detection System, 116-P-APRIME2-CONFIG/EGB, Rev. A, 2013-04-03, Autronica Fire and Security AS Page 36... -
Page 37: Connect To Disable Input Device
Enter twice. Use the arrow button to select the Panel, then press Enter. To confirm the setting, press Enter once more. Configuration Handbook, Autroprime Interactive Fire Detection System, 116-P-APRIME2-CONFIG/EGB, Rev. A, 2013-04-03, Autronica Fire and Security AS Page 37... -
Page 38: Disconnect From Alarm Zone
Use the arrow down/up button to select the device to be disconnected, then press Enter. To confirm the setting, press Enter once more. Configuration Handbook, Autroprime Interactive Fire Detection System, 116-P-APRIME2-CONFIG/EGB, Rev. A, 2013-04-03, Autronica Fire and Security AS Page 38... -
Page 39: Disconnect From Panel
Enter. Configuration Handbook, Autroprime Interactive Fire Detection System, 116-P-APRIME2-CONFIG/EGB, Rev. A, 2013-04-03, Autronica Fire and Security AS Page 39... -
Page 40: Alarm Zones
Show Activating Detection Zones (chapter 5.3.7) Scroll with the arrow up/down buttons to select the desired menu, then follow the instructions in the relevant chapter. Configuration Handbook, Autroprime Interactive Fire Detection System, 116-P-APRIME2-CONFIG/EGB, Rev. A, 2013-04-03, Autronica Fire and Security AS Page 40... -
Page 41: Configure Properties For An Alarm Zone
If you want to define another alarms zone as neighbour alarm zone to the selected alarm zone, repeat the procedure above. Configuration Handbook, Autroprime Interactive Fire Detection System, 116-P-APRIME2-CONFIG/EGB, Rev. A, 2013-04-03, Autronica Fire and Security AS Page 41... -
Page 42: Disconnect From Neighbour Alarm Zone
Use the arrow down button to select the Neighbour Alarm Zone in question, then press Enter. The name of the Neighbour Alarm Zone and the unit function will appear in the display. Configuration Handbook, Autroprime Interactive Fire Detection System, 116-P-APRIME2-CONFIG/EGB, Rev. A, 2013-04-03, Autronica Fire and Security AS Page 42... -
Page 43: Show Activating Detection Zones
Use the arrow down button to select the Detection Zone in question, then press Enter. The name of the Detection Zone and the alarm organization will appear in the display. Configuration Handbook, Autroprime Interactive Fire Detection System, 116-P-APRIME2-CONFIG/EGB, Rev. A, 2013-04-03, Autronica Fire and Security AS Page 43... -
Page 44: Points
Show Connected Units (chapter 5.4.8) Scroll with the arrow up/down buttons to select the desired menu, then follow the instructions in the relevant chapter. Configuration Handbook, Autroprime Interactive Fire Detection System, 116-P-APRIME2-CONFIG/EGB, Rev. A, 2013-04-03, Autronica Fire and Security AS Page 44... -
Page 45: Configure Properties For A Point
Use the left or right arrow button to select the desired operation class night setting, then press Enter. To confirm the setting, press Enter once more. Configuration Handbook, Autroprime Interactive Fire Detection System, 116-P-APRIME2-CONFIG/EGB, Rev. A, 2013-04-03, Autronica Fire and Security AS Page 45... -
Page 46: Move To Detection Zone (/Create New)
Use the arrow down button to select the detection zone that is to be connected to the point, then press Enter. o To confirm the setting, press Enter once more. Configuration Handbook, Autroprime Interactive Fire Detection System, 116-P-APRIME2-CONFIG/EGB, Rev. A, 2013-04-03, Autronica Fire and Security AS Page 46... -
Page 47: Connect To Output
Use the left or right arrow button to set Yes or No for Activate on Point Fault, then press Enter. To confirm the setting, press Enter once more. Configuration Handbook, Autroprime Interactive Fire Detection System, 116-P-APRIME2-CONFIG/EGB, Rev. A, 2013-04-03, Autronica Fire and Security AS Page 47... -
Page 48: Connect To Activation Group (/Create New)
Use the arrow down button to select the activation group that is to be connected to the point, then press Enter. o To confirm the setting, press Enter once more. Configuration Handbook, Autroprime Interactive Fire Detection System, 116-P-APRIME2-CONFIG/EGB, Rev. A, 2013-04-03, Autronica Fire and Security AS Page 48... -
Page 49: Disconnect From Output
To disconnect the selected point from an activation group, use the arrow down button to select the activation group, then press Enter. To confirm the setting, press Enter once more. Configuration Handbook, Autroprime Interactive Fire Detection System, 116-P-APRIME2-CONFIG/EGB, Rev. A, 2013-04-03, Autronica Fire and Security AS Page 49... -
Page 50: Show Connected Units
Show Connected Units, then press Enter. A list will appear in the display, showing all detection zones, outputs etc. that are activated by the selected point. Configuration Handbook, Autroprime Interactive Fire Detection System, 116-P-APRIME2-CONFIG/EGB, Rev. A, 2013-04-03, Autronica Fire and Security AS Page 50... -
Page 51: Fire Alarm Devices
Show Connected Units (chapter 5.5.4) Scroll with the arrow up/down buttons to select the desired menu, then follow the instructions in the relevant chapter. Configuration Handbook, Autroprime Interactive Fire Detection System, 116-P-APRIME2-CONFIG/EGB, Rev. A, 2013-04-03, Autronica Fire and Security AS Page 51... -
Page 52: Configure Properties For A Fire Alarm Device
Alarm Zone, press Enter twice, type the name, then press Enter. o Use the left/right arrow buttons to select the Parent Alarm Zone”, then press Enter twice to confirm. Configuration Handbook, Autroprime Interactive Fire Detection System, 116-P-APRIME2-CONFIG/EGB, Rev. A, 2013-04-03, Autronica Fire and Security AS Page 52... -
Page 53: Show Connected Units
In the display you will now see the alarm zone that belongs to the selected Fire Alarm Device. Press Enter.to view the name of the alarm zone. Configuration Handbook, Autroprime Interactive Fire Detection System, 116-P-APRIME2-CONFIG/EGB, Rev. A, 2013-04-03, Autronica Fire and Security AS Page 53... -
Page 54: Loop Outputs
Show Connected Units (chapter 5.6.12) Scroll with the arrow up/down buttons to select the desired menu, then follow the instructions in the relevant chapter. Configuration Handbook, Autroprime Interactive Fire Detection System, 116-P-APRIME2-CONFIG/EGB, Rev. A, 2013-04-03, Autronica Fire and Security AS Page 54... -
Page 55: Configure Properties For A Loop Output
If the door is not closed within this period, a technical alarm will be activated. The Activation Monitoring Timer determines this period (supervisory). Configuration Handbook, Autroprime Interactive Fire Detection System, 116-P-APRIME2-CONFIG/EGB, Rev. A, 2013-04-03, Autronica Fire and Security AS Page 55... -
Page 56: Connect To Output
Use the arrow up/down button to select the activation group that is to be connected to the loop output, then press Enter. To confirm the setting, press Enter once more. Configuration Handbook, Autroprime Interactive Fire Detection System, 116-P-APRIME2-CONFIG/EGB, Rev. A, 2013-04-03, Autronica Fire and Security AS Page 56... -
Page 57: Disconnect From Output
Enter. To confirm the setting, press Enter once more. Configuration Handbook, Autroprime Interactive Fire Detection System, 116-P-APRIME2-CONFIG/EGB, Rev. A, 2013-04-03, Autronica Fire and Security AS Page 57... -
Page 58: Show Activating Detection Zones
Show Activating Points, then press Enter. In the display you will now see a list of all points that are connected to the selected loop output. Configuration Handbook, Autroprime Interactive Fire Detection System, 116-P-APRIME2-CONFIG/EGB, Rev. A, 2013-04-03, Autronica Fire and Security AS Page 58... -
Page 59: Show Activating Inputs
Show Activating Groups, then press Enter. In the display you will now see a list of all activation groups that are connected to the selected loop output. Configuration Handbook, Autroprime Interactive Fire Detection System, 116-P-APRIME2-CONFIG/EGB, Rev. A, 2013-04-03, Autronica Fire and Security AS Page 59... -
Page 60: Show Activating Outputs
Show Connections, then press Enter. In the display you will now see a list of all connections that are connected to the selected loop output. Configuration Handbook, Autroprime Interactive Fire Detection System, 116-P-APRIME2-CONFIG/EGB, Rev. A, 2013-04-03, Autronica Fire and Security AS Page 60... -
Page 61: Local Outputs
(Menu selection not applicable to FARE and FWRE) Scroll with the arrow up/down buttons to select the desired menu, then follow the instructions in the relevant chapter. Configuration Handbook, Autroprime Interactive Fire Detection System, 116-P-APRIME2-CONFIG/EGB, Rev. A, 2013-04-03, Autronica Fire and Security AS Page 61... -
Page 62: Configure Properties For A Local Output
Press Enter. To confirm the setting, press Enter once more. Configuration Handbook, Autroprime Interactive Fire Detection System, 116-P-APRIME2-CONFIG/EGB, Rev. A, 2013-04-03, Autronica Fire and Security AS Page 62... -
Page 63: Connect To Output
Use the arrow up/down button to select the activation group that is to be connected to the local output, then press Enter. To confirm the setting, press Enter once more. Configuration Handbook, Autroprime Interactive Fire Detection System, 116-P-APRIME2-CONFIG/EGB, Rev. A, 2013-04-03, Autronica Fire and Security AS Page 63... -
Page 64: Disconnect From Output
Enter. To confirm the setting, press Enter once more. Configuration Handbook, Autroprime Interactive Fire Detection System, 116-P-APRIME2-CONFIG/EGB, Rev. A, 2013-04-03, Autronica Fire and Security AS Page 64... -
Page 65: Show Activating Detection Zones
Use the arrow up/down button to select a point, then press Enter. The point’s properties will appear in the display. Configuration Handbook, Autroprime Interactive Fire Detection System, 116-P-APRIME2-CONFIG/EGB, Rev. A, 2013-04-03, Autronica Fire and Security AS Page 65... -
Page 66: Show Activating Inputs
5.4.4): o the name of the Activation Group o the Unit State o the Coincidence Configuration Handbook, Autroprime Interactive Fire Detection System, 116-P-APRIME2-CONFIG/EGB, Rev. A, 2013-04-03, Autronica Fire and Security AS Page 66... -
Page 67: Show Activating Outputs
Alarm Zone, press Enter twice, type the name, then press Enter. o Use the left/right arrow buttons to select the Parent Alarm Zone, then press Enter twice to confirm. Configuration Handbook, Autroprime Interactive Fire Detection System, 116-P-APRIME2-CONFIG/EGB, Rev. A, 2013-04-03, Autronica Fire and Security AS Page 67... -
Page 68: Show Connected Units
Use the arrow up/down button to select a connection, then press Enter. In the display you will now see the name and unit function. Configuration Handbook, Autroprime Interactive Fire Detection System, 116-P-APRIME2-CONFIG/EGB, Rev. A, 2013-04-03, Autronica Fire and Security AS Page 68... -
Page 69: Loop Inputs
Show Connected Units (chapter 5.8.7) Scroll with the arrow up/down buttons to select the desired menu, then follow the instructions in the relevant chapter. Configuration Handbook, Autroprime Interactive Fire Detection System, 116-P-APRIME2-CONFIG/EGB, Rev. A, 2013-04-03, Autronica Fire and Security AS Page 69... -
Page 70: Configure Properties For A Loop Input
Use the left/right arrow buttons to select Supervisory:Yes or No, then press Enter. To confirm the setting, press Enter once more. Configuration Handbook, Autroprime Interactive Fire Detection System, 116-P-APRIME2-CONFIG/EGB, Rev. A, 2013-04-03, Autronica Fire and Security AS Page 70... -
Page 71: Connect To Output
To disconnect the selected loop input from an output, use the arrow down button to select the output, then press Enter. To confirm the setting, press Enter once more. Configuration Handbook, Autroprime Interactive Fire Detection System, 116-P-APRIME2-CONFIG/EGB, Rev. A, 2013-04-03, Autronica Fire and Security AS Page 71... -
Page 72: Disconnect From Alarm Zone
In the display you will now see the name and unit function of the connections that are connected to the selected loop input. Configuration Handbook, Autroprime Interactive Fire Detection System, 116-P-APRIME2-CONFIG/EGB, Rev. A, 2013-04-03, Autronica Fire and Security AS Page 72... -
Page 73: Local Inputs
Show Connected Units (chapter 5.9.7) Scroll with the arrow up/down buttons to select the desired menu, then follow the instructions in the relevant chapter. Configuration Handbook, Autroprime Interactive Fire Detection System, 116-P-APRIME2-CONFIG/EGB, Rev. A, 2013-04-03, Autronica Fire and Security AS Page 73... -
Page 74: Configure Properties For A Local Input
“Supervisory” and “Supervisory Text” are no longer shown, and are replaced by the selection “Sound Patterns”. Now you will be able to select one of several sound patterns (see chapter 1.1). Configuration Handbook, Autroprime Interactive Fire Detection System, 116-P-APRIME2-CONFIG/EGB, Rev. A, 2013-04-03, Autronica Fire and Security AS Page 74... -
Page 75: Connect To Output
To disconnect the selected local input from an output, use the arrow down button to select the output, then press Enter. To confirm the setting, press Enter once more. Configuration Handbook, Autroprime Interactive Fire Detection System, 116-P-APRIME2-CONFIG/EGB, Rev. A, 2013-04-03, Autronica Fire and Security AS Page 75... -
Page 76: Disconnect From Alarm Zone
In the display you will now see the name and unit function of the connections that are connected to the selected local input. Configuration Handbook, Autroprime Interactive Fire Detection System, 116-P-APRIME2-CONFIG/EGB, Rev. A, 2013-04-03, Autronica Fire and Security AS Page 76... -
Page 77: Loop I/O Carriers
The subunits of a Loop I/O carrier are also present in the listing of units of menu commands Points, Loop Inputs and Loop Outputs. Configuration Handbook, Autroprime Interactive Fire Detection System, 116-P-APRIME2-CONFIG/EGB, Rev. A, 2013-04-03, Autronica Fire and Security AS Page 77... -
Page 78: Accessing The Menu
Show Carrier Outputs (chapter 5.10.7) Scroll with the arrow up/down buttons to select the desired menu, then follow the instructions in the relevant chapter. Configuration Handbook, Autroprime Interactive Fire Detection System, 116-P-APRIME2-CONFIG/EGB, Rev. A, 2013-04-03, Autronica Fire and Security AS Page 78... -
Page 79: Configure Properties For A Loop Io Carrier
In the display you will now see a list of all Carrier Units. "Show all Carrier Units" creates a list of units independent of the IO Carrier configuration (i.e. dip switch setting). Configuration Handbook, Autroprime Interactive Fire Detection System, 116-P-APRIME2-CONFIG/EGB, Rev. A, 2013-04-03, Autronica Fire and Security AS Page 79... -
Page 80: Show Carrier Points
Use the arrow up/down button to select a Carrier Input, then press Enter. In the display you will now see the relevant properties. Configuration Handbook, Autroprime Interactive Fire Detection System, 116-P-APRIME2-CONFIG/EGB, Rev. A, 2013-04-03, Autronica Fire and Security AS Page 80... -
Page 81: Show Carrier Outputs
Use the arrow up/down button to select a Carrier Output, then press Enter. In the display you will now see the relevant properties. Configuration Handbook, Autroprime Interactive Fire Detection System, 116-P-APRIME2-CONFIG/EGB, Rev. A, 2013-04-03, Autronica Fire and Security AS Page 81... -
Page 82: Mimic Panels
Type a new Name, or accept the existing one by pressing the arrow down button. Press Enter To confirm the setting, press Enter once more. Configuration Handbook, Autroprime Interactive Fire Detection System, 116-P-APRIME2-CONFIG/EGB, Rev. A, 2013-04-03, Autronica Fire and Security AS Page 82... -
Page 83: Configure Mimic Inputs And Outputs
Connect to Output Connect to Alarm Zone Disconnect from Output Disconnect from Alarm Zone Show Connected Units Configuration Handbook, Autroprime Interactive Fire Detection System, 116-P-APRIME2-CONFIG/EGB, Rev. A, 2013-04-03, Autronica Fire and Security AS Page 83... -
Page 84: Activation Groups
Show Connected Units (chapter 5.12.6) Scroll with the arrow up/down buttons to select the desired menu, then follow the instructions in the relevant chapter. Configuration Handbook, Autroprime Interactive Fire Detection System, 116-P-APRIME2-CONFIG/EGB, Rev. A, 2013-04-03, Autronica Fire and Security AS Page 84... -
Page 85: Configure Properties For An Activation Group
Use the arrow up/down button to select the output that is to be connected to the selected Activation Group, then press Enter. To confirm the setting, press Enter once more. Configuration Handbook, Autroprime Interactive Fire Detection System, 116-P-APRIME2-CONFIG/EGB, Rev. A, 2013-04-03, Autronica Fire and Security AS Page 85... -
Page 86: Disconnect From Output
In the display you will now see a list of all connections that are connected to the selected Activation Group. Use the arrow up/down button to select a connection, then press Enter. Configuration Handbook, Autroprime Interactive Fire Detection System, 116-P-APRIME2-CONFIG/EGB, Rev. A, 2013-04-03, Autronica Fire and Security AS Page 86... -
Page 87: Show Connected Units
Use the arrow up/down buttons to select the External Interface that is to be configured, then follow the instructions in the relevant chapter. Configuration Handbook, Autroprime Interactive Fire Detection System, 116-P-APRIME2-CONFIG/EGB, Rev. A, 2013-04-03, Autronica Fire and Security AS Page 87... -
Page 88: Serial Port Settings
Use the arrow left/right button to select “Subnet Mask”, then press Enter. To confirm the setting, press Enter once more. Configuration Handbook, Autroprime Interactive Fire Detection System, 116-P-APRIME2-CONFIG/EGB, Rev. A, 2013-04-03, Autronica Fire and Security AS Page 88... -
Page 89: Espa
Use the arrow left/right buttons to select whether you want to prepare for a startup message, then press Enter. To confirm the settings, press Enter once more. Configuration Handbook, Autroprime Interactive Fire Detection System, 116-P-APRIME2-CONFIG/EGB, Rev. A, 2013-04-03, Autronica Fire and Security AS Page 89... - Page 90 + prealarm + supervisory To confirm the settings, press Enter once more. Configure the properties for all other users as described above. Configuration Handbook, Autroprime Interactive Fire Detection System, 116-P-APRIME2-CONFIG/EGB, Rev. A, 2013-04-03, Autronica Fire and Security AS Page 90...
- Page 91 “Text Message Transmitted”. o A text message is transmitted to verify that there is a proper communication between Autroprime and the paging system. Configuration Handbook, Autroprime Interactive Fire Detection System, 116-P-APRIME2-CONFIG/EGB, Rev. A, 2013-04-03, Autronica Fire and Security AS Page 91...
-
Page 92: Modbus
Select the Fault Timer (default 10 seconds), or use the alphanumeric keypad to type another Fault Timer, then press Enter. To confirm the settings, press Enter once more. Configuration Handbook, Autroprime Interactive Fire Detection System, 116-P-APRIME2-CONFIG/EGB, Rev. A, 2013-04-03, Autronica Fire and Security AS Page 92... - Page 93 Register Type Register Number 40001 Range of Command Register 40002 40003 40004 Range of Status Register 40xxx 40004 + number of registers -1 Configuration Handbook, Autroprime Interactive Fire Detection System, 116-P-APRIME2-CONFIG/EGB, Rev. A, 2013-04-03, Autronica Fire and Security AS Page 93...
- Page 94 Use the arrow down button to select Set Testbit to 0, then press Enter. The following message will appear: “Test finished”. Configuration Handbook, Autroprime Interactive Fire Detection System, 116-P-APRIME2-CONFIG/EGB, Rev. A, 2013-04-03, Autronica Fire and Security AS Page 94...
- Page 95 Use the arrow down button to select Assign Unique MODBUS Indexes, then press Enter. To confirm the setting, press Enter once more. Configuration Handbook, Autroprime Interactive Fire Detection System, 116-P-APRIME2-CONFIG/EGB, Rev. A, 2013-04-03, Autronica Fire and Security AS Page 95...
- Page 96 Use the arrow down button to select Send Test Event, then press Enter The following message will appear: “Test message transmitted”. Configuration Handbook, Autroprime Interactive Fire Detection System, 116-P-APRIME2-CONFIG/EGB, Rev. A, 2013-04-03, Autronica Fire and Security AS Page 96...
-
Page 97: Remote Access
Time Limitation. Select Time Limitation (hours) if applicable. Press Enter. To confirm, press Enter once more. Configuration Handbook, Autroprime Interactive Fire Detection System, 116-P-APRIME2-CONFIG/EGB, Rev. A, 2013-04-03, Autronica Fire and Security AS Page 97... - Page 98 Use the arrow left/right button to set the External Server Address (for example,10.62.63.79:10002), then press Enter. To confirm, press Enter once more. Configuration Handbook, Autroprime Interactive Fire Detection System, 116-P-APRIME2-CONFIG/EGB, Rev. A, 2013-04-03, Autronica Fire and Security AS Page 98...
- Page 99 If a proxy server is to be connected, type the Proxy Server Address (for example, 10.64.1.46:8080), then press Enter. To confirm, press Enter once more. Configuration Handbook, Autroprime Interactive Fire Detection System, 116-P-APRIME2-CONFIG/EGB, Rev. A, 2013-04-03, Autronica Fire and Security AS Page 99...
-
Page 100: Detection Loops
Press Enter, use the arrow left/right button to set the limit for maximum loop current, then press Enter. To confirm, press Enter once more. Configuration Handbook, Autroprime Interactive Fire Detection System, 116-P-APRIME2-CONFIG/EGB, Rev. A, 2013-04-03, Autronica Fire and Security AS Page 100... -
Page 101: Operator Panels
Type a new Name, or accept the existing one by pressing the arrow down button. Press Enter, then use the arrow left/right button to type the panel type. Configuration Handbook, Autroprime Interactive Fire Detection System, 116-P-APRIME2-CONFIG/EGB, Rev. A, 2013-04-03, Autronica Fire and Security AS Page 101... -
Page 102: Unit Test
Function button , use the arrow down button to select Stop Test, then press Enter twice. Configuration Handbook, Autroprime Interactive Fire Detection System, 116-P-APRIME2-CONFIG/EGB, Rev. A, 2013-04-03, Autronica Fire and Security AS Page 102... -
Page 103: Testing Alarm Zones
Function button , use the arrow down button to select Stop Test, then press Enter twice. Configuration Handbook, Autroprime Interactive Fire Detection System, 116-P-APRIME2-CONFIG/EGB, Rev. A, 2013-04-03, Autronica Fire and Security AS Page 103... -
Page 104: Testing Fire Alarm Devices
Alarm Device that is set to test mode, press the Function button , use the arrow down button to select Stop Test, then press Enter twice. Configuration Handbook, Autroprime Interactive Fire Detection System, 116-P-APRIME2-CONFIG/EGB, Rev. A, 2013-04-03, Autronica Fire and Security AS Page 104... -
Page 105: Testing Loop Outputs
Function button use the arrow down button to select Stop Test, then press Enter twice. Configuration Handbook, Autroprime Interactive Fire Detection System, 116-P-APRIME2-CONFIG/EGB, Rev. A, 2013-04-03, Autronica Fire and Security AS Page 105... -
Page 106: Testing Local Outputs
Function button use the arrow down button to select Stop Test, then press Enter twice. Configuration Handbook, Autroprime Interactive Fire Detection System, 116-P-APRIME2-CONFIG/EGB, Rev. A, 2013-04-03, Autronica Fire and Security AS Page 106... -
Page 107: Testing Mimic Panels
Function button , use the arrow down button to select Stop Test, then press Enter twice. Configuration Handbook, Autroprime Interactive Fire Detection System, 116-P-APRIME2-CONFIG/EGB, Rev. A, 2013-04-03, Autronica Fire and Security AS Page 107... -
Page 108: System Topology
The loop resistance + wire Panel bus: o The name of the panel bus o The panel type (for example, BS-200) Configuration Handbook, Autroprime Interactive Fire Detection System, 116-P-APRIME2-CONFIG/EGB, Rev. A, 2013-04-03, Autronica Fire and Security AS Page 108... -
Page 109: Show Topology
Use the arrow down button to select Show All Faults, then press Enter. All faults related to the panel bus, or the selected loop in the entire system will appear in the display. Configuration Handbook, Autroprime Interactive Fire Detection System, 116-P-APRIME2-CONFIG/EGB, Rev. A, 2013-04-03, Autronica Fire and Security AS Page 109... -
Page 110: Clear Loop Config. - Restart System
“The configuration related to any unit on this loop will be deleted and the loop will be completely restarted.” Use the left arrow button to select Accept, then press Enter. Configuration Handbook, Autroprime Interactive Fire Detection System, 116-P-APRIME2-CONFIG/EGB, Rev. A, 2013-04-03, Autronica Fire and Security AS Page 110... -
Page 111: Deactivate
Press the Function button Use the arrow buttons to select Activate, then press Enter. The selected detection zone will be activated. Configuration Handbook, Autroprime Interactive Fire Detection System, 116-P-APRIME2-CONFIG/EGB, Rev. A, 2013-04-03, Autronica Fire and Security AS Page 111... -
Page 112: Export And Import
The USB port is provided with a resettable fuse. USB output We recommend that the USB memory stick that is to be used contains Autronica-related files only. Configuration Handbook, Autroprime Interactive Fire Detection System, 116-P-APRIME2-CONFIG/EGB, Rev. A, 2013-04-03, Autronica Fire and Security AS Page 112... -
Page 113: Export Log
To read the ExportLog.txt file, connect the USB device to a computer, then open the ExportLog.txt file in an editor, for example, WordPad. Configuration Handbook, Autroprime Interactive Fire Detection System, 116-P-APRIME2-CONFIG/EGB, Rev. A, 2013-04-03, Autronica Fire and Security AS Page 113... -
Page 114: Select Configuration & Restart System
To execute the command, use the left arrow button to select Accept, then press Enter. Configuration Handbook, Autroprime Interactive Fire Detection System, 116-P-APRIME2-CONFIG/EGB, Rev. A, 2013-04-03, Autronica Fire and Security AS Page 114... -
Page 115: Export Configuration
“Config Report.csv” and can be opened in Excel. The report provides a complete overview of the current configuration, including any configuration changes that may not have been saved. Configuration Handbook, Autroprime Interactive Fire Detection System, 116-P-APRIME2-CONFIG/EGB, Rev. A, 2013-04-03, Autronica Fire and Security AS Page 115... -
Page 116: Import Configuration
To use the imported configuration, please restart the system.” To execute the command, press the left arrow button to select Accept, then press Enter. Configuration Handbook, Autroprime Interactive Fire Detection System, 116-P-APRIME2-CONFIG/EGB, Rev. A, 2013-04-03, Autronica Fire and Security AS Page 116... -
Page 117: Configuration Examples
The examples (example 1 and 2) in this chapter deals with a site-specific configuration of a typical medium-sized installation. Configuration Handbook, Autroprime Interactive Fire Detection System, 116-P-APRIME2-CONFIG/EGB, Rev. A, 2013-04-03, Autronica Fire and Security AS Page 117... -
Page 118: Example 1: Basic Configuration Example
A point in alarm is to be configured to activate all Fire Alarm Devices. A point in alarm is to be configured to activate all Fire Alarm Routing Equipment. Configuration Handbook, Autroprime Interactive Fire Detection System, 116-P-APRIME2-CONFIG/EGB, Rev. A, 2013-04-03, Autronica Fire and Security AS Page 118... - Page 119 CORRIDOR SOUTH CORRIDOR SOUTH Autronica Autronica Detection Zone 3 Detection Zone 3 Sounder Sounder BBR-200 BBR-200 BBR-200 BBR-200 A1005 A1005 A1006 A1006 Configuration Handbook, Autroprime Interactive Fire Detection System, 116-P-APRIME2-CONFIG/EGB, Rev. A, 2013-04-03, Autronica Fire and Security AS Page 119...
-
Page 120: Site Information - Excel Sheet
9.2.2 Buttons Enter Alpha- Arrow Up/Down numeric Arrow Left/Right Keypad Cancel Select / Back Function Configuration Handbook, Autroprime Interactive Fire Detection System, 116-P-APRIME2-CONFIG/EGB, Rev. A, 2013-04-03, Autronica Fire and Security AS Page 120... -
Page 121: Initial Startup - Default Configuration
When the system reboot is completed, you can enter Service Mode, and start the first step of the site-specific configuration. Configuration Handbook, Autroprime Interactive Fire Detection System, 116-P-APRIME2-CONFIG/EGB, Rev. A, 2013-04-03, Autronica Fire and Security AS Page 121... -
Page 122: Site-Specific Configuration - Example 1
Routing Equipment (FARE). As this specific functionality already is provided by the default configuration, no configuration is required. Refer to chapter 5.2.4, 5.4.4 and 5.6. Configuration Handbook, Autroprime Interactive Fire Detection System, 116-P-APRIME2-CONFIG/EGB, Rev. A, 2013-04-03, Autronica Fire and Security AS Page 122... -
Page 123: Step 1: Create Detection Zones And Connect Points
Repeat this procedure for the points that are to be connected to Detection Zone 2 (including point A1004), Detection Zone 3 (including point A1007) and Detection Zone 4 (including the manual callpoint A1008). Configuration Handbook, Autroprime Interactive Fire Detection System, 116-P-APRIME2-CONFIG/EGB, Rev. A, 2013-04-03, Autronica Fire and Security AS Page 123... -
Page 124: Add A Site-Specific Name To Each Point (If Needed)
A1002 CANTEEN A1003 CANTEEN A1004 SALES OFFICE A1005 SALES OFFICE A1006 CORRIDOR SOUTH A1007 CORRIDOR SOUTH A1008 Manual Call Point CORRIDOR SOUTH Configuration Handbook, Autroprime Interactive Fire Detection System, 116-P-APRIME2-CONFIG/EGB, Rev. A, 2013-04-03, Autronica Fire and Security AS Page 124... -
Page 125: Step 2: Connect The New Detection Zones To The Alarm Zone
Alarm Zone. Press Enter to confirm the settings (Accept). 9.2.9 Step 3: Save Configuration / Restart System Refer to chapter 9.2.4. Configuration Handbook, Autroprime Interactive Fire Detection System, 116-P-APRIME2-CONFIG/EGB, Rev. A, 2013-04-03, Autronica Fire and Security AS Page 125... -
Page 126: Example 2: Configuration With Several Alarm Zones And Control Functions
Alarm Zone 1 and 2 (Parent Alarm Zone). A point in alarm is to be configured to activate all Fire Alarm Routing Equipment. Configuration Handbook, Autroprime Interactive Fire Detection System, 116-P-APRIME2-CONFIG/EGB, Rev. A, 2013-04-03, Autronica Fire and Security AS Page 126... - Page 127 Detection Zone 3 Detection Detection Sounder Sounder Zone 7 Zone 7 BBR-200 BBR-200 BBR-200 BBR-200 BBR-200 BBR-200 A1005 A1005 A1006 A1006 B1003 B1003 Configuration Handbook, Autroprime Interactive Fire Detection System, 116-P-APRIME2-CONFIG/EGB, Rev. A, 2013-04-03, Autronica Fire and Security AS Page 127...
-
Page 128: Site-Specific Configuration - Example 2
Routing Equipment (FARE). As this specific functionality already is provided by the default configuration, no configuration is required. Refer to chapter 5.2.4, 5.4.4 and 5.6. Configuration Handbook, Autroprime Interactive Fire Detection System, 116-P-APRIME2-CONFIG/EGB, Rev. A, 2013-04-03, Autronica Fire and Security AS Page 128... -
Page 129: Step 1: Create Detection Zones And Connect Points
Repeat this procedure for the points that are to be connected to Detection Zone 6 (including point B1002) and Detection Zone 7 (including point B1003 and B1004). Configuration Handbook, Autroprime Interactive Fire Detection System, 116-P-APRIME2-CONFIG/EGB, Rev. A, 2013-04-03, Autronica Fire and Security AS Page 129... -
Page 130: Add A Site-Specific Name To Each Point (If Needed)
Repeat the procedure for each point according to the list below: B1001 STORAGE B1005 STORAGE B1006 STORAGE B1002 Manual Call Point STORAGE B1003 WORKSHOP B1004 WORKSHOP Configuration Handbook, Autroprime Interactive Fire Detection System, 116-P-APRIME2-CONFIG/EGB, Rev. A, 2013-04-03, Autronica Fire and Security AS Page 130... -
Page 131: Step 2: Connect Fire Alarm Devices To New Alarm Zones (5.5.3)
Use the arrow down button to select Alarm Zone 1. Press Enter to connect the detection zones to this alarm zone. To confirm the setting, press Enter once more. Configuration Handbook, Autroprime Interactive Fire Detection System, 116-P-APRIME2-CONFIG/EGB, Rev. A, 2013-04-03, Autronica Fire and Security AS Page 131... -
Page 132: Step 4: Connect The New Detection Zones To A New Alarm Zone (Alarm Zone 2). (5.2.3)
Select Alarm Zone 1 as the neighbour alarm zone, then press Enter. To confirm the setting, press Enter once more. Configuration Handbook, Autroprime Interactive Fire Detection System, 116-P-APRIME2-CONFIG/EGB, Rev. A, 2013-04-03, Autronica Fire and Security AS Page 132... -
Page 133: Step 6: Connect A Point In Detection Zone 6 To The Parent Alarm Zone (5.2.3)
Use the arrow left/right buttons to select the Detection Activation State (Prealarm, Small Alarm, Large Alarm, Silent Alarm), then press Enter. Configuration Handbook, Autroprime Interactive Fire Detection System, 116-P-APRIME2-CONFIG/EGB, Rev. A, 2013-04-03, Autronica Fire and Security AS Page 133... -
Page 134: Step 8: Save Configuration / Restart System
Configuration Examples To confirm the setting, press Enter once more. 9.3.10 Step 8: Save Configuration / Restart System Refer to chapter 9.2.4. Configuration Handbook, Autroprime Interactive Fire Detection System, 116-P-APRIME2-CONFIG/EGB, Rev. A, 2013-04-03, Autronica Fire and Security AS Page 134... -
Page 135: Other Functions
Press the Function button Select Cut (the first menu selection), then press Enter The name is cut, and is placed in the clipboard. Configuration Handbook, Autroprime Interactive Fire Detection System, 116-P-APRIME2-CONFIG/EGB, Rev. A, 2013-04-03, Autronica Fire and Security AS Page 135... -
Page 136: Paste
(blinking cursor). Press the Function button Use the arrow down button to select View Content, then press Enter Configuration Handbook, Autroprime Interactive Fire Detection System, 116-P-APRIME2-CONFIG/EGB, Rev. A, 2013-04-03, Autronica Fire and Security AS Page 136... -
Page 137: Capital And Small Letters -Toggle Functionality
Other Functions 10.2 Capital and Small Letters –Toggle functionality To toggle between capital letters and small letters, use the #-key. Configuration Handbook, Autroprime Interactive Fire Detection System, 116-P-APRIME2-CONFIG/EGB, Rev. A, 2013-04-03, Autronica Fire and Security AS Page 137... -
Page 138: Configuration Tool
define the detection zone type (directly in the loop window) 11.2 Setup Wizard Insert the CD into you disk drive, then follow the instructions in the setup wizard. Configuration Handbook, Autroprime Interactive Fire Detection System, 116-P-APRIME2-CONFIG/EGB, Rev. A, 2013-04-03, Autronica Fire and Security AS Page 138... - Page 139 Configuration Tool Configuration Handbook, Autroprime Interactive Fire Detection System, 116-P-APRIME2-CONFIG/EGB, Rev. A, 2013-04-03, Autronica Fire and Security AS Page 139...
-
Page 140: Starting The Configuration Tool
Configuration Tool 11.3 Starting the Configuration Tool Double-click the program icon, and the configuration tool will appear. Configuration Handbook, Autroprime Interactive Fire Detection System, 116-P-APRIME2-CONFIG/EGB, Rev. A, 2013-04-03, Autronica Fire and Security AS Page 140... -
Page 141: Help File
Configuration Tool 11.4 Help File For detailed information on the Autroprime Configuration Tool, refer to the help file located in the Help Menu. Configuration Handbook, Autroprime Interactive Fire Detection System, 116-P-APRIME2-CONFIG/EGB, Rev. A, 2013-04-03, Autronica Fire and Security AS Page 141... -
Page 142: Appendix
Parent Alarm Zone, all Fire Alarm Devices (FADs) within this zone, plus all FADs belonging to all “sub-level”-alarm zones will be activated. Configuration Handbook, Autroprime Interactive Fire Detection System, 116-P-APRIME2-CONFIG/EGB, Rev. A, 2013-04-03, Autronica Fire and Security AS Page 142... -
Page 143: Immediate Action Detection Zones
Note that an activation of a manual call point in a dependency action detection zone will always initiate actions (provided that the point has been set to Override Delay and Dependency, YES). Configuration Handbook, Autroprime Interactive Fire Detection System, 116-P-APRIME2-CONFIG/EGB, Rev. A, 2013-04-03, Autronica Fire and Security AS Page 143... -
Page 144: Delayed Action Detection Zones
Acti ons will be initiated after the T1 delay period has expired. Pressing PROLONG DELAY, will terminate T1 and the delay period T2 will start. Configuration Handbook, Autroprime Interactive Fire Detection System, 116-P-APRIME2-CONFIG/EGB, Rev. A, 2013-04-03, Autronica Fire and Security AS Page 144... -
Page 145: Delayed Dependency Detection Zones
Override Delay and Dependency, YES, the Delayed Dependency detection zone will enter the Large Alarm state directly, regardless of Day or Night Mode. Configuration Handbook, Autroprime Interactive Fire Detection System, 116-P-APRIME2-CONFIG/EGB, Rev. A, 2013-04-03, Autronica Fire and Security AS Page 145... -
Page 146: Solas Detection Zones
The table on the next page indicates which levels are available for different types of detection zones. Configuration Handbook, Autroprime Interactive Fire Detection System, 116-P-APRIME2-CONFIG/EGB, Rev. A, 2013-04-03, Autronica Fire and Security AS Page 146... - Page 147 Small Alarm Large Alarm Immediate Action Detection Zone Delayed Action Detection Zone Dependency Action Detection Zone Delayed Dependency Detection Zone SOLAS Detection Zone Configuration Handbook, Autroprime Interactive Fire Detection System, 116-P-APRIME2-CONFIG/EGB, Rev. A, 2013-04-03, Autronica Fire and Security AS Page 147...
-
Page 149: Reader's Comments
Title: Configuration Handbook, Autroprime Interactive Fire Detection System, Ref. No.: 116-P-APRIME2-CONFIG/EGB, Rev. A, 2013-04-03 Your information on any inaccuracies or omissions (with page reference): Please turn the page Configuration Handbook, Autroprime Interactive Fire Detection System, 116-P-APRIME2-CONFIG/EGB, Rev. A, 2013-04-03, Autronica Fire and Security AS... - Page 150 ------------------------------------------------------------------------------------------------ Fax: ------------------------------------------------------------------------------------------------ Date: ------------------------------------------------------------------------------------------------ Please send this form to: Autronica Fire and Security AS N-7483 Trondheim Norway Tel: + 47 73 58 25 00 Fax: + 47 73 58 25 01 www.autronicafire.com Configuration Handbook, Autroprime Interactive Fire Detection System, 116-P-APRIME2-CONFIG/EGB, Rev. A, 2013-04-03,...
- Page 151 Reader’s Comments Configuration Handbook, Autroprime Interactive Fire Detection System, 116-P-APRIME2-CONFIG/EGB, Rev. A, 2013-04-03, Autronica Fire and Security AS...
- Page 152 Autronica Fire and Security is an international company, headquartered in Trondheim, one of the largest cities in Norway. The company is owned by United Technologies Corporation and employs more than 319 persons with experience in developing, manufacturing and marketing of fire safety equipment. Our products cover a broad range of systems for integrated solutions, including fire detection systems, integrated fire and gas detection systems, control and presentation systems, voice alarm systems, public address systems, emergency light systems, plus suppression systems.
Need help?
Do you have a question about the Autroprime 2 and is the answer not in the manual?
Questions and answers