Table of Contents
Advertisement
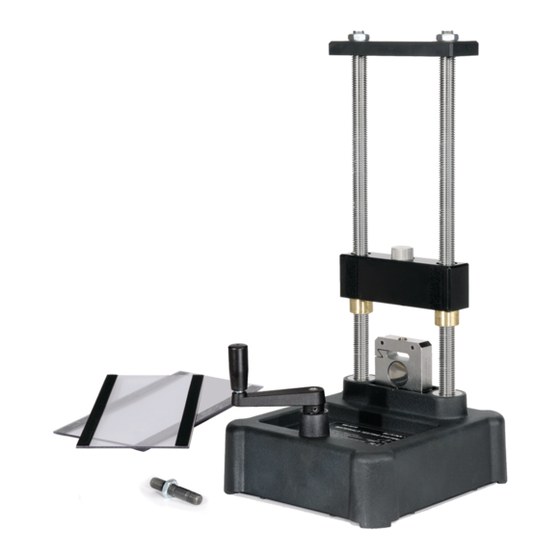
Materials Testing Machine
Materials Testing System
WARNING: Provide proper eye
protection when using the Materials
Testing Machine or its Accessories.
Operate the Materials Testing Machine
behind protective Safety Shields.
USB Link*
*Items from the
ME-8230 Materials
Testing System
Tensile Samples*
(60)
Velcro® Hook
Material
Safety Shield (2)
Sensor
Cable
Load Bar
Round Nut
ME-8236
Part of the
Comprehensive
ME-8244
Velcro® Loop
Material
Crankshaft
Calibration
Rod and Nut
Instruction Ma nual
Leadscrews
Load Bar
(crosshead)
7100 N
Load Cell
Materials Testing
Machine
0 1 2 - 1 3 7 6 2 D
Base
Advertisement
Table of Contents


Need help?
Do you have a question about the ME-8236 and is the answer not in the manual?
Questions and answers