
Summary of Contents for Robo 3D R1
- Page 1 CONTENTS CHAPTER I: Welcome to Your ROBO 3D Experience! CHAPTER II: Installing Software CHAPTER III: Connecting Your R1 3D Printer CHAPTER IV: Software Navigation CHAPTER V: Slice CHAPTER VI: Your First 3D Print- Workflow CHAPTER VII: 3D Printing Resources CHAPTER VIII: Troubleshooting...
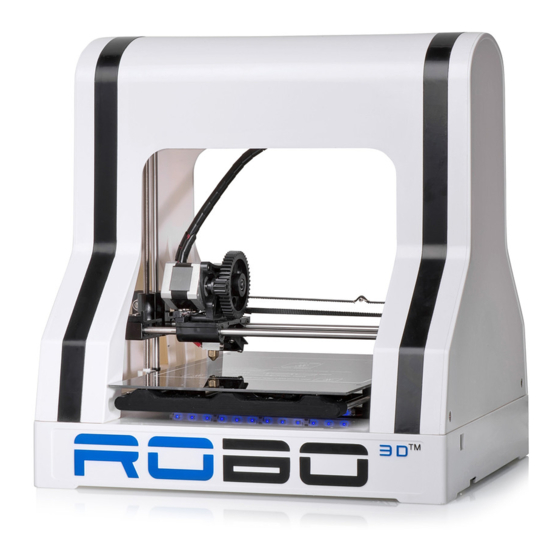
- Page 2 Welcome to your ROBO 3D experience! We at ROBO 3D really love 3D printing and our aim is to help spread this amazing technology around the globe. If you are reading this guide you probably have one of our units and we can’t tell you how appreciative we are for your help in making our dream come true.
- Page 3 Installing Software So you’ve got your ROBO 3D unit put together- now what? Well the next step is to get the software you need to work with your computer. We have included a copy of our software in the box that your printer shipped in and it is also available on our website, www.robo3d.com...
- Page 4 CH III Connecting your R1 3D Printer Physically connect your printer Locate a solid flat surface to place your printer- somewhere close to your computer You also need to be close to a power outlet Plug the USB cable that comes with your kit into the right side of the printer and connect the other end to an available port on your computer.
- Page 5 A new window will pop up and you will be able to set up a 3D printer. From here you can assign your ROBO 3D a nickname. This helps you keep track of multiple units. (3.4a) Next find the “Select Make” drop down list and choose ROBO 3D.
- Page 6 (3.4a) (3.4b) (3.4c) Now a new set of windows will open and prompt to “Install Communication Driver”. Do this by clicking “Install Driver” in the bottom left corner of this screen. (3.5a) Once the driver is finished installing a “3D Printer Setup” window will appear. Follow the instructions on this screen to disconnect the printer and press “Continue”.
- Page 7 Reconnect your ROBO 3D after this and press “Connect”. (3.6a) Once the printer connects, you will see a “Connection Succeeded!” message. From here click “Done”. (3.6b) (3.6a) (3.6b) Your ROBO 3D Printer is connected to the software!
- Page 8 Software Configuration for Printing ROBO 3D has teamed up with MatterHackers to provide a top of the line 3D printing software that is very user friendly. In this chapter we will be diving into this software and explaining everything you need to know in order to get the best possible prints out of your R1 3D printer.
- Page 9 If you have loaded multiple files into the queue, then you will see them listed out in the middle of the screen When you click on a file listed in your queue, it will become highlighted and a preview picture will show in the top portion of your screen.
- Page 10 Your library is where you can store different files that you frequently print. We include a preloaded library with over twenty ROBO 3D Optimized* prints to help you get started. To add an object to your print queue, simply hover over the item and click “Add to Queue”...
- Page 11 (4.4) 4. About The About tab is very important. This is where you will be able to access and download software updates for your machine as they come available. Click the “Check for Update” button to see if there is an update available. (4.5) (4.5) 5.
- Page 12 (4.6) The Build Plate This is where you can view the part files that you load and their configuration on the build plate. Here you can edit the orientation of your part, scale it and even print multiple pieces together. 1.
- Page 13 (4.7c) 2. View Options Use the 3 buttons in the top left hand corner to edit the viewing agle, rotation and zoom of the build plate. Select to rotate the view angle of the build plate. Do this by clicking the rotate button and then left click on the part and hold.
- Page 14 (4.8a) Make sure to click the save button once you are done editing your part. (4.8b) (4.8b) 4. Adding Multiple Parts to One Build Plate...
- Page 15 If you would like to add a completely separate part to your build plate, Click the button on the lower left hand side of your screen and select another file that you want to add to your platform. (4.9a) (4.9a) ...
- Page 16 (4.9b) You can use the button to move the newly added copies of your part around on the build surface. save all changes Again, be sure to before exiting the build plate screen. The Advanced Settings Panel The configuration panel is where you are able to define all of the intimate details about how your part file will be printed, adjust settings during printing and also customize your version of this software.
- Page 17 Controls The “CONTROLS” tab is where you can physically control your printer through the software. Here you can pre heat your extruder and heated bed, and even adjust your print speed while printing. 1. Adjusting Temperatures To adjust your temperature for either the extruder or heated bed, simple type your desired temps in the “target”...
- Page 18 To set up your preheat buttons click the button next to either “Extruder Temperature Override” or “Bed Temperature Override”. You will see a screen like this appear (4.10b): (4.10b) Now enter in the desired preheat temp settings. *An Extruder Preheat should not be set to be higher than 240 for ABS filament or 210 for PLA filament. *A Bed Preheat should not be set to higher than 90 for ABS and 55 for PLA filament.
- Page 19 2. Movement Controls You can use the movement controls on this panel (while your printer is idle) to move the X, Y and Z axis. The extrude/ retract motor movement keys help in loading filament as well. You can unlock the motors after a print job in order to move them around by hand.
- Page 20 Slice Settings Slice settings (4.21) are where you will adjust the parameters of the print job itself. These tools are the very most important to understand in order to get a quality print out of your 3D printer and that is why we have dedicated the entire next chapter to setting up your slice settings.
- Page 21 Configuring Slice Settings Slice settings is the most important panel in this software. These settings are where you will be able to define all aspects of how your part will print. SLICE ENGINES MatterControl comes with 3 different slice engines included: Slic3r, Cura, and MatterSlice. You can choose which engine you prefer by selecting it from the drop down list underlined in green.
- Page 22 Each of these engines is similar in function and for the most part have the same setting options. We encourage you to use all 3 and make sure you pick one that best suits your needs. You will notice that each one will produce slightly different results for any given 3D printed object. For our introduction, we will be focusing on Matter Slice- as it is a good mix of the other two.
- Page 23 button. This will add a short description underneath every setting that is available. We will leave this unchecked for now. We have icluded a preset controls option in our version of Mattercontrol. With this you can create custom presets for any of the settings we are about to cover. Your software comes preloaded with high, medium and low quality settings as well as PLA and ABS material settings.
- Page 24 Layers/ Perimeters Layer Height: Sets the height of each layer of the print. A smaller number will create more layers and more vertical accuracy but also a slower print. Range = .05mm-.3mm First layer height: Sets the height of the first layer. It is often desirable to print a taller first layer to ensure a good solid adhesion to the build plate.
- Page 25 Use the settings within this box to define the speed at which your printer will print each of the listed print moves. Default=60mm/s with outside perimeters at 50mm/s. Speed for Non-Print Moves: Speed to move when not extruding material. This can typically be much faster than normal.
- Page 26 X and Y Distance: The distance the support material will be from the side walls of the object. Z Gap: The number of layers to skip in z. The gap between the support and the model. Similar to interface layers. Support Everywhere: If this is checked support will be allowed starting on top of internal surfaces.
- Page 27 Default= 0mm. Multiple Extruders Support Material Extruders: The index of the extruder to use for support material. R1 3D printers only have one extruder; this should always be set to 1. Advanced First Layer Extrusion Width: Setting this to greater than 100% lays down more material and can often help the first layer have better adhesion to the print bed.
- Page 28 Min Fan Speed: This is the minimum fan speed that your fan can run at. Max Fan Speed: This is the maximum fan speed that your fan can run at. Set this to 100%. Bridging Fan Speed: Fan speed to use during bridging. Default= 100%. Disable Fan For The First: The number of layers for which the fan will be forced to remain off.
- Page 29 This gcode will be inserted when the print is canceled. Extruder 1 Nozzle Diameter: This is the diameter of your extruder nozzle in millimeters. R1 comes standard with a .4mm nozzle. It is important to keep this setting unless you change the nozzle to something different.
- Page 30 The amount the extruder head will be lifted after each retraction in millimeters. Use 0 if you wish to keep your extruder from lifting. This is typically use in conjunction with retraction to help minimize ooze and stringing. Speed: The speed that the filament will be retracted (and re-extruded. Use 30mm/s. Minimum Travel Requiring Retraction: The minimum distance of a non printing move that will result in a retraction.
- Page 31 (5.3a) (5.3b) You can do the same for the Material preset. Select a filament type from the drop down list and see that it affects your Filament and Printer settings. (5.3c) (5.3c)
- Page 32 To create your own presets, click the small button next to which ever preset you would like to customize. This will open the editor. From here you can edit existing presets or make completely new ones by using the button.
- Page 33 (5.3f) After you save your preset, you will be able to access it from the Slice Settings page. (5.3g) (5.3g)
- Page 34 Your First 3D Print (Workflow) Obtain 3D Printable File There are a few different ways to obtain 3D printable files for use on your R1 personal 3D printer. Computer Aided Design Software If you are design savvy and own a CAD software such as AutoCAD, SolidWorks, or Google Sketchup, you can design your own parts! Once you are finished designing, just make sure to export them as .STL or .OBJ files and save them where you can access them when it is time to...
- Page 35 Pre Heat Now is a great time to preheat your extruder and heated bed because they take a couple of minutes to get up to temp. Do this in your Controls panel by clicking on the preheat buttons you set up on page 19. Click the button that corresponds to the type of plastic you will be printing with.
- Page 36 (6.4) Check Build Plate One last thing to double check before your start your pint is your build plate. Make sure that your part is oriented the way you like. To check this, click the preview window at the top of your screen. (6.5) (6.5) ...
- Page 37 (6.6) Straighten out the end of the filament so that it can easily be inserted into the extruder. Pull back the thumb latch on the back of your extruder, this will create an opening for you to load your filament into. ...
- Page 38 Prep Build Plate You can use a couple of different techniques for prepping your build plate. The three that we most commonly use here at ROBO 3D are: -Vinyl Sheeting (We’ve included one in the box for you) -Glue Stick -Hairspray (AquaNet works very well- this is our favorite) (6.9)
- Page 39 (6.10) Apply which ever product you have available and make sure that there are no bumps on the build plate. Now just click the start button! You will notice that your part slices in the software right before the print starts and the printer runs and auto leveling measurement sequence.
- Page 40 Makable.com is a great resource for sharing 3d printer compatible files! Not only is it a database of free, ROBO certified files, it is also a market place where you can contact designers for custom jobs and also list your 3D design services and to market to potential customers! ROBO 3D Tech Support Check out www.robo3d.com for any tech support needs you may have.
- Page 41 Extruder-210c Heated Bed- 55c (with adhesion material) up to 75c. If you have any other type of filament to use on your R1 3D printer, make sure to consult the manufacturer’s instructions for extrusion and adhesion temperatures. Adhesion ...
- Page 42 While an adhesion solution does help to prevent warping, heat is really the main contributing factor. R1 3D printers come standard with a heated build platform, so if your heat settings are correct for the type of material that you are printing with, you should never have to deal with this issue.
- Page 43 There are two ways that print resolution can be measured. -Z resolution. This can be controlled in your slice engine, by editing your Layer Height. R1 can go as low as 50 microns (.05mm) and as high as 300 microns (.3mm) on layer heights. The lower the layer height, the more layers, the longer the print but also the higher the resolution.
- Page 44 homing, your print may not end up on the build plate where you intend it to- possibly causing a print to fail. Auto Leveling Your new printer comes standard with an auto-leveling feature. The way our auto-leveling system works is to probe the heated bed in nine different location to measure any tolerances that it might have.
- Page 45 Z offset measures the distance between “On” and “Off” in your Z endstops for auto leveling. There is sometimes a tolerance to this because of the way that the endstop parts are manufactured. R1 3D printers come standard with a Z offset of 1. ...
- Page 46 (Too High- Just right) 2. In the Custom gcode Field: This will also add your offset to the gcode file that is exported for printing. Use the M Code M565 to define your offset. In Mattercontrol, when you use the custom gcode field, you will need to define your Z offset as a negative An example of a 1mm Z offset code would be: M565 Z-1 ;...
- Page 47 -Tangled Filament: If the filament on your spool for some reason becomes tangled or knotted up, it will eventually create tension and the extruder will not have enough power to pull it through. -Filament Latch too Loose: If there is not enough pressure on the hobbed bolt teeth from the filament latch -Clogged Hot End Tip: This happens when there is something stuck in the bottom of the hot end, preventing the filament from being pushed any further.
- Page 48 Support material can be broken away after the print job is finished. Stringing- Retraction Stringing is caused primarily by a lack of retraction. Retraction is important because it helps to eliminate the inherent oozing of plastic out of the hot end tip.
- Page 49 They usually come from either a loose belt on the X or Y axis, or from a motor pulley that has come unsecured from the motor shaft. Shifting from back to front is most likely a Y axis belt/ pulley issue while left to right is an X axis issue. ...
Need help?
Do you have a question about the R1 and is the answer not in the manual?
Questions and answers