Table of Contents
Advertisement
Quick Links
Installation
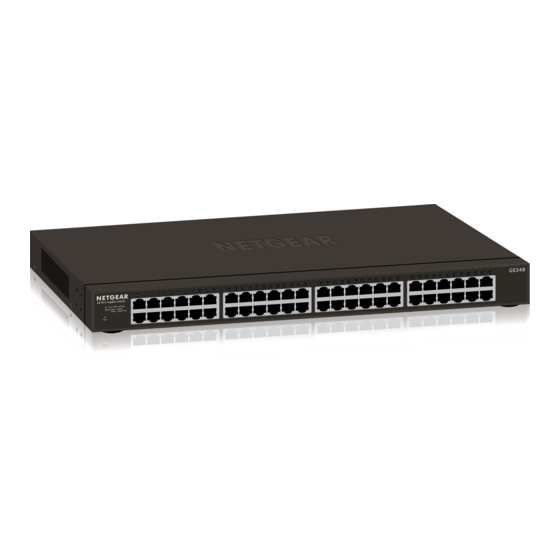
ProSAFE 48-port Gigabit Unmanaged
Ethernet Rackmount Switch
Model GS348
Package Contents
GS348
switch
Rubber
Power cord
feet
(localized to
the region)
Installation guide
(this document)
Step 1: Install the Switch
You can install the switch on a flat surface or in a rack. For information
about how to rack-mount the switch, see
other side of this document.
¾ To install the switch on a flat surface:
1. Attach the rubber feet that came in the package with the switch.
2. Make sure that the switch is positioned with at least 2 inches of
space on all sides for ventilation.
Step 2: Connect Devices
Rack-mount kit
Step 3: Connect Power
Rack-Mount the Switch
on the
Step 4: Check the Status
Power LED
Port LEDs (Ports 1–48)
On
1000 Mbps link
Off
100 or 10 Mbps link
Activity (blinking)
No link (off)
Advertisement
Table of Contents

Related Manuals for NETGEAR GS348


Summary of Contents for NETGEAR GS348
-
Page 1: Package Contents
Step 4: Check the Status Ethernet Rackmount Switch 2. Make sure that the switch is positioned with at least 2 inches of space on all sides for ventilation. Model GS348 Step 2: Connect Devices Power LED Port LEDs (Ports 1–48) -
Page 2: Specifications
Rack-Mount the Switch Specifications Support Thank you for purchasing this NETGEAR product. You can visit Specification Description We recommend that you use the mounting brackets and screws that came www.netgear.com/support to register your product, get help, access the latest with the switch.
Need help?
Do you have a question about the GS348 and is the answer not in the manual?
Questions and answers