Advertisement
Available languages
Available languages
Quick Links
®
ELECTRONIC DEADBOLT LOCK
model no.: 046-7845-0
Instruction Instructions
Toll-free Number: 1-800-268-6591
IMPORTANT
: Please read this manual carefully
before installing this deadbolt lock and save it for reference.
Wood screws
Qty. 4
Exterior Assembly
Latch
Strike
Machine screws
Qty. 2
Interior Assembly
Mounting Plate
Keys
Mounting Plate screws
Qty. 2
Drive-in Sleeve
Face the door from the outside. The door
is left-handed if the hinges are on the left
side of the door, whereas the door is
right-handed if the hinges are on the
right side of the door.
Hinge
Note : Please confirm whether door
is left handed or right handed
before beginning installation.
(Left Handed)
(Right Handed)
Spindle
Left handed door
Right handed
door
install the spindle
install the spindle
(vertically)
(horizontally)
Determine if the latch needs to be adjusted to the 2 3/4" (70 mm) backset.
To adjust, rotate the latch until it stops.
Reverse the direction to return to the 2 3/8" (60 mm) backset.
180°
2 3/8" (60 mm)
2 3/4" (70 mm)
Change Latch Face
Determine which latch mounting method will
Drive-in Installation
be used and make necessary adjustments.
Remove original latch faceplate.
No adjustment required for
Align the
drive-in sleeve
square latch face plate.
illustrated and snap into the latch
a. Use a flat screwdriver to
case.
separate the face plate.
b. Snap selected latch face
onto back plate.
a
b
Drive-in Latch
1. Mark the Door with Template
Select the height and backset as desired on the door face;
use the TEMPLATE as a guide to mark the centre of
the circle on the door face and the centre of the door edge.
2. Drill Holes
Using the marks as a guide to drill a hole Ø2 1/8" (54 mm)
through the door face for the lockset, then a hole of Ø1"
(25.4 mm) for latch.
3. Install Latch
Insert the latch and ensure it is parallel to the door face.
a
Mark the outline of the faceplate, then take out
the latch.
Chisel 5/32" (4 mm) deep along the outline to allow the
b
faceplate to be aligned with the door edge.
Note: It is not necessary to chisel the door edge for the
faceplate installation if you use the drive-in latch.
Insert the latch into the door.
c
(Make sure the cross is on the bottom of the latch.)
Use 2 wood screws to secure latch.
Do not fully tighten the screws until lock is
completely installed.
Install Drive-in Latch
d
Drive the latch into the hole on edge of door.
4. Install the Exterior Assembly
d
a. Make sure the latch bolt is at unlocked position.
b. Make sure you install the spindle inside the lock body
correctly. If your door is LEFT-HANDED the spindle
should be VERTICAL in the latch.
If your door is RIGHT-HANDED the spindle should be
Hinge
HORIZONTAL in the latch.
c. IC wire goes through the bottom of latch hole.
Spindle
Left handed door install
the spindle (vertically)
IC wire
5. Install the Mounting Plate
Before securing the mounting plate to the deadbolt with the mounting screws, make
sure the IC wire fits cleanly through the corner of the plate.
IC wire
For backset
2 3/4" (
70 mm)
TEMPLATE
For backset
2 3/8" (
60 mm)
as
Fit here on door edge
45
40
35
mm
mm
mm
1 3/4"
1 9/16"
1 3/8"
Ø
2 1/8" 54 mm
(
)
Mark Ø1" (25.4 mm) hole at centr
e
of door edge.
6. Install the Interior Assembly
Insert 3 AAA alkaline batteries into the battery case.
Pull the IC cable from the side of the fixation plate and connect to the slot on the
interior assembly.
Match the interior assembly. The turnpiece
should be vertical. Fasten the interior
with screws.
A
B
C
D
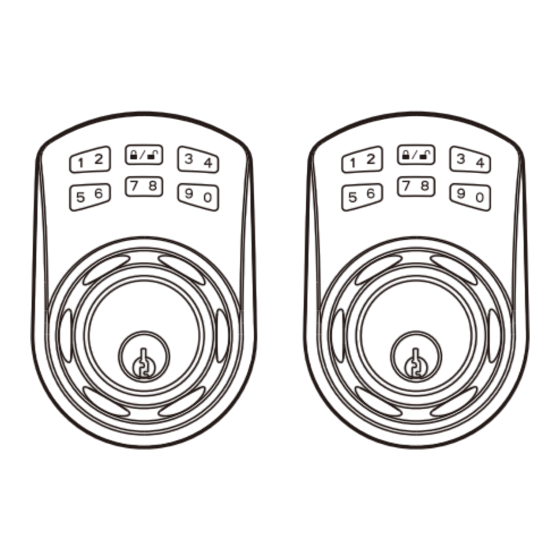
1
Programming Button
Function setup & Lock and unlock.
Input the pass codes, each pass code is 4-10
2
Number Buttons
digits in length.
3
Cylinder Housing
Lock/unlock by control from cylinder housing.
Cylinder
Retract / Extend the latch bolt by key from exterior.
4
5
Turn-Piece
Retract / Extend the latch bolt from interior.
6
R Button (Reset)
Restore default settings.
Lock
To lock your deadbolt - simply push the Lock & Unlock button.
Now you have 5 seconds to rotate the cylinder housing wheel.
Right handed
door install
the spindle (horizontally)
Unlock
To unlock the deadbolt - After you enter the user code (1 2 3 4)
you must push the Lock & Unlock button. Now you have 5 seconds
to manually turn the cylinder housing wheel.
Troubleshooting
When installed, the cylinder housing will not rotate after
pressing
Programming Button
Note : Spindle installation mistake.
Troubleshooting : Refer to Identify door handing section of maunal.
Battery life is short
Note :
Alkaline batteries are recommended in order to stabilize
the power supply. If you do not use alkaline, battery
performance will be reduced greatly.
Troubleshooting : Avoid mixing alkaline batteries with regular zinc-carbon
batteries, or mixing batteries of different brands.
The lock does not respond while programming
Troubleshooting : Keep the lock unlocked. Confirm the latch is not extended.
7. Install Strike
To identify the centre of strike: close the door so the latchbolt is
a
against the door frame.
Mark the centre line on the doorframe exactly opposite the latch hole
in the door edge.
Measure one half of door thickness from door stop and vertically mark
b
centre line of strike.
Drill 1" (25.4 mm) hole, 1" (25.4 mm) deep at intersection of horizontal
and vertical line of strike.
Chisel 5/64" (2 mm) deep along the strike outline to allow the strike to
be aligned with the doorframe.
Install the strike plate into your door frame and tighten with wood screws.
c
Programming Code (PC) : 0000
User Code (UC) : 1234
Your new programming codes (PC)
Your new User Code (UC)
■ Create new User Code (UC)
E
Enter PC
Enter
" 1 "
Enter
F
Note Up to 20 sets of User Codes can be saved. User Codes should be 4-10 digits in length.
:
■ Delete individual User Code (UC)
" 3 "
Enter PC
Enter
Enter
■ Delete all User Codes (UC) a t once
" 5 "
Enter PC
Enter
Enter
Note Keypad locking functions will be invalid when User Codes are deleted.
:
The lock can only be operated by key during that time.
■ Change Programming Code (PC)
" 7 "
Enter PC
Enter
Enter
■ Restore Default Settings
Note : insert a pin into the hole under the bottom opening for 5 seconds. Three long beeps will indicate the restoration
is completed.
Operation indicator sounds and lights
Lights
Meaning
Sounds
1 Beep
Successful Operation
Flashes Green Once
Flashes Red 3 Times
3 Beeps
Operation Error
Code Input Error;
5 Beeps
Flashes Red 5 Times
System Shuts Down
10 Rapid Beeps
Low Battery Power
Flashes Red 10 Times
Flashes Green Twice
2 Beeps
Successful Programming
Flashes Orange 3 Times
3 Long Beeps
Default Setting Restored
Flashes Orange Slowly
In Programming Mode
Remarks
1. We recommend to use alkaline battery in order to stabilize the power supply.
2. Do not mix alkaline battery with regular zinc-carbon batteries, or mix battery brands.
3. Do not use any chemical liquid or lubricating oil with additives to clean the
lock body; it will damage the surface or mainboard.
Enter New UC
Enter
Enter UC
Enter
Enter New PC
Enter
Troubleshooting
Repeat Operation
Wait for 45 seconds
Repeat Operation
Change the Battery
Repeat Setup
G-PD-01
Advertisement

Related Manuals for Garrison 046-7845-0


Summary of Contents for Garrison 046-7845-0
- Page 1 Mark the centre line on the doorframe exactly opposite the latch hole in the door edge. model no.: 046-7845-0 2. Drill Holes Instruction Instructions Measure one half of door thickness from door stop and vertically mark centre line of strike.
- Page 2 Veillez à ce que le centre de la têtière et le centre de la gâche soient le centre du bord de la porte. alignés. N° de modèle : 046-7845-0 Utilisez la marque puisqu'un guide indique le contour de la gâche. 2. Percer les trous Instructions d'utilisation À...
Need help?
Do you have a question about the 046-7845-0 and is the answer not in the manual?
Questions and answers