Advertisement
Quick Links
Advertisement

Related Manuals for Osaki Pro Maestro


Summary of Contents for Osaki Pro Maestro
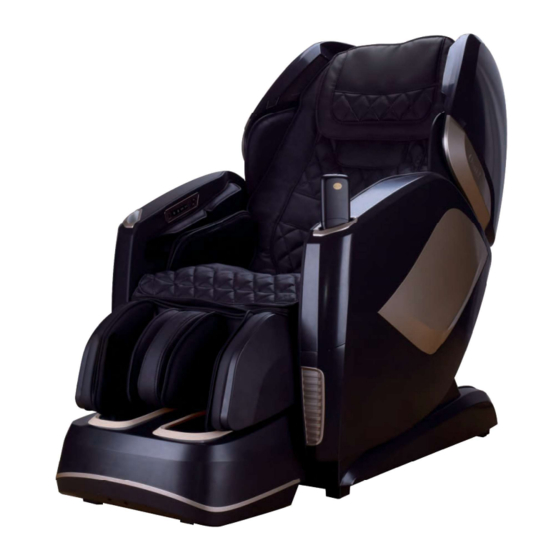
- Page 1 Instruction Manual Osaki Pro Maestro...
- Page 4 ……………………..…….......... ………………………………………..……............ ……………………..……..................……………………..……................…………………..……..........……………………..……................ ……………………..……................……………………..……..........……………………..……....................……………………..……................ ……………………..……................
- Page 5 110V, 60Hz...
- Page 8 Do not put hands or feet between footrest and seat base. Do not put hands or feet between footrest and side panel. Do not put hands or feet between seat base and side panel. Do not put hands or feet between upper and lower part of the footrest. Do not put hands or feet in the gap of seat base.
- Page 10 Bluetooth Speaker Pillow Shoulder Armrest Back Cushion Controller Side Panel Controller Side Panel Seat Pad Footrest...
- Page 11 2 Air bags 12 Air bags 6 Air bags...
- Page 12 Assembly Remove the packing, take out the parts. Power Line x1 Allen key x1 Hex screws x10 Washer x10 Circlip x2 Back up Hex screws X2 Washer X2 Seat base and backrest Footrest Left side panel Right side panel...
- Page 13 Remove side panel cover by slightly pulling the cloth strip.
- Page 14 Install the footrest. Connect the footrest data line and air hose. then with the buckle.
- Page 15 Install the side panel. Align A on the armrest with B on the Connect the data line and air hose. Use four screws to the side panel.
- Page 16 the edge with your hand to the panel cover back to the Tidy the cushions. Fix the waist cushion on the backrest Pull the two zippers on the with the elastic belt. seat pad.
-
Page 17: Before Use
Before use 79.5” 4.7” 25” 63”x31.5”... - Page 18 Do not put hands or feet between footrest and seat base. Do not put hands or feet between footrest and side panel. Do not put hands or feet between seat base and side panel. Do not put hands or feet between upper and lower part of the footrest. Do not put hands or feet in the gap of seat base.
- Page 21 The controller instructions Power switch on the top of controller ON /OFF button Touch screen The touch keys AUTO 1. Power switch on the top of controller ON /OFF button Press this button to start massage chair.Touch any massage function icon to start massage.
- Page 22 3. The touch keys Main page: when star chair, touch this key Reset Once this key is touched, massage chair will return to its Position: Once this key is original possition touched the screen will change massage function continue . AUTO to the Position AUTO: Once this key is touched,...
-
Page 23: Operation Guide
Operation guide 1. Neck & Shoulder Touch this icon the screen will change to the page [Neck & Shoulder] There are 4 auto massage programs, if 1 of 4 auto program is activated chair will automatically perform a shoulder hight scan. The screen will [Shoulder scanning] The roller will go to shoulder adjustment automatically user can manually adjust the... - Page 24 2. Lower back Touch this icon the screen will change to the page [Lower back] There are 4 auto massage programs 1 of 4 auto program 3. Auto Touch this icon the screen will change to the [Auto] There are 8 auto massage programs 1 of 8 auto program...
- Page 25 NOTE: 4D Intensity: There are 8 different levels available for adjustment to suit various massage strength. In the auto mode Air Intensity There are 5 different levels available for adjustment. Massage speed: There are 5 different levels 4. Manual Touch this icon the screen will change to the [Manual] There are 4 programs for different massage User can select the program preferred then the auto program...
- Page 26 NOTE: 4D Intensity: There are 8 different levels In manual mode Intensity / strength / speed: There are 5 different levels for adjustment. Upward / downward: Roller width: The width for tapping, shiatsu rolling. Spot: The spot massage allow user to select spot for any part on the back.
- Page 27 NOTE: Heating: will automatic activate in auto program. Touch this icon to turn off the roller heat. Touch again to activate it. Air: airbag massage program on the arm and waist Calf kneading: Foot kneading: 6. Air massage Touch the screen will change to the [Air massage] .
- Page 28 Control Buttons on the side panel USB mobile phone charger Power: ON /OFF button Z-G: A key to start Zero gravity position AUTO 4D +/- : 4D Intensity adjustment Auto: A key to start demo auto program Pause: Massage function stop/start button...
-
Page 29: After Massage
After massage Turn off the power switch on the controller. Pull the power switch to the position. Pull out the power plug. After us pu the power switch to the OFF position and pull out the power plug;... - Page 34 Model Osaki Pro Maestro Rate Voltage 110 -120V 60Hz Power 250W Working time 15min Guide L Shape 52.8" Forward distance 8 level Approx 3.9" Massage Strength 5 level Roller Speed 5 level Airbag Intensity 5 level Backrest Approx 128°- 155° (Ground Angle)
Need help?
Do you have a question about the Pro Maestro and is the answer not in the manual?
Questions and answers