
Related Manuals for Amulet Hotkey DXZ4-A


Summary of Contents for Amulet Hotkey DXZ4-A
- Page 1 ® DXZ4 security eDition Zero client ser manUal DXZ4-A and DXZ4-AM HB-DXZ4-A001 Revision 1.2 July 2018...
- Page 2 The information contained in this document represents the current view of Amulet Hotkey® as of the date of publication. Because Amulet Hotkey must respond to changing market conditions, it should not be interpreted to be a commitment on the part of Amulet Hotkey, and Amulet Hotkey cannot guarantee the accuracy of any information presented after the date of publication.
- Page 3 Amulet Hotkey website, or directly from the Teradici website. Amulet Hotkey zero clients are ready for use with VMware® View® version 4 and above. This device complies with part 15 of the FCC Rules. Operation is subject to the following two conditions: (1) This device may not cause harmful interference, and (2) this device must accept any interference received, including interference that may cause undesired operation.
-
Page 4: Table Of Contents
DXZ4 security edition zero client Contents 1. Before you start ........9 2. Your zero client ........15 Terminology ..........9 Front panel features....... 15 Rear panel features ........ 16 Extended network connectivity ....9 Power supply ........... 9 Front panel status LEDs ......17 SFP modules .......... - Page 5 5. Set up a PCoIP session ......27 4. Introduction to PCoIP ......23 Power up the DXZ4-A zero client ... 27 What is PCoIP? ........23 Types of PCoIP session ......27 4.1.1 Host rendering ..........5.2.1 Auto Detect ............
- Page 6 DXZ4 security edition zero client 7. Update the BSM firmware on an 8. Fault descriptions ....... 39 individual zero client ......33 Monitors display the incorrect display topology ..........39 Update the BSM firmware for Teradici firmware version 5.2.0 and later .... 33 8.1.1 Symptom ............
- Page 7 Contents List of figures Figure 1: PCoIP Management Console home page �������������������������������������������������������������������������������������������12 Figure 2:. A dministrative.Web.Interface.����������������������������������������������������������������������������������������������������������� �12 Figure 3:. O SD.Connect.screen �������������������������������������������������������������������������������������������������������������������������� �12 Figure 4:. M inimum.gap.around.the.zero.client. ����������������������������������������������������������������������������������������������� �13 Figure 5:. U se.of.spacers.with.two.zero-client �������������������������������������������������������������������������������������������������� �13 Figure 6:. D o.not.put.zero.clients.together.without.spacers ������������������������������������������������������������������������������13 Figure 7:.
- Page 8 DXZ4 security edition zero client Figure 25:. B SM.network.enable.option.selected �����������������������������������������������������������������������������������������������34 Figure 26:. T FTP.utility.client.settings.window. ��������������������������������������������������������������������������������������������������34 Figure 27:. E nable.Wake-on-USB.option.selected ����������������������������������������������������������������������������������������������36 Figure 28:. F inding.the.IP.address.using.the.DHCP.console �������������������������������������������������������������������������������36 Figure 29:. T FTP.utility.client.settings.window. ��������������������������������������������������������������������������������������������������37 Figure 30:. S elect.the.Enable.Configuration.option. �������������������������������������������������������������������������������������������40 Figure 31:. C lear.the.Enable.Configuration.option. ��������������������������������������������������������������������������������������������40 Figure 32:.
-
Page 9: Before You Start
LED status indicators DXZ4-A: The standard security edition zero client has two RJ45 The DXZ4-A has status LEDs on the front and rear panels: network ports; • front panel LEDs show the status of the PCoIP connection DXZ4-AM: This model has two network ports that accept and the power status. -
Page 10: Security Measures For Downloaded Firmware Files
(see 1.12 Zero client management tools) to optimise perfor- At first login, the DXZ4-A prompts for a new password. Make mance for most conditions. sure you set a more secure password before using the DXZ4-A. If bandwidth usage is a concern, we recommend testing and... -
Page 11: Dual Redundant Network Connections
Console define configuration profiles, and apply All Amulet Hotkey zero clients can be configured to use a configuration profiles to groups. third party connection broker (also known as a connection management server). For example, the following connection... -
Page 12: Administrative Web Interface (Awi)
Note: DXZ4-A and DXZ4-AM zero clients are passively cooled. It is a feature of these products that they run hot. Certain components inside the zero client use the metal case as a heat sink, so the unit often feels warm or possibly hot to the touch. -
Page 13: Recommended Enclosure Size
Before you start 1.13.1 Recommended enclosure size To ensure adequate cooling in dual and quad head video appli- cations, the enclosure must allow the following minimum gaps around the unit: • X=25mm, Y=25mm, Z=25mm. Figure 4: Minimum.gap.around.the.zero.client. Note: These recommendations assume room temperature is 25°C and the enclosure is fully open front and back for cable and switch access. - Page 14 DXZ4 security edition zero client Page 14...
-
Page 15: Your Zero Client
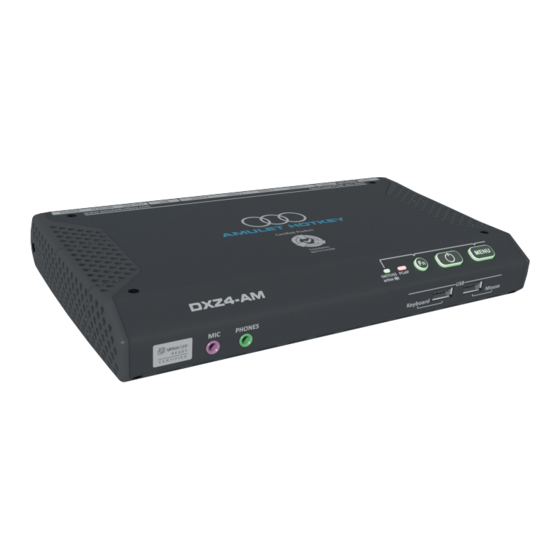
our security eDition Zero client 2. Your zero client DXZ4 security edition zero clients have various ports on the front and rear panels. These are described in the following sections. Front panel features Figure 7 shows the following front panel features: 1. -
Page 16: Rear Panel Features
Rear panel features Figure 8 shows the following rear panel features: 1. Network port (RJ45): The DXZ4-A has two RJ45 sockets. You only need to use one network connection. You can use the other network connection as an outlet port for connection to other networked devices or as a second network input to provide redundancy (if the LAN spanning tree is active). -
Page 17: Front Panel Status Leds
Your security edition zero client Front panel status LEDs 2.3.4 Power switch status LED. As well as turning the unit off and on, the power switch displays There are two status LEDs on the front panel, the SWITCHES the following indications. active status LED and the PCoIP LED. -
Page 18: Activate/Deactivate The Front Panel Switches
Activate/deactivate the front panel switches Figure 11: OSD Zero Client Control Panel Amulet Hotkey zero clients can be installed in cable trays Note: If option 2 is selected the host PC will either power-cycle beneath desks or behind control panels. -
Page 19: Set Up The Zero Client
DXZ4-a DXZ4-aM et up the 3. Set up the zero client This section describes how to set up your DXZ4 security edition zero client. For port descriptions, see 2. Your zero client. STEP 1: Connect the Keyboard, Mouse and optional audio devices 1. -
Page 20: Step 2: Connect The Monitors, Network Cables, Peripherals And Power
1. Press the POWER switch (see Figure 14). A short button press turns on the unit. 1. Connect at least one compatible monitor to the DXZ4-A, starting at the Video 1 port. See Figure 2. When the unit is on: Tip! You may use any rear panel video port for the monitor. -
Page 21: Step 4: Connect To A Pcoip Host
Set up the DXZ4-A and DXZ4-AM STEP 4: Connect to a PCoIP host STEP 5: Connect additional peripherals After powering up the zero client, you are ready to establish a Follow the manufacturer’s instructions to set up any additional new PCoIP session. - Page 22 DXZ4 security edition zero client Page 22...
-
Page 23: Introduction To Pcoip
ntroDuction to 4. Introduction to PCoIP There are three essential features of PCoIP: • Host rendering; What is PCoIP? • Multi-codec display processing; The PCoIP (PC-over-IP) protocol compresses, encrypts and • Dynamically adapts to network conditions. encodes the entire computing experience on a host PC. In a PCoIP system, a PCoIP host transmits the computing experience 4.1.1 Host rendering from a host PC (pixels only) across a standard IP network to a... -
Page 24: Multi-Codec Display Processing
DXZ4 security edition zero client Benefits of PCoIP zero clients 4.1.2 Multi-codec display processing A PC display includes different types of image elements (text, Because zero clients just decode pixels to display images, they graphics, icons, video). Using the same codec to encode all these can be far simpler and more secure than a traditional desktop PC elements would use excessive network bandwidth. -
Page 25: About Pcoip Hosts
PCoIP zero client. 4.4.2 Host types Amulet Hotkey PCoIP hosts are available in various form factors. Some install inside a PC while others are located near to a PC and connect to video, USB and audio ports using standard cables. - Page 26 DXZ4 security edition zero client Page 26...
-
Page 27: Set Up A Pcoip Session
PCoIP Connection Manager + Auto-Logon virtual desktop. • Connect using VMware View When you press the power switch on the DXZ4-A zero client for • Connect using a connection broker the first time, it displays the On Screen Display (OSD) connection screen. -
Page 28: Pcoip Connection Manager
DXZ4 security edition zero client advanced settings to remember the last connected PCoIP host. 5.2.6 Connect using VMware View You can configure zero clients to use PCoIP to connect to a 5.2.3 Connect to a choice of hosts using SLP Discovery virtual desktop in a VMware View environment. -
Page 29: Set An Automatic Connection
Get connected 2. Enter the IP address (or DNS name) for the third party connection broker. 3. Click OK. See section 1.11 for more information about third party connection brokers. Set an automatic connection You can set up zero clients to automatically connect to a remote PCoIP host or virtual desktop when the end-user logs on. - Page 30 DXZ4 security edition zero client Page 30...
-
Page 31: Deployment Security
6. Deployment security Quarantine the zero client until the reason for interference or damage is fully understood and appropriate precautions have This section describes how to improve security for your DXZ4-A been taken. and DXZ4-AM zero clients. Anti-tamper labels... -
Page 32: Set Up The Control Of Allowed Usb Devices
DXZ4 security edition zero client If you keep the AWI and CMI enabled, so that zero client The DXZ4-A and DXZ4-AM zero clients record a log of device administration is not restricted to the local On Screen Display, activity and performance. The zero client supports Syslog and... -
Page 33: Update The Bsm Firmware On An Individual Zero Client
1. Download the BSM firmware update file for Tera2 zero You can update the BSM firmware by downloading a firmware clients from Amulet Hotkey. The file name is in this format: update package over your network to the target BSM. -
Page 34: Bsm
DXZ4 security edition zero client 5. Select the BSM network enable check box. See Figure Figure 26: TFTP.utility.client.settings.window. 4. Enter the following settings: Figure 25: BSM.network.enable.option.selected 6. Verify that the target zero client is powered On. Setting Value 7. Click Apply. The BSM now acquires an IP address Host: Enter the BSM IP address. -
Page 35: Deactivate The Bsm Network Interface
Click the Event Log Messages View button. Example: You can use a script to discover Amulet Hotkey BSMs c). When the log file displays, search for the final occurrence on your network, querying the Address Resolution Protocol of these log entries: (ARP) cache for known MAC address patterns. -
Page 36: Activate The Bsm Network Interface And Acquire An Ip Address
Launch the DHCP console. identifies the product type. In the examples above, ‘50’ identifies the product as a standard DXZ4-A unit, while ‘51’ e). In the left-hand pane, navigate to the Address Leases item identifies a modular DXZ4-AM unit. -
Page 37: Transfer The Firmware Package To The Target
If you are upgrading the firmware on multiple units you can automate this process. Remote File: Leave this setting blank Example: You can use a script to discover Amulet Hotkey BSMs Block Size: Set to 512 bytes. on your network, querying the Address Resolution Protocol (ARP) cache for known MAC address patterns. - Page 38 DXZ4 security edition zero client Page 38...
-
Page 39: Fault Descriptions
rouBleshootinG 8. Fault descriptions • The ‘Use client topology settings…’ check box is selected in the PCoIP Host Software Settings dialog. Monitors display the incorrect display topology This check box determines whether or not the zero client display topology gets reported to the Windows operating This section describes how to resolve a display problem that can system. -
Page 40: Fix 2: Disable The Display Topology On Each Zero Client
DXZ4 security edition zero client Repeat these steps on each zero client used by the user: Repeat these steps on each zero client used by the user: 1. Launch the zero client On Screen Display (OSD). 1. Disconnect the zero client from your network. For example, unplug the network cable. -
Page 41: Fix 3: Disable The Use Client Topology Settings Feature On The Host Computer
USB devices), then any mouse, keyboard or other device plugged into the 3. In the Monitors screen, clear the Use client topology Mouse USB port on the DXZ4-A or DXZ4-AM will be blocked. This settings check box. See Figure is because the port’s integral USB hub is itself rejected. -
Page 42: Why Is An Integral Hub Included
USB ports. 8.2.3 Why is an integral hub included? The hub was included behind the rear ports to allow the DXZ4-A and DXZ4-AM to support additional functionality in the future. It also ensures that high-speed USB devices connected to other DXZ4-A or DXZ4-AM ports, such as a flash drive, do not suffer from compromised performance. -
Page 43: Technical Specifications
USB connections 4 x USB (SDP) 2.0 Type A (up to 0.5A charging current), including keyboard and mouse ports DXZ4-A: Dual redundant RJ45 network ports; 10/100/1000BaseT Network connections DXZ4-AM: Dual redundant SFP modules; Fiber or copper, up to 1 Gbps... -
Page 44: Environment
TCP port 50000 for a connection broker and the PCoIP Management Console; • TCP port 80 and TCP port 443 for the Administrative Web Interface (AWI). For a full list of ports and protocols used by PCoIP, contact Amulet Hotkey Technical Support. Table 13: About.PCoIP.ports...
Need help?
Do you have a question about the DXZ4-A and is the answer not in the manual?
Questions and answers