Table of Contents
Advertisement
Quick Links
24. BATTERY R EPLACEMENT
WARNING
If the LCD displays"
"symbol, please
replace the battery immediately.
Turn off the power and unplug all cables, remove
the battery and replace into the new battery.
Please use the correct specification of the battery
and correctly installed in the battery holder.
25. END OF LIFE
Caution: This symbol indicates
that equipment and its
accessories shall be subject to a
separate collection and correct
disposal.
WARNING
If not using the meter, please remove the
battery to avoid possible damage.
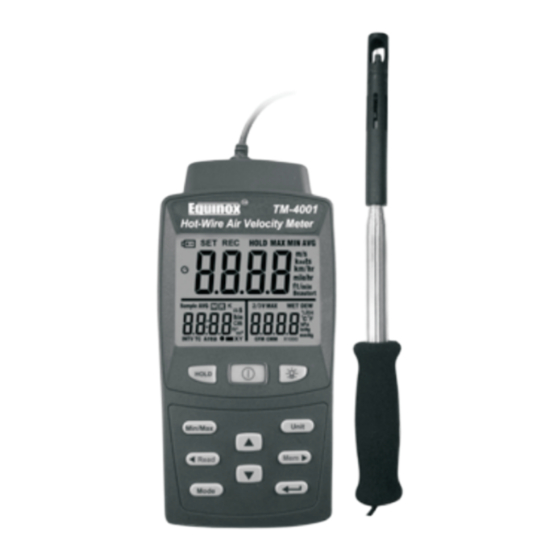
User's Manual
Hot-Wire
Air Velocity Meter
EQ-TM- 4001
Advertisement
Table of Contents

Related Manuals for Equinox Systems EQ-TM- 4001


Summary of Contents for Equinox Systems EQ-TM- 4001
- Page 1 Please use the correct specification of the battery and correctly installed in the battery holder. Air Velocity Meter 25. END OF LIFE EQ-TM- 4001 Caution: This symbol indicates that equipment and its accessories shall be subject to a separate collection and correct disposal.
- Page 2 21. COMPUTER GR ADE z CPU:Pentium Ⅲ 1000MHZ. 1. PREFACE z RAM:SDRAM 256MB. z Hard d isk :200MB. Thank you for purchasing out product. z OS:Windows 2000,Windows XP. Please, read the operating instructions in details before you use this Hot-Wire Velocity z Dispa l y : 800×600 256 color.
- Page 3 3. SPECIFICATIONS (23? ± 5? ) interference (EMI) which may cause erratic readings. Air Velocity Measurement: Pleas e turn off the meter to avoid the sensor burned when you have finished testing the high Accuracy Unit Range Resolution wind speed (more than 20m/s) and remove the 0.01~25.00 0.01 probe.
- Page 4 • Meter Dimension : 156x73x35mm(Lx W x H). 33.0%RH. The duration of calibration time is 10 minutes. • Probe Dimension : After end of the 33.0%RH calibration, you can Wire length : 160cm press button to shut do wn or press Probe length : 128cm button to into 75%RH calibration.
- Page 5 4. INSTRUMENT DESCRIPTION Press button to select the project would you want calibration. ( Select the order of 0.00m/s→10.00m/s→33.00%RH→75.00%RH→ 25.00 ) A. Wind speed calibration (0.00m/s) Press button to select the 0.00m/s and press button to st a rt and the 0.00m/s is blinking.
- Page 6 15. SINGLE DATA RECORD 5. LCD DESCRIPTION Press button to record the current measured result. 16. VIEWING OR CLEARING DATA RECORDS Press button to read the data records and press or wait 15 second to exit. Press button for more than 2 seconds to clear the data records.
- Page 7 Velocity and Absolute Pressure Display. Time constant setting mode operation: WE T: Wet bulb temperature indication. to into time const a nt setting mode. 1. Press 2. In the setting the time constant setting mode DEW : Dew point temperature indication. %RH: humd i ity indication.
- Page 8 INDICATION. 8. BACKLIGHT Press button to turn on the backlight, pres ]: Rectangle duct XY dimension this button again to turn it off. indication. The backlight time is 15 seconds. h : Hour in dication. m : Minute ind ication. 9.
Need help?
Do you have a question about the EQ-TM- 4001 and is the answer not in the manual?
Questions and answers