Table of Contents
Advertisement
Please read this Owner's Manual completely before assembling or operating
Failure to follow these warnings and assembly instructions could result in serious injury or death.
Immediately discard all plastic bags and plastic wrapping materials!
Maximum weight capacity for one child is 9kg, and for two children is 18kg!
Never use this trailer/stroller if it becomes damaged!
To avoid serious injury, children should always wear the seat belt and the shoulder straps!
Never leave children unattended in or around this product!
Never allow children to assemble, fold, or disassemble this unit!
Accessories or parcels placed in trailer/stroller may cause it to become unstable!
Not for use with children under 12 months old! Children must be able to support their own heads!
Before riding, check that all parts are assembled according to the manufacturer instructions!
Tires should be inflated to 35-40 PSI for maximum comfort! Check tire pressure before each use!
Use a foot pump or hand pump to inflate tires! Pressurized air hoses can cause overinflation!
Periodically re-check all fasteners to make sure they are tight!
Clean trailer only with soap and water. Do not use solvents
Take care when folding and unfolding to avoid finger entrapment!
SAFE TOWING TIPS
Make sure your bike brakes work properly! Braking distance is increased when pulling a trailer!
This trailer is wide! Allow extra clearance near curbs, signs, parked cars, and other obstacles!
A bicycle with trailer attached requires a wide turning radius! Do not turn sharply!
Children must wear an approved safety helmet when using this product in trailer mode!
Never remove protective canopy when pulling children in the trailer!
Always use the safety flag when pulling this trailer!
Do not ride over curbs! Avoid bumps and holes! Always signal your turns!
Use extra caution when turning on uneven pavement, and going downhill!
Not for use at high speeds! Do not exceed 15 MPH!
Do not pull this trailer at night!
Install a rearview mirror on your bike to check on children in trailer!
Dress children appropriately to prevent them from getting chilled or overheated while riding
1
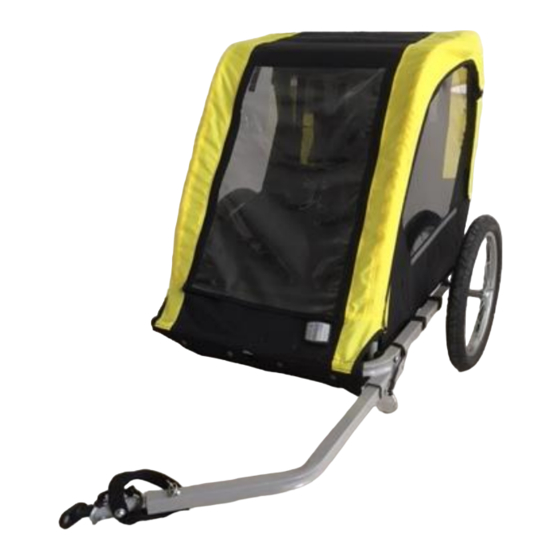
Bike Trailer
Owner's Manual
Please keep this Owner's Manual for future reference.
PRIOR TO ASSEMBLY
This product should be assembled by an adult.
IMPORTANT SAFETY INFORMATION
this product.
WARNING
Advertisement
Table of Contents

Related Manuals for Halfords Bike Trailer


Summary of Contents for Halfords Bike Trailer
- Page 1 Bike Trailer Owner’s Manual Please keep this Owner’s Manual for future reference. PRIOR TO ASSEMBLY Please read this Owner’s Manual completely before assembling or operating this product. This product should be assembled by an adult. IMPORTANT SAFETY INFORMATION WARNING ...
- Page 2 FULLY-ASSEMBLED TRAILER PARTS LIST QTY DESCRIPTION QTY DESCRIPTION 2 16” rear wheels 1 Frame w/ canopy, sling seat with 5-point safety harness, tow bar, tow bar coupler, 1 Safety flag and rear wheel brackets attached. Assembly Tools included Meets EN Norm for Cycle Trailers EN 15918:2011+A2 2017 Certified by Mechanicals and Hardgoods Lab.
- Page 3 Please read all instructions and examine contents carefully before assembly. Key Features Quick Assembly, take down and storage Forward facing seating Five-point seating harness with quick lock and release Full rain cover with roll-up window Quick release wheels with cartridge bearings ...
- Page 4 Pre-Ride Safety Check 1. Check to insure hitch clamp is tight 2. Check to insure hitch safety strap is secure 3. BUCKLE UP! Check seat harness and secure all baggage 4. Inspect bike and trailer condition before each use 5. HELMETS ON! Insure rider and child helmets are on and secure 6.
- Page 5 When fully loaded, the Drawbar load measured at the hitch should be between 3-8kgs. This can be verified by lifting the tow bar of the loaded trailer before attaching the trailer to the bicycle. Make sure parking brakes are engaged when loading trailer.
- Page 6 The safety of your child is of great concern. The trailer seat is intended for passengers older than 12 months and able to wear an approved helmet. Your child must be able to hold their head upright. Check with your pediatrician to make sure your child’s development makes him or her a suitable passenger in the trailer.
- Page 7 ASSEMBLY AND OPERATING INSTRUCTIONS STEP 1 - Remove the trailer from the carton and check the contents against the parts list Fig 1 Fig 1a WARNING Immediately discard all plastic bags and plastic wrapping materials! IMPORTANT! Do not remove the white foam from the wheel axles until STEP 4. STEP 2 - Open Frame Fig 2 Fig 2a...
- Page 8 access the end of the frame tube. Next, slide the back half of the tube into the end of the frame tube (Fig 2,2a). Depress spring pin (Fig 2b),and push tubes together to allow the spring pin to lock in place. (Fig 2c) Note: This process only needed for initial assembly.
- Page 9 Fig 12 WARNING Remove the foam from the wheel axles and discard immediately. Do not remove the washers. 1. Lift the trailer back so the right side is up, and locate the right wheel marked with an “R” sticker. 2. Position the wheel with the stub axle next to the hole in the left wheel bracket (Fig9) 3.
- Page 10 Step 5 – Installing wheel guard/parking brake Your trailer is equipped with a combination wheel guard and parking brake for added safety. The wheel guard helps to deflect the tire from obstructions that might stop the trailer and result in an accident.
- Page 11 Using the Parking Brake To activate the parking brakes, simply move the lever from inside to outside of the trailer base to engage the braking function. The brake shoe will contact the tire to lock the wheel. The WARNING! Always use brakes when loading or unloading trailer, and release brake before riding.
- Page 12 STEP 6 - Attaching the Four Season Cover 1. Position the four-season cover over the trailer where roll-up window is facing towards the front side of the trailer. (Fig.12). 2. Wrap the Velcro backed fixing straps and secure the cover around the frame. 3.
- Page 13 Fig 14 Step 8 - Attaching Trailer Hitch to Bicycle Bolt-on Rear Axle 1. For bolt-on rear wheel, loosen left side rear axle to allow the hitch to attach to frame (Fig 15). 2. Position hitch over left rear axle of bicycle frame, replacing axle nut. Tighten securely, with hitch tab facing rear of bike, roughly parallel to the ground.
- Page 14 Step 9 - Attaching Trailer to Bicycle 1. Position trailer tow arm to align with trailer hitch on bicycle frame. Slide the tow arm flex coupler onto the trailer hitch, aligning the holes in tow arm with the hole in the hitch. 2.
- Page 15 STEP 10 Using the 5-point safety harness Fig 18 WARNING To avoid serious injury children should always wear the seat belt and shoulder straps! 1. Undo the lap belt buckle, unclip the shoulder straps and crotch strap from D-ring, and seat the child 2.
- Page 16 The fabric is not machine washable. Warranty Service: Please return product to store or contact: Halfords Customer Services Department, Halfords Group plc, Washford West, Redditch, Worcestershire, B98 0DE (+44) 0345 504 53 53 customer.services@halfords.co.uk...
Need help?
Do you have a question about the Bike Trailer and is the answer not in the manual?
Questions and answers