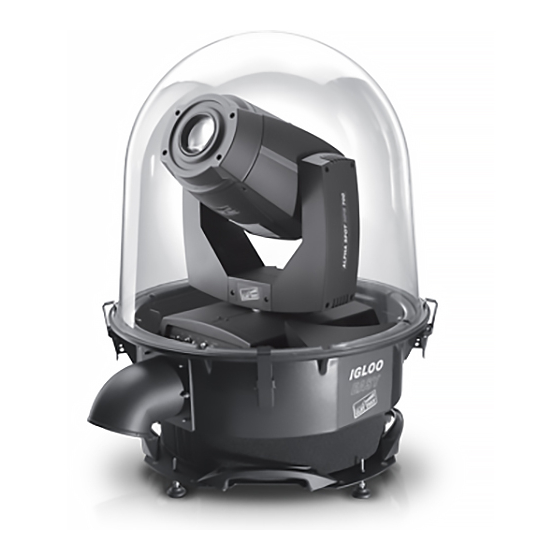
Clay Paky IGLOO Instruction Manual
Hide thumbs
Also See for IGLOO:
- Instruction manual (16 pages) ,
- Instruction manual (16 pages) ,
- Instruction manual (16 pages)
Table of Contents
Advertisement
Quick Links
Congratulations on choosing a Clay Paky product
We thank you for your custom.
Please note that this product, as all the others in the rich Clay Paky range, has been designed and made with total quality to ensure
excellent performance and best meet your expectations and requirements.
Carefully read this instruction manual in its entirety and keep it safe for future reference. It is essential to know the information and
comply with the instructions given in this manual to ensure the fitting is installed, used and serviced correctly and safely.
CLAY PAKY S.p.A. disclaims all liability for damage to the fitting or to other property or persons deriving from installation, use and
maintenance that have not been carried out in conformity with this instruction manual, which must always accompany the fitting.
CLAY PAKY S.p.A. reserves the right to modify the characteristics stated in this instruction manual at any time and without prior
notice.
IGLOO
IGLOO E SY
INSTRUCTION MANUAL
1
1
C61195
C61198
Advertisement
Table of Contents

Summary of Contents for Clay Paky IGLOO
- Page 1 We thank you for your custom. Please note that this product, as all the others in the rich Clay Paky range, has been designed and made with total quality to ensure excellent performance and best meet your expectations and requirements.
-
Page 2: Safety Information
The minimum permissible ambient temperature of use is -20 ° C. When the environment temperature falls below 0 ° C, it is necessary to switch-on projector and lamp located inside the Igloo, at least 30 minutes before use, so as to lead to thermal regime the fixture effects. -
Page 3: Unpacking And Preparation
Mounting brackets for projector placement - Fig. 1 The dedicated brackets replacing the side handles should be mounted before inserting the projector in the IGLOO: C61192 - fast fit bracket for ALPHA 300/700/800 C61191 - fast fit bracket for SHARPY... - Page 4 90° Projector placement - Fig. 2 Once placed in the igloo the projector is fixed to the base by tightening the screws using 1/4 turns secured to the brackets. IGLOO...
- Page 5 The end connections must be made using XLR type 3 or 5-pin male/female connectors. A terminating plug must be inserted into the last fixture into the Igloo with a resistance of 120Ohm minimum 1/4 W) between terminals 2 and 3.
- Page 6 No DMX signal 9 10 Relay OFF Slow flashing DMX signal found Relay OFF STATUS Fast flashing No DMX signal 101-255 39.5-100 IGLOO SWITCHED-ON Relay ON 26-100 10.0-39.0 IGLOO SWITCHED-OFF Mixed flashing DMX signal found NO FUNCTION 0-25 0.0-9.7 Relay ON •...
- Page 7 Installing Igloo - Fig. 7 WARNING: with the exception of when the Igloo is positioned on the floor, the safety cable must be fitted. Cod. 105041/003 available on request). This must be securely fixed to the support structure of the equipment and then connected to the fixing point at the centre of the base.
- Page 8 C61193 - OPTIONAL ACCESSORIES 2 x 183102/802 1 x 272023/001 1 x 033205 1 x 105041/003 Mounting kit C61193 - Fig. 8 IGLOO...
- Page 9 CAUTION: To avoid damage to the internal parts of the fixture, installed inside the IGLOO, when the fixture is not working, is recommended to turn the head down before turning the fixture off, so that the front lens of the fixture is invested as little as possible from the sun.
- Page 10 Lock assembly - Fig. 11 The device latches are fitted with holes for affixing safety locks if desired. IGLOO...
-
Page 11: Maintenance
MAINTENANCE Replacing fuse - Fig. 12 IGLOO... - Page 12 • General visual check of the internal components, cabling, mechanical parts, etc. • Electrical and functional checks; eventual repairs. Cleaning igloo cover Clean the cover using only water and mild soap, then dry with a soft non-abrasive cloth. CAUTION: the use of alcohol or other cleaning products may cause damage to the cover).
-
Page 13: Technical Information
(35.70") Directive 2006/95/CE and Electromagnetic compatibility. Directive 2004/108/CE. Safety Devices • Two 2AT fuses. • The projector placed in the igloo is also equipped with safety devices see dedicated manual) Cooling Forced ventilation with fans. (35.63") Anti-condensation system Pair of RTDs Body •... - Page 16 CLAY PAKY - Via Pastrengo, 3/b - 24068 Seriate BG) Italy - Tel. +39-035-654311 - Fax +39-035-301876 - www.claypaky.it S.p.A.


Need help?
Do you have a question about the IGLOO and is the answer not in the manual?
Questions and answers