
Related Manuals for AC Pro AWH18QD-D3DNB8K/I


Summary of Contents for AC Pro AWH18QD-D3DNB8K/I
- Page 1 AC Pro A-Series 18-24K Manual Models AWH18QD-D3DNB8K/I AWH18QD-D3DNA5K/O AWH24QE-D3DNB8K/I AWH24QE-D3DNA5K/O (Refrigerant R410A)
- Page 2 We reserve the right to correct any clerical errors. Copyright 2018 AC pro.
-
Page 3: Notes For Installation And Maintenance
PART I : INSTALLATION & MAINTENANCE . NOTES FOR INSTALLATION AND MAINTENANCE SAFETY PRECAUTIONS: 10. If the power cord or power connection wire is not long enough, replace with specialized cable from IMPORTANT! manufacturer before proceeding with installation or repair. DO NOT elongate these wires. Please read the safety precautions carefully before installation or prior to performing any maintenance. - Page 4 IF SAFETY PRECAUTIONS 6. DO NOT install the unit in an area exposed to (or potentially exposed to) corrosive or flammable gas FOR INSTALLING AND leaks. RELOCATING THE UNIT: Leaking gas near the unit may cause fire or explosion leading to property damage, severe injury or death.
-
Page 5: Main Tools For Installation And Maintenance
MAIN TOOLS FOR INSTALLATION AND MAINTENANCE 1. Level meter, measuring 2. Screwdrivers 3. Impact drill, drill head, electric drill tape tape 4. Electroprobe 5. Universal meter 6. Torque wrench, open-end wrench, inner hexagon spanner 7. Electronic leakage detector 8. Vacuum pump 9. - Page 6 . INSTALLATION .1 INSTALLATION DIMENSION DIAGRAM Space to the wall Space to the wall At least 6 At least 6 Drainage pipe Technical Information...
- Page 7 Start installation Preparation before installation Read the requirements for Select installation location Prepare tools electric connection Select indoor unit Select outdoor unit installation location installation location Install the support of Install wall-mounting frame, outdoor unit drill wall holes (select it according to the actual situation) Connect pipes of indoor unit and drainage pipe...
-
Page 8: Installation Parts-Checking
.2 INSTALLATION PARTS CHECKING .4 REQUIREMENTS FOR ELECTRIC CONNECTION Name Name 1. Safety Precaution Indoor Unit Sealing Gum • Follow ALL electric safety requirements during Outdoor Unit Wrapping Tape installation. Connection Pipe Support of Outdoor • Use qualified power supply circuit and air switch – Unit according to local safety regulations. - Page 9 • Choose position of piping hole according to the direction of 4. Indoor Unit Pipe Connect the outlet pipe. The position of the piping hole should be • Aim pipe to the corresponding bellmouth (Shown in Figure just slightly lower than the wall-mounted frame. (Shown in #5 below).
- Page 10 6. Indoor Unit Wire Connection 7. Bind Up Pipe • Open panel. Remove screw on wiring panel and detach • Bind the connection pipe, power cord and drain hose with cover (Shown in Figure #11 below). band. Shown in Figure #14 below). •...
-
Page 11: Installation Of Outdoor Unit
Refer to the following table for wrench moment of force: .6 INSTALLATION OF OUTDOOR UNIT Hex nut diameter(inch) Tightening Torque (ft:lb) 1. Support of Outdoor Unit • Select according to actual installation situation. Select 11.10~14.75 installation location according to the structure. 22.12~29.50 •... -
Page 12: Vacuum Pumping And Leak Detection
c. The water outlet cant be placed in water in order to drain .8 CHECK AFTER INSTALLATION smoothly.(As show in Fig.27) AND TEST OPERATION 1. Check after Installation Use chart below No. Check Following Possible Malfunction The drain hose can't be fluctuant Was unit installed firmly/ Unit may shake or emit securely? -
Page 13: Wired Controller
(NOT INCLUDED) .9 WIRED CONTROLLER Equipped with wired controller, please refer to the following introductions. 1. Displaying Part 1.1 LCD Display of Wired Controller Symbols Description Swing function Air exchange function Sleep function (Only sleep 1) Each kind of running mode of indoor unit (auto mode) Cooling mode Dry mode Fan Mode... - Page 14 Symbols Description Lock function SHEILD Shield functions (Button operation, temperature setting, On/Off operation,Mode setting are disabled by the remote monitoring system.) TURBO Turbo function state MEMORY Memory function (The indoor unit resumes the original setting after power failure and power recovery) It blinks while on SAVE Energy-saving function...
- Page 15 3 Operation Instructions 3.1 On/Off Press On/Off to turn unit on or off. Note: The state shown in Fig.3.1.1 indicates “Off”. The state shown in Fig.3.1.2 indicates “On”. 3.2 Mode Setting While ON, press Mode to switch the operation modes in the following sequence: Auto–Cooling–Dry–Fan–Heating. 3.3 Temperature Setting Press to increase/decrease the preset temperature.
- Page 16 Timer off setting: If Timer button is pressed, while on, LCD will display xx. Press button to adjust timer on and press Timer to confirm. Cancel timer: After timer is set, press timer button to display LCD and confirm, Fig.3.5.1 Timer OFF Setting Turn on the unit,without Press Timer repeatedly Press...
- Page 17 Timer range: 0.5-24hr. Press to increase/decrease set time by 0.5hr. If either of them is pressed continuously, the set time will increase/ decrease by 0.5hr every 0.5 seconds. 3.6 Swing Setting Press the SWING button to adjust the fan blowing angle as seen below. •...
- Page 18 Turn off the unit,without Press Function repeatedly Press Enter/Cancel Sleep function activated to get to the Sleep to activated the Sleep setting status function Press Enter/Cancel to Press Function repeatedly cancel this setting to get to the Sleep 3.8 TURBO Setting function again Under COOL or HEAT mode, pressing the function button will speed up cooling or heating.
- Page 19 3.9 E-heater Setting E-heater (also known as auxiliary electric heating function). • This setting improves the efficiency of the heater function. • Press the Function button in heating mode to enter E-heater setting interface. • Pressing ENTER/CANCEL to cancel out of this function. Turn off the unit, without Press Function repeatedly until Press Enter/Cancel to activated...
- Page 20 Notes: If the unit is turned off while the blow function is activated, the indoor fan will run at low speed for 2 minutes with the word “BLOW” displayed on the LCD. Blow function is not available in FAN or HEAT mode. 3.11 Other Functions a.
- Page 21 Fig.4.2 shows the installation steps of the wired controller, but there are some issues that need your attention. • Prior to installation, make sure there is no power going to the unit. • Pull out the four-core twisted pair line from within the installation hole. Push through the rectangular hole behind the soleplate of the wired controller.
- Page 22 5.0 Errors Display If an error occurs during the operation of the system, the error code will be displayed on the LCD screen. If multiple errors present at the same time, their codes will be displayed circularly. Fig.5.1. If multi errors occur at the same time, their codes will be displayed circularly. Note: In the event of any error, turn unit off and consult professional installer/service technician.
- Page 23 . MAINTENANCE .1 PRECAUTIONS BEFORE MAINTENANCE 1. Make sure to leave 20 minutes AFTER power has been shutdown to work on the outdoor unit. High- capacity electrolytic capacitors on the mainboard MUST reduce voltage to safely perform maintenance. Touching the electrolytic capacitors under 20 minutes after power cut-off WILL cause severe electric shock. If maintenance is needed, follow the steps below to safely discharge built-up electricity after power-off.
- Page 24 Indoor unit display method Outdoor uniot display (LED have 3 status) Indicator display (LED blinks Blinks 0.5s-ON/0.5s-OFF) Name of Double AC Status Malfunctions malfunction 8 code Only for the mode with this function display Running Cooling Heating D40/ D41/ D42/ D43/ System high 3s off...
- Page 25 Indoor unit display method Outdoor uniot display (LED have 3 status) Indicator display (LED blinks Blinks 0.5s-ON/0.5s-OFF) Name of Double AC Status Malfunctions malfunction 8 code Only for the mode with this function display Running Cooling Heating D40/ D41/ D42/ D43/ Cooling, dehumidifying;...
- Page 26 Indoor unit display method Outdoor uniot display (LED have 3 status) Indicator display (LED blinks Blinks 0.5s-ON/0.5s-OFF) Name of Double AC Status Malfunctions malfunction 8 code Only for the mode with this function display Running Cooling Heating D40/ D41/ D42/ D43/ Cooling, dehumidifying;...
-
Page 27: Troubleshooting For Main Malfunction
.3 TROUBLESHOOTING FOR MAIN MALFUNCTION Indoor Unit 1. Malfunction of Temperature Sensor F1, F2 Main detection points: • Is the wiring terminal between the temperature sensor and the controller loosened or poorly contacted? • Is there a short circuit due to trip-over of the parts? •... - Page 28 2. Malfunction of Blocked Protection of IDU Fan Motor H6 Main detection points: • Is the control terminal of PG motor connected tightly? • Is the feedback interface of PG motor connected tightly? • Is the fan motor inoperable? • Is the motor is broken? •...
- Page 29 3. Malfunction of Protection of Jumper Cap C5 Main detection points: • Is there a jumper cap on the mainboard? • Is the jumper cap inserted correctly and tightly? • Is the jumper broken? • Is the motor broken? • Detection circuit of the mainboard defined abnormal? Malfunction diagnosis process: Appearance of the Start...
- Page 30 4. Communication malfunction E6 Start Cut off power supply. Check if connection line of IDU and ODU and the wire inside electric box are correctly connected. Connect the line Correct connection? according to wiring Malfunction eliminated? diagram. Main board matches Match correctly with display board? Main according to the...
- Page 31 5. Malfunction of detecting plate (WIFI) JF Start Check if the connection wire is correctly connected Replace the detecting plate with the same model Malfunction eliminated? Replace the detecting plate with the same model Technical Information...
- Page 32 Test Point Test Point Related Elements Test Value Under Normal Condition Number Test 1 Between A and C Neutral wire, live wire 160V-265V Test 2 Between B and C Neutral wire, live wire 160V-265V Test 3 Between D and E Electrolytic capacitor of DC bas bar DC 180V-380V Test 4...
- Page 33 1. Capacity charging malfunction (outdoor unit malfunction) (AP1 below is control board of outdoor unit) Main detection point: • Detect if the voltage of L and N terminal of wiring board is between 210AC-240AC by alternating voltage meter; • Is reactor (L) well connected? Is connection wire loosened or pulled out? Is reactor (L) damaged? Malfunction diagnosis process: Turn on unit and wait 1 minute Use DC voltmeter to measure the voltage...
- Page 34 2. IPM protection, desynchronizing malfunction, phase current of compressor is overcurrent (AP1 below control board of outdoor unit) Main detection points: • Is control board AP1 and compressor COMP well connected? Are tehy loose? Is connection sequence correct? • Is voltage input in the normal range (Test the voltage between L, N of wiring board XT by DC voltage meter)? •...
- Page 35 Energize and switch on If the voltage IPM protection occurs after Use AC voltmeter to measure Check the supply between terminal L and N the machine has run for a the voltage between terminal L voltage and restore it to on wiring board XT is within period of time? and N on the wiring board XT)
- Page 36 3. Diagnosis for anti-high temperature, overload protection (AP1 below is control board of outdoor unit) Mainly detect: • Is outdoor ambient temperature in normal range? • Is the outdoor and indoor fan operating normally? • Is the radiating environment of indoor and outdoor unit functioning. Malfunction diagnosis process: Anti-high temperature overload protection...
- Page 37 4. Diagnosis for failure start up malfunction (AP1 below is control board of outdoor unit) Main detection point: • Is the compressor wiring correct? • Is the stop time of compressor enough? • Is the compressor damaged? • Is the refrigerant charging too much? Malfunction diagnosis process: Power on the unit If the stop time is not enough...
- Page 38 5. Diagnosis for compressor synchronism (AP1 below is control board of outdoor unit) Main detection point: • Is the system pressure over-high? • Is the work voltage over-low? Malfunction diagnosis process: Synchronism occurred Synchronize, then start during operation Check if the fan Replace Is stop time of the Does the outdoor fan...
- Page 39 6. Diagnosis for overload and discharge malfunction (AP1 below is control board of outdoor unit) Main detection point: • Is the electron expansion valve connected securely? Is the expansion valve damaged? • Is the refrigerant leaking? • Is the overload protector damaged? Malfunction diagnosis process: 20 minutes after the Connect wire securely with...
- Page 40 7. Communication malfunction (AP1 below is control board of outdoor unit) Main detection point: • Check if the connection wire and the built-in wiring of indoor and outdoor unit is connected well and no damaged; • Is the communication circuit of indoor mainboard damaged? Is the communication circuit of outdoor mainboard (AP1) damaged Malfunction diagnosis process: Start...
- Page 41 8. Diagnosis process for outdoor communication circuit Start Test voltage value with test 10 position in diagram with voltage meter Number jumping Test voltage value with test 13 position in diagram with voltage meter Number jumping Test voltage value with test Outdoor unit 11 position in diagram with malfunction...
-
Page 42: Troubleshooting For Normal Malfunction
.4 TROUBLESHOOTING FOR NORMAL MALFUNCTION 1. Air Conditioner Cant be Started Up Discriminating Method Possible Causes Troubleshooting (Air conditioner Status) Confirm whether its due to power failure. If yes, wait for No power supply, or poor connection for After energization, operation indicator isnt power recovery. - Page 43 4. ODU fan motor cant operate Discriminating Method Possible Causes Troubleshooting (Air conditioner Status) Check the wiring status according to circuit Connect wires according to wiring diagram to make sure all Wrong wire connection, or poor connection diagram wiring terminals are connected firmly Measure the capacity of fan capacitor with an universal meter and find that the capacity Capacity of the ODU fan motor is damaged...
-
Page 44: Exploded View And Parts List
EXPLODED VIEW AND PARTS LIST .1 Indoor Unit The component picture is only for reference please refer to the actual product. Technical Information... - Page 45 Part Code Description AWH18QD-D3DNB8K/I Product Code CB438N07800 Front Panel 20000300075T Filter Sub-Assy 11122089 Decoration board(left and right) 20192662 Front Case 2002248401 Guide Louver 1051276501 Axile Bush 10542036 Air Louver(Manual) 10512732 Helicoid Tongue 26112512 Left Axile Bush 10512037 Display Board 30565260...
- Page 46 The component picture is only for reference please refer to the actual product. Technical Information...
- Page 47 Part Code Description AWH24QE-D3DNB8K/I Product Code CB438N07900 Front Panel 20000300076T Filter Sub-Assy 11012007 Screw Cover 2425245301 Front Case 2002248603 Air Louver(Manual) 10512737 Helicoid Tongue 26112513 Left Axile Bush 10512037 Display Board 30565260 Rear Case assy 22202570 Rubber Plug (Water Tray) 76712012 Ring of Bearing 26152025...
-
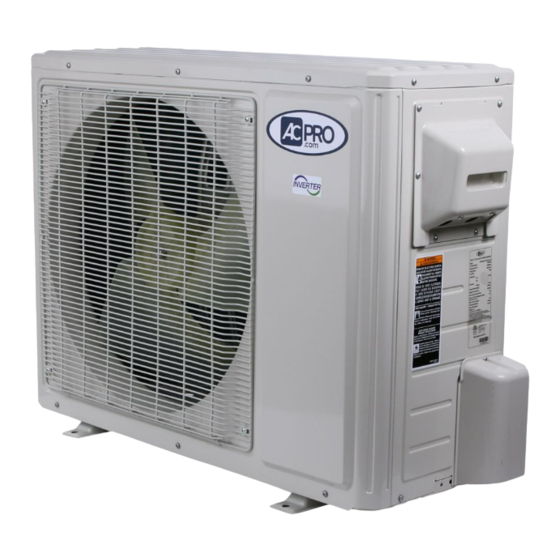
Page 48: Outdoor Unit
.2 OUTDOOR UNIT AWH18QD-D3DNA5KO The component picture is only for reference please refer to the actual product. Technical Information... - Page 49 Part Code Description AWH18QD-D3DNA5K/O AWH24QE-D3DNA5K/O Product Code CB425W07400 CB425W07700 Front Grill 01473049 01473049 Cabinet 01433047P 01433047P Axial Flow Fan 10335008 10335008 Fan Motor 1501506402 1501506402 Chassis Sub-assy 01700000093P 01700000161P Drainage Hole Cap 06813401 06813401 Clapboard Assy 01233153 01235081 4-way Valve Assy 030152000291 030152000073 Compressor and Fittings...
-
Page 50: Removal Procedure
Warning: Be sure to wait a minimum of 20 minutes . REMOVAL PROCEDURE after turning off all power supplies and discharge the refrigerant completely before removal. .1 Removal Procedure of Indoor Unit NOTE: Take A1 panel for an example. Step Procedure 1. - Page 51 Step Procedure Electric box cover 2 4. Remove electric box cover 2 and detecting plate(WIFI) Screw Remove the screws on electric box Screws cover 2 and detecting plate(WIFI), then remove electric box cover 2 and detecting plate(WIFI). Detecting plate (WIFI) 5.
- Page 52 Step Procedure 7. Remove electric box assy a. Loosen the connection clasps between shield cover of electric box sub-assy and electric box, and then remove the shield cover of electric box sub-assy. Take off the water retaining sheet. Indoor tube i.
- Page 53 Step Procedure 8. Remove evaporator assy a. Remove 3 screws fixing evaporator assy. b. At the back of the unit, remove the screw fixing connection pipe clamp and remove the connection pipe clamp. G roove R ear case ass y c.
- Page 54 Step Procedure 9. Remove motor and cross flow blade a. Remove the screws fixing motor clamp, then remove the motor clamp. b. Remove screws at the connection place of cross flow blade and motor; lift motor and cross flow blade upwards to remove them. Remove the bearing holder sub-assy.
-
Page 55: Removal Procedure Of Outdoor Unit
.2 REMOVAL PROCEDU RE OF OUTDOOR UNIT NOTE: Take AWH24QE-D3DNA6E/O for example. Warning: Be sure to wait for a minimum of 20 minutes after turning off all power supplies and discharge the refrigerant completely before removal. Step Procedure 1. Remove big handle,valve cover and top cover big handle Remove screw connecting the big handle... - Page 56 Step Procedure Remove screws connecting the outer case with motor support, isolation plate and chassis; lift outer case upwards; loosen clasps of outer case with right side plate, left side plate, and then remove outer case. outer case 3. Remove right & left side plate Remove screws connecting the right side plate with electric box assy, valve support, chassis and condenser side plate, then...
- Page 57 Step Procedure 4. Remove axial flow blade axial flow fan Remove the nut fixing axial flow blade, then remove blade. motor support Remove the 6 screws fixing the motor, then remove motor. Remove the 2 screws connecting the motor support and chassis, then loosen stopper to remove the motor support.
- Page 58 Step Procedure 6. Remove the soundproof sponge Tear off sticking stripe, then remove the soundproof sponge. soundproof sponge 7. Remove isolation plate Remove the 2 screws connecting the isolation plate and condenser side plate; remove the 3 screws connecting isolation plate and chassis, then remove isolation plate.
- Page 59 Step Procedure 9. Remove compressor Remove the 3 foot nuts fixing compressor, compressor lift compressor upwards to remove compressor and damping cushion. Note: Keep the ports of discharge pipe and suction pipe from foreign objects. 10. Remove condenser sub-assy support Remove the screws connecting the support (condenser) and condenser assy, then remove support(condenser).
-
Page 60: Refrigerant System Diagram
REFRIGERANT SYSTEM DIAGRAM AWH18QD-D3DNA5K AWH24QE-D3DNA5K Outdoor unit Indoor unit Connection pipe specification: Gas pipe Liquid pipe:1/4” side Gas pipe:1/2” for 18K Valve Gas pipe:5/8” for 24K 4-Way valve Di s charge Heat Accumlator Suction exchanger Compressor (evaporator) Heat exchanger Liquid pipe (condenser) side Valve... -
Page 61: Electrical Part
Jumper Cap Yellow Brown COMP Compressor Blue Grounding wire YEGN Yellow/Green Black Violet Orange Note: Jumper cap is used to determine fan speed and the swing angle of horizontal louver for this model. Indoor Unit AWH18QD-D3DNB8K/I AWH24QE-D3DNB8K/I 60000700023002 Technical Information... -
Page 62: Pcb Printed Diagram
PCB PRINTED DIAGRAM AWH18QD-D3DNA5K/O 600007000230 AWH24QE-D3DNA5K/O 60000700078601 The above data is subject to change without notice. Please refer to the nameplate of the unit. Technical Information... - Page 63 AWH18QD-D3DNA5K/O AWH24QE-D3DNA5K/O Name Compressor three phase input interface Terminal of system high pressure protection Compressor overload protection terminal Interface of temperature sensor Terminal of electronic expansion valve Terminal for low pressure protection Interface of fan 4-way valve terminal 2-way valve terminal Terminal of compressor electric heater Terminal of chassis...
Need help?
Do you have a question about the AWH18QD-D3DNB8K/I and is the answer not in the manual?
Questions and answers