Advertisement
Quick Links
ENGLISH
SETUP
cHarGING
The rechargable lithium-ion battery should be charged before operating
the borescope for the fi rst time. The battery can be charged via a standard
120V wall outlet or through a computer USB port. An exhausted battery
will take up to 5 hours to charge. It can be left charging overnight without
needing to be removed from power. The expected lifetime of the included
battery is 500 charging cycles.
WALL OUTLET: Locate the power wall
adapter (f) and the USB cable (g). Remove
the soft input cover and plug the cable
into the borescope's USB port (7). Plug
the other end of the cable into the power
adapter, and plug the wall adapter into a
standard 120V outlet.
COMPUTER: Locate the USB cable (g).
Remove the soft input cover and plug
the cable into the borescope's USB port
(7). Plug the rectangular end into your
computer's USB port.
aTTacHING THE GOOSENEck caMEra
Locate the gooseneck camera (10). Plug it into the camera input socket
of the borescope. Rotate the
adjustment piece clockwise to lock
it into place. The white arrow on the
camera head should be pointing up.
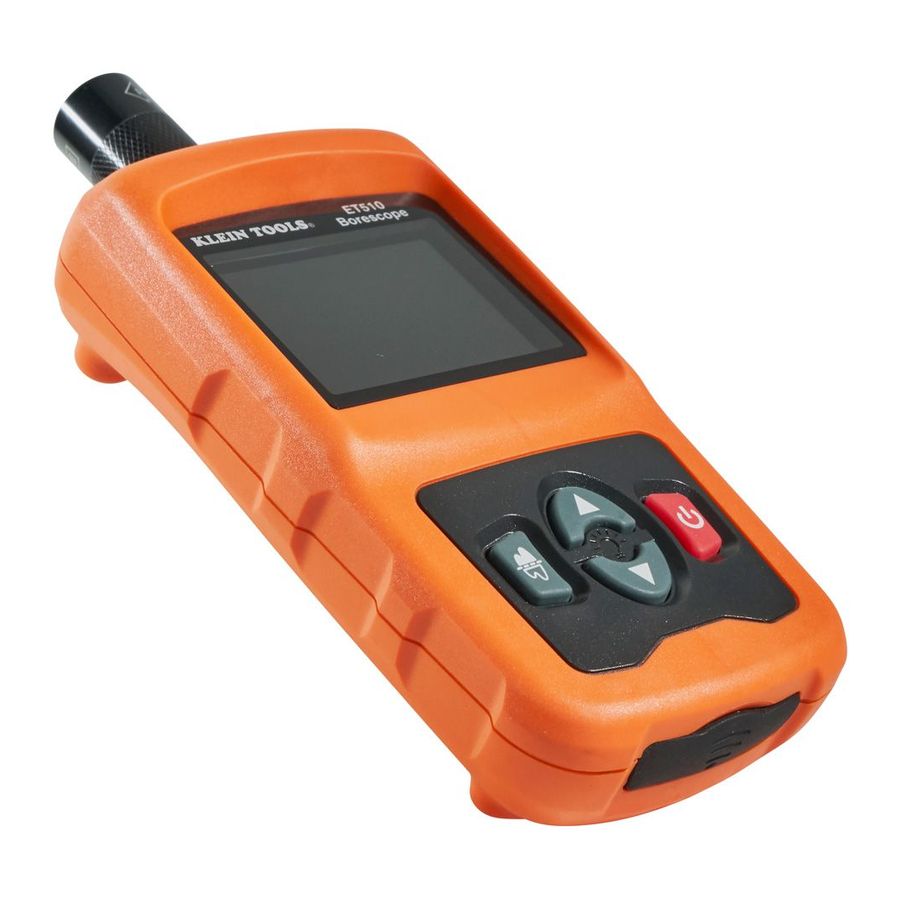
POWErING ON/Off
To power the unit on and off, press and release the power button (2). The
borescope will be operational in a few moments.
LIVE VIDEO MODE
On startup, the borescope will enter the live output mode. The screen will
show the live output of the gooseneck camera along with the estimated
battery life remaining and the auto power off symbol if it is active.
LED BrIGHTNESS
The borescope gooseneck camera head has several LEDs used to light
your work area. You can control the brightness using the up and down
arrow buttons (3 & 4). The LED brightness ranges from off (LED:0) to full
(LED:100). The default setting is 25.
MIrrOrING caMEra OUTPUT
Press the mirror button (5) to mirror the camera output vertically over
the x-axis. This feature is useful when reading text or using the mirror
attachment with the borescope.
aUTO POWEr Off
The borescope can power itself off after 5 or 10 minutes of non-use, or
this feature can be disabled. Press and hold the "mirror" button
for three
seconds until "APO" appears on the screen. Press repeatedly to toggle
between off, 5 min, and 10 min. The "APO" prompt will disappear after 5
seconds. A clock icon will appear in the top left corner of the screen when
auto power off is active.
ET510-139730ART-English.indd 1-4
WarraNTy
This product is warranted to be free from defects in materials and
workmanship for a period of two years from the date of purchase. During
this warranty period, Klein Tools has the option to repair, replace or refund
the purchase price of any unit which fails to conform to this warranty under
normal use and service. This warranty does not cover damage which occurs
in shipment or failure which results from alteration, tampering, accident,
misuse, abuse, neglect, or improper maintenance. Batteries and damage
resulting from failed batteries are not covered by warranty. A purchase receipt
or other proof of original purchase date will be required before warranty
repairs will be rendered.
Any implied warranties, including but not limited to implied warranties of
merchantability and fi tness for a particular purpose, are limited to the express
warranty. Klein Tools shall not be liable for loss of use of the instrument or
other incidental or consequential damages, expenses, or economic loss, or for
any claim or claims for such damage, expenses or economic loss.
Some states or countries laws vary, so the above limitations or exclusions
may not apply to you. This warranty gives you specifi c legal rights, and
you may also have other rights which vary from state to state.
cLEaNING
Turn instrument off and disconnect gooseneck camera. Clean the instrument and
camera by using a damp cloth. Do not use abrasive cleaners or solvents.
STOraGE
Do not expose to high temperatures or humidity. After a period of storage in
extreme conditions exceeding the limits mentioned in the Specifi cations section,
allow the instrument to return to normal operating conditions before using it.
DISPOSaL / rEcycLE
caution:
This symbol indicates that equipment and its accessories
shall be subject to a separate collection and correct disposal.
Instruction
Manual
ET510
ENGLISH
• 2.4" cOLOr LcD
• BrIGHT LED WOrkLIGHT
• IP67 GOOSENEck caMEra
• ScrEEN MIrrOr
• aUTO POWEr Off
Advertisement

Related Manuals for Klein Tools ET510


Summary of Contents for Klein Tools ET510
- Page 1 fi tness for a particular purpose, are limited to the express adapter, and plug the wall adapter into a warranty. Klein Tools shall not be liable for loss of use of the instrument or • IP67 GOOSENEck caMEra standard 120V outlet.
- Page 2 LEDs up to 100. Press and hold to change quickly. Hook camera attachment The Klein Tools ET510 Borescope is an extendable video camera used Worklight Down Button: Decreases the brightness of the camera- to view inaccessible areas. It features a durable camera snake with an Magnet camera attachment mounted LEDs down to 0 (off).
Need help?
Do you have a question about the ET510 and is the answer not in the manual?
Questions and answers