Table of Contents
Advertisement
Quick Links
Owner's Manual
Practice
°
Songs
˙
Sound a metronome
You can sound a metronome.
˙
Practice along with the built-in songs
This piano contains numerous built-in songs.
For the song titles, refer to "Internal Song List" at the end of this manual.
˙
Recording the Song You're Practicing
You can record your own playing.
° Simply opening or closing the fallboard turns the power on/off
1.
When you open the fallboard, the power turns on
automatically.
When you close the fallboard, the power turns off automatically.
Provision of Bluetooth functionality
Please be aware that depending on the country in which you purchased the piano, Bluetooth functionality might not be included.
If Bluetooth functionality is included
The Bluetooth logo appears
when you turn on the power.
Before using this unit, carefully read "USING THE UNIT SAFELY" and "IMPORTANT NOTES" (leaflet "USING THE UNIT SAFELY" and Owner's Manual (p. 30)). After reading, keep the
document(s) including those sections where it will be available for immediate reference.
Copyright © 2017 ROLAND CORPORATION
Play
°
the Piano
˙
Play various sounds
This piano contains a wide variety of tones (sounds). You can freely select and perform using these tones.
For a list of the tones, refer to "Tone List" at the end of this manual.
˙
Play two layered tones (Dual Play)
You can layer two tones on a single key.
˙
Play different tones with your left and right hands (Split Play)
You can divide the keyboard into left and right zones, and select a different tone for each zone.
˙
Save your performance settings (Registration)
You can save tone settings and settings for Dual Play or Split Play, and recall them easily.
Adjust
°
Your Piano
˙
Adjust the keyboard touch
You can adjust the touch sensitivity of the keyboard to match your own playing style.
˙
Match the pitch to other instruments
When playing together with other instruments, you can match this piano's reference pitch to that of the other
instruments (Master Tuning).
˙
Create your own piano (Piano Designer)
You can customize the sound to your own taste by adjusting the sonic elements of the grand piano sound.
10
page
11
page
12
page
2.
Use the [Volume] buttons to adjust the volume.
8
page
9
page
9
page
16
page
8
page
24
page
15
page
5
page
Advertisement
Table of Contents

Related Manuals for Roland GP609


Summary of Contents for Roland GP609
-
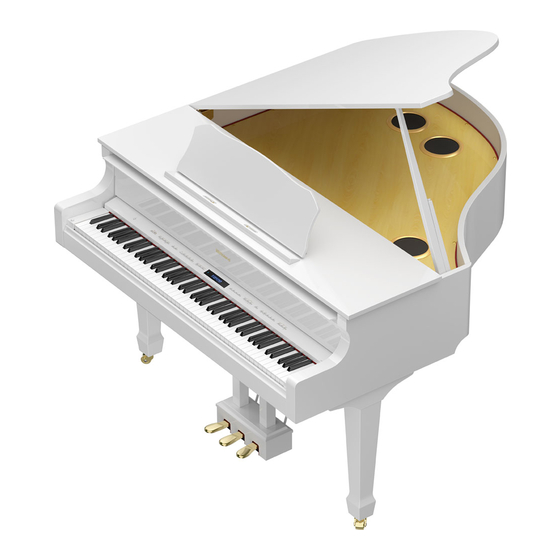
Page 1: The Piano
Before using this unit, carefully read “USING THE UNIT SAFELY” and “IMPORTANT NOTES” (leaflet “USING THE UNIT SAFELY” and Owner’s Manual (p. 30)). After reading, keep the document(s) including those sections where it will be available for immediate reference. Copyright © 2017 ROLAND CORPORATION... -
Page 2: Easy Quick Guide
For more about the tones, refer to “Tone List” at the end of this manual. Listening Piano songs recommended for listening Piano Masterpieces Songs corresponding to the included Masterpieces page collection of scores, “Roland Classical Piano Masterpieces. ” Famous popular songs and classical compositions Using the Metronome Easy Piano Songs corresponding to the included You can perform while hearing a metronome. -
Page 3: Table Of Contents
1,445 (W) x 1,501 (D) x 1,569 (H) mm * This document explains the specifications of the product at the time that the 56-15/16 (W) x 59-1/8 (D) x 61-13/16 (H) inches document was issued. For the latest information, refer to the Roland website. Dimensions Top closed:... -
Page 4: Using The Music Rest
° Before You Play Using the Music Rest Opening/Closing the Lid Raising the music rest Opening the lid * The lid must be opened or closed by an adult. Gently raise the music rest. * When opening the lid, take care not to pinch your fingers * When raising the music rest, take care not to pinch your fingers between the moving part and the body of the unit. -
Page 5: Turning The Power On/Off (Opening/Closing The Fallboard)
Contents Move the tip of the lid stick to lock it. Turning the Power On/Off (Opening/Closing the Fallboard) * Before turning the unit on/off, always be sure to turn the volume down. Even with the volume turned down, you might hear some sound when switching the unit on/off. -
Page 6: Panel Descriptions
° Panel Descriptions [L] Button The power turns on/off when you open/close the fallboard. If you want to turn the power on/off with the fallboard left open, press the [L] button. To turn the power off, long-press the [L] button. * Never disconnect the power cord while the screen indicates “Don’t disconnect the power. -
Page 7: Connecting Your Equipment
* Use a commercially available USB flash drive or a USB flash drive * You can also turn the Headphones 3D Ambience effect off (p. 8). sold by Roland. However, we cannot guarantee that all commercially * You can use the [Ambience] button to adjust the Headphones 3D available USB flash drives will work with this unit. -
Page 8: Operation Guide
Basic operations ° Operation Guide Select a setting item Use the [K] [J] buttons. Edit the value of an item Use the [–] [+] buttons. Restore the default value Press the [–] [+] buttons simultaneously. Selecting a Tone In addition to piano sounds, this piano lets you enjoy performing with To end the tone demo, press the [u] (Exit) button. -
Page 9: Dividing The Keyboard For Two People (Twin Piano)
Operation Guide Dividing the Keyboard for Two People (Twin Piano) Creating Your Own Piano Tone (Piano Designer) You can divide the keyboard into left and right areas so that two You can create your own piano tone by customizing the elements of people can play the same range of pitches. -
Page 10: Display
Operation Guide Selecting an Item/Editing a Value Display This shows information such as the tone name, song name, tempo, Select a setting item Use the [K] [J] buttons. and time signature. The “K” “J, ” and “-, ” “+” indications shown in the Edit the value of an item Use the [–] [+] buttons. -
Page 11: Selecting A Song
Internal Memory Songs saved in internal memory Listening Piano songs recommended for listening Piano Masterpieces Songs corresponding to the included Masterpieces collection of scores, “Roland Classical Piano Masterpieces. ” Famous popular songs and classical Time signature Song name Tempo Measure... -
Page 12: Advanced Operation
° Advanced Operation ˙ Recording Your Performance You can play back a recorded performance to check your playing, or Press the [s] button. play along with a recorded performance. Recording stops, and your performance is automatically saved. MEMO Recording 5 You can delete the song that you recorded (p. 13). 5 You can rename the song that you recorded (p. -
Page 13: Recording Audio To Usb Flash Drive
Advanced Operation Listening to the recorded performance Recording Audio to USB Flash Drive Audio recording After you record, the newly recorded song is selected. If you want to record your piano performance and listen to it on your Press the [s] button. computer or audio player, or to create a CD, you can record it as audio Playback starts from the beginning of your recorded performance. -
Page 14: Copying A Saved Song (Copy Song)
Advanced Operation Use the cursor [J] (right) button to select “Yes,” and then Renaming a Song (Rename Song) press the [s] (Enter) button. Here’s how to rename a previously-saved song. The deletion is executed. NOTE Press the [Ambience] button and [Brilliance] button Never turn off the power or disconnect the USB flash drive while simultaneously. -
Page 15: Personalizing Your Piano Sound (Piano Designer)
Advanced Operation ˙ Personalizing Your Piano Sound (Piano Designer) Items Value Explanation Adjusts the sound produced when the hammer of an What is Piano Designer? String acoustic piano strikes the string. Hammer Noise Hammer Noise -2–0–2 Resonance This piano allows you to Higher settings will produce a louder sound of the personalize your piano sound by hammer striking the string. -
Page 16: Saving Your Performance Settings (Registration)
Advanced Operation ˙ Saving Your Performance Settings (Registration) Tone settings and settings such as Dual Play or Split Play can be saved Recalling a Registration and recalled easily. Such settings are called a “registration. ” Press the [Registration] button. You can save a total of 25 registrations, five each in buttons [1]–[5]. Press a number button ([1] to [5]) to choose the location These 25 registrations are collectively called a “registration set. -
Page 17: Saving A Registration Set (Registration Export)
Advanced Operation Saving a Registration Set (Registration Export) Loading a Saved Registration Set (Registration Import) You can save all registrations held in registration memory into a registration set on a USB flash drive. Here’s how a registration set that’s saved on a USB flash drive can be loaded into the [Registration] button. -
Page 18: Loading/Saving Piano Setups
Advanced Operation ˙ Loading/Saving Piano Setups The piano settings that you make can be used on another GP609 unit Loading Piano Settings (Piano Setup Import) if you save your settings on a USB flash drive and then load them into the other GP609. -
Page 19: Convenient Functions
Advanced Operation ˙ Convenient Functions Initializing the Memory (Format Media) Restoring the Factory Settings (Factory Reset) Here’s how to erase all of the files that you saved in internal memory or Here’s how to restore all registrations and internally saved settings to on a USB flash drive (sold separately). -
Page 20: Using The Bluetooth® Functionality
You can use apps to expand your piano enjoyment. You can install apps (such as Roland’s “Piano Partner 2” or “Piano Designer”) on your mobile device, and use them in conjunction with the piano. 0 “Using Apps with the Piano” (p. 22) App “Piano Partner 2”... -
Page 21: Listening To Music Through The Piano's Speakers
When you make this setting, an ID number is added to the end of the device name shown on the mobile device (e.g., GP609 Audio1). When pairing is successful, “GP609 Audio” is added to the list of “My Press the [Ambience] button and [Brilliance] button Devices”... -
Page 22: Using The Piano With An App
If the GP609 is already paired in the Bluetooth settings of the mobile device, temporarily cancel pairing. If the device name “GP609” is not shown, the piano is not paired. Proceed to the step 3. If you have more than one piano... -
Page 23: Using The Pedals To Turn Pages On A Music Score App
If the GP609 is already paired in the Bluetooth settings of the mobile device, temporarily cancel pairing. If the device name “GP609” is not shown, the piano is not paired. Proceed to the step 3. Simultaneously press the [Ambience] button and [Brilliance] button to exit Function mode. -
Page 24: Various Settings
° Various Settings ˙ Various Settings (Function Mode) Basic Operations in Function Mode Simultaneously press the [Ambience] button and [Brilliance] button. This piano is in Function mode. Use the [K] [J] buttons to select the item that you want to set. MEMO Depending on the item that you select, another screen may appear, allowing you to select additional items. -
Page 25: Specifying The Keyboard's Tone When Playing Back A Song (Smf Play Mode)
Various Settings Indication Value Explanation Specifying the Keyboard’s Tone When Playing Back a Song (SMF Play Mode) This setting specifies the tone that you play on the keyboard while an internal song or external data is playing back. Normally you will use the “Auto Select”... -
Page 26: Specifying A Maximum Volume (Volume Limit)
Various Settings Indication Value Explanation Specifying a Maximum Volume (Volume Limit) You can specify a maximum volume value. This prevents an unnecessarily high volume from sounding even if you inadvertently operate the Volume Limit [Volume] buttons. 20, 40, 60, 80, 100 Preventing Doubled Notes When Connected to a Sequencer (Local Control) When you have a MIDI sequencer connected via USB, set this parameter to Local Off. -
Page 27: Troubleshooting
It may be that this piano has malfunctioned. Please Could the Auto Off If you don’t need the power to Power turns off on contact your dealer or a Roland customer service center. setting be something turn off automatically, turn the p. 26 its own other than “Off”? - Page 28 In some cases when you switch the Bluetooth Turn/MIDI function, the connection with the mobile device might become unavailable. MIDI p. 22 After unpairing the “GP609” that is registered on the mobile device, turn the mobile device’s Bluetooth function “Off” and then “On” again, (Can’t make settings to use and then reestablish the connection.
-
Page 29: Error Messages
A MIDI transmission error has occurred. Check the connected MIDI device. There may be a problem with the system. Repeat the procedure from the beginning. If it is not solved after you have tried several times, contact the Roland Error 51 service center. -
Page 30: Using The Unit Safely
• Roland assumes no liability concerning the restoration of any • For regular dusting, use a soft, clean cloth and/or a piano-use recorded medium of said content or making them available on a stored content that has been lost. -
Page 31: Tone List
° Tone List Piano Other Tone Name Tone Name Concert Piano UprightPiano Ballad Piano MellowUprght Mellow Piano BrightUprght Bright Piano Rock Piano RagtimePiano MEMO Fortepiano Mellow Forte Piano Designer can be used to customize the sound only for tones of the [Piano] Bright Forte button. -
Page 32: Internal Song List
“External, ” the volume of all parts will change. Gavotte François Joseph Gossec * Songs marked by an asterisk (*) are arranged by Roland Corporation. The copyrights Sonatine op.36-1 Muzio Clementi to these songs are owned by the Roland Corporation.
Need help?
Do you have a question about the GP609 and is the answer not in the manual?
Questions and answers