
Subscribe to Our Youtube Channel
Related Manuals for Milwaukee M18 FUEL FTS210


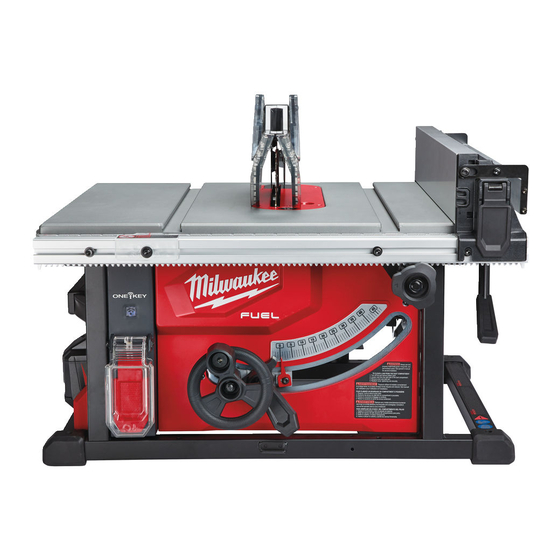
Summary of Contents for Milwaukee M18 FUEL FTS210
- Page 1 OPERATOR'S MANUAL Cat. No. M18 FTS210 M18™ FUEL™ 210mm (8 1/4") TABLE SAW W/ ONE-KEY™ WARNING To reduce the risk of injury, user must read and understand operator's manual.
-
Page 2: General Power Tool Safety Warnings
GENERAL POWER TOOL Remove any adjusting key or wrench before turning the power tool on. A wrench or a key left SAFETY WARNINGS attached to a rotating part of the power tool may Read all safety warnings, instruc- WARNING result in personal injury. Do not overreach. -
Page 3: Table Saws
When battery pack is not in use, keep it away Use the appropriate saw blade for the riving from other metal objects, like paper clips, coins, knife. For the riving knife to function properly, the keys, nails, screws or other small metal objects, saw blade diameter must match the appropriate that can make a connection from one terminal riving knife and the body of the saw blade must be... -
Page 4: Kickback Causes And Related Warnings
Milwaukee Tool or a trained straight edge to guide it with a mitre gauge or along the fence. A warped, knotted, or twisted professional for additional information or training. -
Page 5: Specifications
SPECIFICATIONS ADDITIONAL BATTERY SAFETY RULES WARNING To reduce the risk of fire, personal Cat. No..........M18 FTS210 injury, and product damage due to a short circuit, Volts............18V DC never immerse your inflator, battery pack or Battery Type ..........M18™ charger in fluid or allow a fluid to flow inside them. Corrosive or conductive fluids, such as seawater, Charger Type..........M18™... -
Page 6: Functional Description
FUNCTIONAL DESCRIPTION... -
Page 7: Removing/Inserting The Battery
For extra stability, mount the table saw to workbench using the mounting holes in the in the frame. Insert screws at an angle through the table saw frame. ® The MILWAUKEE Table Saw Stand can also be ASSEMBLY used. Understanding the Table Saw... - Page 8 Selecting, Installing, and Changing Blades 8. Match the arrow direction on the replacement saw blade with the arrow direction on the riving knife. Do not use blades rated less than WARNING The teeth should point toward the front of the table the speed of this tool.
- Page 9 Changing the Riving Knife Installing Anti-kickback Pawls Use the appropriate saw blade for WARNING Always install the anti-kickback WARNING the riving knife. Match kerf width pawls onto the riving knife with of blade (>1.8 mm) and blade body thickness guard when performing "through cutting" opera- (<1.55 mm) with the marking on the riving knife tions.
-
Page 10: Transporting And Storing
To use the extending rip Using an Auxiliary Fence Use an auxiliary fence for cutting thin pieces of wood, Use the extending rip fence such as veneer panels, that could get pinched under to hold the edge of the work- the rip fence. -
Page 11: Operation
ONE-KEY™ Inspect the work for knots or nails before beginning a cut. Knock out any loose knots with a hammer. To learn more about the ONE-KEY™ function- Never saw into a loose knot or nail. ality for this tool, please reference the Quick Always use the rip fence when rip cutting. -
Page 12: Cutting Aids
Clearing a Jam/Cleaning the Dust Chute How to Make a Jig (For rip cutting narrow workpiece) To clear a jam: 1. Turn OFF the tool. If ripping a narrow workpiece places the hands too 2. Remove the battery pack. close to the blade, it will be necessary to make and If it is not possible to use a jig. -
Page 13: Types Of Cuts
Types of Cuts How to Mount a Featherboard There are six basic cuts: the cross cut, the rip cut, Do not locate the featherboard to WARNING the mitre cut, the bevel cross cut, the bevel rip cut, the rear of the workpiece. If posi- and the compound (bevel) mitre cut. - Page 14 Cutting Rules mitre gauge and feed the workpiece into the blade. This table saw can perform a variety of cuts that are NOTE: The hand closest to the blade should be not all mentioned in this manual. DO NOT attempt placed on the mitre gauge lock knob and the hand to make any cuts not covered here unless you are farthest from the blade should be placed on the...
- Page 15 Making a Mitre Cut Making a Bevel Rip Cut Make sure the blade guard assem- Make sure the blade guard assem- WARNING WARNING bly is installed and working prop- bly is installed and working prop- erly to avoid serious possible injury. erly to avoid serious possible injury.
-
Page 16: Making A Non-Through Cut
Making a Non-Through Cut the mitre gauge and feed the workpiece into Non-through cuts can be made with the grain (rip- the blade. NOTE: The hand closest to the blade ping) or across the grain (cross cut). The use of should be placed on the mitre gauge lock knob a non-through cut is essential to cutting grooves, and the hand farthest from the blade should be... -
Page 17: Troubleshooting
Troubleshooting Problem Cause Solution Saw does Battery pack is at end Charge battery not start. of charge. pack. Excess Blade is out of Replace blade. vibration. balance. Battery pack contacts Clean battery pack are dirty. contacts. Replace blade. Blade is damaged. Blade Blade is dull or dirty. -
Page 18: Maintenance
Return the tool, battery pack, and 2. Remove the riving knife with guard. ® charger to a MILWAUKEE service facility for repair. 3. Lower the blade by turning the height adjusting After six months to one year, depending on use, wheel counterclockwise. - Page 19 3. Blade to Mitre Slot Adjustment (Heeling) 0° Adjustment Screw 1. Remove the battery pack. Pointer 2. Set the blade angle (bevel) to 0° and lock into Screw 0° Cam place. 3. Raise the blade by turning the height adjusting wheel clockwise.
- Page 20 5. Riving Knife to Saw Blade Adjustment 6. Slide the fence over to touch blade and lock the fence lock lever. To check the alignment of the riving knife: 1. Remove the battery pack. 2. Raise the blade by turning the height adjusting wheel clockwise.
-
Page 21: Internal Battery
To adjust: Internal Battery 1. Remove the battery pack. An internal battery is used to facilitate full ONE-KEY™ 2. Remove the throat plate. functionality. Turn the saw over to access the battery 3. Install the blade. door. 4. Install the riving knife or riving knife with guard. To replace the battery: NOTE: Recheck and adjust for each change in 1. - Page 24 SERVICE - AUSTRALIA and NEW ZEALAND MILWAUKEE ® prides itself in producing a premium quality product that is Nothing But Heavy Duty ® . Your satisfaction with our products is very important to us! If you encounter any problems with the operation of this tool, please contact your authorised MILWAUKEE ®...
Need help?
Do you have a question about the M18 FUEL FTS210 and is the answer not in the manual?
Questions and answers