Table of Contents
Advertisement
Quick Links
Advertisement
Table of Contents

Subscribe to Our Youtube Channel
Related Manuals for Avintage DIVA Revolution 195


Summary of Contents for Avintage DIVA Revolution 195
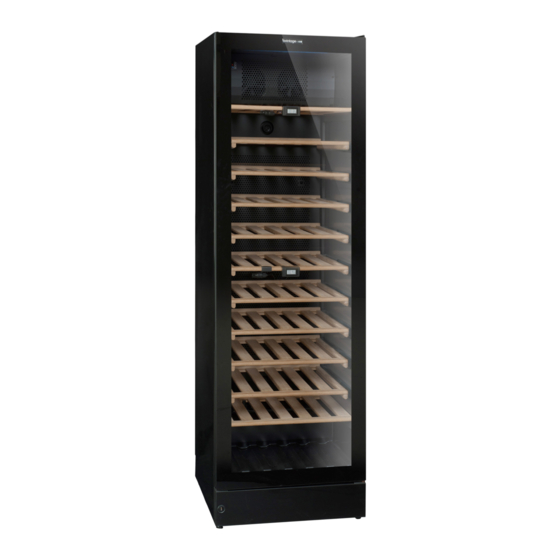
- Page 1 DIVA Revolution 195 User Guide...
- Page 2 About Avintage and French Corner Cellars Avintage is the premium line of wine cabinets made by Frio Group, Europe’s leader in wine cabinets. Located in France, Frio’s sole activity is the development and manufacturing of wine cabinets. Frio is recognized for its expertise resulting from years of servicing wine enthusiasts.
-
Page 3: Table Of Contents
USA/CA Contents Warning and Safety Instructions 3 - 4 Get to know your wine cooler Before use 6 - 7 Installation and start-up Operation & functions 9 – 11 Defrosting and cleaning Technical data 13-14 Reversible door 15 - 22 Accessories 23 - 24 Customer Care and Troubleshooting... -
Page 4: Warning And Safety Instructions
USA/CA Warning and safety instructions Warnings and Safety Instructions mentioned in this guide are not meant to cover all possible instructions and situations that may occur during the cabinet lifetime. ●Keep ventilation openings in the cabinet ●Do not store explosive substances such or in the built-in structure clear of as aerosol cans with a flammable propel- obstruction. - Page 5 USA/CA ●To avoid any risk of fire electric shock or injury, do not dismount the cellar. ●To avoid any risk of fire, electric shock or injury, do not immerse the power cord, the plug or the device in water or any other liquid.
- Page 6 USA/CA Get to know your wine cabinet Light Control panel Charcoal filter Wooden shelf Sealing strip Nameplate Kick plate Lock Adjustable feet...
-
Page 7: Before Use
USA/CA Before use At cabinet reception Check that the cabinet and or box have not been damaged during transport. Do not put in use if the cabinet has been damaged during transport. Transport Damages must be reported to French Corner Cellars within 24 hours of the delivery. - Page 8 USA/CA Max weight on the shelves (fig. 1) Max. 85 kg./187 pounds fig. 1...
-
Page 9: Installation And Start-Up
Installation and start-up Location Make sure to measure the area where the DIVA Revolution 195 will be located and ensure there is enough clearance on all sides (3 inches on the top of the cabinet, 1 inch on the sides and back). -
Page 10: Operation & Functions
USA/CA Operation & functions Electronic control panel temperature in the bottles. electronic control panel (above) Consequently, the indicator does not ensures that the temperatures set at the react on short-term fluctuations of the top and at the bottom of the cabinet are air temperature (e.g. -
Page 11: Door Alarm
USA/CA Temperature setting at the bot- pushing the “up and down” buttons simultaneously. After approximately 3 tom of the cabinet seconds “Pof” flashes on the display. Push SET2. The temperature at the bottom Then the actual temperatures are of the cabinet may then be adjusted up and shown as usual. - Page 12 USA/CA at a temperature which is a few degrees lower than the desired drinking temperature, as the wine will be warmed slightly when it is poured (into the glass.) Single-zone setting for long- term storage For long-term wine storage preservation, the top and bottom sections should both be set at about 54°C.
-
Page 13: Defrosting And Cleaning
USA/CA Defrosting and cleaning Automatic defrosting. The wine cooler is defrosting automatically. Defrost water runs through a pipe and is collected in a tray above the compressor where the heat generated by the compressor causes it to evaporate. The defrost water tray should be cleaned once a year. Cleaning. -
Page 14: Technical Data
USA/CA Technical data The DIVA Revolution 195 cabinet is the only one on the market to offer up to 6 zones of temperature thanks to its pushed air technology. It is particularly appreciated by collectors, restaurants and retailers as it offer the opportunity to serve any type of wine at the correct temperature. - Page 15 USA/CA The technical marking and Serial Number of the cabinet can be seen from the plate located on the back of the cabinet (below). Important: Wiring and connections in power supply systems must respect all applicable domestic electrical codes. Consult these codes lengths and sizes prior to cabinet installation.
-
Page 16: Reversible Door
USA/CA Reversible door Follow the instructions carefully. NOTE: Before you start, the unit needs to be disconnected from the main grid. We recommend that the change of door side is done by a technician. It is advised to have two persons to perform this operation. - Page 17 USA/CA 4. Dismount the bottom cover (the built-in snap function in each side can be unsnapped with the flat-headed screw- driver). 5. Place the bottom cover with glass front down, on an additional support, so the wires are not stretched. 6.
- Page 18 USA/CA 8. Lift the bottom sheet metal part and turn the glass so the lock hole fits the other ends round Ø hole concentric. Place the sheet metal part on the glass again, and mount the brackets onto the plastic pro- file in each end again.
- Page 19 USA/CA 12. Pull the LED wires gently out of the bot- tom hinge pin. 13. Dismount the bottom hinge pin and fit it on the opposite side. Note: The socket must also be moved. 14. Turn the door, so the glass side is down (Note: Place something between the glass and the other surface to prevent scratching the glass).
- Page 20 USA/CA 16. Replace the wires into the plastic groove and lead them to the other side. 17. Push the wires through the oblong hole and through the new hinge hole. This can be a bit tricky so try to mount only one wire first.
- Page 21 USA/CA 19. Make sure the wires are fitted into the plastic groove and mount the gasket. It’s important to check that the sealing strip provides a tight seal all the way round. If it does not, carefully heat the strip all the way round using a hair dryer.
- Page 22 USA/CA 23. Pull the two wires through the bottom hinge pin… 24.… and through the wire hole in the pla- stic column. 25. Remount the wires (see under # 6) and make sure that they are firmly secured. 26.Push the door back in place over the hinge pin and pull the wires simultane- ously so the wires do not get stuck.
- Page 23 27.Dismount the top door socket and mount it on opposite side. 28.Dismount the plastic caps on the top of the cabinet and mount them on opposite side. 29.Make sure that the door is aligned with the cabinet before mounting the top hinge. 30.
- Page 24 Restarting the cabinet after reversing the door Before connecting the Wine Cabinet to the power source, let it stand upright for approximately 24 hours. This will reduce the possibility of a malfunction in the cooling system caused by handling during transportation. Note: If the door LEDs are not working but the top LED in the cabinet is functioning, the door wires are most likely not mounted correctly into the connector.
-
Page 25: Accessories
Accessories Shelves Stationary wooden shelf Made of unscented oak to prevent any odor transmission to the wine. Dimension: 20.66 x 17.3in (52.5 x 44.0cm) Reference: CLAVIP01 Sliding shelves Made of unscented oak to prevent any odor transmission to the wine. Dimension: 20.66 x 17.3in (52.5 x 44.0cm) Reference: CLAVIP06 Display shelf... - Page 26 Thermometer/Hygrometer Thermometer/hygrometer with digital display to clip on a shelf. Reference: THYG01 Note: Switch F° to C° with the button on the back of the unit. Filter Carbon filter to be placed in the wine cabinet. Reference: FCA-01 Labels Labels to clip on the shelves. Reference: RET1...
-
Page 27: Customer Care And Troubleshooting
Customer care and troubleshooting Customer Care number: 855-WNECORK (855-963-2675) Before calling for service Before calling French Corner Cellars Customer Care, refer to the Troubleshooting Guide below. Check the household fuse or circuit breaker to see if it has been blown or tripped and that the electrical connection to the cabinet has not been disconnected. -
Page 28: Warranty And Spare Parts
Warranty and spare parts Warranty disclaimer Faults and damage caused directly or indirectly by incorrect operation, misuse, insufficient maintenance, incorrect cabinet building installation or main power connection, fire, accident, lightening, voltage variation or other electrical interference, including defective fuses or faults in main power installations will not be covered by the warranty. -
Page 29: Disposal
Disposal The symbol on the product, or on the documents accompanying the product, indicates that this cabinet may not be treated as household waste. Instead it shall be handed over to the applicable collection point for the recycling of electrical and electronic equipment. - Page 30 115 Volts- 60 Hz Version Reserving the right to alter specifications without prior notice. Please refer to our websites to obtain the most recent product specifications, technical and warranty information www.frenchcornercellars.com 1613 Heritage Way 76 Clinton Street Oakville Saratoga Springs, NY 12866 ON L6M 2Z5 United States of America Canada...
Need help?
Do you have a question about the DIVA Revolution 195 and is the answer not in the manual?
Questions and answers