Advertisement
Quick Links
1- Connect all outputs & keypads
2- Connect the input cable
For 240 VAC (4 wires)
Correct wiring of the
electrical service box,
GFCI, and pack terminal
block is essential. Call an
electrician if necessary.
4- Select Low Level
Selecting Low Level & learning
Press and hold Select button for 5 seconds to activate low level programming.
Once activated, the display shows "LL" and, in succession, the current preset low level configuration selected.
Press Change button repeatedly to select the same appropriate configuration for the spa.
See low level programming table.
Press Select to confirm. You will exit menu automatically. The in.xm™ will then reset.
You need to activate all the pumps and blower with the keypad to remove the air in the system. This step is important to do before learning.
After resetting, the system starts a "learning sequence" in which each individual output is activated and its peak current displayed and saved.
Note: if unusual current readings e.g.: 4 to 6 amps are detected on the high speed of any pump, all pumps must be primed and the learning
mode should be restarted.
Quick Start Card
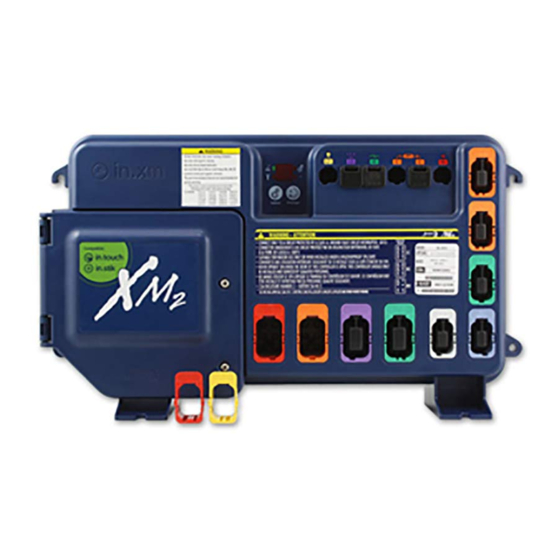
Light or CoolRays
Power box display and buttons
Fuses
Installation brackets
Main power
entry connection
Main power
cable input entry
Mounting feet
Output connectors for in.therm™
remote heating system (240 vac)
Don't forget that the voltage is determined by the cable used (120 or 240V cable)!
For 240 VAC (*3 wires)
*If connected to a
3 wire system (without
neutral), all 120 VAC
components will not
work.
in.xm2
™
Communication connector
connector
Pump 1
Pump 2
Pump 3
3- Set breaker
Make sure all accessories are linked to the bonding connector and connected to
pack. Make sure the spa pack door is closed. Turn on the breaker.
Bonding lug
Selecting Breaker (Br) settings
Press Select button once to activate the
breaker setting menu. Once activated, the display shows "br" and, in
succession, the maximum current rating of the breaker.
Press Change button to change setting.
Press Select to confirm. You will exit menu automatically (in.xm™ will also
reset).
Br values displayed by
the system correspond
to 80% of the maximum
amperage capacity of
the GFCI.
General I/O connector
(IR receiver)
in.keys™ main and
aux. keypad connectors
Connector for direct
120/240 vac 5 Amp
output (for in.play™
audio, video accessories
or in.clear™)
Typically Circulation Pump
(max. 5 Amp)
Typically Blower
(max. 5 Amp)
Ozone
GFCI
Br
60 Amp
48 Amp
50 Amp
40 Amp
40 Amp
32 Amp
30 Amp
24 Amp
Advertisement

Summary of Contents for Gecko in.xm2
- Page 1 Quick Start Card in.xm2 ™ 1- Connect all outputs & keypads Light or CoolRays Communication connector connector General I/O connector (IR receiver) Power box display and buttons in.keys™ main and Fuses aux. keypad connectors Installation brackets Connector for direct Main power...
- Page 2 2sp: 2 speeds pump in Info sub-menu located in Options menu. Installed For complete Techbook or more information, see our website: www.geckoalliance.com © Groupe Gecko Alliance Inc., 2015 All trademarks or registered trademarks are the property of their respective owners. 9919-101177-C Rev.


