
Related Manuals for Fagor 20i-T


Summary of Contents for Fagor 20i-T
- Page 1 Fagor Automation S. Coop. 20i-T / 30i-T 20i-T B / 30i-T B Installation/Operation Manual Manual code: 14460054 Manual version: 0612 Software version: 4.xx...
-
Page 2: Table Of Contents
CE seal..........................27 4.2.1 Declaration of conformity ....................27 4.2.2 Safety conditions ......................28 4.2.3 Warranty terms ......................... 30 4.2.4 Material returning terms ....................30 Error codes ........................31 Maintenance ........................32 (2/32) - Installation/Operation - 20i-T / 30i-T - V0612... -
Page 3: Dro Description
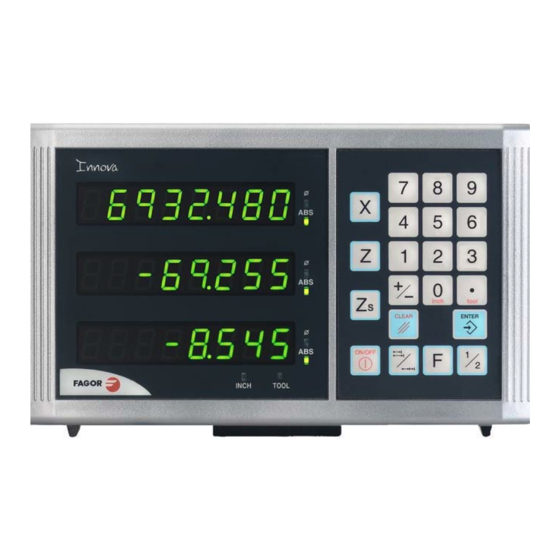
There are 20 tools that may be set for the part when using absolute coordinates. The possible reference points (datum points) are from 0 to 19. The 20i-T model shows the active reference on the display at all times, whereas the 30i-T model only shows it when it is selected, after pressing the reference key. -
Page 4: Turning The Unit On And Off
1.2 Turning the unit on and off It turns on automatically when applying voltage or after pressing the on/off key. It shows Fagor dro or the corresponding error code. See the error table and PAR11 for more options. Turns the DRO on or off. -
Page 5: Dro Operation
The third axis (Zs) display shows the feedrate of the fastest moving axis in m/min or feet/min depending on the status of the "inch" LED. To activate or cancel this option, see PAR11 in the installation manual. V0612 - 20i-T / 30i-T - Installation/Operation - DRO operation - (5/32) -
Page 6: Incremental, Absolute And With Respect To Machine Reference Zero
2.2 Incremental, absolute and with respect to Machine Reference Zero This DRO shows the current position of two or three axes (20i-T / 30i-T). Coordinate means the distance from one point or position with respect with another chosen as reference. -
Page 7: Example
This last method turns out to be more practical as after selecting the destination coordinate one only has to remember to move the axis until the DRO reads zero. V0612 - 20i-T / 30i-T - Installation/Operation - DRO operation - (7/32) - Page 8 -Place the axis exactly over “0” and press: At any time, by pressing this key, the DRO will display the present position with respect with the previous zero (ABS led on). 22.600 47.600 63.600 (8/32) - DRO operation - Installation/Operation - 20i-T / 30i-T - V0612...
-
Page 9: Machine Reference Selection And Search
Fagor linear encoders have reference marks every 50 mm all along its length. In order to use these marks properly, choose an area on the axis, for example in the middle of the measuring length or at one end. -
Page 10: Operation With Tools
To delete the offsets of ALL the tools. Press this keystroke sequence: It will show the text: "Delete?", Press [ENTER] to validate the operation or [C] to cancel it. (10/32) - DRO operation - Installation/Operation - 20i-T / 30i-T - V0612... -
Page 11: Special Operations
• Remove the tool and measure the resulting diameter. • Preset the part diameter. That value will be preset as the offset of the Value selected tool. • Exit the HOLD mode. V0612 - 20i-T / 30i-T - Installation/Operation - DRO operation - (11/32) -
Page 12: Taper (Cone) Calculation
The "X" axis display will show the angle in ten-thousandths of a degree (0.0001º) and the "Z" axis display will do so in degrees, minutes and seconds. - Press any key to return to the regular display mode. α (12/32) - DRO operation - Installation/Operation - 20i-T / 30i-T - V0612... -
Page 13: Calculator
Result = Sin X Cosine Result = Cos X Tangent Result = Tan X It carries out the operation and leaves the result on the X axis display. V0612 - 20i-T / 30i-T - Installation/Operation - DRO operation - (13/32) -
Page 14: Recall And Reset Modes
Z = Preset Z = 2 result of the calculation. = di X = 25 Quits the calculator mode. X = 25 Z = 2 Z = 2 = di (14/32) - DRO operation - Installation/Operation - 20i-T / 30i-T - V0612... -
Page 15: Dro Installation
3.1 Installation of the built-in model Dimensions of the enclosure hole for inserting the DRO Built-in DRO insertion Nut DIN 985 Bolt ISO 7380 M4 Inox M4 x 10 Inox V0612-20i-T / 30i-T - Installation/Operation - DRO installation - (15/32) -
Page 16: Rear Panel
300 V AC. The cord type shall be SO, SJO or STO. Suitable Strain Relief means must be provided in the cord set to assure the connection of the plug and the fitting. CE seal (see "CE seal" page 27) (16/32) - DRO installation - Installation/Operation - 20i-T / 30i-T - V0612... -
Page 17: General Technical Characteristics
- Phase shift: 90º ±20º, hysteresis: 0.25 V, Vmax: 7V, maximum input current: 3mA - High threshold (logic state 1) 2.4V < VIH < 5V - Low threshold (logic state 0) 0.0V < VIL < 0.55V V0612-20i-T / 30i-T - Installation/Operation - DRO installation - (17/32) -
Page 18: Easy Setup
• Move the axis in the positive direction all the way to the end of the travel so the DRO can read as many reference marks as possible. • Press [ENTER] to finish. The moving direction used will be assumed as the positive direction. (18/32) - DRO installation - Installation/Operation - 20i-T / 30i-T - V0612... -
Page 19: Power And Machine Connection
• Numeric values, usually with the corresponding axis resolution, they are entered as regular coordinate preset. • Options; the value is changed by pressing this key which will make the various options appear in a cyclic way. V0612-20i-T / 30i-T - Installation/Operation - DRO installation - (19/32) - Page 20 To recover the factory set default values for the installation parameters: Once in parameter editing mode, displaying PAR00 on all the displays, press this keystroke sequence. The dots of the first axis will light up. (20/32) - DRO installation - Installation/Operation - 20i-T / 30i-T - V0612...
-
Page 21: Parameters To Configure Axis Position Reading And Display
PAR02 PAR03 Where: R = Resolution in degrees p = Pulses per turn of the encoder TTLfactor = Multiplying factor for TTL signal Sfactor = Multiplying factor for sinusoidal signal V0612-20i-T / 30i-T - Installation/Operation - DRO installation - (21/32) - Page 22 TTL multiplying factor (subdivision). Independent for each axis. Options: x4, x2, x1 and x0.5. The factory setting is x4 and it is the one used for FAGOR linear encoders. When using rotary encoders on linear axes, it should be calculating according...
- Page 23 Offset of the reference point with respect to the reference zero of the scale, independent for each axis. Usually, the machine reference zero (reference mark of the linear encoder) does not coincide with the absolute zero to be used. V0612-20i-T / 30i-T - Installation/Operation - DRO installation - (23/32)
- Page 24 If =1, Linear encoder without I0. To carry out a home search when the feedback device does not have a reference mark “Io”, this parameter must be set to “1”. Factory setting: "0". (24/32) - DRO installation - Installation/Operation - 20i-T / 30i-T - V0612...
- Page 25 The compensation point must have at least one point with no error Multi-point leadscrew error compensation table (in mm) Error to be Point Nr. Position compensated 200.000 0.002 275.250 0.007 427.345 -0.005 700.500 -0.007 760.000 0.003 1015.000 0.006 (error 0). V0612-20i-T / 30i-T - Installation/Operation - DRO installation - (25/32)
- Page 26 Not being used at this time. 1 = Enables the buzzer. It beeps when pressing any key. To access the special functions (Hold, taper calculation) It enables this key. (26/32) - DRO installation - Installation/Operation - 20i-T / 30i-T - V0612...
-
Page 27: Appendix
As instructed by the European Community Directives on Low Voltage: 73/23/EEC, (and the 93/68/EEC amendment) on Machine Safety 89/392/EEC and 89/336/EEC on Electromagnetic Compatibility. In Mondragón, April 1st, 2005 V0612 - 20i-T / 30i-T - Installation/Operation - Appendix - (27/32) -
Page 28: Safety Conditions
Read the following safety measures in order to prevent damage to personnel, to this product and to those products connected to it. Fagor Automation shall not be held responsible for any physical or material damage derived from the violation of these basic safety regulations. - Page 29 It indicates that point may be under electrical voltage. "Ground Protection" symbol. It indicates that point must be connected to the main ground point of the machine as protection for people and units. V0612 - 20i-T / 30i-T - Installation/Operation - Appendix - (29/32)
-
Page 30: Warranty Terms
FAGOR is committed to repairing or replacing its products from the time when the first such product was launched up to 8 years after such product has disappeared from the product catalog. It is entirely up to FAGOR to determine whether a repair is to be considered under warranty. EXCLUDING The repair will take place at our facilities. -
Page 31: Error Codes
If there are OK, disconnect the feedback connectors one by one. If the dro comes on, it means a feedback failure. If the fault persists get in touch with Fagor Automation’s Customer Services Department about it. -
Page 32: Maintenance
Bª San Andrés Nº 19 Apdo de correos 144 20500 Arrasate/Mondragón - Spain - Web: www.fagorautomation.com Email: info@fagorautomation.es Tel.: (34) 943 719200 Fagor Automation S. Coop. Fax: (34) 943 791712 (32/32) - Appendix - Installation/Operation - 20i-T / 30i-T - V0612...
Need help?
Do you have a question about the 20i-T and is the answer not in the manual?
Questions and answers