Sign In
Upload
Download
Table of Contents
Contents
Add to my manuals
Delete from my manuals
Share
URL of this page:
HTML Link:
Bookmark this page
Add
Manual will be automatically added to "My Manuals"
Print this page
×
Bookmark added
×
Added to my manuals
Manuals
Brands
Kubota Manuals
Portable Generator
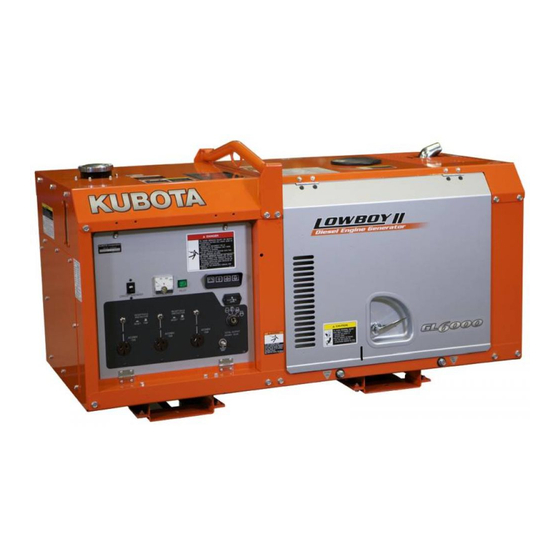
GL6000
Workshop manual
Kubota GL6000 Workshop Manual
Diesel generator
Hide thumbs
1
2
3
4
5
6
7
8
9
10
11
12
13
14
15
16
17
18
19
20
21
22
23
24
25
26
27
28
29
30
31
32
33
34
35
36
37
38
39
40
41
42
43
44
45
46
47
48
49
50
51
52
53
54
55
56
57
58
59
60
61
62
63
64
65
66
67
68
69
70
71
72
73
74
75
76
77
78
79
80
81
82
83
84
85
86
87
88
89
90
91
92
93
94
95
96
97
98
99
100
101
102
103
104
105
106
107
108
109
110
111
112
113
114
115
116
117
118
119
120
121
122
123
124
125
126
127
128
129
130
131
132
133
134
135
136
137
138
139
140
141
142
143
144
145
146
147
148
149
150
151
152
153
154
page
of
154
Go
/
154
Contents
Table of Contents
Troubleshooting
Bookmarks
Table of Contents
General
Safety First
Specifications
Table of Contents
1 Identification
Model Name and Engine Serial Number
E4B Engine
Cylinder Number
2 Precaution
3 Handling Precautions for Electrical Parts and Wiring
Wiring
Battery
Fuse
Connector
Handling of Circuit Tester
4 Lubricants, Fuel and Coolant
5 Tightening Torques
General Use Screws, Bolt and Nuts
Stud Bolts
6 Maintenance Check List
7 Check and Maintenance
Daily Check
Check Points of Initial 50 Hours
Check Point of Every 50 Hours
Check Point of Every 100 Hours
Check Point of Every 200 Hours
Check Point of Every 300 Hours
Check Point of Every 400 Hours
Check Points of Every 500 Hours
Check Point of Every 800 Hours
Check Point of Every 1000 Hours
Check Point of Every 1500 Hours
Check Point of Every 1 Year
Check Point of Every 2 Years
8 Special Tools
Mechanism
Engine Body
Half-Floating Head Cover
Lubricating System
Cooling System
Fuel System
Servicing
1 Troubleshooting
2 Servicing Specifications
3 Tightening Torques
Tightening Torques for Special Use Screws, Bolt and Nuts
Tightening Torques for General Use Screws, Bolts and Nuts
4 Checking, Disassembling and Servicing
Checking and Adjusting
Engine Body
Lubricating System
Cooling System
Fuel System
Electrical System
Preparation
Separating Engine
Disassembling and Assembling
Cylinder Head and Valves
Timing Gears, Camshaft, Fuel Camshaft and Oil Pan
Piston and Connecting Rod
Crankshaft
Water Pump
Injection Nozzle
Starter
Servicing
Cylinder Head and Valves
Timing Gears, Camshaft and Fuel Camshaft
Piston and Connecting Rod
Crankshaft
Cylinder
Oil Pump
Starter
Mechanism
Structure
Automatic Voltage Regulator (A.V.r.)
Emergency Relay Circuit
General
Instructions
Earth
Wiring Diagram
Servicing
1 Troubleshooting
Generator
Engine Circuit
2 Servicing Specifications
3 Tightening Torques
Tightening Torques for Special Use Screws, Bolts and Nut
Tightening Torques for General Use Screws, Bolts and Nut
4 Checking, Disassembling and Servicing
Checking and Adjusting
Control Panel
Emergency Relay Activates
Disassembling and Assembling
External Components
Servicing
Terminal Voltage for each Part During Normal Periods (No-Load Periods)
Stator Coil
Rotor Coil
Exciter Coil
Advertisement
Quick Links
1
Wiring
2
Lubricants, Fuel and Coolant
Download this manual
WORKSHOP MANUAL
DIESEL GENERATOR
GL6000,GL7000,
GL9000,GL11000
KiSC issued 05, 2015 A
Table of
Contents
Previous
Page
Next
Page
1
2
3
4
5
Advertisement
Chapters
General
14
Mechanism
45
Servicing
50
Mechanism
112
Servicing
131
Table of Contents
Troubleshooting
TROUBLESHOOTING
51
TROUBLESHOOTING
132
Need help?
Do you have a question about the GL6000 and is the answer not in the manual?
Ask a question
Questions and answers
Related Manuals for Kubota GL6000
Portable Generator Kubota GL6000-STD Operator's Manual
Diesel generators (62 pages)
Portable Generator Kubota GL6000-STD Operator's Manual
Diesel generators (49 pages)
Portable Generator Kubota GL6000-AUS Operator's Manual
Diesel generator (62 pages)
Portable Generator Kubota GL7000 Workshop Manual
Diesel generator (154 pages)
Portable Generator Kubota GL9000 Workshop Manual
Diesel generator (154 pages)
Portable Generator Kubota GL11000 Workshop Manual
Diesel generator (154 pages)
Portable Generator Kubota GL6000A-AU-B Workshop Manual
Diesel generator (171 pages)
Portable Generator Kubota GL9000D-AU-B Workshop Manual
Diesel generator (171 pages)
Portable Generator Kubota GL6000D-AU-B Workshop Manual
Diesel generator (171 pages)
Portable Generator Kubota GL7000-CAN Operator's Manual
Diesel engine generator (55 pages)
Portable Generator Kubota GL11000-CAN Operator's Manual
Diesel engine generator (55 pages)
Portable Generator Kubota KJ-S130VX Operator's Manual
Diesel generator (67 pages)
Portable Generator Kubota SQ-1120 Operator's Manual
Diesel (63 pages)
Portable Generator Kubota J106-STD Operator's Manual
Diesel generators (85 pages)
This manual is also suitable for:
Gl7000
Gl9000
Gl11000
Table of Contents
Save PDF
Print
Rename the bookmark
Delete bookmark?
Delete from my manuals?
Login
Sign In
OR
Sign in with Facebook
Sign in with Google
Upload manual
Upload from disk
Upload from URL


Need help?
Do you have a question about the GL6000 and is the answer not in the manual?
Questions and answers