Table of Contents
Advertisement
Advertisement
Table of Contents

Related Manuals for Cowon PLENUE 2


Summary of Contents for Cowon PLENUE 2
- Page 1 USER’S GUIDE ver. 1.0 EN...
- Page 2 THANK YOU FOR PURCHASING A COWON PRODUCT. We do our utmost to deliver DIGITAL PRIDE to our customers. This manual contains information on how to use the product and the precautions to take during use. If you familiarize yourself with this manual, you will have a more enjoyable digital experience.
-
Page 3: Copyright Notice
+ Our company complies with the Music Industry Promotion Act, Game Industry Promotion Act, Video Industry Promotion Act, and other relevant laws and regulations. Users are also encouraged to comply with any such laws and regulations. + As soon as you purchase the product, visit the website (http://www.COWON.com), and become a registered member. You will benefit from various member services. -
Page 4: Table Of Contents
CONTENTS Before you start! Using the Product Precautions Playback Screen Package Contents Music Selection Names of Parts and Functions Playback Settings Buttons Detailed Settings Basic Use Additional Power Connection and Charging Product Specification Connecting and Disconnecting from the PC Inserting and Removing the microSD Card Troubleshooting Using Headphone Mode Connecting to Balanced audio Port... -
Page 5: Before You Start
Before You Start! PRECAUTIONS As these precautions are provided for the correct use of the product as well as user safety, be sure to familiarize yourself with them. The company will not be held responsible for any accident that may occur due to the failure to heed these precautions. The following information applies to all products manufactured or produced by our company. - Page 6 Mac. + If you are using a product that comes with an AC power adaptor, please use the genuine charger offered by COWON. + When connecting to a PC, use only USB ports on the mother board or a USB Host card. Using an external USB hub may not guarantee proper operation(e.g.
-
Page 7: Package Contents
Before You Start! 좌측면엔 특징 없음) PACKAGE CONTENTS ver. 1.0W Quick Guide ver. 1.3W PLENUE 2 Leather Case Micro USB Cable Warranty * Actual package contents may differ from the above images. -
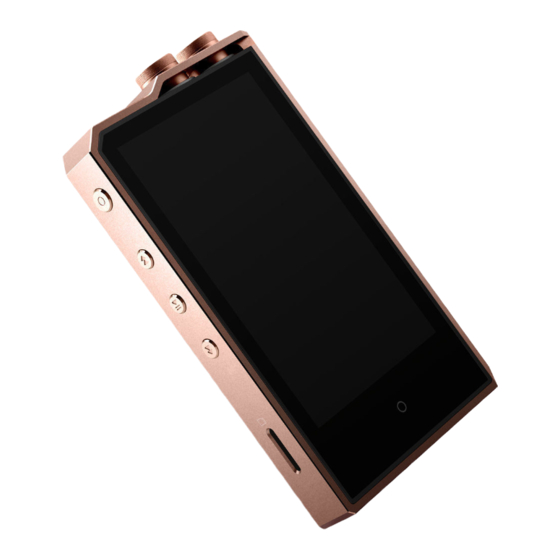
Page 8: Names Of Parts And Functions
BODY (좌측면엔 특징 없음) PWR BUTTON Before You Start! NAmES OF PARTS AND FUNCTIONS SIDE BUTTON PWR BUTTON BODY (좌측면엔 특징 없음) SIDE BUTTON Volume Wheel Multi Wheel BODY (좌측면엔 특징 없음) Power Button REW / Previous Track Play / Pause Micro USB Port FF / Next Track Touch Display... -
Page 9: Buttons
PC CONNECT Before You Start! CONNECT BUTTONS PWR BUTTON PC CONNECT PC CONNECT PWR BUTTON PWR BUTTON Multi Button Power ON / Off Touch the Multi Button to quickly navigate to the playback, playlist, Press and hold the button to turn on the product. SIDE BUTTON settings, or volume control screens. -
Page 10: Buttons
Before You Start! BUTTONS - multi Wheel 1. DAC filter rolloff 2. JetEffect 3. PREV / NEXT You can adjust the sound by changing Turn the Multi Wheel to select a Turn the Multi Wheel to select the the filter type of the DAC. JetEffect 7 preset. -
Page 11: Buttons
Before You Start! BUTTONS - multi Wheel 4. REW / FF 5. Brightness 6. Volume Turn the Multi Wheel during playback to Adjust the brightness of the screen Go to the volume control screen. rewind or fast-forward. in 10 levels. Adjusts the volume in 140 levels. - Page 12 Before You Start! BUTTONS - Volume Wheel Adjust the 140-step volume control by turning the volume wheel or swiping up or down on the volume control screen. Each level adjusts the volume by 0.5dB. Alternatively, touch the volume icon on the top status bar during music playback to be redirected to the volume control screen.
-
Page 13: Basic Use
2. The LED indicates the status of the battery charge. (Red : Charging, White : Charging Complete) - PLENUE 2 can also be charged with an authentic Micro USB DC adapter for smart phones. If 5V/2A or higher Micro USB DC adapters are used, charging will be finished in approximately 3 hours. -
Page 14: Connecting And Disconnecting From The Pc
Basic Use CONNECTING AND DISCONNECTING FROm THE PC PWR BUTTON 1. Use the Micro USB cable to connect PLENUE 2 to your PC. - The maximum number of files and folders that can be recognized by 2. Press and hold the button to turn on the product. -
Page 15: Inserting And Removing The Microsd Card
Basic Use INSERTING AND REmOVING USING HEADPHONE mODE THE microSD CARD PLENUE 2 provides ‘Headphone mode’ to increase output for use with high impedance headphones. 1. Turn Headphone Mode on and off in ‘Settings ► Music ► Headphone mode’. 2. The icon in the upper right corner changes based on Headphone mode. -
Page 16: Connecting To Balanced Audio Port
Basic Use CONNECTING TO BAlANCED AUDIO PORT PLENUE 2 has a high quality balanced line-out port that outputs + and - audio signals. 1. Connect balanced cable-supporting headphones (or a in-ear headphones) to the balanced line-out port (2.5mm). 2. Connect the receiver to the balanced audio port and check the icon status in the upper- R−... -
Page 17: Firmware Upgrade
The firmware uses built-in programs in the hardware and upgrades to improve product capabilities and fix bugs in the software. PLENUE 2 may use the firmware to adjust product performance or methods of use without prior notice, and minor malfunctions in the firmware may occur. -
Page 18: Using The Product
Using the Product PlAYBACK SCREEN ① Play / Pause the track. ② Press briefly to go to the previous track. Press and hold to rewind. ③ Press briefly to go to the next track. Press and hold to fast forward. ④... -
Page 19: Music Selection
Using the Product mUSIC SElECTION Select a folder, artist, or album to view the corresponding track list. View track lists by folder. View track lists added to Favorites. View all tracks saved in the product. View track lists by artist. View track lists by album. -
Page 20: Playback Settings
⑬ Set the Headphone mode On or Off. Select the Elapsed+, you can hide the progress bar above the album art. * PLENUE 2 provides Gapless Playback to remove gaps between tracks during playback. Gapless Playback is applied in all situations without additional setup. -
Page 21: Detailed Settings
Using the Product DETAIlED SETTINGS JetEffect 7 Settings 1. In Detailed Settings, select JetEffect 7 . 2. Select User 1 / User 2 / 3. EQ : Change the tone by 4. BBE+ : Select and apply 5. SE : Select and apply Chorus User 3 / User 4 and set adjusting the level of each BBE sound effect. -
Page 22: Detailed Settings
Reverb (9 mode) Maximize the natural and live presence of the sound. * You may hear distortion or noise when using extreme settings of JetEffect. * For detailed information about BBE, please see the introduction to BBE on our homepage(www.COWON.com). -
Page 23: Detailed Settings
Using the Product DETAIlED SETTINGS Music Auto off : If there is no activity for a set amount of time, the product automatically turns off. Skip interval : Set the skip interval in various units. (Extended function of Auto display off : If there is no activity for a set amount of time, the screen ‘previous track/next track’) Choose an interval of Track/2/3/4/5/10/20/30 automatically turns off. -
Page 24: Additional
Additional PRODUCT SPECIFICATION Model Name PLENUE 2 Product Capacity Built-in Memory : 128GB / External Memory : microSD SDXC Display 3.7” AMOLED Touch Display (480x800) Dimensions & Weight 67.9mm(W) x 116.7mm(H) x 16.5mm(D) / 192g Case Premium High-Strength Metal Body & Carved Glass... - Page 25 Additional PRODUCT SPECIFICATION AK4497EQ 123dB Unbalance / 123dB Balance THD+N 0.0005% Unbalance / 0.0005% Balance (24bit, 48kHz) Stereo Crosstalk -137dB Unbalance / -139dB Balance Audio Characteristics Output 2Vrms Unbalance / 2Vrms Balance Output Impedance 0.6Ω Unbalance / 1.2Ω Balance Volume 140 levels Clock Precision Clock Dual TCXO (Phase Jitter 1.0ps)
-
Page 26: Troubleshooting
COWON website(www.COWON.com) provides support for users of If connection is unstable due to frequent disconnects, connect COWON products with FAQ (Frequently Asked Questions). Users are directly to the USB port on the main board of the PC. strongly encouraged to check out the website for further information... - Page 27 www.COWON.com...
Need help?
Do you have a question about the PLENUE 2 and is the answer not in the manual?
Questions and answers