Table of Contents
Advertisement
Quick Links
PLEASE READ ALL INSTRUCTIONS FIRST
PROGRAMMING INSTRUCTIONS
1.0 INSTALLATION INSTRUCTION
• Plug the timer into a 120VAC receptacle. If you charge battery
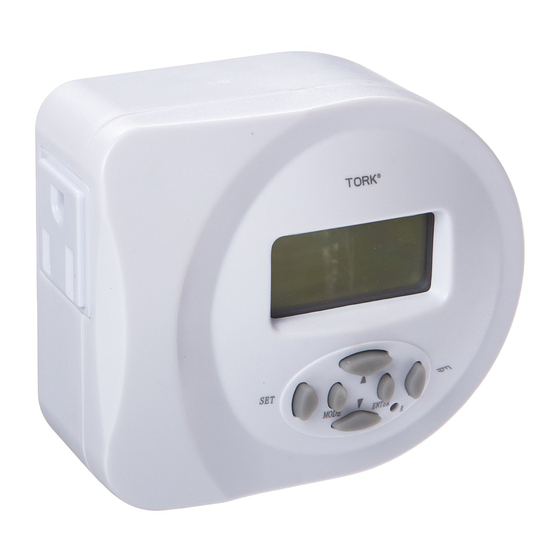
457Z
overnight, the unit can be removed and programmed without
AC power.
• Press the R (RESET) button by using an insulated tool.
• Press the ENTER to start the timer.
2.0 SET TIME AND DATE (CALD)
• Press the MODE button two times to display "CALD" flashing.
• Press the ENTER button to start current time setting mode.
• Using
• Continue to using
date, hour, minutes, and seconds.
• Press the ENTER button to save the current time setting and return
SET
to clock mode.
MODE
ENTER
R
3.0 SET SCHEDULE
• Press the MODE button to display "PROG" flashing.
• Press the ENTER button to display "PROG 1 ON". This is the first
of 20 ON/OFF pairs. For first ON program, press SET. To go to other
programs, press
RATINGS
3.1 SELECT DAYS
• 120V 15A, 1800W General Purpose
• All days are flashing. Use
• 120V 15A, 1800W Resistive
then press SET.
• 120V, 960W Tungsten
3.2 SET ON
• 120V 1/3 HP, TV-5
• Use
a) "TIME" for a program with user set times
b) "SNUP" for a timer calculated sunrise time that will change daily
throughout the year.
c) "SNST" for a timer calculated sunset time that will change daily
throughout the year.
• Then press SET. If "TIME" selected: Use
hour, then press SET button. Repeat for minutes.
3.3 SET OFF
• "PROG 1 OFF" is flashing on display. Press SET.
• All days are flashing. Use
days, then press SET.
• Use
a) "TIME" for a program with user set times,
b) "SNUP" for a timer calculated sunrise time that will change daily
throughout the year.
c) "SNST" for a timer calculated sunset time that will change daily
throughout the year.
• Then press SET. If "TIME" selected: Use
hour, then press SET button. Repeat for minutes. Press SET.
• Repeat steps for a total 20 ON and 20 OFF time settings.
• Press the ENTER button to finish programming set and return to
clock mode.
ONE YEAR LIMITED WARRANTY: If this product
fails because of a manufacturing defect within
one year after purchase, we will, at our option,
either repair or replace it at no charge. Our
warranty does not cover damage caused by
accident, abuse or misuse. We assume no
further liability with respect to the sale or use
of this product. THIS WARRANTY IS IN LIEU
OF ALL OTHER WARRANTIES, EXPRESSED OR
IMPLIED, INCLUDING THE WARRANTY OF
MERCHANTABILITY. We make no warranty with
respect to the fitness of any goods for the users
particular application. This warranty gives you
specific legal rights, and you also may have other
rights which vary from state to state.
It is our intent to provide accurate and current
specification information. However, in the interest
of product improvement, TORK may alter the
specifications or constructional details without
prior notice.
A DIVISION OF
NSi INDUSTRIES, LLC
4.0 OPTIONAL SUNSET/SUNRISE TIME ZONES
• Press the MODE button three times to display "ZONE" flashing.
• Press the ENTER button to start Zone setting mode.
• Use the
ASTRONOMIC LATITUDE ZONES
ZONAS ASTRONOMICAS (LATITUDES)
ALAS
NUSA
WASHINGTON
MONTANA
OREGON
IDAHO
buttons change year, then press SET button.
and SET button to enter current month,
CUSA
NEVADA
UTAH
CALIFORNIA
ARIZONA
SUSA
HAWI
---
NOTE: NUSA (Default) = North USA, CUSA = Center USA, SUSA = South
USA, ALAS = Alaska&Northern Canada, HAWI = Hawaii&Puerto Rico.
----
.
• Press the ENTER button to save the setting and return to clock
mode.
to choose a different set of days,
5.0 OPTIONAL SUNSET/SUNRISE OFFSET
---
NOTE: This mode displays calculated sunset/sunrise. You can change to
turn ON/OFF earlier or later with this mode.
to choose:
---
• Press the MODE button four times to display "SUN± " flashing.
• Press the ENTER button to start offset mode .
• Screen displays today's SNUP (sun up) time flashing. Use
to change default time.
• Press SET and screen displays today's SNST (sunset) time flashing.
buttons to change
Use
• Press ENTER to complete the setting and back to normal clock
mode.
6.0 OPTIONAL CHANGE DAYLIGHT SAVINGS TIME (DST)
to choose a different set of
---
NOTE: Skip this step for default daylight savings dates. Follow instructions
to choose:
below only if you need to remove or change. MANU (Manual Mode) – no
DST change by timer. NEW mode - change dates to something other than
default dates.
----
• Press the MODE button five times to display "DST" flashing.
• Press the ENTER button to choose daylight savings times.
buttons to change
• Use the
a) The display shows "INIT". For timer to follow current U.S. DST
dates, press ENTER.
b) The display shows "MANU". For no DST adjustment, press ENTER.
c) The display shows "NEW". For modified DST dates, consult
technical support phone line.
FOR TECHNICAL SUPPORT: SOUTIEN TECHNIQUE : PARA COMUNICARSE CON EL SERVICIO TÉCNICO: techsupport@nsiindustries.com 877.230.7874
7.0 COUNTDOWN TIME SETTING
---
NOTE: Countdown mode will postpone the manual off for a preset period.
keys to display the correct zone.
As an example, press
minutes before load is shut down. This will give you time to exit the room.
---
ZONES DE LATITUDE
• Press the MODE button to display "PROG" flashing.
• Press the ENTER button to display "PROG 1 ON".
• Press the
• Press SET for the Countdown (dL) screen.
• Press
NORTH DAKOTA
MINN
MICHIGAN
MAINE
• Press ENTER to complete the setting and back to normal clock
WISCONSIN
VT
SOUTH DAKOTA
NH
WYOMING
IOWA
NEW YORK
mode.
MASS
NEBRASKA
PENNSYLVANIA
RHODE ISLAND
ILLINOIS
IND
OHIO
CONNECTICUT
COLORADO
NEW JERSEY
WEST
KANSAS
VIRGINIA
MISSOURI
DELAWARE
KENTUCKY
8.0 RANDOM ON/OFF TIME
VIRGINIA
MARYLAND
OKLAHOMA
TENNESSEE
NORTH CAROLINA
ARKANSAS
• Pressed key SET &
SOUTH
NEW MEXICO
CAROLINA
MISS
TEXAS
ALABAMA
GEORGIA
Display shows "RND".
LOUISIANA
MEXICO
• To Cancel Random function simply repeat above procedure. The
FLORIDA
"RND" sign will disappear from display.
9.0 OVERRIDE BUTTON FUNCTIONS (
• Press one time to turn timer ON or OFF.
10.0 ACTIVATE COUNTDOWN
---
NOTE: To activate Countdown step 7 must be completed and the timer in
the ON position.
---
• Press
or
to change default time.
to choose daylight savings options.
button to turn off lights and timer will wait five
once to bring the Countdown time setting.
to choose length of time.
simultaneously to set the Random function.
)
LI-846
Advertisement
Table of Contents

Subscribe to Our Youtube Channel
Related Manuals for NSi INDUSTRIES TORK 457Z


Summary of Contents for NSi INDUSTRIES TORK 457Z
- Page 1 However, in the interest of product improvement, TORK may alter the specifications or constructional details without prior notice. A DIVISION OF NSi INDUSTRIES, LLC FOR TECHNICAL SUPPORT: SOUTIEN TECHNIQUE : PARA COMUNICARSE CON EL SERVICIO TÉCNICO: techsupport@nsiindustries.com 877.230.7874 LI-846...
- Page 2 • Appuyez sur la touche ENTER pour terminer le réglage et retourner au mode • Presione el botón ENTER para terminar la configuración de la horloge. programación y volver al modo reloj. LI-846 A DIVISION OF NSi INDUSTRIES, LLC FOR TECHNICAL SUPPORT: SOUTIEN TECHNIQUE : PARA COMUNICARSE CON EL SERVICIO TÉCNICO: techsupport@nsiindustries.com 877.230.7874...
Need help?
Do you have a question about the TORK 457Z and is the answer not in the manual?
Questions and answers