Advertisement
Quick Links
CONTROLLING READOUT DIGITS AND POLARITY
Press and hold the [ MODE ] button and
[ SET ] button simultaneously to change
the number of digits displayed to the
right of the decimal point, and the
direction of increasing display value.
The options are represented as:
0.001/ 0.01 / -0.001 / -0.01 on the
display for the available choices.
[MODE]
Button
[SET]
Button
Press and
Hold Both
Buttons at
Same Time
OPERATION
①Remove any grease and dust from the measuring surfaces with a clean
cloth, such as a lens cleaning cloth. Make sure no foreign objects are
adhered to the surfaces.
②Turn on power and make sure measurement screen is displayed.
③Insert the measurement head into object to be measured and turn spindle
until the measuring surfaces make contact with the inside diameter.
Continue turning until ratchet stop『clicks』1∼3 times and read the
measurement off the LCD display.
CAUTION
Always allow sufficient time for instrument and object to be measured to reach the same temperature before taking
●
measurement.
Always remove dirt from measuring surfaces with a lens cloth before use.
●
Keep instrument away from direct sunlight or high temperatures such as in a car, or near a stove or heat source.
●
Do not turn ratchet stop above or below measurement range.
●
When low battery indicator is displayed, please replace battery as soon as possible. Continued use may cause reading
●
errors.
This is a precision instrument, handle with care. Do not drop or subject to excessive forces.
●
Remove dust and cutting chips after use and apply rust preventative oil to metallic surfaces. Please keep out of reach
●
of children.
Please do not use organic solvents to clean the instrument body.
●
Please do not disassemble or modify.
●
Only use as directed. Improper use may cause accident or injury.
●
4
Value displayed for
【SETTING SCREEN】
【MEASUREMENT SCREEN】
spreading gauge head
"Click, Click"
Object To Be Measured
Niigata seiki Co., Ltd.
6-15-22, Tsukanome, Sanjo, Niigata, Japan, 955-0055
Tel. : +81-256-31-5660 Fax. : +81-256-39-7730
MAIL:intl.sales@niigataseiki.co.jp
URL http://www.niigataseiki.co.jp
DIGITAL S-LINE 3-POINT MICROMETER
Thank you for purchasing the DIGITAL S-LINE 3-POINT MICROMETER. Please read this manual thoroughly before use
for proper operation.
Ring gauge calibration standard (not included) is required for zero setting. Please prepare ring gauge appropriate for the
Increase
instrument's measurement range.
FEATURES
Easy to read digital display.
Increase
●
High accuracy 3-point ID measurements.
●
Capable of storing up to three preset values.
●
With tolerance setting capability.
●
Auto display off function (approx. 4 hrs.)
●
Decrease
SPECIFICATIONS
Resolution:0.001mm
●
Accuracy:4μm
Decrease
●
Operating Temperature Range:15∼40℃
●
Storage Temperature Range:0∼50℃
●
Electronic Unit Waterproof Grade:IP65 Spec.
●
Power:CR2032 (Lithium Battery)
●
※1x included for testing
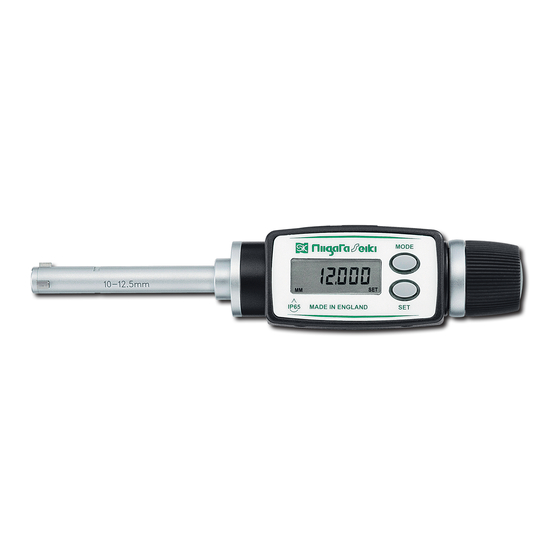
PART IDENTIFICATION
Probe Tips
20-25mm
Rod
Gauge Head
REPLACING THE BATTERY
①Using accessory driver, remove the two battery
○
cover screws. A flat-head driver can be used in the
notch to gently pry open the cover. Pull out the battery
cover.
②Insert the new battery following the marks on the
battery cover.
③Replace the cover and tighten the screws.
※When battery level is low,
『
indicator will display on the LCD. With
continued use, the display will become
unstable and readout may not be
correct.
I221-K
1411
MCD-0608IPS
MCD-0810IPS
MCD-10125IPS
MCD-12516IPS
MCD-1620IPS
MCD-2025IPS
MCD-2535IPS
MCD-3550IPS
Battery Cover
Ratchet Stop
(Constant Force Mechanism)
LCD Display
(side)
[ MODE ] Button
[ SET ] Button
Notch
B
』
B
※The battery cover screws
are very small, care must be
taken to prevent loss.
INSTRUCTION MANUAL
Model No. : MCD- **** IPS <combined>
Measurement Range
Measuring Part
(mm)
Material
6
8
−
8
10
−
Alloy Steel Tip
10
12.5
−
12.5
−
16
16
20
−
20
25
−
Carbide Tip
25
−
35
35
50
−
【 ACCESSORIES 】
・
CR2032 (Lithium Battery)
※Provided for testing.
CR2032
Please replace with new
battery before use.
・
○ Driver for battery replacement
(Ring gauge not included.)
PLEASE NOTE
Always use CR2032
battery.
Battery
Notch
C R 2 0 3 2
+
※Use care not to bend the terminals
when inserting the battery.
1
Advertisement

Related Manuals for Niigata seiki MCD-0608IPS


Summary of Contents for Niigata seiki MCD-0608IPS
- Page 1 are very small, care must be C R 2 0 3 2 correct. + taken to prevent loss. Niigata seiki Co., Ltd. 6-15-22, Tsukanome, Sanjo, Niigata, Japan, 955-0055 ※Use care not to bend the terminals Tel. : +81-256-31-5660 Fax. : +81-256-39-7730 when inserting the battery.
- Page 2 POWER ORIGIN-POINT SETTING SETTINGS and MODES A long press of [ MODE ] button selects the display mode. [ MODE ] , [ SET ] buttons change the settings. ※Use ring gauge appropriate for instrument measuring range. 【POWER ON】 Press either [ MODE ] or [ SET ] button to turn on instrument -- The Origin point will be reinitialized after power off or battery POWER ON 【Display OFF】...