Table of Contents
Advertisement
Quick Links
Advertisement
Table of Contents

Subscribe to Our Youtube Channel
Related Manuals for miniDSP SHD


Summary of Contents for miniDSP SHD
- Page 1 PRELIMINARY SHD Series TEREO HIGH DEFINITION ROOM CORRECTION PROCESSOR AND CROSSOVER SHD Studio Featuring Dirac Live® Room Correction Technology User Manual miniDSP Ltd, Hong Kong / www.minidsp.com / Features and specifications subject to change without prior notice...
- Page 2 PRELIMINARY Revision history Revision Description Date First draft 26 March 2018 Preliminary for public release 12 June 2018 miniDSP Ltd, Hong Kong / www.minidsp.com / Features and specifications subject to change without prior notice...
-
Page 3: Table Of Contents
Configuration steps with advanced/back-end processing ..............18 Playing Audio / Quick-start Guide ........................19 Basic connections and audio – SHD ......................19 Basic connections and audio – SHD Studio ..................... 20 USB Audio ..............................21 4.3.1 Mac OS X ............................21 4.3.2... - Page 4 Custom biquad programming ........................68 9.4.1 What’s a “biquad? ........................... 68 9.4.2 Using custom biquad programming ....................69 9.4.3 Biquad design software ........................70 miniDSP Ltd, Hong Kong / www.minidsp.com / Features and specifications subject to change without prior notice...
- Page 5 10.3.1 Windows ............................77 10.3.2 macOS / OS X ........................... 79 10.4 Troubleshooting ............................80 10.4.1 SHD plugin ............................80 10.4.2 DLCT ..............................81 10.5 Obtaining support ............................ 82 10.6 Open source licenses ..........................82 miniDSP Ltd, Hong Kong / www.minidsp.com...
-
Page 6: Important Information
Please read the following information before use. In case of any questions, please contact miniDSP via the support portal at minidsp.desk.com. System Requirements To configure the miniDSP audio processor, you will require a Windows PC or Apple Mac OS X computer with the following minimum specification: Windows •... - Page 7 PRELIMINARY installation, improper or undocumented use, unauthorized servicing, modification or alteration of the unit in any way, or any usage outside of that recommended in this manual. If in doubt, contact miniDSP prior to use. FCC Class B Statement This device complies with Part 15 of the FCC Rules. Operation is subject to the following two conditions: •...
- Page 8 • In Preview on the Mac, click on the View menu and select Table of Contents. The table of contents will appear on the left and can be unfolded at each level by clicking on the triangle icons. miniDSP Ltd, Hong Kong / www.minidsp.com...
-
Page 9: Product Overview
Thank you for purchasing a miniDSP SHD Series high-resolution room correction processor powered by Dirac Live®, the world’s premier room correction solution. The new SHD Series offers a wealth of input-output options, powerful back-end processing for subwoofer integration and active systems, and of course Dirac Live. -
Page 10: Dirac Live
The impulse response is a critical factor for accurate sound-staging, clarity and bass reproduction. A UMIK-1 is included in the standard purchase price of each SHD Series processor. Other microphones cannot be used. miniDSP Ltd, Hong Kong / www.minidsp.com... -
Page 11: Better Connectivity
AVB (Audio-Video Bridging) protocol. For home systems, the SHD Series processors incorporate popular network streaming protocols for the first time. They ship with the popular network streaming endpoint Volumio, which supports multiple methods of playing networked audio. -
Page 12: Powerful Back-End Processing
OWERFUL BACK END PROCESSING In addition to Dirac Live processing, the SHD Series processors all include a powerful set of additional functions, controlled by miniDSP’s well-known and easy-to-use software interface. Flexible routing from the inputs through to the outputs allows applications such as integration of one or two subwoofers and two-way active speakers. -
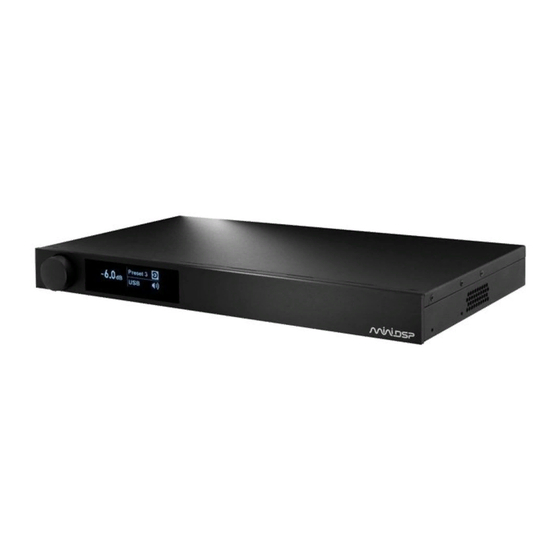
Page 13: Hardware Overview
See Specifications for maximum input voltages. 10. Analog outputs. Connect power amplifiers here using balanced XLR or unbalanced RCA connections. See Specifications for maximum output voltages. miniDSP Ltd, Hong Kong / www.minidsp.com / Features and specifications subject to change without prior notice... -
Page 14: Rear Panel Connections - Shd Studio
6. SPDIF Out. Connect external DACs with RCA cables here. Each DAC must be capable of running at 24-bit 96 kHz. 7. AES-EBU. Connect external DACs with XLR AES-EBU cables here. Each DAC must be capable of running at 24-bit 96 kHz. miniDSP Ltd, Hong Kong / www.minidsp.com / Features and specifications subject to change without prior notice... -
Page 15: Front Panel Controls And Display
To return to normal volume control operation, press the encoder knob briefly. (Note: preset and input selection, as well as turning Dirac Live on and off, is much faster with a remote control.) miniDSP Ltd, Hong Kong / www.minidsp.com... -
Page 16: Remote Control
The remote control provided with the processor controls all key runtime functions. Source Cycles through the input sources in the indicated order: SHD: RCA (unbalanced analog), XLR (balanced analog), USB, LAN (Ethernet), TOSLINK, SPDIF, AES-EBU SHD Studio: USB, LAN (Ethernet), TOSLINK, SPDIF, AES-EBU 1, 2, 3, 4 Switches to the selected preset. -
Page 17: Software Overview
OFTWARE VERVIEW SHD Series processors are configured by software running on a PC or Mac. There are two programs: Dirac Live Calibration Tool (DLCT) and the SHD plugin. If you are interested in using the SHD Series processor for stereo room correction only, please follow the steps on this page. -
Page 18: Configuration Steps With Advanced/Back-End Processing
ONFIGURATION STEPS WITH ADVANCED BACK END PROCESSING The steps for configuring SHD Series processor for applications such as subwoofer integration in addition to Dirac Live® room correction are summarized as follows: 1. Connect the SHD Series processor into your system and install software. -
Page 19: Playing Audio / Quick-Start Guide
ASIC CONNECTIONS AND AUDIO The diagram below illustrates a typical example of a simple connection to use to get started with the SHD. Depending on the specific equipment that you have, you may use a different input, or use the balanced outputs instead of the RCA outputs. -
Page 20: Basic Connections And Audio - Shd Studio
A/V receiver or digital integrated amplifier. Power on the source equipment. Plugin in the power to the SHD Studio. Wait a few seconds until the display shows the volume level. Use the knob or included remote control to turn volume down to −60 dB. -
Page 21: Usb Audio
4.3 USB A UDIO The miniDSP SHD Series processors accept stereo PCM audio at sample rates of 44.1, 48, 88.2, 96, 176.4, and 192 kHz over USB. The same USB connector is used both for streaming audio and configuration. 4.3.1 Mac OS X Open the program Audio MIDI Setup (in Applications->Utilities). -
Page 22: Windows
If you are having an issue with inadequate output volume over USB playback, check the Volume tab. To set the SHD Series processor as the default output device, open the Windows Control Panel and navigate to the Audio Devices section. On the Output tab, select SHD and click on the “Set Default” button. Individual audio playback programs may allow the SHD Series processor to be selected for audio output independently of the system default. -
Page 23: Network Audio
4.4 N ETWORK AUDIO For streaming network audio, the miniDSP SHD Series processors use the popular network endpoint Volumio, running on its own Linux processor board within the processor chassis. Volumio has a wealth of functions for controlling and delivering network audio at sample rates up to 192 kHz. -
Page 24: Web Interface
“Playback Options”. The Output Device option should be set to “I2S”. Use the front panel encoder or the remote control to select the LAN input source: miniDSP Ltd, Hong Kong / www.minidsp.com / Features and specifications subject to change without prior notice... -
Page 25: Playing From Usb Stick
You can either browse the stick directly by going to “Music Library,” or view by artists or albums. Click on an album artwork and then press the Play button (triangular icon). miniDSP Ltd, Hong Kong / www.minidsp.com / Features and specifications subject to change without prior notice... -
Page 26: Spotify Streaming
Click on Browse at the lower left. You should see the Spotify icon: Click on the Spotify icon and use it to browse or search the Spotify library. miniDSP Ltd, Hong Kong / www.minidsp.com / Features and specifications subject to change without prior notice... -
Page 27: Software Installation
If you purchased your product directly from miniDSP, your software will be available from the User Downloads section of the miniDSP website when your order ships. You will need to be logged into the website with the account you created when purchasing to access the download. -
Page 28: Software Installation - Windows
INDOWS Possible Windows installation issues The miniDSP software requires that a number of other frameworks be installed for it to work. For Windows 7 and later, these packages should be installed automatically. For earlier versions of Windows, please download and install the following frameworks before attempting to install any miniDSP software. You can also manually install these if you receive an error message that required software is missing. - Page 29 Note: the first time run DLCT, you may see a warning from Windows Firewall as shown below. If so, ensure that “Private networks...” is checked and “Public networks...” is not checked. Then click on “Allow access.” miniDSP Ltd, Hong Kong / www.minidsp.com...
-
Page 30: Software Installation - Macos / Os X
We recommend that you accept the default installation settings. To run the SHD plugin, locate SHD.app in the Applications -> miniDSP folder and double-click on it. To make it easier to run in future, right-click on its dock icon and select Options -> Keep in Dock. -
Page 31: Acoustic Measurement For Dirac Live
The Dirac Live Calibration Tool Stereo for miniDSP (DLCT) needs a set of measurements made in your listening room so that it can calculate the room correction filters. You will make these measurements using the SHD Series processor, your computer, and a miniDSP UMIK-1 measurement microphone. -
Page 32: Preparing For Acoustic Measurement
“90-degree” file for when pointing the microphone at the ceiling. For stereo systems, we generally recommend pointing the microphone between the two speakers. miniDSP Ltd, Hong Kong / www.minidsp.com / Features and specifications subject to change without prior notice... -
Page 33: Configuring For Measurement
ONFIGURING FOR MEASUREMENT Start Dirac Live Calibration Tool for miniDSP (DLCT). Be sure to quit the SHD plugin program before starting DLCT. Running the two programs at the same time will result in communication conflicts and odd behavior. The main areas of the interface are: Logo and status progress bar This area shows a progress bar with current status when the program is performing calculations. -
Page 34: Check Your Configuration/Preset (Advanced)
Preset to Stereo Speaker System. This is the only configuration supported by the SHD Series processors. Test signal playback device Preset to SHD. (If this is not present, check that your processor is connected via USB and powered on, then click the Rescan button.) Once you have verified that this tab is correct, click the Proceed button. -
Page 35: Mic Config Tab
Sound System tab and click on Rescan. Then drop down the selection menu and select “Microphone” underneath UMIK-1. Note: the miniDSP version of DLCT will only recognize the miniDSP UMIK-1. Other microphones or audio interfaces can not be used. -
Page 36: Output & Levels Tab
Click on the Test button for the right channel and confirm that the level is reasonably close to −12 dB. If necessary, adjust Input gain or Output volume so that both channels are in the green. When done, click the Proceed button. miniDSP Ltd, Hong Kong / www.minidsp.com / Features and specifications subject to change without prior notice... -
Page 37: Running The Measurements
Minimize the effect of any external noise, ensure that measurement signal levels are adequate, and/or choose a suitable time for performing measurements. miniDSP Ltd, Hong Kong / www.minidsp.com / Features and specifications subject to change without prior notice... -
Page 38: Listening Environment
The important thing is to ensure that the measurement locations are spread out over the whole listening area and that the microphone is moved a sufficient distance vertically as well as horizontally. miniDSP Ltd, Hong Kong / www.minidsp.com... -
Page 39: Executing Measurements
To redo a measurement, delete it, move the microphone to the appropriate location, and click on Start. Note: if more than one measurement is deleted, the marker will move to the lowest-numbered one. 6.4.4 Completing the measurements miniDSP Ltd, Hong Kong / www.minidsp.com / Features and specifications subject to change without prior notice... -
Page 40: Saving And Loading Projects
This is done by clicking on the Save button. The default location for project files is My Documents\MiniDSP\Projects (Windows) or Documents/MiniDSP/Projects (Mac). A project can be reloaded at any time by clicking on the Load button. This enables you to generate new correction filters for different target curves at a later date, or to redo any of the measurements. -
Page 41: Dirac Live Filter Design And Download
The target curve – that is, the desired in-room magnitude response. This curve is user-adjustable, so you can fine-tune it to best suit your speakers, room, and preferences. See Designing your target curve. miniDSP Ltd, Hong Kong / www.minidsp.com / Features and specifications subject to change without prior notice... - Page 42 Double-click on the graph to zoom back out to the previous zoom level, or click on • the small “–” sign next to the zoom indicator at the top right of the display. miniDSP Ltd, Hong Kong / www.minidsp.com / Features and specifications subject to change without prior notice...
-
Page 43: Designing Your Target Curve
“disconnected” channel tab over the top of the selected channel. 7.2 D ESIGNING YOUR TARGET CURVE The target curve is the desired in-room frequency response with the miniDSP SHD Series processor performing digital room correction. 7.2.1 The Auto Target When first viewing the Filter Design tab, an estimated target curve suitable for your speakers is shown as the red curve. -
Page 44: Editing The Target Curve
If the left and right channels are linked, the same target curve is used for both channels. To create separate target curves for the left and right channels, unlink the two channels as described in Working with graphs. miniDSP Ltd, Hong Kong / www.minidsp.com / Features and specifications subject to change without prior notice... -
Page 45: Guidelines For Target Curve Design
In almost all cases, the left and right channels should remain linked for target curve adjustment, to ensure that both speakers produce the same response across the listening area. In certain unusual circumstances, miniDSP Ltd, Hong Kong / www.minidsp.com / Features and specifications subject to change without prior notice... -
Page 46: Saving And Loading Target Curves
(The predicted impulse response can be viewed by clicking on the Impulse button.) To download the generated filters into the processor, click the Proceed button or on the Export tab on the left. miniDSP Ltd, Hong Kong / www.minidsp.com... -
Page 47: Loading Filter Sets
(*) If using advanced/backend processing, ensure that you load the filters into the same slot as the preset selected when running the measurements for Dirac Live calibration. miniDSP Ltd, Hong Kong / www.minidsp.com / Features and specifications subject to change without prior notice... -
Page 48: Configuring Backend Processing
The two “halves” of the signal flow are configured by two different programs – DLCT, and the SHD plugin. In the case of DLCT, correction filters are loaded into four “slots.” In the case of the SHD plugin, configurations are set up or loaded in one of four presets. -
Page 49: Plugin User Interface
The main user interface of the plugin has several areas, indicated in this screenshot: Note: Do not attempt to run the SHD plugin and DLCT at the same time. If you are running DLCT, quit before starting the SHD plugin. -
Page 50: Connecting To The Processor
8.3 C ONNECTING TO THE PROCESSOR Connect the SHD Series processor to a USB 2.0 port on your computer if it is not already. Then click on the Connect button: If successful, the button changes to a green tick as shown above. For the sake of brevity, this state is referred to as “online”... - Page 51 PRELIMINARY Cancel This option cancels the attempt to connect to the processor. The plugin will remain offline. miniDSP Ltd, Hong Kong / www.minidsp.com / Features and specifications subject to change without prior notice...
-
Page 52: Key Features
Four configurations are stored onboard. The currently selected preset is indicated in the row near the top of the UI as the darkened one: To switch to a different preset, just click on the desired button: 8.4.3 Inputs miniDSP Ltd, Hong Kong / www.minidsp.com / Features and specifications subject to change without prior notice... -
Page 53: Input Selection
Both inputs can be mixed to each output if desired, and the mix level can be set individually for each input. 8.4.6 Outputs miniDSP Ltd, Hong Kong / www.minidsp.com / Features and specifications subject to change without prior notice... - Page 54 Each channel has an individual gain adjustment slider, and a graphical and numerical display of the current signal level on that channel. A comprehensive set of signal processing functions is accessed with the buttons PEQ, Xover, and Comp. miniDSP Ltd, Hong Kong / www.minidsp.com / Features and specifications subject to change without prior notice...
-
Page 55: Acoustic Measurement For Back-End Configuration
Note that it will be necessary to quit DLCT prior to starting up the SHD plugin to make changes, and vice versa. Be sure to save the project before quitting DLCT if you wish to preserve each measurement. -
Page 56: Sample Plugin Configurations
On the Routing tab, set the matrix like this: After you have set up the SHD plugin, save your configuration to a file. Then quit the SHD plugin, start DLCT and run Dirac Live calibration as described in Sections 6 and 7. -
Page 57: Add Single Subwoofer
After you have set up the SHD plugin, save your configuration to a file. Then quit the SHD plugin, start DLCT and run Dirac Live calibration as described in Sections 6 and 7. miniDSP Ltd, Hong Kong / www.minidsp.com... -
Page 58: Add Dual Subwoofers
After you have set up the SHD plugin, save your configuration to a file. Then quit the SHD plugin, start DLCT and run Dirac Live calibration as described in Sections 6 and 7. miniDSP Ltd, Hong Kong / www.minidsp.com... -
Page 59: Stereo Supporting Woofers/Fast
It is recommended that you take acoustic measurements to check and fine-tune your crossover settings. After you have set up the SHD plugin, save your configuration to a file. Then quit the SHD plugin, start DLCT and run Dirac Live calibration as described in Sections 6 and 7. -
Page 60: Two-Way Active Speaker
This is a typical high pass setting for the tweeters: After you have set up the SHD plugin, save your configuration to a file. Then quit the SHD plugin, start DLCT and run Dirac Live calibration as described in Sections 6 and 7. -
Page 61: Plugin Reference
-72 and +12 dB. To adjust the gain, right-click on the cross point and a gain control will appear. Adjust the gain with the slider, or by typing in the value directly, then click close. miniDSP Ltd, Hong Kong / www.minidsp.com... -
Page 62: Output Channels
Current Gain text box. The maximum gain setting is 12 dB, and the minimum gain setting is – 72 dB. (0 dB, the default, is unity gain or no change in level.) miniDSP Ltd, Hong Kong / www.minidsp.com... -
Page 63: Parametric Eq
To link a channel, select the other channel from the drop-down menu at the top left of the PEQ display, and click the Link checkbox. miniDSP Ltd, Hong Kong / www.minidsp.com... - Page 64 "lit". (Note that all other filters are still operational unless individually bypassed.) A filter will also have no effect if its gain is set to 0.0. miniDSP Ltd, Hong Kong / www.minidsp.com / Features and specifications subject to change without prior notice...
-
Page 65: Crossover
The current channel is displayed in orange, with the others displayed in grey. Hovering the mouse over the curve brings up an overlay showing the frequency and the attenuation at that frequency. miniDSP Ltd, Hong Kong / www.minidsp.com / Features and specifications subject to change without prior notice... - Page 66 To link a channel, select the other channel from the drop-down menu at the top left of the Xover display, and click the Link checkbox. miniDSP Ltd, Hong Kong / www.minidsp.com...
-
Page 67: Compressor
Each channel can be inverted in polarity, and individually muted. When either of these options is selected, the visual indicator on the button is "lit": miniDSP Ltd, Hong Kong / www.minidsp.com / Features and specifications subject to change without prior notice... -
Page 68: Time Delay
A biquad is the basic unit of processing that is used to create digital filters. It can be described either with an equation or with a signal flow diagram, as shown here: miniDSP Ltd, Hong Kong / www.minidsp.com / Features and specifications subject to change without prior notice... -
Page 69: Using Custom Biquad Programming
This example illustrates the correct file format: biquad1, b0=0.998191200483864, b1=-1.9950521500467384, b2=0.996920046761057, a1=1.9950521500467384, a2=-0.9951112472449212, biquad2, b0=0.999640139948623, b1=-1.9981670485581222, biquad3, biquad4, biquad10, b0=1.0010192374642126, b1=-1.9950555192569264, b2=0.9940580112181501, a1=1.995060938714333, a2=-0.9950718292249559 miniDSP Ltd, Hong Kong / www.minidsp.com / Features and specifications subject to change without prior notice... -
Page 70: Biquad Design Software
It includes the ability to automatically generate a bank of parametric EQ biquads based on a measurement. These coefficients can be saved to a file from REW and loaded directly into a PEQ bank in a miniDSP plugin. Room EQ Wizard can be downloaded here: •... -
Page 71: Working With Configurations
(as long as the Synchronize Config button is selected). The configuration contained in the miniDSP hardware unit cannot be uploaded back to the computer. Therefore, you must save your configuration to a file if you wish to recover from any changes you make while offline. -
Page 72: Saving And Loading Configurations
Each configuration preset in the SHD plugin corresponds to the same-numbered filter set configured in DLCT. For example, if the remote control or front panel is used to select preset 3, then both SHD configuration 3 and Dirac Live filter set 3 are loaded for audio processing. -
Page 73: Restoring To Defaults
9.6 K EYBOARD SHORTCUTS The SHD plugin supports the use of the keyboard for many operations. The Tab key moves the focus from the current user interface element to the next. A blue-grey surrounding box usually indicates the user interface element with the focus. Shift-Tab moves the focus in the opposite direction. -
Page 74: Additional Information
10 A DDITIONAL NFORMATION 10.1 S PECIFICATIONS All SHD Series processors Computer connectivity Driverless USB 2.0 control interface for Windows and Mac OS X USB audio input XMOS asynchronous USB audio, 44.1 to 192 kHz stereo PCM, USB Audio Class 2 compliant. - Page 75 SPDIF on RCA connector / Isolated with digital audio transformer. Power supply Universal mains supply, 110 – 240 V AC Dimensions (H x W x D) 41.5 x 429 x 236 mm miniDSP Ltd, Hong Kong / www.minidsp.com / Features and specifications subject to change without prior notice...
-
Page 76: Programming A Third-Party Remote
10.2 P ROGRAMMING A THIRD PARTY REMOTE While each SHD Processor is supplied with a basic miniDSP remote, the processor can also “learn” the control codes of your current remote if it supports one of the following remote control codes: •... -
Page 77: Firmware Upgrade
MCU firmware to enable new features. To upgrade the MCU firmware, first download and install the latest version of the SHD plugin from the User Downloads section of the miniDSP website. - Page 78 Once the firmware upgrade completes, you will see a message that the upgrade completed successfully: Click on Exit. That’s it! You’re done. You can now use your PROCESSOR with the new functionality. miniDSP Ltd, Hong Kong / www.minidsp.com / Features and specifications subject to change without prior notice...
-
Page 79: Macos / Os X
Tab key after typing the first two characters of any filename, to activate auto-completion. Download the latest software for the SHD Series processors from the User Downloads area of the minidsp.com website. Double-click on it to unzip it. Assuming that you have placed it into the Downloads folder on your Mac,... -
Page 80: Troubleshooting
Installation). software The Adobe Air environment may need a network connection the SHD plugin running in first time you run a plugin. Close the plugin program, ensure that background but not your computer has a network connection, and restart the plugin. -
Page 81: Dlct
SHD System tab plugin. Check that you have installed and run the miniDSP version of the Dirac Live software, called Dirac Live Calibration Tool for miniDSP. Go to the Sound System tab and click the Rescan button. -
Page 82: Obtaining Support
10.6 O PEN SOURCE LICENSES The Volumio portion of the SHD Series processors runs on a separate ARM processor and is subject to various open-source licenses. To view the complete list of open source licenses and credits, connect to the Volumio page using your web browser and select System from the menu, then Credits and Open Source Licenses.
Need help?
Do you have a question about the SHD and is the answer not in the manual?
Questions and answers